

Add Online Booking to Any Website with Calendly-Style Scheduling
Let visitors book meetings from your site in minutes. Embed a Calendly-style scheduler, set availability, automate reminders, and reduce no-shows.
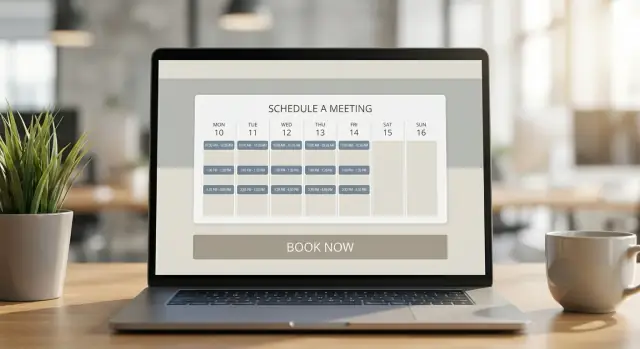
What online booking adds to your website
Online booking on your website means visitors can pick a time and confirm an appointment right where they already are—without calling, waiting for a reply, or bouncing between back-and-forth emails. A Calendly-style scheduler shows real-time availability, collects the basics (name, email, reason for meeting), and locks in the slot automatically.
Common use cases (beyond “book a meeting”)
Online booking works anywhere time is part of the purchase decision. Typical examples include:
- Sales calls and demos: let prospects book a call the moment they’re ready.
- Consultations: discovery calls, intro sessions, audits, strategy sessions.
- Lessons and coaching: tutoring, fitness, language lessons, music instruction.
- Local services: cleaners, photographers, salons, repair visits, onsite quotes.
The key is that the booking flow becomes part of your website appointment scheduling—so the user doesn’t have to figure out “what happens next.”
Benefits you’ll notice quickly
A good appointment booking system usually pays off in three straightforward ways:
Faster conversions. When someone can book meetings online immediately, you capture intent at the peak moment. Instead of “Contact us” and waiting, the next step is a confirmed time.
Fewer emails. No more “Does Tuesday at 3 work?” threads. Your availability settings handle time zones, buffers, and working hours automatically.
24/7 booking. Visitors can schedule at night, on weekends, or from another time zone. Even if you respond later, the appointment is already on the calendar.
What visitors expect from a modern scheduler
People are used to seamless, checkout-like experiences. With an embed booking widget (or a simple link), they typically expect:
- Clear options: meeting type, duration, and what it’s for.
- Instant confirmation: a thank-you screen and an email invite.
- Accurate availability: no “actually, I’m not free then” follow-ups.
- A short, respectful form: only questions that help you prepare.
When online booking feels effortless, it builds trust. It signals you’re organized, responsive, and ready to help—before you ever speak.
Choose the right booking experience (embed, popup, link)
Where (and how) you show online booking affects conversions as much as your availability settings. The best choice depends on what you want visitors to do next—and how much focus you want to give scheduling.
Embedded widget (inline on the page)
An embed booking widget keeps everything in one place: visitors see times immediately and book without leaving your site.
Best for: service pages, “Contact” pages, high-intent traffic.
Pros: highest visibility, fewer clicks, feels like part of your website appointment scheduling.
Cons: takes page space, can slightly impact performance if added to every page.
Popup or slide-out
A popup keeps your page clean but makes booking one click away (often via a “Book now” button).
Best for: homepages, long-form pages, portfolios—anywhere you want booking available without dominating the layout.
Pros: good balance of design + conversion, easier to place in multiple spots.
Cons: extra step; some visitors dislike popups if they trigger too aggressively.
Booking link (opens a separate scheduling page)
A simple link is the lightest integration: “Book meetings online” using a dedicated scheduling page.
Best for: email signatures, social profiles, ads, and teams that want a quick launch.
Pros: fastest to implement, minimal impact on your site.
Cons: feels less “native,” and the handoff can reduce completion rates.
Match the experience to your scheduling type
If you’re single-person scheduling, any option works—choose based on design and traffic intent.
For team scheduling (round-robin, ownership, or routing), popups and embeds help users pick the right time without navigating away.
If you offer appointments vs. classes/events, consider:
- 1:1 appointments: embed or popup for immediacy.
- Group sessions/events: link or dedicated page can better explain details before booking.
Choose the format that supports your goal: quick conversions (embed), flexible placement (popup), or fastest rollout (link).
Plan your scheduling setup before you embed
Embedding a booking widget is the easy part. The results (smooth scheduling vs. endless back-and-forth) mostly depend on how you set your rules first. Spend a few minutes planning now and you’ll avoid confusing availability, last‑minute requests, and meetings that don’t fit your day.
Define your meeting types
Start by listing the appointments people can book. Keep the menu short and specific.
Decide the length (e.g., 15, 30, 60 minutes), add buffers before/after (so you can prep, travel, or write notes), and set the location for each type:
- Video call (Zoom/Meet link added automatically)
- Phone call (who calls whom?)
- In‑person (address, parking notes, or “we’ll confirm after booking”)
If you offer different purposes (intro call vs. paid consultation), make them separate meeting types so each can have its own rules.
Set working hours and time zones
Your availability should reflect your real workday, not just your calendar’s default settings. Block out recurring commitments (team meetings, lunch, deep work) and decide whether you want availability to differ by day.
For time zones, aim for a simple experience:
- Let invitees see times in their local time zone.
- Make sure your confirmation message clearly states the time zone (especially if you travel).
- Consider a “travel mode” plan (e.g., update working hours when you’re away).
Add booking rules that protect your calendar
Rules prevent awkward gaps and last‑minute surprises. Common ones include:
- Lead time / minimum notice (e.g., no same‑day bookings)
- Daily limits (cap the number of meetings per day)
- Scheduling window (only allow booking up to X weeks ahead)
Pick defaults that match your capacity, then adjust per meeting type.
Write your cancellation and reschedule policy
Don’t hide this in fine print. Add one or two clear sentences near the widget, such as:
“Please reschedule or cancel at least 24 hours in advance. Late cancellations may be charged a fee.”
Clarity here reduces no‑shows and sets expectations before anyone clicks “Confirm.”
How to embed Calendly-style scheduling on any site
Embedding a booking flow should feel like adding a “Book now” block—not starting a web project. The goal is to place scheduling exactly where visitors are already ready to take action.
Where booking works best
Start with pages that attract high-intent visitors:
- Service pages: put booking right under the service description (e.g., “30‑minute consultation”).
- Pricing page: add a booking option next to plans for people who need a quick walkthrough.
- Contact page: replace long forms with a simple choice: “Send a message” or “Book a time.”
If you’re unsure, add it to the page that already gets the most “How do I talk to you?” clicks.
Add a clear CTA (and a little context)
Use a button visitors can understand instantly—“Book a call”, “Schedule a demo”, or “Reserve an appointment.” Right below it, include one sentence that removes hesitation, like: “Pick a time that works—confirmation is instant.”
Embed options: no-code vs. a snippet
Most scheduling tools offer three common ways:
- Embed widget: the calendar appears directly on your page (best for service/pricing pages).
- Popup: a “Book” button opens the scheduler in a modal (good for cleaner layouts).
- Link: send people to a dedicated booking page (useful for email and social).
No-code site builders often have an “Embed” block where you paste a widget URL. Custom sites typically paste a short script snippet into the page template.
If you want a more tailored flow than a standard widget—like a custom booking page, intake step, and post-booking automation—teams sometimes build it as a lightweight app. For example, Koder.ai can generate web apps from a chat prompt (React front end + Go/PostgreSQL back end) and supports deployment/hosting and source code export, which is handy when you want full control without a long dev cycle.
Mobile-friendly placement tips
On mobile, keep the booking block near the top or after the first key section. Add generous spacing, avoid tiny buttons, and don’t sandwich the widget between dense text—let it breathe so it’s easy to tap and scroll.
Customize the booking widget to match your brand
A scheduling widget shouldn’t feel like a detour. With a few small tweaks, it can look and sound like a natural part of your site—so visitors trust it and complete the booking.
Visual branding: make it feel native
Start with the basics your visitors notice instantly:
- Colors: match your primary button color (and hover state) to your site’s main CTA.
- Fonts: choose a close match to your site typography, or keep it simple with a clean system font for readability.
- Button labels: swap generic text (“Schedule”) for action-oriented labels like “Book a Call,” “Reserve a Demo,” or “Choose a Time.”
If your widget supports it, preview on both desktop and mobile before publishing. A button that looks perfect on desktop can feel too small on a phone.
Booking form questions: ask less, learn more
Keep the form short so people don’t abandon it. Add only questions that help you prepare or qualify the appointment.
Good examples:
- “What would you like help with?” (short answer)
- “Company size” (dropdown)
- “Phone number (optional)”
Avoid long, multi-part questions. If you need more detail, collect it after booking via email or a follow-up form.
Confirmation page and thank-you message
Your confirmation screen is a great place to reduce back-and-forth.
Include:
- A friendly thank-you message that sets expectations (“You’ll receive a calendar invite and a reminder 24 hours before.”)
- Key details like meeting length and location (phone/Zoom/in-person)
- Optional next steps (e.g., “Add anything else you’d like us to know”)
Accessibility basics (don’t skip these)
A branded widget still needs to be usable for everyone:
- Ensure text and buttons have strong contrast against the background.
- Use clear, descriptive labels (not just placeholders).
- Test keyboard navigation (Tab/Shift+Tab) to confirm someone can complete the booking without a mouse.
Prevent double-booking with calendar connections
Double-booking usually happens when your booking page doesn’t know what’s already on your calendar—or when your calendar doesn’t update after someone schedules. The fix is a proper calendar connection with two-way sync, so busy times are blocked automatically and new bookings appear on the right calendar immediately.
Use two-way sync (not “view-only”)
When you connect Google Calendar, Outlook, iCloud, or Exchange, make sure the connection is set to read and write. “Read-only” can show availability, but it won’t add the appointment back to your calendar—so conflicts still slip through.
A good two-way setup means:
- Existing events mark you as busy, so those times can’t be booked.
- New bookings are created as calendar events, instantly blocking that slot everywhere.
Multiple calendars: avoid hidden conflicts
Many people keep separate calendars (work, personal, shared team). If your booking tool only checks one, you can accidentally offer times that clash with something on another calendar.
Best practice: check all calendars for conflicts, but write new bookings to one “main” calendar. That gives you clean reporting and fewer duplicates while still protecting your availability.
Time zones: let clients book in theirs, you work in yours
Remote clients should see availability in their local time zone, while you keep your schedule anchored to yours. Enable automatic time zone detection and include the time zone in confirmations so no one shows up an hour early (or late).
Test before you launch
Before embedding your online booking widget on your website, create a few real calendar events (busy blocks, recurring meetings, personal appointments) and try booking around them. Then cancel/reschedule a test appointment and confirm the calendar updates correctly. This is the fastest way to catch sync gaps before clients do.
Automate confirmations, reminders, and no-show reduction
Once someone books, the real work begins: confirming details, helping them show up, and making it easy to adjust plans without back-and-forth. A few simple automations can save hours and noticeably cut no-shows.
Automatic email confirmations and reminders
Start with a confirmation email sent immediately after booking. Keep it scannable:
- Who they’re meeting (name + role)
- Date/time with the correct time zone
- Location details (address, parking notes, or video link)
- What to prepare (documents, questions, forms)
Then schedule at least one reminder (commonly 24 hours before) and, for shorter appointments, an additional reminder 1–2 hours before. If you serve multiple regions, double-check time zone wording (e.g., “10:00 AM Eastern”).
SMS reminders: when to use them and what to say
SMS is best for high-volume, time-sensitive appointments (salons, clinics, onsite services) where people are on the move. Use it sparingly—too many texts can feel intrusive.
A good SMS is short and action-oriented:
“Reminder: Your appointment with [Business] is tomorrow at 10:00 AM. Need to change it? Reschedule: [link]”
Only send SMS if you have clear consent, and include a simple opt-out method if your provider supports it.
Reschedule/cancel links and guardrails
Always include reschedule and cancel links in confirmations and reminders. It reduces no-shows by giving people a graceful exit.
Add guardrails so your calendar doesn’t get disrupted:
- A minimum notice period (e.g., no changes within 12–24 hours)
- Limits on last-minute cancellations
- A clear policy line: “If you can’t make it, please reschedule at least 24 hours in advance.”
Reducing no-shows with buffers, deposits, and clear instructions
If no-shows are costly, combine:
- Buffers (e.g., 10 minutes before/after) to prevent delays cascading
- Deposits for high-demand slots (even a small amount increases attendance)
- Clear instructions: what to bring, how to join, where to park, and what happens if they’re late
The goal is simple: remove uncertainty, make changes easy, and make attendance the default.
Team scheduling: round-robin, routing, and ownership
If more than one person can take an appointment, team scheduling keeps your online booking experience fast for customers and fair for your team. The key is deciding how availability is shared, how bookings are assigned, and who owns what.
Group scheduling: shared availability vs. round-robin
Shared availability shows times when anyone on the team is free, then books the first available person (or lets the visitor choose). It’s ideal for “next available” services like support calls or consultations.
Round-robin rotates bookings across the team so workload stays balanced. It’s a good fit for sales demos, onboarding calls, or any workflow where you want even distribution. Most Calendly-style scheduling tools let you add weighting (e.g., senior staff get fewer meetings) and buffer rules.
Routing bookings by service, location, or answers
Routing prevents visitors from picking the wrong person. You can route by:
- Service type (demo vs. training vs. renewal)
- Location (city, time zone, in-person vs. online)
- Answers from intake questions (company size, urgency, existing customer)
This turns your embed booking widget into a simple “smart form” that directs people to the right calendar—without back-and-forth emails.
Ownership and admin controls
Decide who can edit availability settings, event types, and notifications. Common setup:
- Admins control templates, branding, and the appointment booking system rules
- Team members manage only their own hours and connected calendars
Hand-off rules for time off
Set clear rules for out-of-office coverage: automatically skip unavailable teammates, reroute to a backup, or temporarily remove a person from rotation. This avoids broken booking links and helps reduce no-shows caused by last-minute rescheduling.
Add payments and intake forms without friction
If your online booking flow ends with “Great—now please go pay somewhere else,” you’ll lose people. The best appointment booking system keeps payment (when needed) and intake details inside the same Calendly-style scheduling experience so customers can confirm in one pass.
Collect payments or deposits (only when it helps)
Payments work best when they remove uncertainty for both sides: reserving limited time slots, protecting against no-shows, or selling fixed-price sessions. For lower-commitment meetings (like discovery calls), skipping payment often increases conversions—so consider enabling it only for certain services or event types.
If you do charge at booking, deposits are usually the sweet spot: they improve show-up rates while keeping the decision easy.
What to show: price, refund rules, and a clear confirmation
Be upfront before anyone clicks “Confirm.” Display the total price (or deposit amount), what’s included, and any conditions (like late cancellation fees). Keep refund rules short and human, and avoid surprises at checkout.
After payment, the confirmation should be unambiguous:
- A receipt or payment confirmation (even if it’s just “Paid: $50 deposit”)
- The exact appointment time and time zone
- A quick note on what happens next (e.g., “You’ll receive an email with the meeting link and calendar invite”)
This clarity reduces support emails and builds trust.
Intake forms that help you prepare (without scaring people off)
Intake questions can turn a “book meetings online” flow into a prepared, productive session. Ask only what you truly need to deliver the service well—then follow up later for everything else.
Good intake topics include:
- Goals for the session (one short question)
- Requirements or context (e.g., “What platform are you using?”)
- Consent or policy acknowledgement when relevant
If you need more detail, consider a two-step approach: collect essentials during booking, then send a link to a longer form after confirmation.
Keep fields short to reduce drop-off
Every extra field increases abandonment. Aim for the minimum set: name, email, and 1–3 high-value questions. Use multiple choice where possible, avoid long paragraphs, and don’t require account creation.
As a rule of thumb: if a question won’t change how you run the appointment, remove it from the booking form.
Integrations and workflows after someone books
A booking is only the first step. The real payoff of online booking comes when each appointment automatically triggers the right next actions—so leads don’t sit in inboxes, and clients feel taken care of without extra manual work.
Route new bookings into your CRM and marketing
Connect your appointment booking system to tools you already use (or plan to use) for lead management and communication:
- Connect bookings to your CRM and email marketing so every new meeting creates/updates a contact record and adds the person to the correct list or segment.
This keeps your “who booked what” data consistent, and makes it easy to run follow-up campaigns without exporting spreadsheets.
Keep your pipeline and team in sync
When someone books, treat it like a status change:
- Send booked leads to a pipeline stage and notify your team (e.g., move to “Discovery Scheduled,” assign an owner, and post a notification to your sales channel).
With a simple workflow, you can also tag bookings by meeting type, source, or service—helpful when you want reporting later (“Which services are getting booked most?”).
Automate follow-ups before and after the meeting
Small, timely messages reduce no-shows and improve meeting quality:
- Automate follow-ups: pre-meeting checklist, post-meeting recap (agenda, what to prepare, directions/links; then next steps, recap notes, and a clear call-to-action).
If you take payments or collect intake info elsewhere, you can trigger a “complete your details” email only when those fields are missing—no nagging everyone.
Performance, privacy, and troubleshooting checklist
A booking widget should feel invisible: quick to load, clear about data use, and dependable. Use this checklist before and after launch.
Keep pages fast
Only load the scheduling widget on pages where people are ready to book (for example, /contact or /book). If you place it site-wide, you’re adding extra scripts to every page view.
If your site supports it, defer or lazy-load the embed so the rest of the page renders first. Also keep the surrounding page lightweight: large videos, heavy sliders, and multiple third-party trackers can make the widget feel slow even when it’s fine.
Privacy basics (what you collect and why)
List the exact fields you collect (name, email, phone, notes) and connect each one to a purpose (confirmations, reminders, prep for the call). Don’t ask for “nice to have” details unless you truly use them.
If you record meeting links, capture health information, or work with minors, check whether you need additional consent language. Update your privacy policy and link it near the widget (e.g., “By booking, you agree to our Privacy Policy”).
Spam prevention
Most spam shows up as fake bookings. Reduce it by:
- Requiring email (and optionally phone) and making key fields mandatory
- Adding a minimum notice window (e.g., no bookings within the next 2–4 hours)
- Limiting how many times someone can book in a day/week
- Using verification options offered by your scheduling tool (CAPTCHA, email confirmation) when available
Troubleshooting checklist
If the embed isn’t showing:
- Confirm you pasted the full embed snippet (and only once)
- Check if an ad blocker or privacy plugin is blocking the scheduling script
- Test in an incognito window and on mobile
If time slots are missing:
- Verify your availability settings (working hours, buffers, minimum notice)
- Check calendar connections and time zone settings
- Look for conflicts from linked calendars (personal calendars often block times)
If bookings aren’t arriving:
- Confirm notification emails aren’t going to spam
- Make sure the confirmation page is live and not blocked by redirects
Launch checklist and next steps
A smooth launch is less about “publishing the widget” and more about confirming the full loop works: booking → calendar → notifications → show-up.
What to test before you announce it
Run at least two test bookings: one from a desktop browser and one from a phone.
- Booking flow: Can someone pick a time, enter details, and finish without confusion? Check time zone handling and any buffer times.
- Notifications: Confirm the booker and host both receive the right confirmation email (and SMS, if enabled). Verify reschedule/cancel links work.
- Calendar sync: Create, reschedule, and cancel a test meeting and confirm it updates on connected calendars. Make sure blocked times actually block.
- Mobile experience: Check readability, button sizes, and form length. If it feels long, reduce required fields.
Track conversions (so you can improve)
At minimum, measure clicks to booking completion:
- Count how many people click “Book now” vs. how many complete a booking.
- If you use analytics, tag the booking button and track a “booking completed” event on the confirmation page.
Look for drop-offs: if lots of clicks don’t turn into bookings, your availability may be too limited, the form too long, or the widget too slow to load.
Ongoing optimization
After launch, review weekly for the first month:
- Are no-shows high? Increase reminders or add a simple confirmation step.
- Are meetings low quality? Add one clarifying intake question.
- Are you overbooked? Tighten availability windows and buffers.
Next steps
Try your live booking flow end-to-end, then share the link in your site header and key pages. If you’re choosing a plan or need advanced features, see /pricing. Want help setting it up for your team? Reach out at /contact.
FAQ
What does “online booking” on a website actually mean?
Online booking lets visitors choose a time and confirm an appointment directly on your site—without calls or email back-and-forth.
A Calendly-style scheduler shows real-time availability, collects a few details (like name and reason), and automatically creates the calendar event and confirmation.
Should I use an embedded widget, a popup, or a booking link?
Choose based on intent and layout:
- Embed (inline): best for high-intent pages (services, pricing, contact) where you want maximum completions.
- Popup/slide-out: good when you want booking available without taking over the page.
- Link to a booking page: fastest to launch and great for email/social, but can reduce completion because it feels less “native.”
Where should I place booking on my site for the best conversions?
Start with pages where visitors are already ready to act:
- Service pages (right under the offer)
- Pricing pages (next to plans for people who want a walkthrough)
- Contact pages (replace or complement long forms)
If you’re unsure, add booking to the page that gets the most “contact” clicks today.
What should I set up before embedding a scheduling widget?
Define 2–4 clear meeting types, each with:
- Duration (15/30/60 minutes)
- Buffers before/after
- Location details (Zoom/phone/in-person)
- Any unique rules (lead time, daily limits)
Keep choices specific (e.g., “15-min Intro Call” vs. “Call”) so visitors know what they’re booking.
How do I prevent time zone confusion for remote clients?
Let invitees see times in their time zone, but keep your availability anchored to your working hours.
Also:
- Include the time zone in confirmation messages
- Enable automatic time zone detection
- If you travel, plan how you’ll update working hours (a simple “travel mode” routine helps)
Which booking rules reduce last-minute bookings and awkward gaps?
Use rules that protect your calendar and reduce chaos:
- Minimum notice (e.g., no same-day bookings)
- Daily meeting limits (cap meetings per day)
- Scheduling window (only allow booking up to X weeks ahead)
- Buffers to prevent back-to-back stress
Add a short cancellation/reschedule policy near the widget so expectations are set before someone clicks “Confirm.”
How do I prevent double-booking when I add online scheduling?
Connect your calendar with two-way sync (read + write), not view-only.
Best practices:
- Check multiple calendars for conflicts (work + personal)
- Write new bookings to one “main” calendar to avoid duplicates
- Run a test booking, then reschedule/cancel it to confirm everything updates correctly
What confirmations and reminders should I automate to reduce no-shows?
Use lightweight automations:
- Instant confirmation email with time zone + location/video link
- Reminders (commonly 24 hours before, plus 1–2 hours before for short appointments)
- Always include reschedule/cancel links
For high-no-show services, consider deposits and clearer instructions (what to bring, how to join, what happens if late).
How does team scheduling (round-robin and routing) work?
Yes—if more than one person can take appointments.
Common approaches:
- Shared availability: book the next available teammate (great for “fastest help”).
- Round-robin: rotate bookings for fairness (great for sales/demo teams).
- Routing: assign based on answers (service type, location, customer status) so people reach the right calendar the first time.
How should I handle payments and intake forms without increasing drop-off?
Keep it minimal and transparent:
- Use payments/deposits when they protect scarce time slots or reduce no-shows (not for every discovery call).
- Ask only high-value intake questions (1–3 is a good starting point).
- Show price/deposit and refund rules before confirmation.
If you need more detail, collect essentials at booking and send a longer form after confirmation.