Jun 24, 2025·8 min
How to Build a Marketplace Website Without a Dev Team
A practical step-by-step guide to plan, build, and launch a marketplace website using no-code tools—features, costs, timelines, and common pitfalls to avoid.
Start With a Clear Marketplace Concept (MVP First)
A marketplace is a repeatable transaction between two sides—so your first job is to define that transaction in one sentence. If you can’t describe it clearly, you’ll end up building features that don’t help anyone buy or sell.
Define your marketplace type
Start by choosing which “shape” you’re building:
- Services (e.g., tutors, cleaners, designers): buyers pay for time and expertise
- Products (e.g., handmade goods, refurbished items): buyers pay for physical items
- Rentals (e.g., equipment, venues): buyers pay for access over a time window
- Leads (e.g., match homeowners to contractors): buyers pay to contact, quote, or win a job
Each type changes what your MVP must support (scheduling for services, inventory for products, availability calendars for rentals, lead rules for lead marketplaces).
Clarify the two sides and the exchange
Write down, plainly:
- Who supplies (sellers/providers/hosts)
- Who buys (customers/clients/renters)
- What’s exchanged (a service session, a product shipment, a rental period, a qualified lead)
Then confirm what “done” looks like. Example: “A booking is complete when payment is captured and both sides confirm the service took place.” This definition prevents endless debate later.
Pick one niche and one first use case
Your MVP should do one thing extremely well for one audience. “Marketplace for local wellness professionals” is still broad; “Marketplace for prenatal massage therapists offering 60-minute in-home sessions” is specific enough to validate.
A good first use case is simple, frequent, and easy to explain. You can expand categories and flows later—after you have proof that people will list and transact.
Choose your top 3 success metrics
Avoid vanity metrics and pick three numbers that show real progress. Common options:
- Signups (per week)
- Listings created (and % approved)
- Bookings / orders (completed)
- GMV (gross merchandise value)
Pick the three that match your marketplace type, set a short time horizon (e.g., 30 days), and define targets. This keeps your MVP focused: if a feature doesn’t move one of these metrics, it’s not “Day 1.”
Design the Transaction Flow and Business Model
Before you choose tools or design pages, define what “success” looks like for one transaction. A marketplace isn’t a brochure site—it’s a repeatable sequence that must work the same way for hundreds (or thousands) of listings.
1) Pick your core transaction
Choose one primary action your marketplace is built around:
- Purchase (buyer pays now, seller fulfills)
- Booking (reserve a time slot, often with a deposit)
- Quote request (lead goes to seller; payment happens later)
- Subscription (recurring access or ongoing service)
Pick the one that best matches how money changes hands. Trying to support multiple transaction types on day one adds edge cases (refunds, timing, messaging rules) that slow you down.
2) Decide how you make money
Your business model should be simple enough to explain in one sentence—and easy to calculate automatically.
- Commission (e.g., 10% per transaction): aligns incentives; requires a payments flow
- Listing fee (e.g., $19 to post): simple payments; less control over quality
- Subscription (e.g., $49/month for sellers): predictable revenue; needs retention
- Hybrid (small subscription + lower commission): works when sellers are active
Sanity-check pricing against average order value and seller margins. If your fee feels “painful,” sellers will avoid completing transactions on-platform.
3) Map the happy path end-to-end
Write the clean, ideal flow as a short sequence:
Visitor → signup → create listing → listing approval (optional) → order/booking → payment → confirmation → fulfillment → payout
For each step, define what the user sees, what data you collect, and what triggers the next step (email, status change, payment event).
4) Keep scope tight with a one-paragraph statement
Create a scope statement that limits the build to what you can describe in ~3000 words of requirements. Example: “We enable buyers to book local photographers, pay a deposit, and receive confirmation; sellers get paid after the shoot, minus a 12% fee.”
That sentence becomes your filter: if a feature doesn’t support it, it’s not day one.
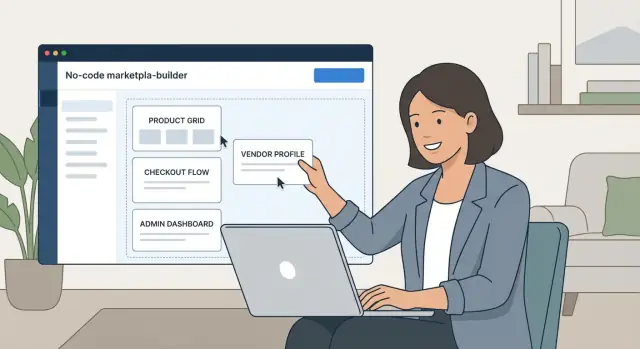
Create a Feature Checklist (What You Need on Day 1)
Marketplace MVPs get expensive and slow when “nice-to-haves” sneak into the first build. Your Day 1 checklist should support a single successful transaction loop: a buyer finds a listing, contacts or buys, and both sides know what happens next.
Essential pages (the minimum storefront)
Start with the pages that make discovery and decision-making feel effortless:
- Home: clear value proposition, top categories, and a simple call-to-action (browse or list)
- Category pages: curated, readable grids—avoid heavy filtering at first
- Listing detail: photos, description, price, availability, delivery/pickup info, and a clear next step
- Search: basic keyword search is often enough for an MVP
- Seller profile: credibility signals (bio, ratings, response time, other listings)
- Checkout (if applicable): minimal fields, transparent fees, and a confirmation page
Core features buyers and sellers expect
Day 1 features should reduce uncertainty and prevent “ghosting”:
- Accounts (email + password; add social login later)
- Messaging or inquiries (even a simple “contact seller” form can work)
- Reviews/ratings (start simple: 1–5 stars + short text)
- Notifications (email is fine initially; push can wait)
Admin essentials (so you can run the business)
If you can’t manage the marketplace, you’ll end up doing everything manually:
- User management (ban/suspend, verify, reset access)
- Listing moderation (approve, reject, edit, and flag reasons)
- Dispute handling (a basic workflow and a place to store evidence/notes)
What to postpone (to launch faster)
Common features to delay until you have real demand: mobile apps, complex filters, multi-currency, advanced personalization, and intricate role permissions. Add them only when your data shows they’ll improve conversion or reduce support tickets.
Choose the Right Stack (and Avoid Tool Sprawl)
Your tool choices will either keep you moving fast—or slowly trap you in “glue work” between five different apps. The goal is a small, reliable stack that handles the marketplace fundamentals without constant manual patching.
Pick the builder type that fits your marketplace
Most “no-dev-team” marketplaces start with one of these paths:
- General-purpose no-code site builder: great for marketing pages and simple catalogs, but you’ll often need extra tools for checkout, memberships, and seller workflows
- Marketplace-specific builder: usually the quickest route to a working marketplace because listings, profiles, and transactions are first-class features
- Plugins on top of a CMS/ecommerce platform: flexible if you already know the ecosystem, but can become plugin-heavy and harder to maintain as you add multi-vendor complexity
A simple rule: if transactions and seller management are central to your business, prefer a marketplace-specific option or a platform proven for multi-vendor flows.
Consider “vibe-coding” as a modern alternative to classic no-code
If you want more flexibility than templates—but still don’t want a traditional engineering pipeline—vibe-coding platforms can be a strong middle ground.
For example, Koder.ai lets you create web, backend, and mobile apps through a chat interface (with an agent-based architecture under the hood), while still giving you the option to export source code later. That can be useful for marketplaces that start simple but eventually need custom transaction logic, roles/permissions, or richer admin workflows.
Typical stacks matter here: Koder.ai’s primary web tech is React, backend is Go with PostgreSQL, and mobile apps can be built with Flutter—a setup that’s common for production-grade marketplaces.
Use practical evaluation criteria (not feature lists)
Before you commit, confirm the tool can handle these day-one needs:
- Checkout and order flow: can buyers pay in a way that matches your model (one-time, deposits, subscriptions)? Can you handle cancellations/refunds?
- Seller onboarding: application forms, identity/business details, listing creation, and “ready to sell” verification
- Payouts: scheduled payouts, split payments (if needed), payout status tracking, and clear fee breakdowns
- Permissions and roles: sellers should only see their own orders/customers; admins need full visibility
If a platform can’t do one of these natively, you’ll likely spend time and money compensating with third-party tools.
Check extensibility before you need it
Even if you’re launching an MVP, make sure you can grow without rebuilding:
- Webhooks and integrations (e.g., automation tools)
- API access or at least a way to trigger events
- Data export options (orders, listings, users)
If you can’t reliably export your data, you don’t really control your marketplace.
Estimate total cost (not just the platform fee)
Build a simple monthly stack budget that includes:
- Platform subscription + marketplace fee (if any)
- Payment processing and payout fees
- Email/SMS tools for notifications
- Analytics and attribution
This prevents surprise bills—and reduces the temptation to add yet another tool “just for now,” which is how tool sprawl starts.
Structure the Marketplace: Categories, Listings, and UX
Your marketplace structure is the “shelf layout” of your store. Get it right and users find what they need quickly; get it wrong and even great supply won’t convert.
Draft your information architecture (before you design)
Start by mapping how people browse and filter. Keep categories shallow at first—2 levels is usually enough for an MVP.
- Categories: 5–12 top-level categories that match how buyers think (not how sellers describe)
- Locations (if relevant): country → city, or “Remote/Local” as a first cut
- Attributes: price, availability dates, condition, delivery method, service duration, brand, size—only what affects decisions
A quick check: can a new visitor narrow to a good option in under 3 clicks?
Create a simple design system (so pages feel consistent)
Consistency builds trust and reduces build time in no-code tools.
Define:
- 1 primary color, 1 accent color, and neutral grays
- 2 fonts max (one for headings, one for body)
- Button styles (primary, secondary, disabled)
- Spacing rules (e.g., 8px increments)
This prevents every page from becoming a one-off design experiment.
Prepare templates for listings and profiles
Treat listings like product pages: structured, scannable, and comparable.
Create reusable templates:
- Listing card: title, price, location, 1 strong image, 1 trust signal (rating/verified)
- Listing page: gallery, key facts table, description, policies, seller summary, clear CTA
- Seller profile: bio, response time, reviews, other listings
Use real sample data early (10–20 listings)
Don’t design with lorem ipsum. Add 10–20 realistic listings with messy variations (long titles, missing photos, different price ranges). You’ll quickly spot UX problems like:
- filters that don’t matter
- cards that break on long text
- categories that overlap
If your sample data feels hard to browse, real users will bounce faster.
Seller and Buyer Onboarding That Builds Trust
Launch with real sellers
Spin up a private beta and iterate quickly with snapshots and rollback.
Onboarding is where a marketplace earns (or loses) confidence. Your goal is to help real people get to a “first successful transaction” quickly—without creating loopholes that attract low-quality listings or bad actors.
Keep signup steps short (separate seller vs. buyer)
Treat buyers and sellers as two different journeys.
For buyers, aim for: browse → account → contact details → checkout. If you can, allow browsing without an account and ask them to sign up at the point of purchase.
For sellers, aim for: account → create listing → submit for review (or publish). Don’t block listing creation with long forms upfront—collect what you need when it becomes necessary.
Collect only the fields you truly need
A common mistake is building a “perfect” profile form on day one. Instead, collect in phases:
- Identity basics: name, email/phone, location (only as specific as your marketplace requires)
- Listing essentials: photos, description, availability, pricing
- If required: business name, tax/VAT fields, or age confirmation (only when applicable)
- Payout details: request when a seller is approved or after the first sale, not before
If a field doesn’t reduce risk or improve match quality, skip it.
Add trust signals buyers can understand
Trust is often visual and immediate. Add a few simple signals that don’t require complex engineering:
- Verification badges (email/phone verified, “ID checked” if you do it)
- Clear photo requirements (minimum number, no watermarks, good lighting)
- Seller responsiveness (show typical response time once you have data)
- “About this seller” highlights (years active, completed orders, reviews)
Publish basic marketplace rules early
Make expectations explicit and easy to find—link them from signup and every listing:
- What’s allowed vs. prohibited
- Cancellation and refund approach (who can cancel, deadlines, fees)
- Communication rules (e.g., no off-platform payments)
Clear onboarding plus clear rules reduces support tickets and prevents conflicts before they start.
Payments, Fees, and Payouts (Without Getting Stuck)
Payments are where many marketplace MVPs stall. The goal isn’t to build the perfect finance system—it’s to choose a payment approach that fits your risk tolerance and what you can operate reliably.
Pick a payment approach you can run
Most marketplaces start with one of these:
- Direct charge: buyer pays you; you pay sellers later. Simple UX, more responsibility on you.
- Escrow-like hold: buyer pays, funds are held until delivery/confirmation, then released. Great for services and higher-trust categories, but you must follow provider rules.
- Manual invoicing: you facilitate matching; sellers invoice buyers off-platform. Lowest complexity, but harder to track and take fees.
Define fees and payout timing (write it down)
Decide early:
- Your take rate (percentage), any fixed fee, and whether you charge buyers, sellers, or both
- Who covers payment processing fees (often 2.9% + fixed amount). If you say “seller pays,” reflect it in the net payout
- Payout schedule: instant, weekly, or after a delivery window. Slower payouts reduce fraud risk
Handle the messy edge cases
Your MVP needs clear rules for:
- Cancellations (before/after fulfillment)
- Partial refunds (e.g., missing items)
- Chargebacks (who provides evidence, who absorbs loss)
Publish these in your terms and make them visible during checkout.
Document the flow and test scenarios
Create a one-page diagram and a few “what happens if…” tests.
Buyer pays → Platform records order → (Hold window) → Seller fulfills → Payout → Fee deducted
             ↘ cancellation/refund ↙                ↘ dispute/chargeback ↙
Run test orders end-to-end before launch, including a refund and a failed payout, so you’re not debugging money with real customers.
Admin Dashboard, Moderation, and Automations
A marketplace can look “done” on the front end and still fail behind the scenes. Your admin setup is what keeps listings accurate, disputes fair, and users feeling safe—without hiring extra people.
Admin roles and permissions (keep it simple)
Start with 2–3 roles, then expand only if needed:
- Owner/Admin: full access (settings, payouts, refunds, banning)
- Support/Moderator: can review listings, message users, remove content
- Content/Operations (optional): can edit categories, featured sections, and static pages
Define what each role can do: edit listings, issue refunds, adjust fees, pause sellers, and ban users. The goal is to prevent “everyone can do everything,” which leads to mistakes.
A clear moderation workflow
Build a predictable flow so sellers know what to expect:
New listing → review → publish → monitor
During review, check basics (category, pricing, images, prohibited items, duplicate listings). After publishing, monitor signals like unusually high refund rates, repeated complaints, or rapid-fire listing changes. Even a lightweight checklist keeps quality consistent.
Automations that save hours every week
Set up a few automations early:
- Welcome emails for new buyers and sellers (include next steps and rules)
- Abandoned checkout reminders (one nudge is often enough)
- Review requests after delivery or booking completion
Use tags/fields (e.g., seller_verified, listing_pending) to trigger the right messages and reduce manual follow-up.
Canned responses for faster support
Create templates for common issues: “how to edit a listing,” “refund policy,” “payment failed,” and “report a user.” Pair each template with a link to your policies page (e.g., /terms, /refunds) so answers stay consistent and your inbox stays manageable.
Testing, Analytics, and a Simple Launch Plan
Offset early experiment costs
Earn credits by creating content about Koder.ai or inviting others to try it.
Shipping a marketplace isn’t just “site is live.” You’re validating a transaction system with real people, money, and expectations—so your goal is to launch with confidence and learn quickly.
Set up analytics that match the marketplace funnel
Before you invite users, define a small set of events that tell you where people drop off. Keep it consistent across tools (builder, forms, and payment pages).
Track at least these core events:
- Signup completed (buyer and seller, ideally with a
roleproperty) - Listing created (and listing published, if moderation is involved)
- Checkout started (clicked “Buy” or opened payment step)
- Purchase completed (successful payment)
Add a couple of marketplace-specific signals if you can: first message sent, quote requested, booking requested, and refund requested. The point isn’t “more data”—it’s knowing whether you have a supply problem, a trust problem, or a checkout problem.
Build a pre-launch QA checklist you can repeat
A quick, repeatable checklist catches the issues that hurt credibility. Run it on desktop and mobile, and repeat it after every meaningful change.
Your minimum QA checklist:
- Mobile UX: listing cards, filters, checkout, and forms (thumb-friendly)
- Forms: validation, required fields, error states, and confirmation screens
- Emails: signup verification, listing confirmation, order confirmation, seller notifications
- Payments: test cards, failed payments, refunds (if applicable), and edge cases like double-clicking the pay button
If your checkout happens offsite (e.g., Stripe Checkout), confirm you can still measure “checkout started” and “purchase completed” reliably.
Run a private beta with 5–20 sellers
A marketplace can’t be tested only with friends acting as buyers. Recruit 5–20 real sellers and treat it like a structured pilot.
Ask each seller to:
- Create 1–3 listings using your real flow
- Respond to a few inquiries within a set timeframe
- Complete at least one test transaction (or a $1 real transaction if feasible)
Collect feedback in a consistent format: what confused them, what slowed them down, and what would stop them from using it again. You’ll learn more from five serious sellers than fifty casual visitors.
Define clear launch criteria (so you don’t “launch forever”)
Decide what “ready” means before you share your launch link.
Simple launch criteria that work:
- Baseline supply: enough listings in your core category that a buyer can choose (not just 2–3)
- Response times: sellers respond within X hours (set a realistic target)
- Support coverage: someone is available to handle payment issues, cancellations, and basic questions during launch week
When you hit those criteria, launch—then iterate using the analytics events above.
SEO for Marketplaces: Make Listings Discoverable
Marketplace SEO is mostly about making every listing and category page easy for search engines (and people) to understand. You don’t need a dev team to get the fundamentals right—most builders support these settings.
Nail the on-page basics (site-wide)
Start with clean, consistent page titles and headings. Your title tag should mirror the search intent (“Used Road Bikes in Austin”) and your H1 should match the page topic.
Keep URLs readable and stable:
- Good:
/category/road-bikesand/listing/trek-domane-54 - Avoid: random IDs, long query strings, or frequent slug changes
Use internal links to help discovery and spread authority:
- Link category pages to subcategories and top listings
- Link each listing back to its category and related searches
- Add a simple “Browse” hub page that links to your main categories (e.g.,
/browse)
Make listing and category pages truly indexable
For marketplaces, your inventory is your SEO. Ensure listing pages can be crawled (not behind login, not blocked by robots settings, not loaded only via client-side filters).
Category pages should not be empty shells. Add a short intro that’s unique per category (who it’s for, what’s included, pricing range, popular brands/locations). This helps you avoid a site full of near-duplicate pages.
If you offer filters (price, size, location), be careful: thousands of filter combinations can create duplicate URLs. In many stacks, the simplest fix is to keep filters on-page without generating new indexable URLs unless you intentionally support them.
Add schema where possible
Structured data can improve how your pages appear in search results. If your tools support it, add schema for:
Product(or a service equivalent) on listing pagesReview/ratings where applicableLocalBusinessfor sellers with a physical presence
Performance basics that move the needle
Fast pages get crawled more efficiently and convert better.
Compress images, enable lazy loading, and keep layouts simple. Prefer fewer heavy widgets over “nice-to-have” effects—marketplace SEO wins through lots of clean, fast, indexable pages.
Compliance, Safety, and Accessibility Basics
Improve marketplace SEO basics
Generate clean category and listing pages that search engines can index.
You don’t need a legal team or custom engineering to build a safer, more compliant marketplace—but you do need a few basics in place before you invite real users. The goal is to protect buyers and sellers, reduce risk, and avoid avoidable trust issues.
Privacy and data handling (keep it simple)
Start by listing what data you collect (email, phone, addresses; payment info handled by your payment provider) and why you collect it. Then make sure your site reflects that in plain language.
At minimum, implement:
- Consent where required: cookie consent and marketing opt-in (especially for email updates)
- A retention rule: decide how long you keep sensitive data (e.g., messages, IDs, support tickets), and delete what you don’t need
- Access and deletion requests: create one support path (a form or email) for “export my data” and “delete my account,” plus a short internal checklist so you can complete requests reliably
If you’re using hosted tools, check each one’s settings for data exports, user deletion, and audit logs. A plain “privacy” page that links to your policies is usually enough for an MVP.
Terms you should prepare (before launch)
Marketplaces need clearer rules than single-seller stores. Prepare three short documents and link them in the footer and during signup:
- Marketplace Terms (how the platform works, your role, liability boundaries)
- Seller Terms (seller responsibilities, payout rules, prohibited behavior)
- Acceptable Use Policy (what users can’t do: spam, harassment, fraud, etc.)
Keep them readable. The point is to set expectations and give you a basis for moderation decisions.
Safety measures that scale without heavy engineering
Even a basic MVP should include:
- Reporting: a “Report listing/user” option that creates a ticket for review
- Dispute process: a simple flow describing how disputes are handled, response timelines, and what evidence you’ll ask for
- Banned items/services list: a clear list of what can’t be sold, plus “we may remove at our discretion” language
Accessibility basics (easy wins)
Accessibility improves conversion and reduces support issues. Focus on:
- Contrast: readable text and buttons (avoid light gray on white)
- Alt text: require sellers to add a short description for each image
- Keyboard navigation: test your checkout, filters, and forms without a mouse
Treat this section as a launch checklist: simple policies + a few product affordances can prevent most early problems.
Growth Without a Dev Team: Acquisition and Retention Loops
Growth is mostly about building repeatable loops—things that bring new users in, help them succeed quickly, and encourage them to return.
Pick one acquisition channel (and commit)
Choose a single primary channel for your first 30–60 days so you can learn faster and avoid spreading yourself thin:
- SEO (best for marketplaces with lots of searchable listings)
- Partnerships (associations, newsletters, local orgs, influencers)
- Paid ads (if your unit economics are clear)
- Community (Discord/Slack/Facebook groups, offline meetups)
Your goal isn’t traffic—it’s qualified visits that convert into a first message, booking, or purchase.
Solve the cold start problem
Marketplaces fail early when buyers show up to empty shelves—or sellers join and hear crickets. Seed supply before you ask for demand.
Practical ways to do it without engineering:
- Curate the first listings yourself (even 25–50 strong listings can be enough)
- Offer early-seller incentives: fee-free month, featured placement, faster payouts
- Start with a narrow category or geography so supply and demand concentrate
- Use manual matching for the first transactions (concierge-style) to create success stories
If you’re building with a platform like Koder.ai, consider using snapshots and rollback during this phase so you can iterate aggressively (pricing, onboarding steps, listing fields) without fear of breaking production.
Retention: make “come back” the default
Retention often comes from a few small behaviors you can automate:
- Saved searches + alerts (“New listings matching X”) via email/SMS
- Notifications for messages, offers, expiring availability, or price drops
- Repeat purchase offers: bundles, loyalty discounts, “rebook in one click”
These can be powered by your email tool + database triggers, not custom code.
Monthly iteration cycles (based on drop-offs)
Once a month, review where users abandon the funnel: landing page → search → listing view → contact/checkout. Pick one bottleneck and improve it (copy, pricing clarity, fewer steps, better filters). Small, steady improvements compound—especially when you focus on the highest drop-off step rather than adding new features.
A practical note on deployment, hosting, and ownership
Whichever approach you choose (no-code, plugins, or vibe-coding), aim for three things early:
- You can export your data (and ideally your code)
- You can deploy reliably and roll back quickly
- You can control domains and environments (staging vs. production)
Koder.ai, for example, supports deployment and hosting, custom domains, and source code export, with global AWS infrastructure and the ability to run applications in different countries for data residency needs. That combination is useful if you’re launching fast now but want a path to a more custom marketplace later.
If you also plan to create content during your launch, it’s worth noting that Koder.ai offers an earn-credits program (for content) and referral credits—both can help offset early experimentation costs while you’re validating your marketplace MVP.