

How to Build a Portfolio Website in 30 Minutes (No Code)
Create a clean portfolio website in about 30 minutes—no coding. Follow a simple checklist: pick a template, add work, connect a domain, and publish.
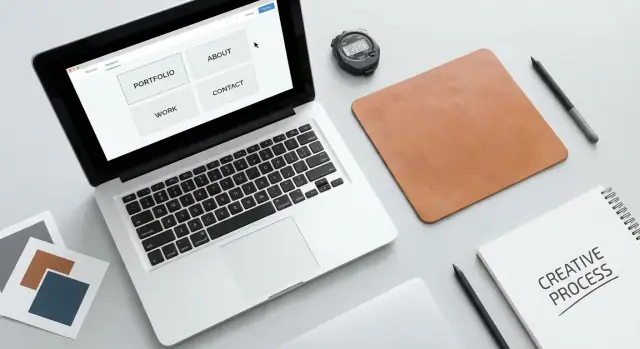
What You’ll Build in 30 Minutes
By the end of this quick build, you’ll have a clean, one-page portfolio website that does three jobs well: shows your work, explains who you are, and makes it easy to contact you.
What you’ll have when you hit “Publish”
A simple page with:
- A top section (your name + what you do + a clear call to action)
- A projects section with 3–6 pieces of work, each with a short description
- An About section that’s readable in under a minute
- A Contact section with the right links (email, social, booking link, or a form)
This is intentionally minimal. A one-page portfolio is faster to build, easier to update, and often converts better than a multi-page site when someone is scanning your work.
Who this is for
This approach fits freelancers, students, creatives, and job seekers who need something professional quickly—especially if you’re applying for roles, pitching clients, or sharing your work on social platforms.
What you should have ready before you start
To stay within 30 minutes, gather these first:
- 3–6 projects (images, links, or short case-study notes)
- 1 headshot (or a simple logo/avatar)
- A short bio (2–4 sentences)
- Links you want visitors to click (email, LinkedIn, Behance, GitHub, Dribbble, etc.)
The 30-minute time plan
- Setup (5 minutes): pick a builder, start a site, choose a starting design
- Content (15 minutes): add projects, write your headline and About, add contact links
- Polish (10 minutes): spacing, readability, mobile check, and one final pass for typos
Plan the Site Before You Start
A 30-minute build works only if you spend 3–5 minutes deciding what “done” looks like. Otherwise you’ll lose time tweaking fonts, rearranging sections, and second-guessing what to include.
1) Set one clear goal
Pick the primary outcome for your portfolio:
- Get hired (recruiters and hiring managers)
- Get clients (people ready to buy your service)
- Showcase a specialty (e.g., “UX for fintech apps” or “food photography”)
This goal determines what you highlight first: your role and outcomes for hiring, your offer and process for clients, or your niche work for a specialty.
2) Choose a simple structure
Decide whether you’re building:
- Single-page site: fastest, best for most creatives and freelancers. Visitors scroll, understand you, and contact you.
- Multi-page site: useful if you have lots of case studies, writing, or multiple services.
If you’re racing the clock, start with a single page now—you can split it into pages later.
3) Pick 1–2 calls to action (CTA)
Choose one primary CTA and (optionally) one secondary CTA. Examples:
- “Email me”
- “Book a call”
- “Download resume”
Everything on the page should support these actions.
4) Write a one-sentence positioning statement
Before you touch a template, draft a simple line:
I help [who] with [what], so they can [result].
Example: “I help SaaS startups design onboarding flows that reduce churn and improve activation.”
Keep this sentence visible while you build—it’s your filter for what to include and what to cut.
Choose a Builder (What to Look For)
Your builder determines how fast this “30-minute” project feels. Pick something that lets you publish without fighting menus.
Common options (and who they fit)
- Website builders (general-purpose): good if you want a simple multi-page site and room to grow later.
- Portfolio-specific tools: great for galleries, projects, and case studies—ideal for designers, photographers, illustrators, and other visual creatives.
- Landing page tools: perfect for a one-page portfolio with a strong CTA (like “Book a call” or “Email me”).
If you want a more custom result without going through a traditional dev cycle, Koder.ai is another route: it’s a vibe-coding platform where you describe your portfolio in chat and generate a real React web app (with Go + PostgreSQL available if you later add backend features). You can export source code, deploy/host, connect a custom domain, and use snapshots/rollback—useful if you want something flexible but still fast.
What to look for (so you don’t lose time)
Start with these must-haves:
- Templates you can actually edit: clean layouts, easy section reordering, and sensible typography defaults
- Image handling: automatic compression, good-looking galleries, and fast loading without manual resizing
- Mobile editing and previews: you can adjust spacing, font sizes, and image crops for mobile
- Custom domain support: publish as yourname.com (not a long subdomain)
Check limits before you commit
Many tools look cheap until you hit a paywall. Scan for:
- Page caps (1 page vs. 5+ pages)
- Storage and bandwidth (important for image-heavy portfolios)
- Forms (contact form included? email notifications? spam protection?)
- Analytics (basic traffic stats, or support for your preferred tracking tool)
- Branding removal (can you remove the builder’s logo/footer?)
If pricing matters, compare tiers on /pricing and choose the minimum plan that supports a custom domain and the features above. You can upgrade later when your portfolio expands.
Pick a Template That Won’t Fight You
A good template should feel like a helpful starting point—not a puzzle you have to solve before you can publish. When you’re aiming for a 30-minute build, the wrong template is the fastest way to lose time.
Start with a portfolio (or personal site) template
Choose a template designed for showcasing work: a clear hero section, a grid for projects, a short About area, and an obvious Contact section. If you start from a business landing page or event template, you’ll spend your time deleting and rearranging instead of publishing.
Choose clean over clever
Prioritize clean typography, strong spacing, and whitespace. Fancy animations, unusual navigation, and “creative” scrolling effects may look impressive in demos—but they often make content harder to scan and harder to edit.
Your portfolio is the product. The template should get out of the way.
Make sure it supports the sections you need
Before you commit, confirm the template can handle these basics without hacks:
- Projects section (grid or list with an image, title, and short description)
- Contact section (button, email link, or simple form)
- Responsive layout (rearranges nicely on phones)
If the template doesn’t naturally include these, you’ll end up forcing them in—and that’s where builders start feeling frustrating.
Preview on mobile before you fall in love
Open the mobile preview and scan for three things:
- Is the text readable without zooming?
- Do project thumbnails crop in a weird way?
- Does the menu behave simply (no confusing navigation)?
If the mobile view is messy now, it won’t magically fix itself later. Pick a simpler template and keep moving—you can always upgrade the look once your portfolio is live.
Set Your Branding in 5 Minutes
Your portfolio doesn’t need a full brand guide to look professional. You just need a few consistent choices so every element feels like it belongs together.
1) Logo or wordmark (optional) + one accent color
If you already have a logo, upload it and use it in the header and footer only. If you don’t, a clean wordmark (your name in a good font) works perfectly—especially for freelancers and creatives.
Pick one accent color you’ll use for links, buttons, and small highlights (not large text blocks). A simple way to choose: pull a color from your best project image.
2) Choose 1–2 fonts (readability wins)
Limit yourself to one font for headings and one for body text. Many templates look “messy” because they mix too many type styles.
Keep it readable:
- Body text should feel comfortable at a glance (avoid ultra-thin or overly stylized fonts)
- Use a clear size hierarchy: big headings, normal body, smaller captions
If you’re not sure, stick with the template defaults and change only the accent color.
3) Lock in spacing, buttons, and image corners
Consistency is what makes a no-code portfolio website look custom.
Quick settings to standardize:
- Spacing: use the same vertical spacing between sections (e.g., “Large” padding everywhere)
- Buttons: pick one style (filled or outline) and use it site-wide
- Image corners: choose either sharp corners or one rounded radius and keep it consistent across thumbnails
This matters more than fancy effects, and it makes templates feel polished instead of “template-y.”
4) Check accessibility: contrast and legibility
Do a 10-second scan: can you read text comfortably on every background?
- Avoid light gray text on white
- If you’re using a photo behind text, add a subtle overlay or place text in a solid block
A mobile-friendly portfolio is often where contrast issues show up first, so preview on mobile before moving on.
Build the Page Structure (Fast and Simple)
You don’t need a complex sitemap to ship a good no-code portfolio website. One clear page is often enough—especially when your goal is to build a portfolio in 30 minutes.
The minimum sections that work
Use a simple top-to-bottom flow. These sections cover what most visitors look for in under a minute:
- Hero (top of the page)
- Work (your projects)
- About (short, human, specific)
- Testimonials (optional)
- Contact (make it effortless)
If your template starts with extra blocks (blog, newsletter, pricing, long feature grids), delete them for now. You can always add later.
Build a Hero that does the job
Your hero is the “why should I care?” section. Use this tight checklist:
- Who you are (name + role)
- What you do (one sentence)
- Proof point (client names, years of experience, award, niche)
- CTA (e.g., “View my work” or “Contact me”)
Keep it scannable: short sentences, clear headings, and breathing room.
Navigation: only if you need it
Add a navigation bar only if the page is long. If your page fits in a few scrolls, skip the nav and let the layout guide people naturally.
Keep the structure consistent
Use the same pattern for each section: a heading, one short intro line, then the content. Consistency makes your portfolio feel intentional—even when built fast.
Add Projects That Show Your Skills Clearly
Your projects are the point of the portfolio. Aim for 3–6 strong pieces that prove what you can do, rather than filling the page with everything you’ve ever made.
Choose the right 3–6 projects
Pick work that matches the kind of jobs you want next. If you’re a designer, show design; if you’re a photographer, lead with your best series; if you’re a generalist, choose a mix that still feels coherent.
A quick filter: remove anything you can’t explain confidently in a short interview. If a project needs long disclaimers (“I didn’t really do much”), it weakens the whole site.
Use a simple, repeatable project format
For each project, include the same core details so people can skim:
- The problem: what needed to be solved?
- Your role: what were you responsible for (and what weren’t you)?
- What you delivered: the concrete outputs (screens, brand assets, shoot, edits, copy, etc.)
- Outcome: results, learnings, or impact (only if you can share them)
Keep it tight—2–5 short sentences is usually enough.
Lead with the best visual
Use 3–6 images per project, or a short video if motion is the work. Put the strongest image first, because that’s what gets clicked.
If you can, add one “process” visual (wireframe, sketch, before/after, contact sheet) to show how you think—without turning the page into a case study novel.
Make each project easy to scan
Use clear titles and labels (e.g., “Brand identity,” “Web redesign,” “Editorial shoot”). If the project includes a link, make it obvious and simple: “View live site” or “Watch the final cut.”
Write an About Section People Actually Read
Your About section has one job: help someone decide quickly whether you’re the right person to contact.
Start with a simple photo (or avatar)
Use a friendly headshot or a clean illustration/avatar. Keep the background plain and the lighting natural. Busy scenes, party photos, and heavy filters make people work harder to read you.
Use a 3-part bio that’s easy to scan
Aim for 4–6 lines total:
- Present focus: what you do now and for whom ("I design landing pages for SaaS teams")
- Past highlights: one or two credible proof points (a client type, a result, a well-known project)
- What you want next: the kind of work you’re looking for ("Open to contract product design, 2–3 days/week")
Example:
I’m a freelance UI designer focused on clean, conversion-friendly landing pages for early-stage SaaS. Previously, I helped a fintech startup ship a new onboarding flow and improved activation by 18%. I’m looking for 1–2 new client projects this month.
Add credibility (only if it’s true)
Mention tools you actually use (Figma, Webflow, Notion), industries you know (health, fintech, education), and awards/certifications only when they’re accurate and relevant.
Make the next step effortless
If it fits your field, add a short line with a clearly labeled PDF:
“Download resume (PDF)”
Keep it near your contact button so someone can skim your story, trust you, and act in one scroll.
Make It Easy to Contact You
A beautiful portfolio only works if someone can reach you quickly. Your contact section should be obvious, short, and friction-free—no hunting, no guessing.
Offer 2–3 clear ways to reach you
Aim for two options, three at most:
- Contact form (best for most visitors)
- Direct email link (for people who prefer their own inbox)
- One social link (choose the one you actually check)
If you add more than that, people hesitate. Keep it simple and (if you have a nav) label it “Contact.”
Set expectations (and build trust)
A single sentence can reduce back-and-forth and attract better inquiries. For example:
“I’m available for freelance branding projects starting next month. Typical reply time: within 1–2 business days.”
Only say this if it’s true. If you’re not taking work, say what you are open to (collabs, full-time roles, speaking, etc.).
Calendar booking: only if you’ll maintain it
A booking link can be great for service-based work, but only add it if you can keep it updated and you’re comfortable with people grabbing a slot without emailing first. If your schedule changes often, stick to email + form.
Include your location or time zone
If you work with clients, add a quick note like “Based in Berlin (CET)” or “Working globally (UTC-5).” It helps people propose meeting times and signals professionalism—especially for remote work.
Repeat the contact link in your footer too. People scroll, decide, and click from there.
Mobile, Speed, and Final Quality Checks
You can have a beautiful portfolio and still lose people if it’s awkward on a phone or takes forever to load. Spend a few minutes here and your site will feel polished—without adding any extra pages.
Check mobile first (then everything else)
Most visitors will see your portfolio on a phone. Open the builder’s mobile view and do a quick scroll from top to bottom.
Preview on multiple screen sizes (mobile, tablet, desktop) and look for:
- Text that becomes too small or too wide
- Projects that stack in a strange order
- Sections with awkward gaps or items touching the edges
- Buttons that are hard to tap
Fixes are usually simple: reduce padding, set consistent spacing, or switch multi-column blocks to a single column on mobile.
Speed: cut the heavy stuff
Fast sites feel more professional. The biggest speed killers are oversized images and background media.
Compress large images (especially project screenshots). As a rule of thumb, portfolio images rarely need to be more than ~2000px wide. If your builder has an “optimize” toggle, turn it on.
Avoid huge background videos. If you really want motion, a lightweight loop or a small embedded clip is usually enough—your work should be the focus, not the header.
Buttons and links: the “trust” test
Click every button and link—including social icons, project cards, and your email/contact button.
Make sure:
- Links go to the right place (and open in a new tab for external sites)
- Labels are clear (“View case study” beats “Click here”)
- Tap targets are big enough on mobile (no tiny icons that require precision)
2-minute polish checklist
Before you publish, run a fast pass for quality:
- Spelling and punctuation (especially project titles and headings)
- Consistent titles (same capitalization style across sections)
- No broken sections (empty blocks, placeholders, or “Lorem ipsum”)
- Clean alignment (cards line up; padding feels intentional)
When your portfolio is mobile-friendly, quick to load, and free of small mistakes, it instantly feels more credible—even if you built it in under 30 minutes.
Publish and Connect a Custom Domain
A custom domain makes your portfolio feel finished—and it’s easier to share on resumes, email signatures, and social profiles. Publishing is usually one button. Domain connection takes a few more minutes, but it’s still straightforward.
Pick a domain name you won’t regret
Keep it simple and professional:
- Use a simple domain name: yourname.com or yourname.design if available
If your exact name is taken, try small, readable variations (middle initial, “studio”, or your profession). Avoid hyphens and long phrases—people mistype them.
Connect it in your builder
Most builders guide you through setup with a checklist.
Connect the domain in your builder settings and follow the DNS instructions carefully.
Typically you’ll copy one or two DNS records (often an A record and/or CNAME) into your domain registrar (where you bought the domain). Double-check spelling, punctuation, and whether the record targets the root domain (yourname.com) vs “www”.
Make sure it’s secure and looks right
- Enable SSL/HTTPS if the platform supports it (most do automatically)
- Add a favicon and a clear site title for browser tabs
After DNS changes, give it time. Some domains connect in minutes; others take a few hours. Once it resolves, open your site on both yourname.com and www.yourname.com (if you’re using both) and confirm it loads without security warnings.
Finally, set your preferred version (usually non-www or www) as the primary domain so you’re always sharing one clean URL.
Basic SEO Settings You Can Do in Minutes
SEO sounds technical, but the basics for a no-code portfolio website are mostly simple fields and clear wording. Spend a few minutes here and you’ll make your site easier to understand—for both people and search engines.
Set your page title and meta description
In your builder’s SEO settings, find the fields for Page Title and Meta Description (often under “SEO,” “Page settings,” or “Search preview”).
Keep the page title specific and readable. A strong format is:
Your Name — Role | Portfolio
Example: Jordan Lee — Product Designer | Portfolio
For the meta description, write one short sentence explaining what you do and what visitors will find.
Example: “Product designer specializing in mobile apps and design systems. View selected projects, process, and contact details.”
Use a clear H1 and clean section headings
Your homepage should have one clear H1 at the top—usually your name and role. This also helps visitors instantly “get” what you do.
Good H1 examples:
- “Jordan Lee — UX/UI Designer”
- “Sam Patel — Brand Photographer”
Then use descriptive headings for sections like “Selected Work,” “About,” and “Contact.” Avoid vague labels like “Welcome” or “Stuff I’ve Done.” Clear headings make your online portfolio for creatives easier to scan and easier to index.
Add alt text to key images
Portfolio sites are image-heavy, so add alt text where it matters most: project thumbnails, hero images, and any image that communicates results.
Alt text should describe what someone needs to know, not every pixel. Examples:
- “Before-and-after redesign of checkout screen”
- “Logo and packaging for cold brew brand”
This improves accessibility and gives search tools more context.
Submit or share your site link
Some portfolio website builders let you connect to search tools or generate a sitemap automatically. If yours supports it, submit your site there.
If not, don’t stall your launch: publish, then share the link directly on places that already get attention—your LinkedIn bio, Instagram profile, and any directory or community you’re active in.
Launch Checklist and How to Promote It
Before you share your portfolio, do one quick pass to make sure everything works and feels professional. A clean, functioning site beats a flashy one with broken links.
5-minute launch checklist
- Click every link (project buttons, social icons, email link). Make sure nothing opens a 404.
- Test your contact method: submit your form or click your email link and confirm you actually receive it.
- Scan for placeholder text: lorem ipsum, “Project Name,” default testimonials, etc.
- Proofread headings and project titles: fix typos, inconsistent capitalization, and awkward line breaks.
- Check on mobile: open on your phone and confirm the menu, buttons, and images are easy to tap.
- Confirm your homepage story: in 10 seconds, a visitor should understand what you do and what to click next.
Simple ways to promote (without feeling spammy)
- Share on LinkedIn and add the portfolio link to your profile (Featured section + contact info).
- Add the site to your email signature and your social bios so it’s always working in the background.
- Create a short “featured project” post that explains the problem, your role, and the result—then link to the full case study on your portfolio.
Track what’s working
Use basic analytics to measure views, project clicks, and contact submissions. After a week, highlight the project that gets the most clicks, and rewrite any project titles people ignore.
FAQ
Is a one-page portfolio really enough to get hired or win clients?
Yes. A one-page portfolio is often better for fast decisions because it’s easy to scan.
Aim for a clean flow: Hero → Work → About → Contact. You can always split projects into separate case-study pages later once the site is live.
What should I prepare before starting the 30-minute build?
Keep it minimal so you can finish:
- 3–6 projects (images + links + 2–5 sentences each)
- 1 headshot or simple avatar
- A 2–4 sentence bio
- 2–3 contact links (email + one social + optional booking/form)
If you don’t have 3 projects, publish with 1–2 strong pieces and add more later.
How do I choose the right goal for my portfolio?
Pick one primary outcome and let it drive your choices:
- Get hired: emphasize your role, responsibilities, and outcomes.
- Get clients: emphasize your offer, process, availability, and CTA.
- Show a specialty: emphasize niche projects and proof you understand that space.
When you’re unsure what to include, include only what supports that goal.
Which no-code builder should I use for the fastest setup?
Choose the builder that removes friction:
- General website builder: good if you might add more pages later.
- Portfolio-focused tool: best for galleries and visual work.
- Landing page tool: best for a single page with a strong CTA.
Before committing, check for paywalls around custom domains, forms, storage/bandwidth, analytics, and branding removal (often listed on /pricing).
What makes a template “good” for a 30-minute portfolio build?
Pick a template that already has the sections you need (hero, projects grid, about, contact). Then do a quick mobile preview before you customize.
Avoid templates that rely on heavy animations, unusual navigation, or complex layouts—you’ll lose time fixing responsiveness and readability.
How do I make a quick template look professional without redesigning it?
Keep your “brand” to a few consistent choices:
- One accent color for buttons/links
- One heading font + one body font (or keep defaults)
- Consistent spacing between sections
- One button style (filled or outline)
- One image corner style (sharp or a single radius)
Consistency reads as “custom,” even if you used a template.
How should I write project descriptions so they’re easy to scan?
Use a repeatable format so people can skim:
- Problem: what needed solving?
- Your role: what you owned (and what you didn’t)
- Deliverables: what you made
- Outcome: result/impact if you can share it
Keep it tight (2–5 short sentences) and lead with your strongest visual first.
What should I include in my About section (and what should I skip)?
Use a simple structure that answers “should I contact you?” fast:
- What you do now + who it’s for
- 1–2 credibility points (clients, industries, results, tools you actually use)
- What you want next (roles, project types, availability)
Keep it under a minute to read, and place a clear next step nearby (email/contact button, optional “Download resume (PDF)”).
What’s the best contact setup for a portfolio site?
Offer 2 options (3 max):
- Contact form
- Direct email link
- One social link you actually check
Add a short expectation line (reply time, availability) and include your location/time zone if you work remotely. Repeat the contact link in the footer so it’s easy to find after scrolling.
What are the most important final checks before publishing and sharing?
Do these quick checks:
- Mobile: readable text, comfortable spacing, tappable buttons
- Speed: compress images (often you don’t need more than ~2000px wide)
- Trust: click every link; remove placeholders ("Lorem ipsum")
- Domain: connect DNS carefully (A/CNAME), ensure HTTPS, set your preferred primary domain
After publishing, share the link on LinkedIn, your email signature, and social bios, then watch which projects get clicks and adjust your homepage accordingly.