

Build a Website Fast: Your Same-Day Launch Checklist
Use this step-by-step same-day website launch checklist to plan pages, prep content, set up SEO, test on mobile, and publish with confidence.
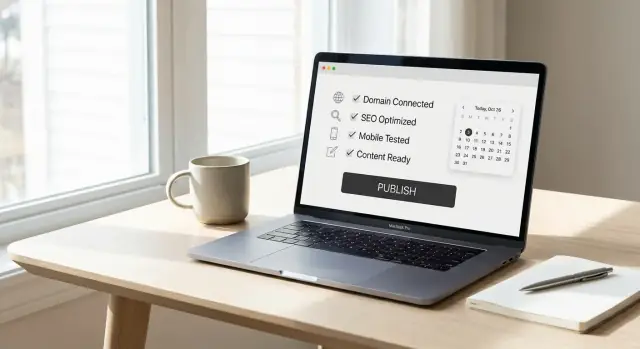
Start With a 30-Minute Launch Plan
Speed comes from decisions made early. Before you open a website builder or buy anything, spend 30 minutes setting a plan you can actually finish today.
1) Define the goal in one sentence
Write the outcome you want from this site:
- Get more leads (quote requests)
- Book appointments
- Sell a small set of products
- Grow a newsletter
- Provide basic info and credibility
If you can’t say it in one sentence, you’ll build pages you don’t need.
2) Pick one primary action (your main CTA)
Choose a single “primary action” you want visitors to take. Examples:
- “Request a quote”
- “Book a call”
- “Buy now”
- “Subscribe”
This becomes your default button text and the decision-maker for what goes on each page. If something doesn’t support the CTA, it’s optional.
3) Timebox the day (so it doesn’t stretch forever)
Put a timer on each phase. A realistic same-day schedule looks like:
- Plan: 30 minutes
- Build core pages: 3–4 hours
- Basic SEO + settings: 30–45 minutes
- QA + fixes: 60–90 minutes
- Publish + checks: 30 minutes
Timeboxes prevent endless tweaking and keep you focused on “good enough to launch.”
4) Make a “week two” list (nice-to-haves)
Write down everything you’re tempted to add today, then deliberately postpone it:
- Blog, portfolio, case studies
- Extra service pages
- Fancy animations, custom icons
- Live chat, complex automations
- A second design concept
You’re not deleting these ideas—you’re protecting launch day. If it doesn’t help the main CTA, it goes on the week-two list.
At the end of 30 minutes, you should have: one goal, one CTA, a timed schedule, and a list of what can wait.
Choose the Minimum Page List That Still Works
A same-day launch succeeds when you keep the site small and purposeful. Your goal isn’t to publish everything you know—it’s to give visitors enough information to trust you and take the next step.
Start with a short site structure (3–5 pages)
For most small businesses, 3–5 core pages is the sweet spot: easy to build, easy to proofread, and hard to break.
Recommended same-day pages:
- Home: a clear promise (what you do), who it’s for, and one primary call-to-action.
- About: a quick credibility page—your story, values, team photo if you have it.
- Services/Products: what you offer, what it includes, starting prices or “request a quote.”
- Contact: the fastest path to reaching you (form, email, phone, hours, service area).
- Privacy: a simple privacy policy (especially if you use analytics, forms, or ads).
If you’re truly pressed for time, you can combine About into Home and still ship with three pages: Home, Services, Contact—then add Privacy as a basic legal requirement.
Add optional pages only if they remove friction
Optional pages are worth it only when they answer a question that would otherwise block someone from converting:
- FAQ if people repeatedly ask the same 5–8 questions.
- Pricing if transparency speeds decisions in your market.
- Booking if appointments are your main workflow.
If an optional page isn’t required for trust or action, leave it for week two.
Sketch navigation labels in plain language
Keep the menu labels obvious:
- “Services” beats “What We Do.”
- “Contact” beats “Let’s Talk.”
A visitor should understand your site in 5 seconds. If they can’t, your page list is too big—or too clever.
Gather Content Before You Touch the Builder
A fast launch depends on having your content ready. If you open a site builder first, you’ll spend the day hunting for photos, rewriting copy, and debating basics. Instead, collect a “content packet” in one sitting—then building becomes mostly copy‑paste.
Write a clear headline (and don’t overthink it)
Your homepage headline should say two things: who it’s for and what you do.
Example formula: “[Service] for [Audience] in [Location]”.
Add a one‑sentence subheading that explains the outcome (what changes for the customer after they work with you).
Pick 3–5 benefits + quick proof
Benefits are customer outcomes, not features. Keep them scannable and specific.
Aim for 3–5 bullets like:
- Save time: “Get a quote in 24 hours.”
- Reduce risk: “Licensed and insured.”
- Clear process: “3 steps from consult to completion.”
Then add proof points right next to them: years in business, number of projects, service area, certifications, notable clients, or a short testimonial.
Collect your core assets (one folder)
Create a single folder named Website Launch and drop in:
- Logo files (PNG/SVG), plus a simple icon if you have one
- Brand colors (even just 2–3 hex codes) and preferred fonts (if any)
- 5–10 photos you’re allowed to use (team, work samples, office, product)
- Testimonials (name, company/location if allowed)
If you don’t have photos, plan for one of these: a quick phone photo session today, or a short‑term stock photo set you can replace later.
Prepare contact details and business hours
Have these ready in plain text:
- Phone number, email, address/service area
- Business hours and holiday notes
- Social links
- Booking link (if you use one)
With this packet done, building your pages becomes assembly work—not a writing project.
Domain, DNS, and Email: Fast Setup Without Mistakes
This is the part of a same-day website launch that can quietly eat hours—mostly because people split responsibilities across too many accounts. Keep it simple: one domain, one place to manage DNS, and one clear plan for email.
Pick a domain you can say (and your customers can type)
Choose a domain that’s easy to spell and say out loud. If you have to explain it (“dash” or “with two Ls”), it’s a sign to simplify.
Aim for:
- Short and readable
- No hyphens or weird spellings if you can avoid them
- Close to your business name (or service + city if you’re local)
Before you buy, do a quick check that the name isn’t confusingly similar to a competitor.
Decide who controls DNS (and stick with it)
Most launch hiccups happen when the domain is bought in one place, the website is hosted in another, and DNS is edited “somewhere else.” Decide on DNS control (registrar or hosting) to avoid confusion.
Two fast, safe options:
- Keep DNS at the registrar and point your website builder/host via A record/CNAME.
- Move DNS to your host (change nameservers) and manage everything in one dashboard.
Pick one. Don’t half-migrate. And once you change DNS, expect propagation to take a bit—sometimes minutes, sometimes hours.
Branded email: do it now or schedule it
If you can, set up a branded email address (like [email protected]) the same day—it helps trust and keeps business separate from personal accounts.
If time is tight, launch the site first and plan email for later, but write it down as a post-launch task so it doesn’t get forgotten. If you already use a tool like Google Workspace or Microsoft 365, confirm your DNS records (MX, SPF, DKIM) won’t be overwritten during the website setup.
Keep logins and recovery info in one secure place
Track logins and recovery emails in one secure place. At minimum, record:
- Registrar login
- Hosting/builder login
- DNS location (where you edited records)
- Admin email + recovery email
This single step prevents “locked out” delays when you’re trying to go live.
Pick a Template and Lock In the Design System
Speed starts with fewer decisions. A good template gives you page structure, typography pairings, and proven section layouts—so you’re not designing from scratch while the clock is ticking.
If you’re building a more custom site (or you want to ship a web app-like experience, not just brochure pages), a vibe-coding platform like Koder.ai can also speed up the first version. You describe the site in chat, iterate on sections and copy, and export source code when you’re ready—useful when “launch today” is the priority.
Start from the closest match (then stop browsing)
Choose a template that already fits your site type: services, portfolio, or store. Don’t aim for “perfect,” aim for “80% right.” If the template includes the sections you need (hero, trust signals, FAQ, contact), you’ll spend your time editing content—not rearranging blocks.
Once you pick, commit. Template-hopping is one of the fastest ways to lose a same-day launch.
Set global styles first (fonts, colors, buttons)
Before you build any pages, set your design system in one place:
- Fonts: pick one heading font and one body font. Use 2–3 text sizes max (H1, H2, body).
- Colors: define a primary color (buttons/links), a neutral background, and a dark text color.
- Buttons: set one primary button style and one secondary style. Keep them consistent everywhere.
This prevents “almost the same” styling across pages, which is a common time sink later.
Use consistent spacing and repeatable section patterns
Pick a simple spacing rule and stick to it (for example, large padding for major sections, smaller padding inside cards). Then reuse the same section patterns across pages:
- Hero (headline + subhead + one CTA)
- Proof (logos, testimonials, numbers)
- Offer (service cards or packages)
- FAQ (5–7 questions)
Consistency makes the site feel polished without extra design effort.
Keep animations minimal to cut testing time
Animations add edge cases: mobile glitches, slower load, odd timing. For a same-day launch, limit motion to one subtle effect (like a fade-in) or skip it entirely. Your future self can add flair after the site is live.
Build the Core Pages (Home, Services, About, Contact)
These four pages are your “minimum viable website.” If they’re clear, complete, and easy to contact you through, you can launch confidently and improve details later.
Home (make the first 5 seconds obvious)
Your Home page should answer: What do you do, who is it for, and what should someone do next?
Place a clear value proposition and a single primary call-to-action (CTA) above the fold (before someone scrolls). Examples: “Book a call,” “Get a quote,” or “View services.” Keep the headline specific, not clever.
Services / Products (sell outcomes, not just features)
List your main offers with:
- What it is and who it’s for
- The outcome (what changes for the customer)
- What’s included (3–5 bullets is enough)
- A starting price or “Contact for a quote”
Add a CTA under each offer and one at the bottom: “Request pricing,” “Schedule an estimate,” etc.
About (credibility in one screen)
Write for trust, not biography. Include:
- A short story: why you do this work
- Proof points: years in business, certifications, notable clients, reviews
- A team photo or founder photo (even a good smartphone shot beats a logo)
- Your location or service area (especially for local businesses)
Contact (remove friction)
Your contact page should make it effortless to reach you:
- A short form (name, email/phone, message)
- Direct email and phone number
- Map or address only if relevant
- Expected response time (“We reply within 1 business day”)
Before moving on, submit your own form and confirm the message arrives where it should.
Handle Legal Basics in One Pass
Legal pages don’t have to slow your same-day launch. Do one focused pass to cover the common requirements, reduce risk, and avoid last-minute “we’ll fix it later” gaps.
1) Add the must-have policies (based on what your site does)
If you collect any information via a form (contact form, newsletter signup, quote request), publish a Privacy Policy. It should clearly state what you collect, why, where it’s stored, and how someone can request deletion.
If you sell anything, take bookings, or provide paid services, add Terms (or Terms of Service). Keep it practical: payment/refund basics, delivery timelines, cancellation rules, and limitation of liability.
If you’re short on time, you can link these from the footer on every page. The goal is coverage, not perfection.
2) Confirm your business identity is consistent
Place your business name, address, and contact info where it’s appropriate and easy to find—typically:
- Footer (name + phone/email)
- Contact page (full details)
- About page (optional)
Use the same formatting everywhere (for example, “St.” vs “Street”). Consistency helps both customers and local search.
3) Cookie consent: only if you actually need it
Don’t add a cookie banner “just because.” Add cookie consent only if your analytics/ads setup requires it (common examples: ad pixels, remarketing, or certain analytics configurations).
If you are running basic analytics, configure it to respect consent where applicable, and make sure your Privacy Policy mentions tracking.
4) Make sure you have rights to everything you publish
Before launch, do a quick “rights check” so you’re not swapping assets under pressure later:
- Images: use your own photos, licensed stock, or images with clear commercial permission
- Fonts: confirm your webfont license allows website use
- Testimonials: get written permission (email is usually fine) and don’t change meaning; consider initials if privacy is a concern
5) Add simple disclaimers where needed
If you’re in a regulated or sensitive field (health, finance, legal), add a short disclaimer: information is general, not advice, and results vary. Keep it visible near claims, not buried.
This is not legal advice—when you have time after launch, have a professional review your policies and industry-specific requirements.
Do the Essential SEO Setup (No Deep Dives)
You don’t need an SEO overhaul to launch. You do need a few basics so search engines can understand your pages, and visitors see clean previews when your site is shared.
1) Write one title tag + meta description per core page
Do this for Home, Services, About, and Contact.
- Title tag: make it specific and readable (about 50–60 characters).
- Meta description: one clear sentence (about 140–160 characters) that matches what’s on the page.
Example:
- Services title: “House Cleaning Services in Austin | BrightNest Cleaning”
- Services description: “Weekly, biweekly, and move-out cleaning in Austin. Get transparent pricing and book in minutes.”
2) Set clean URLs (short, readable, keyword-relevant)
Skip auto-generated slugs like /page-1 or /services-2.
Good:
- /services
- /services/move-out-cleaning
- /contact
Avoid stuffing keywords or dates unless you truly need them.
3) Add one H1 per page and use headings in order (H2, H3)
Each page should have one clear H1 that matches the page purpose.
- Home H1: “Cleaning You Can Count On in Austin”
- Services H1: “Cleaning Services”
Then structure sections with H2s (and H3s only when needed). This helps scanning and accessibility, and makes it easier for search engines to interpret the page.
4) Create a sitemap and robots.txt (if your platform supports it)
Most builders can generate these automatically. Turn them on and confirm the basics:
- Sitemap lists your important pages (usually at /sitemap.xml).
- robots.txt should not block your site from being indexed.
If you’re using a plugin, keep settings simple: include your core pages and exclude admin or checkout pages (if applicable).
5) Add internal links between related pages
Internal links help visitors find what they need and help search engines discover your pages.
A few quick wins:
- From Home → link to /services and /contact
- From Services → link to /contact (or your booking page)
- From About → link to /services and a specific service subpage if it’s relevant
Keep link text descriptive (e.g., “move-out cleaning” instead of “click here”).
QA Checklist: Mobile, Forms, Links, and Speed
This is the “save yourself tomorrow” step. A quick QA pass catches the issues that make a brand-new site feel broken: weird spacing on phones, forms that don’t deliver, buttons that go nowhere, and pages that take forever to load.
1) Check layouts across screen sizes
Open the site on your phone and also resize your browser window on desktop (most browsers have a device preview in Developer Tools). Your goal isn’t perfection on every device—just “nothing looks wrong.”
- Check every page on mobile, tablet, and desktop widths
Look for: text that’s too small, sections with awkward gaps, images that crop faces/logos, headers that wrap into two lines, and sticky menus that cover content.
2) Test every form end-to-end
Forms often “look” fine while silently failing. Submit each form yourself.
- Test forms: validation, confirmation message, delivery to inbox/CRM
Confirm these specifics:
- Required fields show a clear message if left blank.
- After submitting, you see a clear confirmation (and ideally a next step, like “We’ll reply within 1 business day”).
- The message arrives where it should (inbox, helpdesk, or CRM). Also check spam/junk.
3) Click everything (yes, everything)
Broken links are the fastest way to lose trust.
- Click every link, button, and menu item; fix 404s
Pay special attention to your logo link (should go Home), footer links, social icons, and any “Book now”/“Get a quote” buttons.
4) Verify speed basics
You don’t need deep performance work today—just remove obvious drag.
- Verify page speed basics: compress images, remove unused sections
If a page feels heavy, start by shrinking oversized images and deleting sections you don’t truly need for launch.
5) Do a quick accessibility pass
Accessibility checks are also usability checks.
- Run an accessibility quick check: contrast, alt text, focus states
Make sure text is readable against backgrounds, important images have simple alt text, and you can tab through buttons/links with a visible focus indicator.
Pre-Launch Setup: Tracking, Search, and Site Settings
This is the “quiet” part of a same-day website launch checklist—no one sees it, but it prevents you from flying blind after you hit publish. Spend 20–30 minutes here and you’ll avoid the most common “we launched but don’t know what’s working” problem.
Set up tracking you can trust
Add analytics now, before you share the site anywhere. The goal isn’t perfect reporting—it’s confirming that page views are actually being recorded.
- Set up analytics (and confirm it’s collecting page views)
After installation, open your site in an incognito/private window, click to 2–3 pages, then check the real-time view (or equivalent) to confirm your visit appears. If you don’t see activity within a few minutes, the tracking is not working yet—fix it before launch.
Connect Google Search Console (and submit your sitemap)
Search Console is how you confirm Google can find and index your site.
- Connect Search Console and submit your sitemap
Most site builders generate a sitemap automatically (often at /sitemap.xml). Submit it once, and you’re done. Also verify the “property” matches your preferred domain format (for example, https://www.yourdomain.com vs https://yourdomain.com) so you’re not tracking the wrong version.
Site settings that prevent preventable issues
These are small details that make your site feel complete—and reduce support emails.
- Create a custom 404 page and favicon
A simple 404 page should (1) apologize briefly, (2) link back to Home, and (3) offer a clear next step like “View Services” or “Contact.” Add a favicon (the small tab icon) so the site looks legitimate in browser tabs and bookmarks.
- Double-check SSL is enabled (https)
Visit your homepage and confirm the address bar shows https:// (not http://). If SSL is off, fix it now—forms, logins, and even trust can break without it.
Make key pages easy to find
If you have a pricing page, don’t hide it.
- If you have a pricing page, link it clearly (example: /pricing)
Add it to your main navigation or as a prominent button (e.g., “Pricing” or “View Plans”). This reduces back-and-forth and helps visitors self-qualify before contacting you.
Launch and Post-Launch: First 24 Hours
Launching is a moment, but the first day is where most “same-day” websites either earn trust or quietly leak leads. Treat the first 24 hours like a short monitoring window: publish, verify the real-world experience, and capture a clean baseline so you can improve without guessing.
Pick a launch window you can actually watch
Publish at a time when you can stay available for the next 1–2 hours. That buffer lets you catch the common surprises: a broken form notification, a missing page in the menu, or a payment/booking link that looks fine in preview but fails live.
If possible, avoid late-night launches. You’ll miss early feedback, and you’ll be too tired to fix small issues that matter.
Test the live site like a visitor (not like the builder)
Open the live URL on your phone using cellular data (not Wi‑Fi). Cellular is a better simulation of a real customer in a hurry, and it exposes slow-loading pages or heavy images.
Do a quick “money path” test:
- Tap the main call-to-action (Book / Call / Get a Quote)
- Submit the contact form (confirm you receive the email)
- Click your phone number (does it dial?)
- Check the address/map link (does it open correctly?)
Also confirm your SSL/lock icon appears in the browser. If it doesn’t, your domain or DNS may still be propagating.
Announce once, clearly, with one link
For day one, don’t overthink promotion. Make one simple announcement with one link: a short post on social, a quick email to your list, or an update to your business listings. Keep it focused on what people should do next (visit, call, book).
Use a clean URL (like your homepage or a dedicated /contact page) so you can measure results.
Capture a baseline and create a week-one backlog
Before you start tweaking, save a snapshot of key metrics so you can tell what changed:
- Visits (today/this week)
- Form submissions or key clicks
- Top pages people land on
Then create a short week-one backlog: a few SEO improvements, an extra page you skipped (FAQs, pricing, gallery), and any content you had to placeholder. Keep it short and realistic—finishing matters more than perfecting.
If you want to stay organized, add your backlog to a simple doc and schedule a single follow-up session for tomorrow. That’s how a fast launch turns into a site that keeps getting better.
If your backlog includes “turn this into a real app later” (client portal, booking workflow, product catalog with logic), consider building the next iteration in a platform like Koder.ai so you can evolve from a simple site to a full web/mobile experience quickly—without restarting from scratch.
FAQ
What’s the fastest way to plan a same-day website launch?
Start with one goal and one primary CTA (e.g., “Request a quote”). Then timebox the day:
- Plan: 30 minutes
- Build core pages: 3–4 hours
- Basic SEO + settings: 30–45 minutes
- QA + fixes: 60–90 minutes
- Publish + checks: 30 minutes
Finish by writing a “week two” list so nice-to-haves don’t derail launch day.
What pages do I actually need to launch today?
For most small businesses, ship 3–5 pages:
- Home (clear promise + primary CTA)
- Services/Products (what you offer + outcomes + CTA)
- About (quick credibility)
- Contact (form + direct contact details)
- Privacy (especially if you use forms/analytics)
If you’re pressed for time, combine About into Home and still launch strong.
Should I add an FAQ, pricing, or booking page on day one?
Only if they remove friction for your main action. Add optional pages when they answer conversion-blocking questions:
- FAQ if you repeatedly get the same questions
- Pricing if transparency speeds decisions in your market
- Booking if appointments are your main workflow
If it doesn’t directly support your CTA, put it on the week-two list.
What content and assets should I gather before opening a site builder?
Create a single “Website Launch” folder and collect:
- Logo files (PNG/SVG)
- 2–3 brand colors (hex codes) and fonts (if any)
- 5–10 photos you have rights to use
- Testimonials (with permission)
- Phone, email, address/service area, hours, social links
This turns building into copy‑paste instead of a scavenger hunt.
How do I write a clear homepage headline quickly?
Use a simple formula:
- Headline: “[Service] for [Audience] in [Location]”
- Subheading: one sentence describing the outcome
Keep it specific and readable. Your goal is that someone understands what you do and who it’s for in 5 seconds.
How do I choose a domain name without overthinking it?
Pick a domain that’s easy to say and type:
- Short and readable
- Avoid hyphens and odd spellings when possible
- Close to your business name (or service + city for local)
Before buying, quickly check it’s not confusingly similar to a competitor’s name.
What’s the simplest way to avoid DNS mistakes during launch?
Decide one place where DNS is managed, and stick with it:
- Keep DNS at the registrar and point to your host via A record/CNAME, or
- Move DNS to your host by changing nameservers
Avoid “half-migrating.” After changes, expect propagation to take minutes to hours.
How do I choose a template and keep design from slowing me down?
Pick the closest-fit template and stop browsing. Then set global styles before building pages:
- 1 heading font + 1 body font
- A primary color + neutral background + dark text
- One primary button style + one secondary
Reuse the same section patterns (hero, proof, offer, FAQ) to stay consistent and fast.
What SEO tasks are essential on launch day?
Do the minimum that prevents obvious problems:
- Title tag + meta description for Home, Services, About, Contact
- Clean URLs (e.g.,
/services,/contact) - One clear H1 per page; use H2/H3 in order
- Enable sitemap and confirm
robots.txtisn’t blocking indexing - Add a few internal links (Home → Services/Contact; Services → Contact)
Skip deep optimization until after you’re live.
What should I test right before and right after I hit publish?
Test the site like a real visitor:
- Check mobile/tablet/desktop layouts
- Submit every form and confirm delivery (check spam)
- Click every button/link (including logo and footer)
- Verify
https://is active (SSL) - Test on your phone using cellular data
Then announce with one clear link (homepage or /contact) and track a baseline for improvements.