

How to Build a Mobile App for Community Resource Sharing
Learn how to plan, design, and launch a community resource-sharing mobile app, from MVP features and UX to trust, payments, and growth.
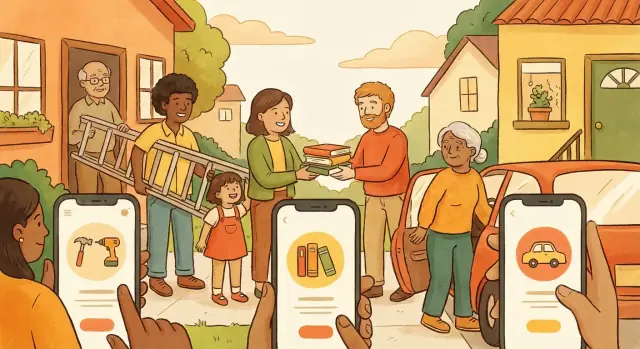
Start With a Clear Problem and Community
A community sharing app succeeds when it solves a real, local pain point for a specific group of people. Before thinking about features, name the community and the day-to-day problem you’re helping them fix. “Share stuff” is vague; “borrow a drill within 30 minutes in my neighborhood” is a clear promise.
Define the community you serve
Pick one community you can actually reach and support. Common starting points include a single neighborhood, a university campus, or a workplace with multiple offices. Each has different norms and practical needs:
- Neighborhoods often care about convenience, safety, and simple coordination.
- Campuses tend to have fast turnover and lots of short-term needs (moving, events, projects).
- Workplaces may focus on shared equipment, meeting spaces, or commuting help.
The tighter your initial community, the easier it is to seed listings, build trust, and get early feedback.
Choose the resource types to start with
Decide what people will share first. Tools, books, rides, and spaces are all valid—but don’t launch with everything. A focused category makes onboarding easier and reduces edge cases.
A useful rule: start with items that are common, occasionally needed, and easy to return. For example, “tools and small home equipment” is usually simpler than “high-value electronics” or “long-term space rentals.”
Clarify what success means
Define a success metric you can measure in weeks, not a year. For a resource sharing mobile app, success might be:
- Fewer emergency purchases (“I didn’t buy it because I borrowed it”)
- Faster access (“I found it today, not next week”)
- Stronger ties (“I met neighbors I can ask again”)
Pick one primary metric and treat everything else as supporting.
List constraints early
Constraints shape the best version of your first release. Write down what you can’t ignore:
- Budget and timeline (e.g., 8 weeks to a pilot)
- Team skills (what you can build and maintain)
- Legal limits (insurance, liability, age requirements, local policies)
Being honest here prevents a bloated plan and keeps your app MVP checklist grounded in reality.
Research Users and Validate Demand
Before you sketch screens or pick a tech stack, prove there’s a real need—and learn what “need” means to different people. A community sharing app succeeds when it fits existing community behavior while removing the frictions that make sharing exhausting.
Interview the three key groups
Talk to lenders, borrowers, and organizers/moderators (like HOA volunteers, library staff, or neighborhood leaders). Each group optimizes for something different:
- Lenders worry about damage, late returns, and who they’re dealing with.
- Borrowers worry about availability, fairness, and awkward coordination.
- Organizers worry about disputes, rules, and keeping things civil.
Keep interviews short (15–30 minutes) and focus on real stories: “Tell me about the last time you tried to borrow something locally.” Concrete examples reveal the hidden workflow your app will need to support.
Map the alternatives people already use
Most communities already share—just not elegantly. Document what they rely on today: neighborhood chat groups, spreadsheets, paper sign-out sheets, bulletin boards, or “ask a friend” networks. The goal isn’t to copy them; it’s to identify what people like (speed, familiarity) and what breaks (tracking, accountability).
Identify pain points you can actually fix
Look for repeated problems you can design around:
- Coordination overhead (back-and-forth messages, unclear pickup times)
- No-shows and ghosting
- Damage concerns and “Who pays?” anxiety
- Lost context (rules, locations, or item condition buried in chat)
If your app can’t reduce at least one of these dramatically, adoption will be an uphill battle.
Validate willingness and frequency
Demand isn’t just “Would you use this?” It’s “How often would you use this, and what would stop you?” Ask:
- What items would you share first?
- How many times per month would you borrow or lend?
- What’s your non-negotiable requirement (ID, deposits, reviews, neighborhood-only access)?
A small number of highly motivated members who will use it weekly is usually more valuable than many people who “might try it someday.”
Turn insights into simple user stories
Convert what you learned into clear, testable user stories that will guide your MVP.
As a lender, I want to set pickup windows and rules so I don’t have to negotiate every time.
As a borrower, I want to see real availability and location so I can plan confidently.
As an organizer, I want a way to handle reports so disputes don’t derail the community.
These stories become your build-and-test checklist—and keep your team focused on real community outcomes, not features that only look good in a demo.
Decide the Sharing Model and Core Flows
Before you think about features, decide what kind of sharing you’re enabling. The model you pick will shape everything else: profiles, listings, booking rules, payments, and how disputes are handled.
Pick a sharing model that matches your community
Common options include:
- Free sharing: neighbors lend items with no money involved; you’ll rely more on trust signals and clear rules.
- Deposit-based: borrowers leave a refundable deposit to reduce risk and late returns.
- Rental fees: owners earn money per day/hour; you’ll need pricing, payouts, and receipts.
- Membership: users pay a monthly fee for access to community-owned items or perks (good for co-ops).
You can start with one model and expand later, but avoid mixing several in your MVP—it complicates the experience and support.
Decide who owns the inventory
There are two main paths:
- Individuals own items: best for peer-to-peer sharing, lots of variety, but more variability in quality and availability.
- Community hubs own items: a library of things run by a group (building manager, nonprofit, HOA). This simplifies standardization and can reduce disputes, but needs someone to manage stock.
Define the “unit” of sharing
Be explicit about what’s being booked:
- An item (e.g., ladder)
- A time slot (e.g., community studio 2–4pm)
- A service task (e.g., help assembling furniture)
Each unit drives different calendar rules and handover steps.
Set basic rules early
Write simple defaults that apply everywhere: loan duration, extension requests, grace periods, and what happens with late returns. These rules should be visible before a borrower confirms.
Sketch the end-to-end flow on one page
Map the shortest path from intent to handover:
Browse/Search → View details → Check availability → Request/Book → Confirm → Arrange pickup/drop-off → Return/Completion → Rate/Report
If your flow doesn’t fit on one page, it’s a sign you should simplify before building.
Plan an MVP That People Will Actually Use
An MVP for a community sharing app isn’t a “smaller app.” It’s the smallest product that completes the full loop: someone lists an item, a neighbor finds it, they agree on a handoff, and both feel good enough to do it again.
MVP must-haves (the complete sharing loop)
Focus on features that directly remove friction from the first successful share:
- Sign-up + basic onboarding (email/phone, minimal steps)
- Profiles (name, photo, neighborhood, a few trust signals)
- Listings (title, photos, category, condition, rules, availability)
- Search + filters (keyword, category, distance)
- Request/booking flow (request, accept/decline, confirm pickup time)
- Chat (to coordinate details and reduce no-shows)
If you want to move faster without cutting scope, consider using a build approach that’s optimized for iteration. For example, Koder.ai is a vibe-coding platform where you can describe these flows in chat and generate a working app quickly, then refine it using planning mode, snapshots, and rollback—useful when your MVP is changing weekly.
MVP trust basics (enough to feel safe)
Add lightweight safeguards that help people say “yes”:
- Verification options (phone, email; optionally community invite codes)
- Ratings/reviews after a completed exchange
- Report + block with clear reasons (spam, unsafe behavior, no-show)
Keep it local from day one
Local constraints make sharing realistic:
- Location radius (e.g., 1–5 miles/km, adjustable)
- Pickup windows (today/tomorrow/weekend)
- Availability controls (calendar-lite, “unavailable until”)
What to postpone (so you ship)
Unless your model requires it immediately, delay:
- Payments, deposits, and insurance
- Advanced recommendations and personalization
- Complex dispute workflows
4–8 week MVP scope checklist
- Week 1: user stories, wireframes, data model, moderation rules
- Weeks 2–3: auth, profiles, listings, search
- Weeks 4–5: requests/booking, availability, chat
- Week 6: reviews, reporting/blocking, basic admin tools
- Weeks 7–8: QA, pilot launch in one neighborhood, fixes + analytics
If your MVP can’t reliably support 20–50 real exchanges, it’s not ready to scale.
Design a Simple, Friendly User Experience
A community sharing app succeeds when it feels effortless. People aren’t “shopping”—they’re trying to borrow a ladder before dinner or lend a stroller after school. Your UX should remove friction, reduce uncertainty, and make the next step obvious.
Start with a clear, lightweight structure
Keep navigation predictable with a small set of primary areas:
- Home: quick shortcuts (recent searches, nearby items, active requests)
- Explore: browse by category, map/list toggle, filters
- Add: create a listing or request
- Messages: conversations and handover details
- Profile: verification, saved items, listing management, settings
This information architecture helps users build muscle memory and find things without thinking.
Design for low effort (especially for listing)
Listings are the “inventory” of your app—make creating them fast:
- Offer templates by category (tools, kids gear, sports, electronics) with prefilled fields.
- Use smart defaults (suggest titles, auto-detect location neighborhood, default availability).
- Provide simple photo tips (“show the full item,” “include any damage,” “add a size label”).
Aim for a listing flow that feels like sending a text with photos, not filling out a form.
Get accessibility basics right
Readable text, strong contrast, and clearly tappable buttons aren’t optional. Use plain labels (“Request to borrow”) instead of vague ones (“Continue”), keep tap targets large, and avoid relying on color alone to communicate status.
Consider offline and poor-signal moments
Pickups often happen in garages, basements, or building lobbies. Cache key details locally: address (when it’s shared), agreed time, item photos, and a simple handover checklist. Also make message sending resilient—queue it and send when connectivity returns.
Prototype key screens before coding
Prototype the core flows in Figma (or similar): browse → item page → request → chat → confirmation. Test with a few real neighbors, watch where they hesitate, and iterate until the flow feels obvious.
Build Trust and Safety From Day One
A community sharing app only works when people feel safe lending a ladder to a neighbor—or showing up to pick it up. Trust isn’t a “nice to have” feature you add later; it’s part of the product.
Start with profiles that signal reliability
Keep profiles friendly and human: name, photo, short bio, and neighborhood (or a limited area indicator). Add lightweight reliability signals that don’t feel intrusive, such as “member since,” response rate, and completed handovers.
A good rule: show enough context to build confidence, but avoid oversharing. Neighborhood-level location is usually safer than exact addresses.
Offer verification options (with sensible defaults)
At minimum, verify email and phone. For higher-trust categories (expensive tools, childcare gear), consider optional ID checks. If your app is tied to real communities, support invite-based joining (e.g., “invite from a verified member” or “join with a community code”).
Make verification benefits clear: verified members may get higher borrowing limits, faster approvals, or special badges.
Build reputation systems that reward good behavior
After each borrow/lend, prompt both sides for a quick rating and a short review. Keep it simple and specific: “Item condition,” “On-time handover,” “Communication.”
Add badges for consistently positive behavior (helpful lender, reliable borrower, quick responder). Badges should be earned, not bought.
Give people safety tools they can actually use
Include a one-tap way to block users, report issues, and control who can view your profile details. Provide meetup guidelines inside the handover flow (public places, daytime meetups, bring a friend, confirm details in-app).
Make community guidelines part of onboarding
Show clear rules during sign-up—before anyone lists an item. Keep them short, specific, and enforceable (prohibited items, respectful communication, punctuality, and what happens after a report). A lightweight “I agree” checkpoint sets expectations early.
Key Features for Listings, Booking, and Handover
This is the transaction core of a community sharing app: someone discovers an item, understands the rules, books it for a specific time, and both sides complete the handover with minimal confusion.
Listings that answer questions upfront
A good listing reduces back-and-forth. Include multiple photos, a clear category, and a simple condition selector (e.g., New / Good / Worn). Add pickup options (porch pickup, meet nearby, building lobby) and any rules (ID required, cleaning expectations, late return fees if you use them).
Helpful small touches: size/weight notes, what’s included (charger, case, accessories), and “not suitable for” warnings.
Availability and booking windows
An availability calendar avoids accidental double-booking. Let owners set booking windows (e.g., minimum 2 hours, maximum 3 days), buffer time between borrows, and lead time (e.g., “book at least 4 hours in advance”).
Request flow that keeps things moving
Make requesting fast with a message template: purpose, dates, pickup preference, and confirmation that the borrower accepts the rules.
Owners should be able to accept/decline with one tap and optionally suggest new times. Add reminders for pickup and return, plus an automatic “still on track?” check-in before the return deadline.
Handover: check-in/out with proof
At pickup and return, use a lightweight check-in/out flow: timestamp, location, and photos of the item’s condition. A short checklist (cleaned, parts included) prevents misunderstandings.
Disputes with clear steps
When something goes wrong, guide users through reporting: pick an issue type, add photos and notes, and specify what resolution they want (repair, replacement, partial refund if you support payments). Show a simple status tracker with next steps and expected response times.
Messaging, Notifications, and Community Moderation
A community sharing app lives or dies by communication. If people can’t quickly agree on timing, condition, and handover details, requests stall and trust erodes. The goal is to make coordination feel effortless—without turning your app into a noisy chat app.
In-app chat that keeps people safe
Provide built-in messaging so users don’t need to exchange phone numbers. Add gentle safety nudges (for example, a banner that discourages sharing personal contact details) and detect common patterns like emails or phone numbers so you can warn users before sending.
Keep the chat focused on the transaction:
- Show the listing card inside the conversation (item name, dates, pickup method).
- Offer quick-reply buttons like “Yes, that works,” “Can we do 6pm?”, or “Please confirm the return time.”
Notifications that help, not spam
Use notifications for moments that unblock the next step:
- New request, approval/decline, and changes to dates
- Pickup reminders (“Tomorrow at 5pm”) and return reminders
- “Item marked returned” confirmations to close the loop
Let users control frequency (all, important only, none) so they don’t churn from overload.
Auto-status updates to reduce back-and-forth
Automate updates that people otherwise type repeatedly:
- “Request sent” → “Approved” → “Ready for pickup” → “Borrowed” → “Due soon” → “Returned”
These status events should appear in the chat timeline as system messages. It keeps both sides aligned and creates a clear history if there’s a dispute.
Community moderation and escalation
Add a simple “Report” action on chats, profiles, and listings. Reports should land in a moderation inbox with context (messages, booking timeline, prior reports) and clear actions: warn, restrict messaging, hide listing, or suspend.
For retention basics, include favorites and saved searches, plus “re-list this item?” reminders for lenders who haven’t posted in a while.
Payments, Deposits, and Pricing (If Needed)
Not every community sharing app needs payments. If neighbors are lending items for free, money can add friction. But payments become important when you’re enabling paid rentals, collecting security deposits, or charging memberships to support operations (for example, insurance, storage, or moderation).
Decide what you’re actually charging for
Start by picking one clear model:
- Paid rental (price per hour/day)
- Deposit (refundable, meant to reduce no-shows or damage)
- Membership (monthly/yearly access to the community)
Avoid combining all three in your first release unless you’re certain it’s required. Complexity makes onboarding harder and increases support requests.
Make pricing transparent (and show the total upfront)
People should understand the cost before they request a booking. Show a simple breakdown early:
- Rental price (time-based)
- Deposit (clearly labeled “refundable”)
- Service fee (if you take one)
- Any late-return fee rules (even if they’re rarely applied)
A good rule: the price someone sees on the listing should match what they expect to pay at checkout—no surprise add-ons.
Choose a payment provider early
Even if payments are “phase two,” pick a provider while planning your MVP. Provider details affect product decisions, including:
- Fees (per transaction + payout fees)
- Payout timing (instant vs. delayed)
- Disputes and chargebacks (who is liable and what evidence you need)
- Split payouts (if you take a platform fee)
Switching later can be painful, especially if you need to migrate saved payment methods or reconcile transaction history.
Refunds, cancellations, and late fees
Write simple rules that you can enforce manually at first:
- When is a booking refundable?
- What happens if the lender cancels?
- How long is the grace period for returns?
Clear policies reduce arguments in messaging and help moderators make consistent decisions.
Taxes and compliance (get local advice)
If money changes hands, confirm local requirements for taxes, KYC/identity checks, or consumer protection rules. A short conversation with a local accountant or legal advisor can prevent expensive rework later.
Choose a Practical Tech Stack and Architecture
Your tech choices should support fast iteration, safe data handling, and the everyday realities of running a community sharing app (moderation, support, and updates). The “best” stack is usually the one your team can maintain for years.
App approach: native vs. cross-platform
If you need the smoothest performance and platform-specific UI, go native (Swift for iOS, Kotlin for Android). If your priority is launching quickly with one codebase, choose cross-platform (Flutter or React Native). For most community sharing apps—profiles, listings, chat, booking—cross-platform is often a strong fit.
Backend essentials you’ll need
Even an MVP typically needs a few dependable backend building blocks:
- Database for users, listings, availability, bookings, and reports (PostgreSQL is a common default).
- File storage for photos and attachments (e.g., S3-compatible storage) with image resizing/compression.
- Search for categories, keywords, and location filtering (start simple with database search; consider hosted search later).
- Messaging for in-app chat (can start with a managed service, or build with WebSockets + a message store).
Managed platforms (Firebase, Supabase, AWS Amplify) can reduce setup time, while a custom API (Node.js/NestJS, Django, Rails) offers more control when rules get complex.
If you’re aiming to ship faster with a modern default stack, Koder.ai is designed for this kind of product: React on the web, a Go backend with PostgreSQL, and Flutter for mobile—plus source code export, hosting, and deploy workflows that can shorten your path from prototype to pilot.
Admin panel: don’t skip it
Plan an admin tool from day one for moderation, category management, and user support. You can start with a lightweight internal dashboard (Retool/Appsmith) before investing in a fully custom panel.
Security basics to build in early
Use secure authentication (email links, OAuth, or well-implemented passwords), enforce rate limits on login and messaging, keep all traffic on HTTPS, and encrypt sensitive data where appropriate. Log key actions for abuse investigations.
Keep it maintainable now, scalable later
Start with a simple architecture (often a modular monolith), clear data models, and background jobs for email/push notifications. Design for growth, but optimize for reliability and ease of change in the first release.
Test, Measure, and Improve Before a Wider Launch
Before you invite multiple neighborhoods, make sure the app works reliably for one real community. A smaller, closed beta keeps issues manageable and helps you learn faster.
Define the KPIs that prove sharing is happening
Pick a short set of metrics that reflect real value—not vanity downloads. For a community sharing app, useful KPIs often include:
- Active users (weekly or monthly)
- Listings per member (supply health)
- Request-to-fulfillment rate (did the request end in a pickup/borrow?)
If those numbers move in the right direction, you’re building habits, not just curiosity.
Instrument the key moments in the flow
Add analytics events where users make decisions or get stuck. At minimum, track:
- Search (including “no results”)
- Request
- Accept/decline
- Pickup
- Return
- Review / rating
This gives you a simple funnel: “found an item → requested it → got it → brought it back → left feedback.” When the funnel breaks, you’ll know exactly where.
Create tight feedback loops
Quantitative data tells you what happened; feedback tells you why.
Offer lightweight options inside the app (a one-question in-app survey after a handover, a support form for problems). Then schedule short community check-ins (monthly calls or a moderated chat thread) to hear patterns in plain language.
Fix the biggest drop-offs first
Don’t try to improve everything at once. If users search but don’t request, you may need better listings or clearer availability. If requests don’t become pickups, improve scheduling, reminders, or trust signals. Iterate, re-test with the same community, and only then expand to the next one.
Launch and Grow Sustainably
A community sharing app doesn’t “launch” once—it earns trust repeatedly. Treat your first release as a living program with clear owners, weekly check-ins, and a tight feedback loop.
Start with pilots, not a citywide splash
Run a small pilot with community leaders (HOA reps, librarians, mutual-aid organizers) and a few local partners (repair cafes, schools, community centers). Give each pilot group a shared goal—e.g., “50 successful borrows in 30 days”—and measure completion rate, response time, and repeat use.
Create an onboarding playbook that reduces empty screens
New users should see value in the first minute. Seed starter listings (items your team owns or donated by partners), plus a welcome checklist:
- Add profile photo + neighborhood
- Post first item (template prompts help)
- Send first request (suggest a popular nearby listing)
Follow up with a friendly nudge after 24 hours if they stall, and celebrate the first successful handover.
Build growth loops that don’t feel spammy
Focus on invitations with purpose: “Invite 3 neighbors to unlock more items nearby.” Pair referrals with featured item drives (“Week of Ladders,” “Back-to-school supplies”) and real-world moments like local events where people can list items on the spot.
If you do run referrals, make them measurable and easy to manage (unique links, clear rewards). Some platforms—including Koder.ai—also offer ways to earn credits through referrals or by creating content, which can be a practical tactic if you’re building your MVP on a tight budget.
Support operations keep the community healthy
Publish concise FAQs and set response-time expectations. Define escalation rules for no-shows, disputes, and safety concerns. Even a simple “report → review within 24 hours” promise increases confidence.
Plan expansion intentionally
Expand neighborhood by neighborhood, then categories. Add features only when the basics hold up (high completion rate, low dispute rate). Keep a backlog for “later” and protect simplicity as you grow.
FAQ
What’s the first step to building a community resource sharing app?
Start with a specific promise tied to a real local pain point (e.g., “borrow a drill within 30 minutes in my neighborhood”). Then pick one reachable community (single neighborhood, campus, or workplace) and one initial resource category (tools, books, kids gear) so you can seed listings and learn fast.
Why should I launch in one neighborhood (or one campus) instead of a whole city?
A tight community makes it easier to:
- Seed enough listings to avoid “empty screen” problems
- Build trust through repeated interactions
- Moderate issues consistently
- Run a pilot with measurable results in weeks (not months)
You can expand to nearby neighborhoods or new groups after the first one has steady exchanges.
What’s a good first category of items to support?
Start with items that are common, occasionally needed, and easy to return (often tools and small home equipment). Avoid early categories that create lots of edge cases, like high-value electronics or long-term space rentals, until you’ve proven the core loop works.
Who should I interview to validate demand?
Interview three groups:
- Lenders (risk, damage, late returns)
- Borrowers (availability, fairness, coordination)
- Organizers/moderators (rules, disputes, community health)
Keep it to 15–30 minutes and ask for real recent stories (“Tell me about the last time you borrowed something locally”).
How do I know what my app should improve over existing sharing methods?
Document what people already use (chat groups, spreadsheets, bulletin boards, “ask a friend”). Don’t copy them blindly—identify:
- What users love (speed, familiarity)
- What breaks (tracking, accountability, item condition info)
Your app should dramatically reduce at least one recurring friction, like coordination overhead or no-shows.
Which sharing model should I choose: free, deposit, rental, or membership?
Pick one model for your MVP:
- Free sharing (trust signals matter most)
- Deposit-based (reduces late returns/damage risk)
- Paid rentals (needs pricing, payouts, receipts)
- Membership (works well for co-ops/community-owned inventory)
Avoid mixing models early—every extra model multiplies rules, UI complexity, and support load.
What features are truly essential in an MVP for a sharing app?
Your MVP must complete the full loop:
- Sign-up + basic onboarding
- Profiles with minimal trust signals
- Listings (photos, rules, availability)
- Search + filters (keyword/category/distance)
- Request/booking (accept/decline, confirm pickup)
- In-app chat for coordination
If users can’t reliably do 20–50 real exchanges, it’s too early to scale.
How do I build trust and safety without making onboarding too hard?
Use lightweight safeguards that reduce anxiety without blocking onboarding:
- Email + phone verification (invite codes if community-based)
- Ratings/reviews after completed exchanges
- One-tap report/block with clear reasons
- Neighborhood-level location (avoid oversharing exact addresses)
Add clearer rules and stronger verification only for higher-risk categories.
How should messaging and notifications work to prevent no-shows and confusion?
Keep chat in-app so users don’t have to share phone numbers, and support coordination with:
- Listing context in the conversation (item, dates, pickup method)
- Quick replies (“Yes, that works”, “Can we do 6pm?”)
- Status events as system messages (Requested → Approved → Picked up → Due soon → Returned)
- Notifications only for actions that unblock the next step
Also allow users to control notification frequency to avoid churn.
What metrics should I track before expanding beyond my pilot community?
Track KPIs tied to real value, such as:
- Weekly/monthly active users
- Listings per member (supply health)
- Request-to-fulfillment rate (requests that become pickups)
Instrument key funnel events (search, request, accept/decline, pickup, return, review). Then fix the biggest drop-off before expanding to more neighborhoods or categories.