Apr 02, 2025·8 min
How to Build a Mobile App for Community Help Requests
A practical step-by-step plan to build a community help request app: MVP features, safety, UX flows, tech choices, testing, and launch checklist.
A practical step-by-step plan to build a community help request app: MVP features, safety, UX flows, tech choices, testing, and launch checklist.
Before you design screens or pick a tech stack, get specific about what “help requests” mean in your community help app. A mutual aid app can cover many needs, but trying to serve everything at once makes the experience confusing and slows down delivery.
Start by writing a short list of the request and offer help categories you will support in version 1—using words your neighbors actually use. Common examples include rides to appointments, grocery pickup, wellness check-ins, borrowing tools, short-term childcare, or help carrying items.
Keep each category tight enough that a helper can understand the commitment in seconds.
Most community help apps have three roles:
Decide which role is the “hero” for v1. For example, if you optimize for helpers, you’ll prioritize fast browsing, clear request details, and smart notifications.
Pick a few metrics that reflect real value—not vanity numbers:
These metrics guide mobile app features, onboarding, and what you track in an admin dashboard for apps.
Be explicit about scope:
When these choices are clear, your MVP mobile app can focus on solving one problem well—and earn trust early.
Your first release should prove one thing: neighbors can successfully request help and someone nearby can complete it without friction. Everything else is optional.
Start with a single, end-to-end flow:
If you can’t describe the app in one sentence that matches this loop, the MVP is probably too big.
Keep each request lightweight so people can post quickly, and helpers can decide fast. A practical minimum is:
Everything beyond this (multi-stop tasks, attachments, detailed forms) can wait until you see real usage.
Be explicit about what’s not in v1. Common items to delay:
Postponing these reduces risk and speeds up learning.
Run the MVP with a limited group (e.g., one neighborhood or partner community). Aim to validate:
Example:
v1 Goal: Enable residents to request and offer nearby help.
Includes: create request (category, location, time window, notes), notify nearby helpers, accept/decline, mark complete, basic admin review.
Excludes: payments, social feed, advanced roles, long-term scheduling.
Success metric: 60% of posted requests are accepted within 30 minutes during the pilot.
Before you pick features, decide how people will move through the app. A clear screen map keeps the experience simple, prevents “extra” screens from sneaking into your MVP, and makes handoff to design and development much smoother.
Sketch (even on paper) the minimum set most community help apps need:
Don’t aim for perfection here—aim for a shared reference that everyone can point to.
Write the “happy path” for both sides, then add a few edge cases:
Edge cases worth designing early: request canceled, no helpers respond, multiple helpers offer, a helper stops replying, location is missing, or the requester needs to edit details after posting.
Keep the core flow to a few taps with clear labels, large buttons, and readable text.
Add accessibility basics from day one: sufficient color contrast, support for dynamic text size, and VoiceOver/Screen Reader labels for buttons and form fields.
Choose between:
A common compromise: allow guest browsing, but require sign-up to post requests or message.
User accounts are where a community help app either feels welcoming—or immediately risky. Aim for low-friction sign-up, while collecting only what you need to make matching and coordination safe.
Offer a few options so people can choose what’s easiest:
At minimum, you typically need: a unique identifier (phone/email), a first name or display name, and a way to contact the user. Anything beyond that should be optional.
Profiles should support the core workflow: “I need help” meets “I can help.” Useful fields include:
Make profiles editable, and clearly label what is public vs. private.
Trust is a mix of signals, not a single gate:
Add controls that make people feel in control:
Back this up with clear community guidelines and lightweight, in-app reminders (e.g., “Meet in public when possible,” “Don’t share financial info in chat”). A small admin dashboard to review reports and flags is worth planning early (see /blog/safety-moderation).
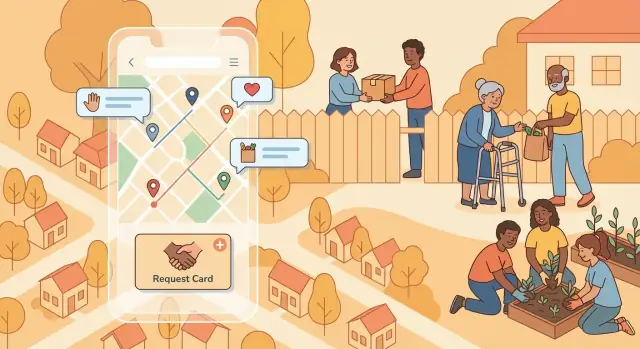
This is the heart of a community help app: turning “I need help” into a clear, actionable request—and then getting it in front of the right people.
Start with a small set of categories that match your community’s needs (groceries, rides, companionship, childcare, errands). Each category should have a lightweight template so users don’t write everything from scratch.
For example, a “Need groceries” template can include:
Templates improve clarity and also help your matching logic work with structured data.
People have different privacy needs. Offer multiple ways to share location:
A good default is “approximate” and an explicit toggle for “share exact location after acceptance.”
Define a simple, visible lifecycle so everyone knows what’s happening:
Open → Accepted → In progress → Completed (plus Canceled).
Make status changes intentional (confirmation prompts) and log them for dispute handling later.
Your first release can match using a few practical signals: distance, availability, skills (e.g., “can lift heavy items”), and a time window (“today 4–6 PM”). Keep the rule set transparent: show helpers why a request appears.
Finally, support both one-to-one and group requests. Group mode should let the requester specify “need 3 helpers” and split tasks (e.g., two pickup slots) while keeping a single request thread for coordination.
Good coordination is what turns a “request” into real help. Your app needs a way for two strangers to communicate quickly, keep the conversation on-platform, and make the next step obvious.
Start with in-app messaging so users don’t have to share phone numbers or personal emails. A basic chat is fine, but add guardrails:
You can also support photo sharing for practical cases (e.g., “this is the entrance,” “this is the item list”), but keep it optional.
When people are in a hurry, fewer taps matters. Add quick replies/buttons in the request thread and chat, such as:
Pair these with lightweight status updates (“Accepted,” “In progress,” “Completed”) so both sides always know what’s happening.
Plan your push notifications around moments that require attention:
To prevent spam, give users clear controls: quiet hours, category preferences, radius settings, and per-thread muting. A “digest” option (e.g., daily summary) can help frequent helpers stay engaged without constant interruptions.
Include an activity log tied to each request: who accepted, timestamps for key actions, cancellations, edits, and messages. This makes it easy for users to review what happened, and it’s invaluable for support and moderation when something goes wrong.
A community help app succeeds only if people feel safe asking for help and safe offering it. Safety isn’t a single “feature”—it’s a set of product decisions that reduce risk, make bad behavior costly, and support quick intervention when something goes wrong.
Start with lightweight guardrails that don’t punish normal users:
Put “Report” and “Block” in predictable places: the request card, chat screen, and user profile.
Keep the flow short: choose a reason, optional note, submit. After reporting, offer immediate actions like “Block this user” and “Hide this request.” Clear UI reduces hesitation and increases signal quality for moderators.
Design an admin queue that supports consistent decisions:
Use short, timely prompts: meeting in public places, bringing a friend, avoiding cash transfers, and not sharing sensitive info. Add “Confirm completion” for both sides to close the loop, and include links to local emergency resources where relevant.
Define what you store, for how long, and why. Example: keep report metadata and moderation decisions longer for repeat‑abuse detection, but expire old chats and location history on a clear schedule. Publish these rules in your privacy policy and enforce them automatically.
Location is the heart of a community help app: it decides what people see first and whether a request feels “local enough” to respond to. The key is balancing usefulness with privacy.
Start by deciding how precise a request needs to be. Many help requests work well with neighborhood-level location (for example, a pin snapped to a nearby intersection or a rounded area). Save exact addresses for private sharing only after someone offers to help. This reduces anxiety for requesters and still lets helpers gauge feasibility.
A map is great for “what’s around me?” browsing and spotting clusters of requests. A list view is better when users want to scan details fast (category, urgency, time window) or sort/filter.
A common pattern: default to a list with a small map toggle, and show a map preview inside each request card (“2.1 miles away”). That way, users get distance context without being forced into map navigation.
If your app supports communities (schools, neighborhoods, faith groups), consider geofencing: only show requests inside a defined boundary. This keeps feeds relevant and supports “members-only” trust expectations. Make it explicit in the UI (“Showing requests in Eastwood Circle”).
Keep estimates simple and clearly labeled. Show “Approx. distance” or “Typical drive time,” and avoid overpromising. Travel times can vary a lot; basic ranges (e.g., 10–15 min) are often more trustworthy than exact minutes.
Avoid background location tracking unless you truly need it. It increases battery drain and raises privacy concerns. Prefer “while using the app” permission and let users manually set a home area if they don’t want GPS.
A community help app lives or dies on reliability: requests must load quickly, messages must arrive, and location-based discovery must feel instant. You don’t need exotic tech to get there—just a clear, boring-by-design architecture.
Define a small set of API resources (and matching database tables/collections) that map to the product:
Keeping these objects consistent across mobile, backend, and admin tools makes later features (moderation, analytics, support) much easier.
If your first release prioritizes speed and budget, cross-platform is often the practical choice.
If you’re trying to ship quickly with a small team, it can also help to prototype the full stack (web admin + API + mobile UI) in a single workflow. For example, teams use Koder.ai to “vibe-code” an MVP by describing the core loop, data model, and screens in chat—then iterating in planning mode and exporting the source code later if needed.
Use pagination for requests and message history, add caching for popular feeds, and treat push/email/SMS as a queue (so spikes don’t break delivery).
Set up dev, staging, and production with separate databases and API keys. Staging should mirror production settings so you can test geolocation and maps, push notifications, and payments/verification flows safely before release.
Community help apps often handle sensitive information: where someone lives, when they’ll be home, health-related needs, or financial hardship. A few upfront choices can reduce risk for both users and your team.
Start with a “need-to-know” mindset. If a feature works without a piece of data, don’t collect it.
For each profile or request field, write a one-sentence reason users can understand (and keep it visible near the form or in a tooltip). Examples:
Also define retention rules (for example, auto-delete exact locations after a request is completed) and allow users to delete their account and associated data.
Request permissions only when the feature is needed:
Explain what happens if they say “No” and how to change permissions later.
Use proven sign-in methods (email magic link, phone OTP, or “Sign in with Apple/Google”). Keep sessions short-lived and refresh tokens securely. Avoid storing secrets (API keys, private tokens) in the app bundle or plain local storage.
Protect accounts with rate limiting on login/OTP attempts, and consider optional two-step verification for coordinators/admins.
Encrypt data in transit (HTTPS/TLS) and follow iOS/Android security guidance for local storage. Log carefully: avoid recording full addresses, message contents, or precise coordinates in analytics.
Finally, include plain-language Privacy Policy and Terms pages accessible from onboarding and settings (for example, /privacy and /terms), and provide a clear way to contact support for data requests.
Testing is where a community help app earns trust. Your goal isn’t just “no crashes”—it’s making sure people can request and offer help under stress, with limited time, spotty connectivity, and imperfect location data.
Start with happy paths: sign up, create a request, get matched, message, mark complete. Then add edge cases and failure states that matter for real use:
Include regression tests around safety features: reporting, blocking, and moderation actions should always work.
If you’re moving fast, prioritize tests around the core loop and safety flows first, then expand coverage. Some teams speed up iteration by generating initial UI and service scaffolding in Koder.ai, then adding targeted QA checks (and snapshots/rollback) as features stabilize.
Run short sessions with people who resemble your users (older adults, volunteers, organizers). Give them tasks (e.g., “Request a ride to a pharmacy”) and watch silently.
Capture confusion points: unclear labels, too many steps, fear of sharing location, uncertainty about what happens after “Submit.” Turn findings into small changes, then retest.
Community apps can spike during storms, outages, or local events. Simulate bursts of:
Verify your system degrades gracefully (slower is acceptable; losing data isn’t).
Prepare store assets early: screenshots, plain-language description, privacy details, and a working support contact. Use clear versioning (e.g., 1.0.0) and keep release notes honest.
Finally, write a lightweight incident plan: who’s on call, how you pause signups or requests during outages, and how safety escalations get handled within defined timeframes.
A community help app lives or dies by trust, responsiveness, and steady improvement. Treat launch as the start of an operating rhythm—not a finish line.
Begin with invite-only groups (one neighborhood, a school community, a faith group, or a local nonprofit). Smaller pilots create clearer feedback and reduce moderation pressure.
Set up simple feedback loops:
Commit to weekly iteration for the pilot period. Fix the top friction points first (confusing categories, unclear request status, missed notifications).
Track metrics that map to community outcomes, not vanity downloads:
Use these to prioritize: long time-to-match often means discovery and notifications need work; high report volume may mean onboarding and verification need tightening.
Even an MVP needs basic operations tooling. Your admin dashboard should let staff or trusted community moderators:
If you don’t build this, you’ll end up doing risky, slow manual work.
Sustainable growth is local. Add referrals (invite links), partner with libraries and nonprofits, and provide simple community onboarding materials (a one-page “how to request help,” moderation guidelines, and templates for outreach).
If you want to move from pilot to multiple neighborhoods faster, make your “launch kit” repeatable: a standard set of categories, notification defaults, and moderation settings that can be cloned per community. Platforms like Koder.ai can help here by letting you iterate on the product (including admin panels) quickly, while keeping a clear plan and the option to export source code if you later need a more customized pipeline.
Common next steps include payments (for reimbursable errands), integrations (SMS/email, calendar), multi-language support, and offline-friendly features for low-connectivity areas.
Write 5–10 categories using words your neighbors use (e.g., “grocery pickup,” “ride to appointment,” “borrow tools”).
Keep each category tight enough that a helper can judge the time/effort in seconds, and save rare/complex needs for later releases.
Pick one “hero” role for v1 (usually requesters or helpers) and optimize the core flow for them.
You can still support the other roles, but avoid building complex coordinator features until you’ve proven the basic request → accept → complete loop works.
Use metrics tied to real outcomes, such as:
Avoid leading with vanity numbers like downloads if they don’t correlate with fulfilled requests.
A solid MVP proves one thing: a neighbor can post a request and someone nearby can complete it without friction.
If you can’t describe v1 in one sentence that matches that loop, your scope is probably too large.
Start with a lightweight minimum:
Only add extra fields after you see real confusion or repeated back-and-forth in chat.
Intentionally delay features that add complexity or risk, like:
Postponing these helps you ship faster and learn from a smaller, safer surface area.
A practical compromise is:
This keeps discovery low-friction while preserving accountability where it matters most (requests, chats, and completion).
Use a mix of lightweight signals without blocking newcomers:
Also make public vs. private profile fields explicit so users don’t feel pressured to overshare.
Default to privacy-preserving location:
Always offer a manual “set my area” option for users who deny GPS.
Start with in-app chat tied to a request, plus safety guardrails:
Add rate limits and basic content filtering early to reduce spam and scams.