Jun 04, 2025·8 min
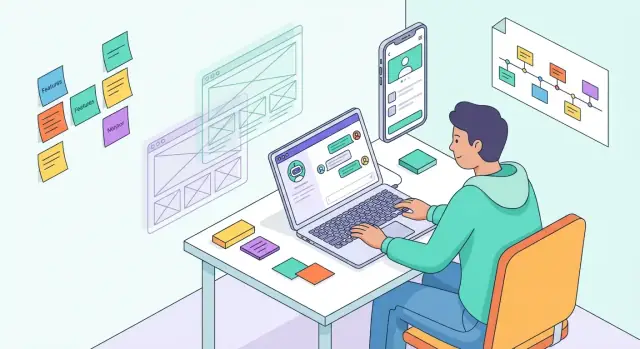
Build a Mobile App End-to-End with AI: No Dev Team Needed
Learn a practical end-to-end workflow to plan, design, build, test, and launch a mobile app using AI tools—without hiring a traditional dev team.
Learn a practical end-to-end workflow to plan, design, build, test, and launch a mobile app using AI tools—without hiring a traditional dev team.
Before you open any AI app builder or prompt a coding assistant, lock down what you’re actually trying to change for a specific person. AI can help you build faster—but it can’t decide what’s worth building.
Write a one-sentence promise:
“For [target user], this app helps them [do X] so they can [get Y].”
Example: “For new dog owners, this app creates a daily care checklist so they don’t miss key tasks.”
Keep the outcome singular. If you can’t explain it in one breath, your scope is probably too big.
Pick 2–3 metrics that match your outcome and business model, such as:
Put numbers next to them. “Good” is vague; “20% D7 retention” is a target you can iterate toward.
Your MVP is the smallest version that proves the outcome. A useful trick: list every feature you want, then tag each as:
If you’re unsure, default to “nice-to-have.” Most first versions fail because they try to be complete instead of clear.
Be honest about your weekly hours and energy. A realistic MVP plan might be 2–6 weeks of focused evenings/weekends.
Also decide what you’ll pay for (e.g., design templates, a no-code plan, app store accounts, analytics). Constraints reduce decision fatigue later.
Write down anything that could change your tool choices:
With this scope nailed, your next steps (PRD, wireframes, and building) become dramatically faster—and far less chaotic.
Your first big decision isn’t “how do I code this?”—it’s which build path matches your budget, timeline, and how much control you’ll need later.
No-code (Bubble, Glide, Adalo, FlutterFlow) is fastest for an MVP and great when your app is mostly forms, lists, profiles, and simple workflows. The trade-off is customization limits and potential lock-in.
AI code generation (ChatGPT + templates, Cursor, Copilot) gives you maximum flexibility and ownership of the codebase. It can also be the cheapest long-term, but you’ll spend more time setting up the project, fixing edge cases, and learning basic debugging.
Hybrid is the practical middle: prototype in no-code, then move critical pieces to code (or keep no-code for admin tools while coding the consumer app). This reduces early risk while keeping a path to scale.
If you want a workflow that feels closer to “vibe-coding” than traditional development, platforms like Koder.ai sit in between: you describe the app in chat, and it helps generate and evolve real projects (web, backend, and mobile) with an agent-based approach under the hood—while still keeping you oriented around product scope, screens, and data.
If your MVP can work local-only (saved drafts, offline checklists, simple calculators), start without a backend to move faster.
If you need accounts, sync, payments, or shared data, plan a backend from day one—even if it’s a managed service like Firebase or Supabase.
| Option | Speed | Cost | Flexibility | Risk |
|---|---|---|---|---|
| No-code | High | Low–Med | Low–Med | Med (limits/lock-in) |
| AI code | Med | Low | High | Med–High (quality/debugging) |
| Hybrid | High | Med | Med–High | Low–Med |
Even if you start in no-code, define what you’ll want to export later: user data, content, and key logic. Keep your data model simple, document workflows, and avoid tool-specific features unless they’re truly essential. That way, “version 2” is an upgrade—not a restart.
A Product Requirements Doc (PRD) is the bridge between “cool idea” and something you (or an AI tool) can actually build. Use AI as a structured interviewer—then you edit for clarity and realism.
Start with a simple input: what the app does, who it’s for, and the one problem it solves. Then ask AI to produce a PRD in a consistent format.
You are a product manager. Create a PRD for a mobile app.
Idea: [describe in 3–5 sentences]
Target users: [who]
Primary outcome: [what success looks like]
Constraints: [budget, timeline, no-code vs code]
Output sections: Overview, Goals/Non-goals, Personas, User Stories,
Requirements, Edge Cases, Analytics, Non-functional Requirements, Risks.
Make user roles explicit (e.g., Guest, Registered User, Admin). For each key user story, add acceptance criteria that a non-technical person can verify.
Example: “As a Registered User, I can reset my password.” Acceptance criteria: user receives email within 1 minute, link expires after 30 minutes, error shown for unknown email.
Ask AI to list “what happens when” scenarios: no internet, user denies notifications, payment fails, duplicate accounts, empty states, slow API, time zone differences. These prevent last-minute surprises.
Include basics: performance targets (e.g., first screen loads <2s on average devices), accessibility (minimum tap sizes, contrast), localization (which languages/currencies), and compliance expectations (data retention, consent).
Have AI convert requirements into a prioritized backlog (Must/Should/Could) and group tasks into weekly milestones. Keep week 1 focused on the smallest usable flow—your MVP—then layer improvements after real feedback.
If you’re using a chat-driven build environment (for example, Koder.ai), this PRD-to-backlog step becomes especially valuable: you can paste requirements directly into “planning mode,” sanity-check scope, and keep snapshots/rollback points as you iterate.
User flows and wireframes are where your app stops being “an idea” and becomes something you can evaluate in minutes. AI is useful here because it can generate multiple options quickly—but you still need to choose the simplest path that gets users to value fast.
Start with one primary user journey from first open to the moment a user feels the benefit (the “aha”). Write it as 6–10 steps using plain language.
A good AI prompt:
“My app helps [target user] achieve [outcome]. Propose 3 alternative user flows from first open to the first successful outcome. Keep each flow under 8 steps. Include where onboarding happens and what data is required at each step.”
Ask for multiple flow options, then pick the one with:
For each step, create a low-fidelity wireframe (no colors, no typography decisions). You can do this on paper, in a basic wireframing tool, or by having AI describe the layout.
Ask AI to produce a screen-by-screen outline:
Decide navigation before visuals: tab bar vs. stack navigation, where onboarding sits, and how users get back “home.” Also define empty states (no data yet, no search results, offline) so your app feels complete even with minimal content.
Before building anything, test the flow with 5–10 people who match your audience. Show the wireframes and ask them to:
Use their feedback to simplify. A great wireframe outcome is boringly clear.
Good visual design isn’t about making things “pretty”—it’s about making the app feel consistent, trustworthy, and easy to use. AI can speed up the early decisions so you don’t get stuck tweaking pixels for days.
Start with a tiny style guide you can actually maintain: a color palette (primary, secondary, background, text, danger/success), typography (1–2 fonts, sizes for headings/body), spacing scale (e.g., 4/8/12/16/24), and a simple icon direction (outline vs filled).
A useful AI prompt:
Create a lightweight mobile style guide for a [app type] app aimed at [audience].
Include: 6–8 colors with hex codes, type scale (H1/H2/body/caption), spacing scale, button shapes, and icon style notes.
Keep it modern and accessible.
Instead of designing screen-by-screen, define a small set of components you’ll reuse everywhere:
Ask AI to describe states and edge cases (empty states, long text, error messages) so you don’t discover them late.
Keep it simple: ensure text is readable, buttons are easy to tap, and color isn’t the only signal.
Aim for:
Design your icon and screenshot layout while the UI system is fresh. If you wait, you’ll scramble at launch. Create a screenshot “template” (device frame + caption style) so you can drop in real screens later.
Store design tokens (colors, type sizes, spacing) and component specs in one place (a doc or design file). Consistency is easier than cleanup.
A clean backend plan saves you from the most common “AI-generated app” problem: screens that look great but can’t reliably store, fetch, or secure real data. Before you prompt an AI to generate code or configure a no-code tool, decide what your app knows, who can access it, and how it moves.
Start with plain-language nouns. Most apps boil down to a few core objects:
For each object, note the minimum fields required for your MVP. Ask AI to propose a starter schema, then trim anything nonessential.
Draw boxes and arrows or write it out:
Also decide where you need uniqueness (e.g., email), ordering (e.g., newest first), and search (e.g., by title). These choices affect your tool and database later.
You generally have three options:
Pick based on what you must ship now. You can migrate later, but keeping your model clean makes migration dramatically easier.
Decide how people sign in: email magic link/password, phone OTP, or SSO (Google/Apple). Then define roles:
Write these rules down. Your AI prompts for backend rules and policies will be much better.
Even if you’re using no-code, think in API terms:
This becomes your backend checklist and keeps your AI app builder workflow from generating endpoints you don’t actually need.
Once your data model and wireframes are set, the frontend is where your app starts feeling real. AI is most helpful here when you treat it like a “pair designer + junior developer”: it can generate structured build steps, draft UI code, and spot missing states—while you keep the final say.
Paste one wireframe at a time (or a short description of it) into your AI tool and ask for:
This turns a fuzzy “build the Home screen” task into a checklist you can complete in order.
Start with the critical path: onboarding → main list/detail → create/edit → settings/account. Get these working end-to-end before animations, fancy visuals, or secondary features.
AI can help you keep scope tight by suggesting an MVP version of each screen (minimum fields, minimum actions) and a “later” list.
Ask AI to write:
Then edit for your brand voice and keep text consistent across screens.
Have AI propose reusable components: buttons, input rows, cards, and headers. When you tweak one component, every screen benefits—without chasing layout bugs.
For every API-backed screen, ensure there’s a spinner/skeleton, a retry option, and a cached/offline message. These “boring” states are where apps feel professional—and AI is great at generating them when you ask explicitly.
Once your core screens work, integrations make the app feel “real”—but they’re also where most early apps break. Treat each integration like a small project with clear inputs, outputs, and failure plans.
Even if you’re using a no-code builder, connect to your backend (or a lightweight API layer) rather than calling multiple third-party services directly from the app. This helps you:
Ask AI to generate example request/response payloads for every endpoint and include validation rules (required fields, formats, max lengths). Use those examples as test data in your app builder.
Authentication can be simple and still safe. Decide the flow first:
Have AI draft a one-page “auth flow spec” that lists every screen/state: signed out, signing in, email not verified, session expired, logout.
Payments introduce edge cases (refunds, retries, pending states). Wait until users can complete the main job-to-be-done without paying, then add monetization.
When you do, document:
Create a single integration doc (even a shared note) that includes: API keys ownership/rotation, environments (test vs. prod), webhook URLs, sample payloads, and a “what to do when it fails” section. This small habit prevents most launch-week fire drills.
QA is where “looks done” becomes “works reliably.” The trick as a small team (or solo) is to test systematically and use AI to do the boring prep work—without trusting it blindly.
For each feature, write a short checklist that covers:
If you already have user stories, paste them into your AI tool and ask it to generate test cases. Then edit the output to match your actual screens and rules—AI often invents buttons or forgets platform specifics.
Don’t rely on one simulator. Aim for a small matrix:
Focus on layout issues (text truncation, overlapping buttons), keyboard behavior, and gestures. Ask AI to create a “screen-size QA checklist” so you don’t miss common UI breakpoints.
Set up basic crash reporting and logs you can read. Tools like Firebase Crashlytics (or similar) can show crashes, affected devices, and stack traces.
When you hit a bug, capture:
Then ask AI to propose likely causes and a fix checklist. Treat its answer as hypotheses, not truth.
Recruit 10–30 testers and give them clear tasks (e.g., “create an account,” “complete checkout,” “turn notifications off”). Use a simple feedback form that captures device model, OS version, what they tried, and a screenshot if possible.
This process finds the issues that automated testing won’t: confusing wording, missing states, and real-world friction.
You don’t need enterprise-level security to ship an MVP—but you do need a few non-negotiables. A good rule: protect user data like it’s already valuable, and keep your app’s attack surface small.
Collect only the data you truly need for the MVP. If you don’t need date of birth, home address, or contacts, don’t ask for them.
Also decide what you can avoid storing entirely (for example, store a payment provider customer ID instead of card details).
Ask AI to produce a first draft privacy policy in plain English based on your actual data flows (sign-in method, analytics tool, payment provider, email service). Then review it carefully and remove anything untrue or overly broad.
Keep it readable: what you collect, why, who you share with, and how users can contact you. Link it inside the app and on your store listing. If you need a template structure, you can also reference your /privacy page.
Secure API keys by keeping them on the server (not inside the app bundle), using environment variables, and rotating them if exposed.
Add basic controls:
Even MVPs should handle:
Write a one-page checklist for “something broke”: how you pause sign-ups, revoke keys, post a status update, and restore service. AI can help draft this, but confirm owners, tools, and access ahead of time.
Launching is mostly paperwork and polish. Treat it like a checklist-driven project and you’ll avoid the most common “rejected at review” surprises.
Write the store description in plain language: what the app does, who it’s for, and the first action a user should take. Use your AI assistant to generate multiple variants, then edit for clarity and accuracy.
Collect the basics early:
Pick a simple scheme you’ll stick to:
Keep a running “What changed?” doc as you build, so release notes aren’t rushed the night before launch.
Both platforms care about user trust. Only request permissions you truly need, and explain why in-app before the system prompt appears.
Don’t skip disclosures:
Start with TestFlight (iOS) and Internal/Closed testing (Google Play). After approval, do a staged rollout (e.g., 5% → 25% → 100%) and watch crash reports and reviews before expanding.
At minimum, publish a support email, a short FAQ page (/help), and add in-app feedback (“Send feedback” + optional screenshot). Fast responses in week one can prevent low ratings from becoming permanent.
Shipping is the start of the real work. The fastest “no dev team” apps stay healthy because they measure what matters, fix the right things first, and keep a lightweight rhythm that prevents small issues from becoming expensive rewrites.
Pick 2–4 metrics that directly reflect the promise of your app—then ignore the rest unless they explain a problem.
Examples:
Avoid vanity numbers like total downloads unless you’re running paid campaigns and need a funnel view.
A small-team cadence keeps you moving without constant context switching:
Keep scope tiny. One meaningful improvement shipped weekly beats a “big release” every two months.
Collect feedback from App Store/Google Play reviews, support emails, and in-app prompts. Then use AI to turn noisy input into an actionable list.
Paste your feedback into your AI tool and ask for:
This is especially helpful when you don’t have time to read every message end-to-end.
AI can speed up delivery, but you should plan for outside help when the risk is high:
Think of specialists as targeted upgrades, not a permanent dependency.
Keep a single doc that answers:
Even a 2–3 page “handoff” makes it dramatically easier for future contributors—or you, six months later—to ship changes safely.
Start with a one-sentence promise: “For [target user], this app helps them [do X] so they can [get Y].” Keep one outcome, then set 2–3 success metrics (e.g., activation rate, D7 retention, trial-to-paid conversion) with numeric targets so you can judge progress quickly.
Use a must-have vs nice-to-have list. A feature is must-have only if removing it breaks your promise to the user. If you’re unsure, mark it nice-to-have and ship without it.
A practical check: can a user reach the first “aha” moment without this feature? If yes, it’s not MVP.
Pick based on speed, control, and your tolerance for debugging:
If your audience is split or you need broad reach, cross-platform (Flutter or React Native) is usually the best budget choice.
Go iOS-first if your users are mostly on iPhone or monetization speed matters. Go Android-first if you need wider global distribution sooner.
Not always. If the MVP works local-only (offline checklists, calculators, drafts), skip a backend and ship faster.
Plan a backend from day one if you need accounts, sync across devices, shared data, payments/subscriptions, or admin controls. Managed backends like Firebase or Supabase can reduce setup time.
Use AI as a structured interviewer, then you edit. Ask for a PRD with consistent sections like:
The key is adding acceptance criteria that a non-technical person can verify.
Map one journey from first open to the “aha” moment in 6–10 steps. Choose the flow with:
Then create low-fidelity wireframes and test them with 5–10 target users before building.
Create a tiny style guide you can maintain:
Bake in basics like readable text, 44×44 px tap targets, and not using color as the only signal.
Treat integrations like small projects with failure plans:
Keep one integration checklist with keys, environments, webhook URLs, sample payloads, and troubleshooting steps.
Use AI to generate test cases from your user stories, then verify they match your real screens.
Cover:
When debugging, give AI reproducible steps + logs and treat its output as hypotheses, not truth.