Nov 13, 2025·8 min
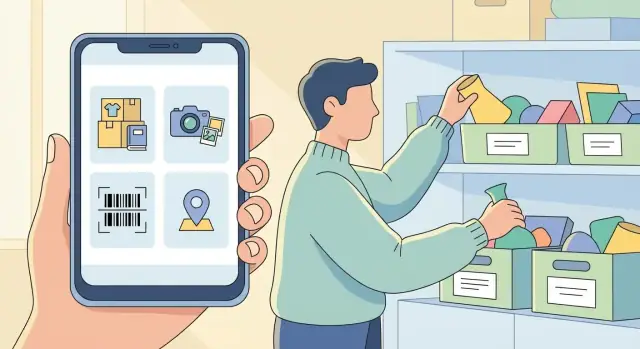
How to Build a Mobile App for Personal Inventory Tracking
Learn how to plan, design, and build a personal inventory tracking mobile app—from features and data model to scanning, sync, security, testing, and launch.
Learn how to plan, design, and build a personal inventory tracking mobile app—from features and data model to scanning, sync, security, testing, and launch.
A personal inventory app can mean very different things depending on who’s using it. Start by choosing a clear primary audience, because it will shape every product decision that follows.
Common audience options include:
If you can’t pick one, choose the “first best” audience and design the app so it can expand later without breaking the core.
Write down the few moments when your app saves someone real time or money:
Treat these as “golden paths.” Your MVP should make them feel effortless.
Define a concrete outcome, such as:
Choose a small set of measurable targets:
These metrics keep feature debates grounded and help you validate the MVP before expanding scope.
An MVP for a personal inventory app should answer one question: “Can I quickly record what I own and find it later?” If you nail that, everything else becomes an upgrade—not a dependency.
Start by mapping the handful of screens people will use every week:
Keep these flows fast. If “add item” takes longer than a few taps, adoption drops.
These features are valuable, but they expand scope quickly:
Put them behind a “Phase 2” label in your roadmap.
Decide early: iOS, Android, or both. Supporting both from day one increases QA and design work. Also decide whether you’ll support tablet layouts or go phone-first to ship sooner.
Be explicit about requirements like offline access, privacy expectations, multi-device sync, and budget/time. For example, “offline-first with optional cloud sync later” is a perfectly valid MVP boundary—just communicate it clearly in onboarding and settings.
A personal inventory app lives or dies by its data model. If you keep it flexible, you can add features later (like cloud sync or barcode scanning) without rewriting everything.
Most apps begin with a single table/collection for items. Keep the defaults simple, but design so it can grow:
A good rule: avoid locking users into your categories. Let them rename, merge, and create new categories and tags over time.
“Location” sounds like a string field, but it usually needs structure. People organize items in layers: Home → Bedroom → Closet → Box A. Consider a locations table with:
idnameparent_location_id (optional)That single parent_location_id enables nested rooms/boxes without complexity. Your item then stores location_id, and you can show breadcrumb-style paths in the UI.
Media isn’t just decoration—photos and receipts are often the reason people keep an inventory.
Plan a separate media model that can attach to items:
This is usually a one-to-many relationship: one item, many media records.
A few small relationship tables can unlock real-world workflows:
owner_id per item.Every item should have an internal item ID that never changes. On top of that, you can optionally store scanned identifiers:
Also decide how you’ll represent batch items vs. single items. For example, “AA batteries (24)” might be one item with quantity=24, while “laptops” should usually be individual items (each with its own serial number and photos). A practical approach is to support both: quantity for consumables, and separate records for high-value uniques.
A personal inventory app succeeds when adding and finding items feels effortless. Before polishing visuals, map the “happy paths”: add an item in under a minute, find an item in two taps, and review what you own at a glance.
Home dashboard should answer quick questions: “How many items?”, “Total value?”, and “What needs attention?” (e.g., warranties expiring). Keep it lightweight: a few summary cards and shortcuts.
Item list is your workhorse. Prioritize scannability: item name, thumbnail, category, and location. Allow sorting (recently added, value, alphabetical).
Item detail should feel like a “profile page”: photos, notes, purchase info, tags, and actions (edit, move location, mark as sold). Put the most-used actions near the top.
Add/edit form should be short by default, with optional fields tucked behind “More details.” This keeps fast entry fast.
Tabs work well when you have 3–5 primary areas (Dashboard, Items, Add, Locations, Settings). A drawer can help if you expect many secondary pages, but it adds friction.
Consider a persistent “Add” button (or bottom-center tab) plus quick actions: Add item, Add receipt, Add location.
Make search prominent on the item list. Filters that matter most:
If you can, let users save a filter as a view (e.g., “Garage tools” or “Over $200”).
Use readable typography, strong color contrast, and large tap targets (especially for edit/delete). Ensure forms work well with screen readers by using clear labels (not placeholder-only text).
Photos and documents turn a basic personal inventory app into something you can actually use during a warranty claim, move, or insurance paperwork. Barcode scanning speeds up entry, but it should be treated as an assistant—not the only path.
Let people attach multiple photos per item: a wide shot, a close-up of serial/model numbers, and any damage notes. Small touches matter here:
A practical approach is to store the original (or “best available”) image plus a compressed display copy. That gives you speed in the UI without losing detail when zooming.
Receipts and manuals are often PDFs or photos. Support both, with clear limits:
Pick a scanning library/SDK that’s actively maintained and performs well on mid-range devices. Plan for messy conditions:
If you scan UPC/EAN, you can suggest an item name or category based on a lookup service or a small curated database. Present it as a suggestion the user can edit—avoid making hard promises about accuracy or coverage.
An inventory app is most useful when it works in basements, garages, storage units, and places with spotty reception. An offline-first approach treats the phone as the “source of truth” moment-to-moment, then syncs to the cloud when it can.
Start with reliable on-device storage, then layer sync on top.
For a personal inventory app, the key isn’t the brand—it’s consistency: predictable IDs for items, clear timestamps, and a way to mark “pending sync.”
Make create / update / delete work instantly while offline. A practical pattern is:
This keeps the UI fast and avoids confusing “try again later” errors.
When the same item is edited on two devices, you need a policy:
Whatever you choose, log the resolution so support and users can understand what happened.
Offer at least one safety net:
A simple restore flow builds trust: users want to know their photo-based item catalog won’t vanish after an upgrade.
Choosing your tech stack is less about what’s “best” and more about what fits your MVP scope, offline-first needs, and long-term maintenance. For a personal inventory app, the biggest drivers are: camera/scanner features, fast local search, reliable offline storage, and (optionally) cloud sync.
Native (Swift for iOS, Kotlin for Android) is a good fit if you want the smoothest camera experience, best barcode scanning performance, and platform-specific polish. The tradeoff is building (and maintaining) two apps.
Cross-platform (Flutter or React Native) can be a great choice for an MVP: one codebase, faster iteration, and shared UI. Check two things early:
If your goal is to validate the product quickly (and you’re comfortable with modern tooling), platforms like Koder.ai can also accelerate the early build. Because it’s a vibe-coding platform, you can prototype flows like item CRUD, search/filter screens, and exports through a chat-driven workflow—then iterate on React-based web UI or a Go + PostgreSQL backend when you’re ready to add accounts and sync.
For most MVPs, aim for a clean separation:
This keeps you flexible if you start local-only and later add cloud sync without rewriting the app.
You have three practical paths:
If your MVP is focused on “track my stuff at home,” local-only + backup is often enough to validate demand.
Offer an auth approach that matches user expectations:
The main ongoing costs usually come from image storage and bandwidth (item photos, receipts), plus hosting if you run an API. Push notifications are typically low-cost, but still worth budgeting if you plan reminders or warranty alerts.
A lightweight MVP can keep costs predictable by limiting photo sizes and offering optional cloud sync.
If you want your personal inventory app to sync across devices (or support family sharing), you’ll need a small backend. Keep it boring and predictable: a simple API plus storage for photos and receipts.
Start with the minimum set of endpoints your mobile app needs:
Inventory lists grow quickly. Make list endpoints paginated (limit/offset or cursor-based). Support lightweight responses for list screens (e.g., item id, title, thumbnail URL, location) and fetch full details only when the user opens an item.
For media, rely on lazy loading thumbnails and add caching headers so images don’t re-download every time.
Validate on the server even if the app validates too:
Return clear error messages the app can display without jargon.
Assume your app and backend won’t update at the same time. Add API versioning (e.g., /v1/items) and keep old versions working for a defined period.
Also version your item schema: when you add new fields later (like “condition” or “depreciation”), treat them as optional and provide safe defaults so older app versions don’t break.
A personal inventory app can store surprisingly sensitive details: photos of valuables, purchase receipts with addresses, serial numbers, and where items are kept. Treat security and privacy as core features, not add-ons.
Start with encryption at rest. If you store inventory data locally (common for offline-first apps), use platform-provided encrypted storage where possible (for example, an encrypted database or encrypted key/value store).
Avoid saving secrets in plain text. If you cache login or sync credentials, keep them in secure storage (Keychain/Keystore) rather than preferences.
If the app syncs to a server, enforce HTTPS for every request and validate certificates correctly.
Use short-lived access tokens with refresh tokens, and define session expiration rules. When a user changes their password or logs out, revoke tokens so old devices can’t keep syncing.
Collect only what you truly need. For many use cases, you don’t need a real name, contacts, or precise location—so don’t ask.
When requesting permissions (camera for photos, storage for attachments), show a clear “why” prompt. Offer alternatives when possible (e.g., manual entry if someone declines camera access).
Give users control over their data:
If you add cloud sync, document what’s stored remotely, how long, and how users can remove it (a short privacy summary inside the app is often more useful than a long policy page).
A personal inventory app only feels “done” when it’s fast. People use it in closets, garages, and stores—often one-handed—so delays and stutter quickly become deal-breakers.
Define measurable goals early and test them on mid-range phones:
Keep the initial screen lightweight: load essentials first, then fetch thumbnails and secondary details in the background.
Search feels “smart” when it’s also predictable. Decide which fields should be searchable (common examples: item name, brand, model/SKU, tags, location, and notes).
Use your local database features to avoid slow full-table scans:
Photos are usually the largest performance and storage cost:
Performance isn’t only speed—it’s also resource usage.
Limit background work (especially sync and uploads) to reasonable intervals, respect low-power modes, and avoid constant polling. Add cache management: cap total image cache size, expire old thumbnails, and provide a simple “Free up space” option in settings so users stay in control.
Testing is where a personal inventory app stops being a demo and starts feeling trustworthy. Because users rely on it during stressful moments (moving, insurance claims, lost items), bugs that “only happen sometimes” are the ones that hurt most.
Start with unit tests around your data rules—the parts that must always work, regardless of UI:
These tests are fast to run and catch regressions early when you change the data model or storage layer.
Add UI tests for the workflows that define your app:
Keep UI tests focused. Too many brittle UI tests can slow you down more than they help.
Inventory apps are used in imperfect conditions, so simulate them:
A simple checklist you can run before every beta build will catch most painful issues.
Use platform beta channels—TestFlight (iOS) and Google Play testing tracks (Android)—to ship builds to a small group before launch.
Feedback collection checklist:
If you add analytics, keep it minimal and avoid personal details. Track only product signals like:
Make it easy to opt out, and document what you collect in your privacy policy.
Launching a personal inventory app is less about “shipping code” and more about removing friction for real people who want results in minutes. A tight checklist helps you avoid common store-review delays and early churn.
Make your store page match what the app actually does:
First-run experience should create momentum:
Have a small, visible support surface:
Start with reviews and support tickets, then iterate:
If you plan tiers, be explicit about what’s free vs. paid and point users to /pricing.
If you do publish learnings or build-in-public updates while iterating, consider programs that reward content and referrals. For example, Koder.ai offers an earn-credits program for creating content about the platform and a referral link system—useful if you’re documenting how you built your MVP and want to offset tooling costs while you grow.
Start with one primary audience and build around their “golden paths.” For most MVPs, homeowners/renters are a strong default because the core flows are clear: add items fast, find them quickly, and export for insurance or moving. Make the model flexible (tags, custom categories, nested locations) so you can expand to collectors or shared family inventories later.
Define “done” as a measurable outcome, not a feature list. Practical MVP success targets include:
If users trust the data and can retrieve it under stress, the MVP is working.
Focus on the non-negotiable weekly flows:
Use an Item record as the core entity, with flexible metadata:
Treat media as first-class data and keep it separate from the item record.
This makes it easier to add cloud sync or exports later without redesigning everything.
Make offline a default behavior, not an error state:
This keeps capture fast in garages/basements and prevents data loss when a user closes the app mid-task.
Pick a clear policy and document it in-app (even if briefly):
Also log the resolution so you can debug user reports later.
Barcode scanning should speed up entry but never block it.
This avoids frustration when labels are worn, curved, or poorly lit.
Separate your app into three layers so you can expand safely:
This structure lets you start local-only and add cloud sync later without rewriting core flows.
Focus on data protection, minimal permissions, and user control:
Everything else (barcode lookup, depreciation, reminders) can be Phase 2.
nameitem_idcategory, quantity, location_id, value, notes, tagsModel Locations as a tree (parent_location_id) so you can represent paths like Home → Bedroom → Closet → Box A without hacks.
Inventory data can be sensitive (receipts, serial numbers, valuables), so these features build trust.