

Build a Portfolio Website Without Coding: Step-by-Step Guide
Learn how to build a polished portfolio website without coding—from picking a no-code builder to templates, content, SEO, and publishing your site.
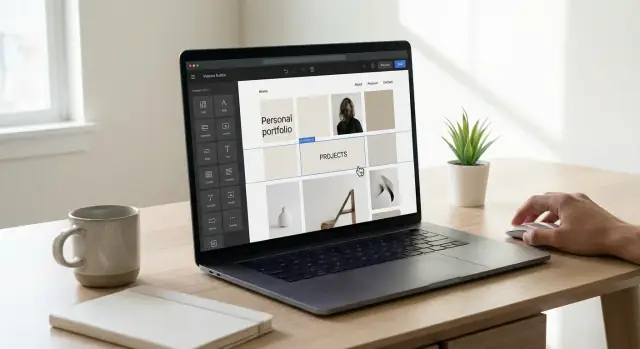
What You’ll Build and Why It Matters
A portfolio website is a simple, professional home for your work—one link you can share anywhere. Done well, it does three jobs at once: it builds trust, shows real proof, and makes it easy for someone to contact you.
What a portfolio site should achieve
Credibility: When someone searches your name or clicks your link, they should immediately see a clean, consistent presentation that feels “real.” A personal website signals that you take your work seriously.
Leads (opportunities): Your site should guide visitors toward a clear next step—emailing you, booking a call, requesting a quote, or downloading a resume. If people like your work but can’t figure out how to reach you, the site isn’t doing its job.
Proof of work: Social feeds and marketplaces are useful, but they don’t always show your best work in context. Your online portfolio lets you explain the goal, your role, and the outcome—so visitors understand what you can actually do.
Who this guide is for
This step-by-step approach is built for people who want a no-code portfolio website they can publish quickly:
- Designers and photographers who need a visual online portfolio
- Writers and marketers who want to showcase samples and case studies
- Students and job seekers who need a polished personal website
- Freelancers who want inquiries without relying on DMs
If you can drag, drop, and edit text, you can use a portfolio website builder or drag-and-drop website tool to get this done.
Note: If you want something a bit more flexible than classic no-code (but still don’t want to hand-code), a “vibe-coding” platform like Koder.ai can also be a strong option. You describe what you want in chat, and it generates a real web app you can publish—useful if your portfolio needs custom pages, forms, or interactive sections beyond typical templates.
What you’ll have by the end
By the time you finish all sections, you’ll have:
- A live portfolio site (homepage, project pages, about page, and contact)
- A clear structure you can expand later without redoing everything
- A lightweight update routine so your site stays current (new projects, refreshed bio, updated links)
Time and budget expectations
Most people can publish a first version in a weekend (or a few focused evenings) if content is ready.
Budget depends on your choices:
- Free plans: Great for testing a portfolio template and learning the builder, but you may have a platform-branded domain and limited features.
- Paid plans: Often needed for a custom domain and a more polished presentation.
- Domain cost: Expect roughly $10–$20/year for a standard domain (yourname.com). Some builders bundle domain and hosting in their plans, which simplifies setup.
The goal isn’t perfection—it’s launching a clean, clear site you can improve over time.
Set Your Goal and Audience Before You Start
Before you touch a portfolio website builder or browse portfolio templates, get clear on two things: what you want this site to do for you, and who you need to convince in the first 30 seconds.
A no-code portfolio website is easiest to build when every decision (layout, projects, copy, buttons) has a simple filter: “Does this help my ideal visitor take the next step?”
Pick one primary goal
Choose the main outcome you care about most right now:
- Get hired (full-time or contract roles)
- Get clients (sell a service)
- Showcase projects (build credibility, attract collaborations)
Secondary goals are fine, but give one goal priority so your homepage doesn’t feel like a menu of unrelated options.
Define your audience (and what they need first)
Your audience might be a recruiter, a hiring manager, a potential client, or a collaborator. Each one looks for different proof.
Ask:
- What question are they trying to answer? (“Can this person do the job?” “Can I trust them with my budget?”)
- What proof matters most: results, process, visuals, testimonials, certifications?
- What should they see first on your online portfolio: 2–3 best projects, a clear service list, or a short positioning statement?
Narrow your focus: 1–2 roles or services
Being “open to anything” makes your personal website forgettable. Pick one target role (e.g., “Junior UX Designer”) or one core service (e.g., “Brand identity for startups”), and optionally a second closely related option.
Decide your call to action (CTA)
Your drag-and-drop website should guide visitors toward one next step:
- Email link (fastest)
- Contact form (organized)
- Booking link (best for client calls)
Place that CTA in your header and repeat it near the end of the homepage (for example, linking to /contact).
Plan Your Site Structure (Pages and Navigation)
Before you touch a template, decide what your site needs to do: help someone understand who you are, what you can do, and how to contact you—fast. A simple structure makes every no‑code builder easier to use, and it keeps visitors from getting lost on mobile.
Start with the essential pages
Most portfolio sites work best with a small “core” that fits in a single top navigation bar:
- Home: a quick summary and a clear next step (view work, contact, download resume).
- Work / Projects: your main gallery or list of projects.
- About: your story, skills, and what you’re looking for.
- Contact: a form or email link plus social links.
If you’re not sure, begin with these four. You can always add more later without rebuilding everything.
Add optional pages only if they support your goal
Optional pages can help, but only if they make decisions easier for the visitor:
- Services (if you freelance): what you offer, typical packages, how to start.
- Resume / CV: a dedicated page or a downloadable PDF.
- Blog: useful if you’ll publish consistently.
- Case studies: deeper write-ups for your strongest projects.
Choose navigation labels and click order
Use labels that match what people expect: “Work” or “Projects,” not clever names. Put your most important link early (often Work) and your conversion link last (Contact). A common order:
Home → Projects → About → Contact
Keep it mobile-simple
On phones, your menu becomes a small icon, so limit top-level items to 4–6. If you have extra content, group it under one item (for example, “More” or “Resources”) or link to it from the footer.
Choose a No‑Code Builder That Fits Your Needs
Before you touch templates or colors, pick the tool you’ll build in. The “best” builder is the one you’ll actually keep updated—so optimize for simplicity and fit, not features you’ll never use.
The main types of no‑code options
Website builders (most flexible): Wix, Squarespace, Webflow, Framer, WordPress.com. These are full websites with pages, menus, and built-in publishing.
Portfolio platforms (fastest to start): Behance, Dribbble, Adobe Portfolio. Great if you want to post work quickly and benefit from built-in communities, but you’ll have less control over structure and branding.
All‑in‑one tools (minimalist, good for simple portfolios): Notion-based sites, Carrd, or “one-page” builders. Perfect for a clean, lightweight presence, especially early on.
Chat-to-app builders (fast, more custom than templates): If you want a portfolio that behaves more like a small web app (custom forms, dynamic project pages, gated case studies, or unique layouts), consider a chat-driven platform like Koder.ai. You describe what you want, iterate in conversation, and publish—without starting from scratch in a visual editor.
Criteria to choose with confidence
Look for these basics (they matter more than fancy animations):
- Ease of editing: Can you change text and swap images in minutes?
- Templates you like: If the starting designs fit your style, you’ll finish faster.
- Mobile design: Does it automatically look good on phones, and can you tweak mobile layout if needed?
- SEO controls: Page titles, meta descriptions, clean URLs, and image alt text should be easy to set.
- Forms and contact options: Built-in contact forms or simple integrations (email, calendar links).
Understand free plan limits
Free plans are useful for testing, but often include:
- Builder branding (their logo or banner)
- No custom domain (you’ll get a subdomain like yourname.builder.com)
- Limited storage or pages
- Fewer SEO controls and integrations
If you’re applying to jobs or pitching clients, a paid plan with a custom domain is usually worth it.
Make a short shortlist (then pick)
Choose 2–3 tools, build a quick draft homepage in each, and decide based on your goal:
- Hiring-focused portfolio: choose the easiest editor + strong templates.
- Design-heavy work: prioritize layout control and typography.
- Simple “presence” site: pick the quickest one-page option.
Once you choose, commit—switching tools mid-build is the fastest way to stall.
Pick a Template You Can Customize Quickly
A template is your shortcut to a portfolio that looks intentional from day one. The goal isn’t to find “the perfect design.” It’s to start with a layout that already matches how people in your field expect to browse work—then tweak it to feel like you.
Start with templates made for your field
Most no‑code builders organize templates by use case. That filter saves you time because the sections and page types are already aligned with what you need.
- Creative (design, photo, video): big visuals, simple navigation, project-focused homepages
- Business (consulting, marketing, freelance): clear services, testimonials, contact-first layouts
- Tech (developer, product, data): case studies, role clarity, links to GitHub/LinkedIn, simple structure
- Student / entry-level: projects + skills + a strong About section, without assuming years of client work
What to check before you commit
Open the template preview and evaluate it like a visitor would.
Look for:
- Strong typography: headings are clearly different from body text, and everything is easy to scan
- A clear project grid: your work should be visible within the first scroll, with consistent thumbnails and titles
- Readable mobile layout: tap targets aren’t tiny, text isn’t cramped, and the project grid collapses cleanly
If possible, preview on your phone (or narrow your browser window) before choosing.
What to avoid (even if it looks impressive)
Some templates are built to show off effects, not your work.
Skip templates with busy animations, hidden navigation, autoplay video, or light-gray text on white backgrounds. If a visitor has to “figure out” how to read your site, they’ll leave—especially on mobile.
Confirm customization is easy
Before you invest time filling it in, make sure the builder lets you quickly adjust the elements that create a cohesive personal brand:
- Colors: can you set a primary color and apply it across buttons/links?
- Fonts: can you change heading and body fonts without editing every block?
- Sections: can you reorder, delete, or add sections without breaking the layout?
A good rule: if you can’t make the template feel like yours in 15–20 minutes (colors, fonts, spacing, and a few section swaps), pick a simpler one. Your portfolio should spotlight your projects—not the template.
Gather Content: Text, Images, and Your Personal Brand
Before you touch a builder, collect what you’ll actually put on the site. This step saves hours later because you won’t be pausing every five minutes to hunt for a photo, rewrite a bio, or resize a screenshot.
Write one clear headline (and keep it human)
Your headline is the first thing people read—make it instantly understandable. Aim for one sentence that says what you do and who you help.
Examples you can adapt:
- “UX designer helping startups turn messy ideas into simple flows.”
- “Freelance photographer for weddings, brands, and editorial shoots.”
- “Front-end developer building fast marketing sites for small businesses.”
If you’re multi-skilled, don’t list everything. Pick the service you want more of right now.
Collect your key assets in one folder
Create a single folder (and subfolders) so building feels like assembling, not searching.
What to gather:
- Logo (optional): A wordmark is enough. Don’t block yourself here.
- Headshot: Friendly, well-lit, and cropped for both square and wide formats.
- Project images: Screenshots, photos, mockups—anything that shows outcomes.
- Testimonials: Even 1–2 short quotes help. Include name, role, and company if possible.
Tip: Export images in web-friendly formats (JPG/PNG; WebP if your tool supports it) and keep filenames descriptive (e.g., brand-redesign-homepage.jpg).
Prepare 3–6 best projects (quality beats quantity)
A small set of strong projects is more convincing than a long list of “okay” ones. For each project, write 3–5 bullets in plain language:
- What was the goal?
- What did you do (your role)?
- What tools/skills were involved?
- What changed because of your work (result)?
If you’re a beginner, use:
- A personal project with a clear brief
- A redesign concept (“before/after”)
- A volunteer or school project
Create a simple brand style (so everything looks intentional)
You don’t need a full brand guide. You need consistency.
- Fonts: Choose 1–2 (one for headings, one for body) from your builder’s defaults.
- Colors: Pick 2–3 (primary, neutral, accent). Use accent sparingly for buttons/links.
- Spacing: Decide your “default” spacing (e.g., generous padding and clear section breaks) and stick with it.
When your content is ready, the no-code build becomes mostly drag-and-drop—because the real work (clarity) is already done.
Build the Homepage That Gets People to Click
Your homepage has one job: help someone understand who you are, what you do, and what to do next—within a few seconds. If a visitor has to “figure you out,” they’ll usually leave.
Start with a sharp hero section
Open with a simple intro that combines role + specialty + outcome. Aim for one sentence that sounds like something a client or hiring manager would search for.
Example:
“Product Designer specializing in B2B SaaS—helping teams ship clearer workflows and boost activation.”
Add a second line that supports it (your niche, tools, or the types of projects you take on). Keep it tight.
Show featured projects (with clear labels)
Don’t make people hunt for your work. Add a small “Featured Projects” area right on the homepage.
Keep each project card scannable:
- Project name + label (e.g., “UX Case Study,” “Brand Identity,” “Web Redesign”)
- One-line result or focus (e.g., “Improved onboarding completion”)
- A clear link to the full project page
If you’re early-career, feature personal projects, volunteer work, redesign concepts, or class work—clarity and presentation matter more than the logo.
Use one primary CTA (and make it obvious)
Pick a single main button and repeat it in 1–2 places (top and near the bottom): Contact or Book a call. Link it to /contact.
Avoid multiple competing buttons like “Download CV,” “Email me,” “Follow me,” and “Book”—choose one primary action and make everything else secondary.
Keep it scannable
Use short sections, clear headings, and whitespace. A simple homepage structure is often enough:
Intro → Featured Projects → Short “About” snippet → Testimonials/clients (optional) → CTA
Create Project Pages (Even If You’re a Beginner)
Project pages are where your portfolio earns trust. A simple, repeatable format helps visitors understand what you did—without making them read a novel.
Use a repeatable layout (so you can publish faster)
Create one “project page template” in your no‑code builder, then duplicate it for each new project. Aim for a clear flow:
- Overview: what the project is and who it was for (even if it’s “personal project”)
- Your role: what you owned (research, design, writing, photography, etc.)
- Tools: apps, materials, or methods you used
- Steps: what you did, in order
- Results: what changed, what you shipped, or what you’d improve next
Show your process (not just the final output)
Beginners often think they “don’t have enough” to show. Process fills that gap and signals real skill. Include quick snapshots of your thinking—sketches, drafts, key decisions, or a before/after comparison.
A good rule: if someone asked “How did you get from idea to outcome?” your page should answer it.
Add context that makes you memorable
A few lines of context can make a small project feel substantial:
- Constraints (tight deadline, limited budget, brand rules)
- Timeline (even a simple “Weekend sprint”)
- Collaboration (who you worked with and how)
- What you learned (one honest takeaway)
If you can’t share details, share what you can
For client or workplace work, write a “sanitized” case study: explain the goal, your responsibilities, your approach, and the impact in general terms. You can also replace sensitive visuals with simplified versions (wireframes, redacted screenshots, or recreated examples) and note what was removed.
Finish each project with a small call to action: “Want something like this? Reach me via /contact.”
Write an About Page and Clear Contact Options
Your About page is where a visitor decides whether you’re “their person.” Keep it warm, specific, and easy to skim—especially if someone is viewing your online portfolio on a phone.
A bio that sounds like you (4–6 sentences)
Write a short paragraph that answers: what you do, who you help, and what kind of results you aim for. Add one detail that makes you memorable (a niche, a method, or a value you care about).
Example structure: “I’m a [role] who helps [audience] with [type of work]. I specialize in [focus]. Recently, I’ve worked on [type of projects/results]. I’m based in [location/time zone] and available for [full-time/freelance/collabs].”
Add credibility without turning it into a résumé
Pick 3–6 credibility signals that matter for your work:
- Key skills (the ones your projects demonstrate)
- Clients or companies (even small ones)
- Education, certifications, or relevant training
- Awards, publications, or speaking
If you’re early-career, use proof you do have: coursework projects, volunteer work, internships, or a clear process you follow.
If you freelance: list services simply
A short services list reduces back-and-forth. Keep it concrete and include what’s typically included (and what’s not).
- Service name (e.g., “Brand Design”)
- What’s included (deliverables, rounds of revision, timeline range)
- Starting price or “Starting at…” (optional)
Make contacting you effortless
Offer multiple contact options and set expectations:
- Email (clickable)
- A short contact form (name, email, message)
- Social links where you actually respond
Add one line like: “I reply within 1–2 business days,” plus what you’re open to (“freelance projects, full-time roles, collaborations”). This small detail builds trust and saves time for both sides.
Add SEO and Accessibility Basics (No Tech Headache)
You don’t need to “do SEO” like a marketer to make your portfolio easy to find. A few small settings help search engines understand what you offer—and help real people use your site comfortably.
Page titles + meta descriptions (the quick wins)
Each page should have its own page title and meta description. Think of the page title as the headline that shows in Google, and the meta description as the short pitch.
- Title: Put your role + specialty first (e.g., “UX Designer for Mobile Apps | Sam Lee”).
- Meta description: One sentence on who you help and what you make (e.g., “Portfolio of Sam Lee, UX designer focused on onboarding flows, prototypes, and usability testing.”).
If your builder offers “SEO settings” per page, that’s where these live.
Headings + URLs that make sense
Use headings to create a clear outline:
- Use H1 once per page (usually the main page headline).
- Use H2/H3 for sections like “Selected Work,” “Process,” or “Results.”
Keep URLs readable and consistent, like:
/(home)/about/work/project-name/contact
Avoid messy auto-generated slugs like /page123.
Images: faster pages and better accessibility
Portfolios are image-heavy, so keep pages quick to load:
- Compress images before uploading (many builders also auto-optimize).
- Add alt text that describes what matters: “Before/after redesign of checkout screen” beats “image1.”
Alt text helps screen readers and also clarifies your work to search engines.
Footer: small detail, big clarity
Add a simple footer to every page with:
- Quick navigation (Home, Work, About, /contact)
- A clear contact method (email or form)
- Optional: your location/time zone and relevant social links
This improves usability and makes it easier for clients to reach you from anywhere on the site.
Set Up Your Domain and Publish Confidently
A custom domain (like yourname.com) makes your portfolio feel more professional and easier to share on resumes, LinkedIn, and email signatures. The goal here is simple: choose a name people can type correctly, connect it to your builder, and publish after a quick quality check.
Choose a domain that’s easy to remember
Pick something that passes the “say it out loud” test. If someone hears it once, can they spell it?
Good options:
firstnamelastname.com(most common)lastname.design/lastname.dev/lastname.photo(if it fits your work)firstnamecreates.com(if your name is taken)
Try to avoid hyphens, doubled letters that cause typos, and overly clever phrases.
Connect it in your builder (DNS, explained simply)
When you buy a domain, it lives with a registrar. Your portfolio lives in a portfolio website builder (Squarespace, Wix, Webflow, Framer, Carrd, and others).
DNS is the set of “signposts” that tell the internet where to send visitors. In practice, you’ll paste a few records from your builder into your domain registrar:
- A record: points your domain to an IP address
- CNAME: points a subdomain like
wwwto your site
Most builders provide a step-by-step domain connection screen and will confirm when it’s working. Changes can take minutes to a few hours to fully update.
If you build with a platform that includes hosting and deployment (for example, Koder.ai supports deployment/hosting and custom domains), publishing can be even more streamlined—especially if you want the option to export source code later.
Preview everywhere before you hit publish
Before publishing, check:
- Mobile, tablet, and desktop layouts
- Navigation and buttons (easy to tap on mobile)
- Font sizes and line spacing (readable without zooming)
Run a simple pre-launch checklist
Do one last sweep for:
- Broken links (especially project buttons and social icons)
- Typos and inconsistent capitalization
- Contact form works (test submission + confirmation message)
- Image quality (not blurry, not stretched, reasonable file size)
Once those pass, publish—then share your domain everywhere you want people to find you.
Maintain, Measure, and Improve Over Time
Publishing your portfolio isn’t the finish line—it’s the point where it starts working for you. A little maintenance keeps it accurate, easy to navigate, and focused on the outcomes you want (messages, calls, bookings, interviews).
Add lightweight analytics (so you know what’s happening)
Most no‑code builders offer built-in stats or simple integrations. Turn on basic analytics so you can answer:
- Which pages get visited most (Homepage, About, specific projects)?
- Where do visitors come from (LinkedIn, search, referrals)?
- Do people reach your Contact section—or drop off earlier?
If you prefer, connect Google Analytics or a privacy-friendly alternative. Keep it simple: check once a month and look for trends, not daily noise.
Track conversions, not just views
Pageviews feel good, but conversions show value. Pick 1–3 actions that matter and track them consistently:
- Contact form submissions
- Clicks on your email address (mailto)
- Booking link clicks (Calendly or similar)
Create a quick note in a spreadsheet: date, change made, and results after a few weeks. That’s enough to learn what improves responses.
Set an easy update cadence
Maintenance is easiest when it’s scheduled:
- Monthly (15 minutes): fix outdated info, check links, add one testimonial or metric.
- Quarterly (30–60 minutes): swap in a stronger project, tighten copy on your homepage, refresh your “featured” work.
Aim for “current and clear,” not “perfect.”
Promote it where people already look
Make your portfolio hard to miss:
- Add it to your LinkedIn profile (featured section + headline link)
- Put it in your email signature
- Include it in job applications as the first link
- If you publish regularly, consider a simple /blog to share updates, case studies, or process notes
Small improvements compound—especially when you measure, adjust, and keep showing up.
FAQ
What is the main purpose of a portfolio website?
A portfolio site should do three things:
- Build credibility with a clean, consistent presentation.
- Show proof with a few strong projects explained in context (goal, role, outcome).
- Drive a next step with an obvious CTA like an email link, a form, or a booking link.
If visitors like your work but can’t quickly contact you, it’s not working yet.
How long does it usually take to build a no-code portfolio site?
Most people can publish a solid first version in a weekend (or a few focused evenings) if your content is ready.
A practical plan:
- Day 1: pick goal, pages, builder, template
- Day 2: add projects, About, Contact, then publish
Start simple; you can improve after it’s live.
How much does it cost to launch a portfolio website?
Plan for:
- Domain: about $10–$20/year for something like
yourname.com. - Builder plan: free plans are fine for drafts, but paid plans are often needed for a custom domain and a more polished look.
If you’re applying to jobs or pitching clients, upgrading for a custom domain is usually worth it.
How do I choose the right goal and CTA for my portfolio?
Pick one primary goal so your homepage doesn’t feel like a random menu:
- Get hired
- Get clients
- Showcase projects for credibility/collabs
Then set one main CTA that matches it (e.g., “Contact,” “Book a call,” or “Download resume”) and repeat it in the header and near the bottom of the homepage.
What pages should a portfolio website include?
Start with the core four pages:
- Home (what you do + featured work + CTA)
- Work/Projects (your portfolio grid/list)
- About (your bio + credibility)
- Contact (form/email + social links)
Add extra pages only if they support your goal (e.g., Services for freelancers, Resume for hiring).
Which no-code builder should I use for my portfolio?
Choose based on what you’ll actually maintain:
- Website builders (Wix, Squarespace, Webflow, Framer, WordPress.com): best for full sites with navigation and customization.
- Portfolio platforms (Behance, Dribbble, Adobe Portfolio): fastest to post work, less control.
- One-page tools (Carrd, Notion-based sites): simplest “online presence” early on.
Make a shortlist of 2–3, build a quick draft homepage in each, then commit to one.
How do I pick a template that won’t slow me down?
Avoid templates that show off effects instead of your work.
Check for:
- Readable typography and clear hierarchy
- A project grid visible within the first scroll
- A mobile-friendly layout (tap targets, spacing, no cramped text)
Skip busy animations, hidden navigation, autoplay video, and low-contrast text. If you can’t make it feel like yours in 15–20 minutes (fonts/colors/spacing), pick a simpler template.
What content do I need before I start building?
Keep it lightweight and consistent:
- Write one clear headline: what you do + who you help.
- Collect 3–6 best projects (quality beats quantity).
- For each project, prep 3–5 bullets: goal, your role, tools, steps, result.
- Gather assets in one folder: headshot, screenshots/photos, testimonials.
This makes building feel like assembling blocks instead of constantly hunting for content.
How should I format project pages (especially as a beginner)?
Use a repeatable structure so you can publish faster:
- Overview (what it is, who it was for)
- Your role (what you owned)
- Tools (what you used)
- Steps/process (how you worked)
- Results (impact, what shipped, or what you’d improve)
If you’re new, process is your advantage—include sketches, drafts, decisions, or before/after comparisons.
What are the simplest SEO and accessibility steps for a portfolio site?
Do the basics that improve findability and usability:
- Set page titles and meta descriptions per page.
- Use clean URLs like
/about,/work/project-name,/contact. - Add alt text that describes what matters (not “image1”).
- Compress images so pages load fast.
Before publishing, run a quick check: mobile layout, broken links, form test, typos, and image quality.