

How to Build a Product Website for Non‑Technical Users
Learn how to create a clear, easy product website for non-technical users: messaging, layout, onboarding, pricing, trust signals, and launch tips.
Start With the User: Goals, Fears, and Success Metrics
Before you write a headline or design a layout, get specific about who “non-technical” really is for your product. It’s not a single group—it’s a set of roles with different motivations and worries.
Define the exact audience (roles, goals, anxieties)
Write down 2–3 primary roles you expect to buy or use the product (for example: office manager, small business owner, HR coordinator, marketing generalist). For each role, capture:
- Goal: what they’re trying to achieve in plain terms (save time, reduce errors, look professional, stay compliant).
- Fear: what might stop them (breaking something, hidden costs, a long setup, needing IT approval, looking foolish in front of their team).
- Context: where they’ll use it (during busy workdays, on mobile, under deadlines).
List the top 3 jobs-to-be-done
Pick the three most common “jobs” your product helps with. Phrase them as outcomes, not features:
- “Create X in under 10 minutes.”
- “Keep Y organized so nothing gets missed.”
- “Share results with my team without confusion.”
These jobs become your north star for what the page should emphasize.
Choose one primary action
Decide the single main action the page should drive: start a trial, book a demo, or sign up. If you try to push all three equally, the page feels indecisive—and indecision is hard to trust.
Define success metrics
Define what “success” means for this page before you start tweaking copy.
- Choose one primary metric (signups, demo requests, purchases).
- Add 1–2 supporting metrics (trial-to-activation, onboarding completion, click-through to pricing).
This keeps decisions grounded when you revise copy and design later.
Craft Simple Messaging That Explains the Product Fast
Most non-technical visitors decide whether to keep reading in seconds. Your job is to remove guesswork: say what it is, who it’s for, and what happens after they use it—without requiring them to translate jargon.
Start with a one-sentence value proposition (no jargon)
Write a single sentence that answers: what it is + the outcome + for whom.
Examples:
- “A simple invoicing app that helps freelancers get paid faster.”
- “A team checklist tool that keeps projects on track—without spreadsheets.”
If you can’t say it in one sentence, you may still be describing features instead of the result.
Clarify what the product is (not just what it does)
Many pages jump straight to verbs (“automate,” “optimize,” “streamline”). Add the noun. People need a category to anchor their understanding.
Try this pattern:
- “It’s a [type of product] that [does the key job], so you can [benefit].”
For example: “It’s a customer support inbox that collects messages from email and chat in one place, so customers get answers quicker.”
Describe outcomes in plain language with concrete examples
Outcomes feel real when they’re specific and familiar. Instead of “improves efficiency,” describe a day-in-the-life change.
- Before: “You chase updates across five tools.”
- After: “You see who’s doing what and what’s blocked in one view.”
Add one or two concrete use cases near the top (not buried): “Send a quote, get it approved, and turn it into an invoice in under a minute.”
Include a quick “for” and “not for” statement
This builds trust and reduces anxiety about choosing the wrong product.
- Who it’s for: “Solo business owners who want a simple way to track invoices and payments.”
- Not for: “Large finance teams that need complex approval workflows.”
When visitors feel understood, they’re more likely to keep scrolling—and more confident when they reach your call-to-action.
Plan a Page Structure That’s Easy to Scan
Most visitors won’t read your product page top to bottom. They’ll skim, look for familiar cues, and decide quickly whether to keep going. A scannable structure helps them find answers in seconds—without needing technical context.
Start with a clear hero
Your hero area should do four jobs immediately:
- Headline: say what the product helps them achieve (one sentence)
- Subhead: add who it’s for and the main outcome (one short line)
- Primary CTA: one clear action (for example, “Try it free” or “See a demo”)
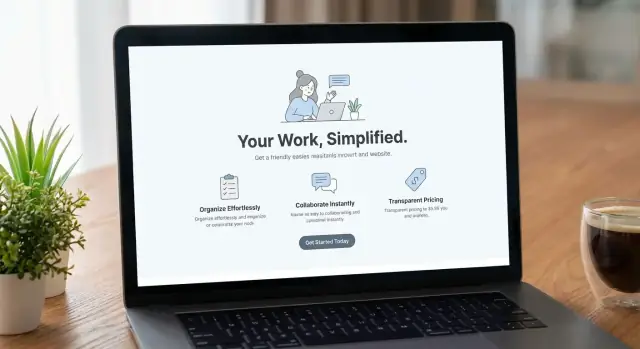
- One supporting visual: a simple screenshot or diagram that reinforces the promise (keep it uncluttered)
Add 3–5 key benefits (not a feature dump)
After the hero, lead with benefits people can recognize from their daily work. Keep each benefit to 2–3 lines:
- Save time on routine tasks: automate the steps that usually require copying, chasing, or re-checking.
- Stay organized without effort: everything important lives in one place, with clear next actions.
- Avoid mistakes and rework: built-in checks reduce common “oops” moments.
- Share progress easily: teammates can understand what’s happening at a glance.
Explain “How it works” in three steps
A short, predictable sequence lowers anxiety:
- Connect or set up: answer “What do I need to start?”
- Do the main action: show the core workflow in plain language.
- Get the result: make the payoff concrete (what they see, receive, or finish).
Finish with a strong final CTA and recap
End with a brief recap of the promise (one or two sentences) and repeat a single primary CTA. This is your “decision moment”—remove extra choices and restate the outcome they’ll get if they click.
Build fast without sacrificing clarity
If you’re iterating quickly, you can still keep the structure disciplined. For example, teams using Koder.ai often generate a clean React-based landing page from a simple chat prompt, then refine the hero, benefits, and “How it works” steps with a planning mode before shipping changes. Because Koder.ai supports deployment/hosting, custom domains, and source code export, you can move fast early without painting yourself into a corner later.
Write Copy for Non-Technical Readers
Non-technical readers aren’t “less informed”—they’re busy. Your job is to reduce translation work so they can quickly decide: “Is this for me, and will it be easy?”
Replace jargon with everyday words
Start by listing your most-used terms (features, acronyms, integrations). For each one, write a plain-English version and use that by default.
- “API access” → “Connect your other tools”
- “Role-based permissions” → “Choose who can see or change things”
- “Data sync” → “Keep information up to date automatically”
If you must keep a technical term (for buyers comparing options), add a short definition the first time it appears, or maintain a small glossary at the bottom of the page.
Make sentences short—and buttons specific
Use short sentences and clear headings that answer real questions. Avoid clever labels.
- “Get started” → “Create my account”
- “Submit” → “Send my request”
- “Learn more” → “See how setup works”
Answer the “practical questions” inline
Don’t force visitors to hunt for basics. Include crisp answers near the first mention of a feature:
- Time to set up: “Most teams are running in 30 minutes.”
- What’s required: “You’ll need an email address and your company name.”
- Who manages it: “An admin can invite teammates and control access.”
Show a simple before vs after
Ground the product in everyday scenarios.
Before: “Updates live in spreadsheets and nobody knows what changed.”
After: “Updates are in one place, with clear owners and automatic reminders.”
That contrast teaches the value faster than a feature list, and it keeps the copy readable for everyone.
Use Visuals That Teach Without Overwhelming
Visuals do more than “make the page look nice.” For non-technical users, they reduce reading effort and remove guesswork: What does this do? Where do I click? What happens next?
Use screenshots and short clips with clear captions
Choose visuals that answer one practical question at a time. A screenshot can show what the user will actually see; a 10–20 second clip can show motion (like creating something, sending something, or getting a result).
Add a caption under every visual that explains what to look for in plain language. Good captions point to outcomes, not interface trivia.
Prefer annotated images over long paragraphs
If you need to explain steps, annotate the image instead of writing a wall of text. Use simple callouts like “1, 2, 3” and label only the elements that matter for the task.
Keep annotations minimal:
- Highlight one area (button, field, menu)
- Use short labels (“Choose a template,” “Preview the result”)
- Avoid naming internal features users don’t need
Show one core workflow end-to-end (start → result)
Pick a single “hero” workflow that matches the main reason people buy your product. Show it from the first click to the final outcome.
A helpful sequence might be:
-
Start: what the user begins with
-
Action: the key step they take
-
Result: the finished output, confirmation, or benefit
This creates confidence: users can picture themselves succeeding.
Avoid clutter: one message per visual
Don’t cram multiple features into the same screenshot grid. If a visual tries to explain three ideas, it usually explains none.
Use whitespace, consistent sizing, and a predictable rhythm (visual → caption → next) so scanning feels effortless.
Design Calls-to-Action That Feel Safe and Clear
A call-to-action (CTA) is a promise: “If you click this, here’s what will happen next.” For non-technical users, uncertainty is the main conversion killer—so your job is to make the next step feel predictable, low-risk, and easy to undo.
Keep one primary CTA consistent
Pick a single main action for the page (for example, “Start free trial” or “Create account”) and repeat it in the same wording across the page. Consistency reduces decision fatigue and reassures readers that they’re on the right path.
A simple rule: if your header button says “Start free trial,” don’t switch to “Get started,” “Sign up,” and “Try it now” further down. Different labels can feel like different commitments.
Add a secondary CTA for cautious users
Many visitors aren’t ready to commit, especially if they don’t fully understand the product yet. Give them a safe “learn more” step that still moves them forward, such as:
- Watch demo (sets a clear time-bound expectation)
- See examples (shows outcomes, not features)
- Explore templates (lets them imagine themselves using it)
Place the secondary CTA near the primary one, but style it as less prominent so the page still has a clear “main” path.
Reduce form fields—and justify what you ask
If your CTA leads to a form, keep it minimal. Every field creates a new reason to stop. Ask only what you need to deliver the next step.
When you must request something sensitive (like a phone number), explain it right next to the field in plain language:
- “Phone number (only for account recovery—no sales calls)”
- “Company name (used to personalize your workspace)”
This turns a suspicious moment into a transparent one.
Use microcopy to set expectations after clicking
Small lines of text around a CTA can remove uncertainty by answering: How long will this take? What happens next? Will I get spammed?
Examples:
- “Takes about 2 minutes. No credit card required.”
- “Next: choose a template, then add your first project.”
- “We’ll email you a sign-in link—no password to remember.”
The goal is to make the click feel like a safe, clearly defined step—not a leap into the unknown.
Make Pricing and Plans Easy to Understand
Pricing is often where non-technical visitors hesitate—not because it’s expensive, but because it’s unclear. Your goal is to make the cost and the commitment feel predictable.
Say what you charge, in everyday language
Start with one plain sentence that answers: “How is this priced?” Examples: per user per month, per project, or flat monthly fee. If there’s a setup fee or minimum term, say it up front.
If you have a dedicated pricing page (often labeled /pricing), make sure the headline and first lines remove ambiguity before anyone scrolls.
Show what each plan includes (and what it doesn’t)
Use short, simple bullet lists under each plan. Focus on outcomes and limits people actually feel:
- Number of users included
- Projects or tasks allowed
- Storage or usage limits
- Key features people compare (exports, permissions, automations)
- Support level (email only, chat, onboarding help)
Avoid feature names that require explanation. If you must use them, add a five-word description right next to the term.
Address the “hidden concerns” directly
Non-technical buyers worry about surprises. Add a small section that clearly answers:
- What happens if I hit a limit?
- Are there overage charges? How are they calculated?
- Can I cancel anytime? What happens to my data?
- Do plans renew automatically?
- Can I change plans mid-month?
Add a pricing FAQ that matches real objections
Write an FAQ based on actual sales emails and support tickets (not guesses). Keep answers short, specific, and free of legal language—save the fine print for the terms page.
Build Trust With Proof, Support, and Clear Expectations
Non-technical visitors are often deciding based on one question: “Will this work for me without surprises?” Trust isn’t a banner you add at the end—it’s the feeling your page creates when everything is verifiable, easy to find, and clearly explained.
Proof people can check
Use social proof, but only if it’s real and attributable.
- Testimonials: Include a name, role, and context (“Used it for invoicing in a 3-person studio”). Avoid vague praise.
- Reviews or ratings: Quote exact numbers and the source if you have permission.
- Customer logos: Only show logos from verified customers, and keep the list short and recognizable.
If you’re early-stage, it’s fine to show specific outcomes from pilots (“Reduced onboarding time from 2 hours to 20 minutes”) as long as you can back it up.
Support that feels reachable
Make help options visible on the page, not hidden in a footer.
State:
- Where to get help (email, chat, help center)
- Typical response times (only if you can meet them consistently)
- Hours/time zone if support isn’t 24/7
Plain language example: “Email us anytime. We reply within 1 business day.”
Security and privacy—only what you can substantiate
Say what you actually do: encryption, access controls, data retention basics, and how you handle personal data. Avoid big claims unless you have the documentation.
“What happens after I sign up?”
Add a short mini section that removes anxiety:
- Create your account (no credit card / credit card required—be explicit)
- A quick setup checklist (what you’ll need)
- First success moment (what they’ll accomplish in 5–10 minutes)
- Where to get help during setup
Clear expectations reduce hesitation and cut support requests later.
Accessibility and Mobile: Remove Common Friction
Accessibility and mobile usability aren’t “nice to have” for non-technical users—they’re the difference between “I get it” and “I’m stuck.” If someone has to squint, hunt, or guess, they’ll leave.
Make reading effortless
Start with typography and contrast. Use comfortably large font sizes, generous line spacing, and clear headings. Keep body text readable without zooming, especially on phones.
Use strong color contrast for text, buttons, and form labels. If you rely on color to communicate meaning (for example, red vs. green), add a second cue like an icon or a short label.
Also, make link text descriptive. “Download invoice template” beats “Click here,” because users can predict what will happen.
Support keyboards, screen readers, and forms
Many users navigate with keyboards or assistive tools. Your page should work without a mouse.
- Ensure users can tab through menus, buttons, and form fields in a sensible order
- Provide alt text for meaningful images (and skip it for purely decorative ones)
- Label every form field clearly and show errors in plain language (what happened and how to fix it)
If you use placeholders inside fields, don’t let them replace labels—placeholders disappear as people type.
Reduce distraction and provide alternatives
Avoid motion that pulls attention away from the content, especially auto-playing animations. If you include video, add captions and make sure key information isn’t only spoken.
Treat mobile as the default
Design and test on mobile first. Aim for short sections, clear headings, and plenty of whitespace.
- Use a sticky primary CTA when it’s helpful (and not covering content)
- Make tap targets large enough for thumbs, with spacing between buttons
- Keep critical information above the fold: what it is, who it’s for, and the next step
Mobile-friendly and accessible pages feel calmer—and calm converts.
SEO for Plain-English Product Pages
SEO works best when it matches what people are already trying to understand. For non-technical users, that means your page should answer simple “Can this help me?” questions with the same wording they use.
Target a few clear search intents
Pick 2–4 intents per page and make them obvious in headings and copy. Examples include:
- “How to [get a result]” (task-focused)
- “[Product category] for beginners” (confidence-focused)
- “Best way to [do a job] without [pain]” (objection-focused)
Avoid chasing dozens of keywords. A tight set of intents keeps the page readable and helps search engines understand what you’re promising.
Make your structure and metadata match the promise
Use descriptive H2s that mirror your visitors’ questions (“What you can do in 10 minutes,” “What you need to get started,” “Is it safe?”). Keep URL slugs short and human (category + outcome beats feature names).
For meta titles and descriptions, don’t be clever—be specific:
- State who it’s for (beginners, small teams, non-technical users)
- State the outcome (save time, organize files, send invoices)
- Reduce anxiety (no setup headaches, guided steps)
Write FAQs from real conversations
Your best FAQ content already exists in support tickets, sales calls, live chat, and onboarding drop-off points. Add 6–10 questions that address:
- “Do I need experience/tools?”
- “How long does setup take?”
- “What happens if I get stuck?”
- “Will it work with what I already use?”
Answer in plain language first, then add details below.
Use internal links as guided next steps
When you reference a concept (“templates,” “importing,” “security”), point to a relevant blog post or help article using relative URLs. This supports SEO, but more importantly, it keeps non-technical visitors moving forward instead of searching elsewhere.
Performance, Navigation, and Measurement Basics
A website that feels “simple” is often the result of invisible work: fast loading, predictable navigation, and measurement that tells you what to fix next. For non-technical users, these basics reduce hesitation and help them stay oriented.
Keep the page fast (especially on mobile)
Speed is part of usability. If your product website loads slowly, people assume the product will be slow too.
Optimize images before uploading (right size, modern formats when possible), and avoid stacking multiple large hero images or auto-playing media. Be cautious with heavy scripts and third-party widgets—each extra tool can add noticeable delay.
A practical rule: if a feature doesn’t directly help someone understand the product or take the next step, consider removing it from the marketing pages.
Make navigation predictable and boring (in a good way)
Non-technical visitors shouldn’t have to “explore” to find critical pages. Use clear, standard labels and keep your top navigation focused:
- Product
- Pricing
- Demo
- Support
- Login
Keep the menu consistent across pages, and avoid clever names that require interpretation. If you have multiple audiences or use cases, a simple “Solutions” page can help—just don’t hide Pricing or Support inside it.
Measure the right actions (without creeping people out)
You don’t need complex analytics to make smart decisions. Start with basic tracking that answers: “Are people finding what they need, and where do they drop off?”
Track:
- CTA clicks (for example: “Book a demo,” “Start free,” “Contact sales”)
- Form submissions (and form errors if you can)
- Scroll depth on key pages (to see whether people reach proof, FAQs, and pricing details)
Choose privacy-friendly analytics options that match your policies and communicate what you collect in plain language. Good measurement respects the user while still giving you the signals you need to improve.
Launch, Test With Real Users, and Improve Iteratively
A product website is never “done.” For non-technical users, small points of confusion can quietly kill sign-ups. Treat launch as the start of a learning loop: publish, watch what people do, fix the friction, and repeat.
A practical launch checklist
Before you announce anything, do a quick pass that focuses on clarity and avoidable errors:
- Content review: confirm the headline matches what the product actually does, and remove jargon or vague claims
- Broken links: click every navigation item, footer link, and key button
- Mobile QA: test on at least one small phone screen and one larger phone; check tap targets, form fields, and sticky headers
Also verify the basics: the primary call-to-action is visible without scrolling, forms submit correctly, confirmation messages are clear, and error states explain what to do next.
Test with non-technical users (fast and revealing)
Run a small usability test with 5–8 non-technical users. Give them realistic tasks (e.g., “Figure out if this is for you,” “Find the price,” “Start a trial”), then stay quiet and watch.
Capture quotes word-for-word, especially:
- What they think the product does after 10 seconds
- What made them hesitate or backtrack
- Which terms felt confusing or “too technical”
These quotes often become the best source for improving copy and headings.
Improve one change at a time
A/B test one element at a time so you can learn what actually helped: headline, CTA text, or hero visual. Keep a simple log of what changed, when, and why.
If your team is shipping fast, add a safety net for experimentation. For example, Koder.ai supports snapshots and rollback, which makes it easier to test new messaging or layout variations without turning every change into a high-stakes deploy.
Finally, plan post-launch updates based on support tickets and sales questions. If people keep asking the same thing, the website didn’t answer it clearly—yet.
FAQ
How do I define “non-technical users” for my product website?
Define “non-technical” by role, not by skill level. Pick 2–3 primary roles and write down for each:
- The outcome they want (in plain words)
- The fear that might stop them (time, cost, breaking something)
- The context they’re in (busy day, mobile, deadline)
This prevents vague copy and helps you design a page that answers real objections fast.
What’s the fastest way to explain my product without jargon?
Use a one-sentence value proposition: what it is + the outcome + for whom.
Example pattern: “It’s a [type of product] that [does the key job], so [audience] can [benefit].”
If you can’t fit it in one sentence, you’re probably describing features instead of results.
Should my page push a trial, a demo, and sign-up all at once?
Choose one primary action (e.g., start a trial or book a demo or sign up). Then repeat that same CTA wording consistently across the page.
Multiple “main” CTAs create uncertainty and make the page feel less trustworthy to cautious visitors.
How do I choose the right “jobs-to-be-done” to highlight?
Anchor the page around 3 “jobs” phrased as outcomes, not features, such as:
- “Create X in under 10 minutes”
- “Keep Y organized so nothing gets missed”
- “Share results with my team without confusion”
Those jobs should shape the hero headline, benefits, and the “how it works” section.
What page structure works best for non-technical visitors who skim?
A clear, skimmable structure usually looks like:
- Hero with headline, subhead, one primary CTA, one simple visual
- 3–5 benefits (2–3 lines each)
- “How it works” in 3 steps
- Proof + support + key objections (pricing, setup, safety)
- Final recap + the same primary CTA
Design it so someone can understand the offer by reading only the bold parts.
How do I remove jargon without oversimplifying the product?
Replace internal terms with everyday phrases and keep a simple translation list.
Examples:
- “API access” → “Connect your other tools”
- “Role-based permissions” → “Choose who can see or change things”
- “Data sync” → “Keep information up to date automatically”
If you must use a technical term, define it the first time (or add a short glossary).
What should I say around CTAs to make them feel “safe”?
Use microcopy near the CTA and form to answer:
- How long it takes
- Whether a credit card is required
- What happens right after clicking
- Whether they’ll be contacted
Example: “Takes about 2 minutes. No credit card required. Next: choose a template and add your first project.”
How do I present pricing so non-technical buyers don’t hesitate?
Make pricing predictable in plain language:
- State the pricing unit clearly (per user/month, per project, flat fee)
- Show what’s included and what’s not with short bullets
- Answer “hidden concerns” upfront (limits, overages, cancellation, data)
Clarity beats persuasion here—confusion is what kills conversions.
What builds trust fastest on a product page for non-technical users?
Show proof people can verify and support that feels reachable:
- Testimonials with name, role, and context (not vague praise)
- Real metrics from pilots if you can back them up
- Visible help options (email/chat/help center) plus realistic response times
Also add a short “What happens after I sign up?” section to remove uncertainty.
What accessibility and mobile details matter most for non-technical users?
Treat mobile and accessibility as conversion basics:
- Readable typography and strong contrast
- Descriptive link text (not “Click here”)
- Keyboard-friendly navigation and clearly labeled form fields
- Plain-language error messages
- Avoid distracting auto-play motion; caption videos
A calm, predictable experience helps people stay oriented and keep going.