

How to Build a Campaign Web App with Client Approvals
Learn how to plan and build a web app for marketing agencies to manage campaigns, assets, and client approvals, with roles, workflows, and audit-ready history.
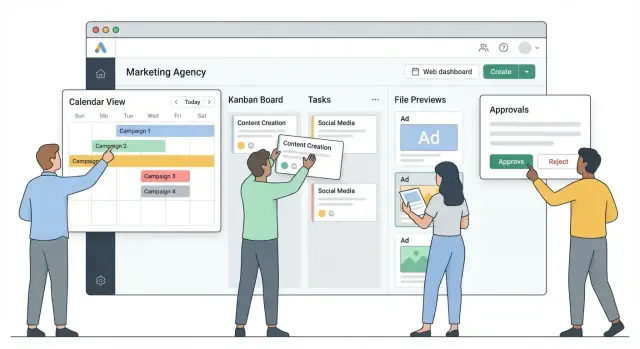
Define the Product Goals and Target Users
Before you sketch screens or pick a tech stack, get clear on the core problem: marketing campaigns and approvals are scattered across email, chat, and shared drives. A campaign web app should pull briefs, assets, feedback, and sign-off into one place so everyone can see what’s next—without chasing threads.
Who you’re building for
Most agency approval workflows involve four groups, each with different needs:
- Account managers / project managers: need a reliable timeline, clear ownership, and fewer follow-up messages.
- Creatives (designers, copywriters, editors): need focused feedback, fewer contradictory notes, and a simple way to upload revisions.
- Clients: need an easy review experience, confidence they’re seeing the latest version, and quick ways to approve.
- Approvers (legal, brand, executives): need context, visibility into risk, and an auditable “approved by” record.
Common pain points to design against
Email-based approvals create predictable problems: missed deadlines because no one sees the latest request, unclear feedback like “make it pop” without specifics, multiple versions floating around, and rework cycles caused by late or conflicting input.
Success metrics that actually matter
Define measurable outcomes so you can judge whether the product works:
- Approval turnaround time (request sent → final approval)
- Number of revision cycles per asset
- On-time delivery rate for campaign milestones
- Client satisfaction signals (e.g., fewer “where are we at?” messages)
What “v1” must include
For v1, focus on the smallest set that keeps campaigns and approvals together:
- Campaign timeline
- Asset upload + preview
- Comment threads tied to specific versions
- A clear approve/reject step with due dates
Save nice-to-haves for later: advanced reporting, deep integrations, automation rules, and custom approval paths.
Map the Campaign and Approval Workflow
Before you think about screens or tech, write down how work actually moves through your agency. A clear workflow turns “Where is this at?” into a predictable set of steps your app can enforce, automate, and report on.
Start with the core objects
Most campaign approval apps can be described with a small set of building blocks:
- Clients (and client teams)
- Campaigns (often tied to a goal, budget, and date range)
- Projects (a campaign broken into deliverables or channels)
- Tasks (who does what, by when)
- Assets (files: concepts, copy docs, images, videos, landing pages)
- Approvals (a decision record tied to an asset/version)
Document the relationships: a campaign contains projects; projects contain tasks; tasks produce assets; assets go through approvals.
Define the approval life cycle
A simple, agency-friendly flow is:
Draft → Internal review → Client review → Approved
Make each state mean something operationally. For example, “Internal review” might require a creative lead and account manager sign-off before a client ever sees it.
Specify how feedback is captured
Decide what feedback looks like in your product:
- Comments (threaded, with @mentions)
- Annotations (pin comments on an image/video frame)
- Change requests (structured fields like “must fix” vs “nice to have”)
The key is tying feedback to an asset version, so you don’t argue about which file the client reviewed.
Find bottlenecks and automate them
Common slowdowns: waiting for reviewers, unclear next steps, and repeated setup. Automation that helps most:
- Reminder rules (e.g., nudge after 48 hours in “Client review”)
- Approval templates (default reviewers, due dates, required checks)
Capture edge cases early
Real approvals aren’t always clean. Plan for:
- Partial approvals (approve copy, reject visuals)
- Rejected items (with required reason + next due date)
- Last-minute changes (re-open approved assets, re-trigger approvals, log who did it)
If you can describe these rules in plain language, you’re ready to turn them into screens and data models.
Plan the UX: Dashboards, Timelines, and Review Views
Great UX for a campaign app starts with a simple information hierarchy that mirrors how agencies already think: Client → Campaign → Deliverables (assets). If users can always answer “Where am I?” and “What happens next?”, approvals move faster and fewer things slip through.
Choose a clear hierarchy (and keep it consistent)
Use the client as the top-level anchor, then show campaigns underneath, and finally the deliverables (ads, emails, landing pages, social posts). Keep the same structure in navigation, breadcrumbs, and search so people don’t have to relearn the app on every screen.
A practical rule: every deliverable should always show its client, campaign, due date, status, and owner at a glance.
Design the key screens (the “daily drivers”)
Dashboard: The agency home base. Focus on what needs attention today: upcoming due dates, items waiting for internal review, and items waiting on client approval.
Campaign timeline: A calendar-like or phase-based view that makes dependencies obvious (e.g., “Copy approved” before “Design final”). Keep it readable—people should understand progress in seconds.
Asset review view: Where time is won or lost. Make the preview large, comments easy to find, and the next action clear.
Inbox: A single place for “things I need to respond to” (new feedback, approval requests, mentions). This reduces ping-pong across email and chat.
Filters that match real questions
Quick filters should answer common agency queries:
- By client (switch context instantly)
- By due date (overdue, due this week)
- By status (draft, in review, changes requested, approved)
- By assignee (who’s on the hook)
Make approval impossible to miss
The primary call to action should be obvious: Approve / Request changes. Keep it fixed in the review view (sticky footer/header) so clients don’t hunt for it after scrolling comments.
Plan for mobile-friendly client reviews
Clients often review between meetings. Prioritize mobile readability: a clean preview, large buttons, and short forms for feedback. If one tap can open the asset and another can approve it, you’ll see faster turnaround times.
Roles, Permissions, and Client Access
A campaign approval app lives or dies by trust: clients must feel confident they’re only seeing what they should, and your team needs clear boundaries so work doesn’t get overwritten or approved by the wrong person.
Core roles (start simple)
Most agencies can cover most needs with five roles:
- Agency admin: manages workspace settings, billing, templates, and user management.
- Account manager: owns campaigns, timelines, and client relationships; can invite clients and assign approvers.
- Contributor (designer/copywriter): uploads assets, responds to feedback, creates new versions.
- Client: can view their campaigns and assets, comment, and request changes.
- Approver: a client-side role (or internal) with explicit approval rights.
Permissions per object (not “one size fits all”)
Instead of global permissions only, define actions per object type (campaign, deliverable, asset, comment). Typical actions include view, comment, upload, approve, edit, and delete.
A practical default is “least privilege”: contributors can upload and edit their own assets, but deleting or changing campaign settings is restricted to account managers/admins.
Client-specific access
Clients should only see their campaigns, assets, and discussions. Avoid shared “client folders” that accidentally expose other accounts. This is easiest when every campaign is tied to a client account, and access checks are enforced consistently across pages, downloads, and notifications.
Multi-approver rules
Support two approval modes per deliverable:
- Any approver: one approval is enough (fast-moving social posts).
- All approvers required: everyone must approve (brand-sensitive work).
Secure sharing without public data
Offer share links for convenience, but keep them private by default: time-limited tokens, optional password, and the ability to revoke.
A good rule: sharing should never bypass the client boundary—it should only grant access to items that user could normally see.
Approval States, Feedback, and Asset Versioning
A client-approval feature lives or dies by clarity. If your team and your clients can’t tell what’s waiting on whom, approvals stall, and “approved” becomes debatable.
A simple, consistent status model
Start with a small set of states that everyone recognizes:
- Draft: internal work-in-progress
- In Review: shared with client (or internal reviewer) and awaiting feedback
- Changes Requested: feedback received; the team needs to respond
- Approved: accepted for use
Avoid adding a new status for every edge case. If you need more nuance, use tags (e.g., “legal review”) rather than exploding the workflow.
Versioning: never overwrite the past
Treat each upload as a new immutable version. Don’t replace files in place—create v1, v2, v3… tied to the same asset.
This supports clean conversations (“Please update v3”) and prevents accidental loss. In your UI, make the current version obvious, while still allowing reviewers to open prior versions for comparison.
Structured feedback that’s easy to act on
Free-form comments alone are messy. Add structure:
- Checklist items for required fixes (each can be marked done)
- Required changes vs. “nice-to-have” suggestions
- @mentions to route work to the right person
If you support timecodes (video) or page/region pins (PDF/images), feedback becomes dramatically more actionable.
Approval metadata and what happens next
When someone approves, record:
- Approver identity (user + role)
- Timestamp
- Approved version ID
After approval, define the rules: typically lock edits on the approved version, but allow creating a minor revision as a new version (which resets status to In Review). This keeps approvals defensible without blocking legitimate last-minute tweaks.
Asset Management: Uploads, Previews, and Storage
Creative approvals live or die on how easily people can access the right file at the right time. Asset management is where many campaign apps quietly become frustrating—slow downloads, confusing file names, and endless “which version is final?” loops.
Store files and metadata separately
A clean pattern is: object storage for the actual files (fast, scalable, inexpensive) and a database for metadata (searchable and structured).
Your database should track things like: asset name, type, campaign, current version, who uploaded it, timestamps, approval state, and preview URLs. The storage layer holds the binary file and optionally derived items like thumbnails.
Support the formats agencies actually use
Aim for a small set that covers most workflows:
- Images (JPG/PNG/WebP)
- PDFs (brand guidelines, print proofs)
- Video (either uploads if you support it, or links to Vimeo/YouTube/Frame.io-style hosting)
- Copy drafts (either as text fields, or simple documents with comments)
Be explicit in the UI about what’s uploadable vs. link-only. That reduces failed uploads and support tickets.
Previews and thumbnails (to avoid unnecessary downloads)
Previews make review faster and more client-friendly. Generate:
- Image thumbnails and a larger preview size
- PDF first-page thumbnails + an in-browser viewer
- Video poster frames (or embed when a link is provided)
This lets stakeholders skim a dashboard of deliverables without pulling down full-resolution files.
Safe uploads: limits, validation, and scanning
Define file limits early (max size, max count per campaign, supported extensions). Validate both file type and content (don’t trust extensions). If you work with enterprise clients or accept large files, consider virus/malware scanning as part of the upload pipeline.
Retention and deletion rules
Approvals often need traceability. Decide what “delete” means:
- Soft delete for day-to-day cleanup (recoverable, still auditable)
- Permanent delete for legal requests and storage control
Pair this with retention policies (e.g., keep assets for 12–24 months after campaign end) so storage costs don’t grow without a plan.
Architecture Overview: Frontend, Backend, and Services
A campaign app with client approvals doesn’t need exotic infrastructure. It needs clear boundaries: a friendly interface for humans, an API that enforces rules, storage for files and data, and background workers to handle time-based work like reminders.
Pick a stack your team can ship
Start with what your team can build and operate confidently. If you already know React + Node, or Rails, or Django, that’s usually the right choice for v1. Hosting preferences matter too: if you want “push to deploy” simplicity, pick a platform that supports your stack well and makes logs, scaling, and secrets straightforward.
If you want to move faster without committing to a heavy build-from-scratch cycle, a vibe-coding platform like Koder.ai can help you prototype and iterate on the workflow (campaigns, assets, approvals, roles) through a chat-driven interface—then export the source code when you’re ready to take ownership.
The core layers (the minimum you need)
Frontend (web app): Dashboards, campaign timelines, and review screens. It talks to the API and handles real-time UX details (loading states, upload progress, comment threads).
Backend API: The source of truth for business rules—who can approve, when an asset is locked, what state transitions are allowed. Keep it boring and predictable.
Database: Stores campaigns, tasks, approvals, comments, and audit events.
File storage + previewing: Store uploads in object storage (e.g., S3-compatible). Generate thumbnails/previews so clients can review without downloading huge files.
Background jobs: Anything that shouldn’t block the user: sending emails, generating previews, scheduled reminders, nightly reports.
Monolith vs. services (keep v1 simple)
For most agencies, a modular monolith is ideal: one backend codebase with well-separated modules (assets, approvals, notifications). You can still add services where they truly help (like a dedicated worker process for jobs) without splitting into many deploys.
Notifications and the job queue
Treat notifications as a first-class feature: in-app + email, with opt-outs and clear threading. A job queue (BullMQ, Sidekiq, Celery, etc.) lets you send reminders reliably, retry failures, and avoid slowing down uploads and approvals.
Environments: dev, staging, production
Plan three environments from the start:
- Dev: fast iteration, seeded sample campaigns.
- Staging: mirrors production settings for safe testing with internal users.
- Production: hardened config, backups, monitoring.
If you want to dive deeper into the data side next, continue with /blog/data-model-and-database-design.
Data Model and Database Design
A clean data model is what keeps your campaign app feeling simple even as it grows. The goal is to make the common screens—campaign lists, asset queues, approval pages—fast and predictable, while still capturing the history you’ll need later.
Core tables (the minimum you’ll thank yourself for)
Start with a small set of tables that match how agencies actually work:
- organizations: one row per agency (your tenant)
- users: internal team members, tied to an organization
- clients: client companies under an organization
- campaigns: work containers, owned by a client
- assets: files or links to creative, owned by a campaign
- approvals: the current approval state for an asset (or asset version)
Keep IDs consistent (UUIDs or numeric IDs—either is fine). The important part is that every child record (clients, campaigns, assets) carries an organization_id so you can enforce data isolation.
Audit + activity: capture the story, not just the status
Statuses alone don’t explain what happened. Add tables like:
- comments: threaded feedback on assets (with author and timestamps)
- events (or activity): “asset uploaded”, “review requested”, “approved”, “changes requested”
- status_changes: a focused log if you need to report on cycle time
This makes audit trails and accountability straightforward without bloating your core tables.
Indexing for real-world lists
Most screens filter by client, status, and due date. Add indexes such as:
- (organization_id, client_id)
- (organization_id, status)
- (organization_id, due_date)
Also consider a compound index for “what needs review now,” e.g. (organization_id, status, updated_at).
Migrations and seed data for templates
Treat your schema like product code: use migrations for every change. Seed a few campaign templates (default stages, sample statuses, standard approval steps) so new agencies can start quickly and your test environments have realistic data.
Authentication, Invitations, and Security Basics
A client-approval app lives or dies on trust: clients need a simple login, and your team needs confidence that only the right people can see the right work. Start with the smallest set of auth features that still feel agency-ready, then expand.
Pick the right sign-in method
If your users are mostly clients who log in occasionally, email + password is usually the smoothest path. For larger organizations (or enterprise clients), consider SSO (Google/Microsoft) so they can use existing company accounts. You can support both later—just avoid making SSO mandatory unless your audience expects it.
Invitations that don’t slow down work
Invites should be fast, role-aware, and forgiving:
- Invite teammates and clients by email, assign a role during the invite
- Allow resending invites and changing roles before acceptance
- Put invited users into a “pending” state until they verify their email
A good pattern is a magic link to set a password, so new users don’t have to remember anything up front.
Secure sessions and password recovery
Use secure session handling (short-lived access tokens, rotating refresh tokens, httpOnly cookies where possible). Add a standard password reset flow with expiring, single-use tokens and clear confirmation screens.
Authorization on every request
Authentication answers “who are you?” Authorization answers “what can you do?” Protect every endpoint with permission checks—especially for campaign assets, comments, and approvals. Don’t rely on hiding UI elements alone.
Logging without collecting sensitive content
Keep audit-friendly logs (login attempts, invite acceptance, role changes, suspicious activity), but avoid storing secrets. Log identifiers, timestamps, IP/device hints, and outcomes—never raw passwords, full file contents, or private client notes.
Notifications, Reminders, and Client-Friendly Updates
Notifications are where campaign apps either feel helpful—or exhausting. The goal is simple: keep work moving without turning every comment into an inbox fire.
Define the events that matter
Start with a small, high-signal set of triggers and keep them consistent across email and in-app:
- New review request (a client is asked to approve a specific asset/version)
- New comment or mention (especially when someone is @mentioned)
- Approval or rejection (status changes that unblock next steps)
- Due date reminders (approvals due soon, overdue items)
Make each notification include the “what” and the next action with a direct link to the right view (for example, an asset review page or the client inbox).
Let users choose channels and frequency
Different roles want different levels of detail. Give control at the user level:
- Channels: email, in-app (and optionally Slack later)
- Frequency: real-time, daily digest, or “only when assigned/mentioned”
Use smart defaults: clients typically want fewer emails than internal teams, and they usually only care about items awaiting their decision.
Prevent noise with batching and smart rules
Batch similar updates (e.g., “3 new comments on Homepage Banner”) instead of sending one email per comment. Add guardrails:
- Don’t notify the person who performed the action.
- Collapse rapid-fire edits/comments into a short time window.
- Escalate only when needed (e.g., overdue reminders).
Build a client-friendly approval inbox
A dedicated Approval Inbox page reduces back-and-forth by showing only what the client needs to do now: items “Waiting for you,” due dates, and a one-click path into the correct review screen. Keep it clean and accessible, and link to it from every review email (e.g., /approvals).
Track delivery and failures
Email isn’t guaranteed. Store delivery status (sent, bounced, failed) and retry intelligently. If an email fails, surface it to admins in an activity view and fall back to in-app notifications so the workflow doesn’t stall quietly.
Audit Trails, Activity Feeds, and Accountability
When clients approve creative, they’re not just clicking a button—they’re taking responsibility for a decision. Your app should make that decision trail easy to find, easy to understand, and hard to dispute later.
Activity feed: the “story” of the campaign
Implement an activity feed at two levels:
- Per campaign: a chronological log of major events (brief created, assets added, client invited, milestones reached).
- Per asset: the detailed review history (new version uploaded, comments added, approval requested, approved/rejected).
Keep entries readable for non-technical users with a consistent format: Who did what, when, and where. For example: “Jordan (Agency) uploaded Homepage Hero v3 — Dec 12, 2:14 PM” and “Sam (Client) approved Homepage Hero v3 — Dec 13, 9:03 AM.”
Audit trail: what you must capture
For accountability, store an audit trail for:
- Approvals and rejections (including the approval state and any optional message)
- Edits to key fields (due dates, brief changes, renames)
- File uploads and versioning events (new version created, version restored)
- Membership actions (invite sent, role changed, access revoked)
A practical rule: if an event affects deliverables, timing, or client sign-off, it belongs in the audit trail.
Editable vs. immutable: set clear boundaries
Audit events should generally be immutable. If something needs correction, record a new event (e.g., “Approval re-opened by Agency”) rather than rewriting history. Allow edits for display-only fields (like a typo in an asset title) but still log that the edit happened.
Exporting a client handoff summary
Support exporting a simple summary (PDF or CSV) for handoff: final approved versions, approval timestamps, key feedback, and links to assets. This is especially useful at project closeout or when a client changes teams.
Done well, this section reduces confusion, protects both parties, and makes your campaign management software feel trustworthy—not complicated.
Reporting, Integrations, and a Practical Roadmap
Reporting and integrations can easily balloon the scope of a campaign approval app. The trick is to ship the smallest set that helps teams run work day-to-day, then expand based on real usage.
Start with reporting that answers “What needs attention?”
Begin with a simple reporting view (or dashboard widgets) that supports weekly status checks and daily triage:
- Approvals pending: items waiting on a client or internal reviewer
- Cycle time: average time from “ready for review” to “approved” (and by stage)
- Overdue items: approvals and tasks past their due date, with the current owner
Then add lightweight campaign health indicators that are easy to understand at a glance:
- On track: milestones and approvals are within expected timelines
- At risk: upcoming due dates + slow cycle time trends
- Blocked: missing inputs, unresolved feedback, or waiting on a specific approver
These don’t need perfect forecasting—just clear signals and consistent rules.
Plan integrations carefully (and earn them)
Integrations should reduce manual follow-up, not create new failure modes. Prioritize based on your users’ daily habits:
- Email for invites, review requests, and decision confirmations
- Slack for quick notifications and reminders (keep messages actionable)
- Calendar for key review milestones (optional, but useful for larger campaigns)
- Storage (e.g., cloud drives) if teams already store source files elsewhere
- CRM only if campaign data must align with accounts/opportunities
API and webhooks: future-proof without overbuilding
Even if you don’t ship a public API immediately, define a clear extension strategy:
- A small set of webhooks (approval decided, comment added, asset version created)
- A stable event schema and retry behavior
- A versioned API plan for later (start internal, document as you go)
A practical roadmap
Phase 1: core dashboards + pending/overdue lists.
Phase 2: health indicators + cycle-time trends.
Phase 3: 1–2 high-impact integrations (usually email + Slack).
Phase 4: webhooks and a partner-ready API.
If you’re considering packaging tiers for reporting and integrations, keep it simple and transparent (see /pricing). If you want a faster path to an initial MVP, Koder.ai can also be useful here: you can iterate on the approval workflow in “planning mode,” deploy a hosted build for feedback, and roll back via snapshots as you refine requirements.
For deeper workflow patterns, you can also link related guidance from /blog.
FAQ
What problem should a campaign approval web app solve first?
Start by defining the core problem: approvals and feedback are scattered across email/chat/files. Your v1 should centralize briefs, assets, feedback, and sign-off so every stakeholder can quickly answer:
- What’s the latest version?
- Who needs to act next?
- When is it due?
Use measurable outcomes like approval turnaround time and revision cycles to keep scope grounded.
Who are the primary users of an agency campaign approval app?
Design around four common groups:
- Account/project managers: timelines, ownership, fewer follow-ups
- Creatives: focused feedback, fewer contradictory notes, easy revision uploads
- Clients: simple review UX, confidence they’re seeing the latest version
- Approvers (legal/brand/executives): context, risk visibility, auditable records
If you optimize only for internal users, client adoption (and approval speed) usually suffers.
Which success metrics matter most for client approvals?
Pick a small set of success metrics tied to real workflow friction:
- Approval turnaround time (request → final approval)
- Revision cycles per asset
- On-time delivery rate for milestones
- Client satisfaction signals (e.g., fewer “where are we at?” messages)
Instrument these early so you can validate improvements after launching v1.
What should be included in v1 vs. saved for later?
A practical v1 includes:
- Campaign timeline (or phase-based plan)
- Asset upload + preview
- Comment threads tied to specific versions
- Clear approve / request changes step with due dates
Defer advanced reporting, deep integrations, automation rules, and custom approval paths until you see consistent usage.
How do you map the campaign and approval workflow into app “objects”?
Model the workflow with a few core objects:
- Clients → Campaigns → Projects/Deliverables → Tasks → Assets → Approvals
Then define an approval lifecycle (e.g., Draft → Internal review → Client review → Approved) where each state has an operational meaning (who can move it, what must be true, what happens next).
What’s the best way to capture feedback so it reduces rework?
Always tie feedback to an asset version to avoid “which file?” disputes. Good options include:
- Threaded comments with @mentions
- Visual annotations (pins on images / frames)
- Structured change requests (e.g., must fix vs nice to have)
Structure reduces rework by making feedback actionable and accountable.
Which screens and navigation patterns make approvals move faster?
Keep navigation consistent around a simple hierarchy: Client → Campaign → Deliverables (assets). Key “daily driver” screens are:
- Dashboard (what needs attention today)
- Campaign timeline (dependencies and progress)
- Asset review view (large preview, clear next action)
- Inbox (mentions, requests, new feedback)
Add filters that match real questions: client, due date, status, assignee.
How should roles and permissions be designed for agencies and clients?
Start simple with roles most agencies need:
- Agency admin
- Account manager
- Contributor
- Client
- Approver
Then define permissions per object (campaign, asset, comment, approval) such as view/comment/upload/approve/edit/delete. Use “least privilege,” and enforce checks on the backend—not just by hiding UI.
How should asset versioning and approval records work?
Treat each upload as a new, immutable version (v1, v2, v3…). Don’t overwrite files in place.
Record approval metadata:
- approver identity
- timestamp
- approved version ID
Typically, lock the approved version but allow a new version to be created (which resets status back to In Review) when changes are needed.
What architecture is “enough” for v1 without overengineering?
A straightforward architecture is:
- Frontend web app (dashboards, review UI)
- Backend API (state transitions, permission enforcement)
- Database (campaigns, assets, approvals, comments, events)
- Object storage for files + generated previews
- Background jobs (emails, reminders, preview generation)
For v1, a modular monolith with a job worker is usually easier to ship and operate than many services.