

Build a Web App to Track Business Assumptions Over Time
Learn how to design and build a web app that records business assumptions, links evidence, tracks changes over time, and prompts teams to review and validate decisions.
What Problem the App Solves (and Who Uses It)
A business assumption is a belief your team is acting on before it’s fully proven. It can be about:
- Market: “This segment is growing fast enough to support our product.”
- Customer: “Users will switch from spreadsheets if setup takes under 10 minutes.”
- Pricing: “Teams will pay $49/month for this feature set.”
- Operations: “Support can handle onboarding with one person.”
- Risks: “This approach won’t trigger compliance concerns.”
These assumptions show up everywhere—pitch decks, roadmap discussions, sales calls, hallway conversations—and then quietly disappear.
Why teams lose assumptions
Most teams don’t lose assumptions because they don’t care. They lose them because documentation drifts, people change roles, and knowledge becomes tribal. The “latest truth” ends up split across a doc, a Slack thread, a few tickets, and someone’s memory.
When that happens, teams repeat the same debates, re-run the same experiments, or make decisions without realizing what’s still unproven.
Outcomes to aim for
A simple assumption-tracking app gives you:
- Clarity: what you believe, what’s proven, and what’s pending
- Accountability: who owns each assumption and when it was last reviewed
- Faster learning: tighter loops between hypotheses, experiments, and evidence
- Fewer re-litigations: a shared record that reduces circular conversations
Who uses it (and how big it needs to be)
Product managers, founders, growth teams, researchers, and sales leaders benefit—anyone making bets. Start with a lightweight “assumption log” that’s easy to keep current, then expand features only when usage demands it.
Define the Core Data Model
Before you design screens or pick a tech stack, decide what “things” your app will store. A clear data model keeps the product consistent and makes reporting possible later.
Core objects (keep it small)
Start with five objects that map to how teams validate ideas:
- Assumption: the claim you believe is true (until proven otherwise)
- Evidence: links, notes, files, or metrics that support or weaken an assumption
- Experiment: a structured test (interview, survey, A/B test, prototype) that generates evidence
- Review: a periodic checkpoint where someone confirms the latest status/confidence
- Comment: lightweight discussion tied to an assumption (and optionally to evidence/experiments)
Recommended Assumption fields
An Assumption record should be fast to create, but rich enough to be actionable:
- Statement (required): a single, testable sentence
- Category (required): e.g., customer, problem, pricing, channel, feasibility
- Owner (required): who will move it forward
- Confidence (required): low/medium/high (or 1–5)
- Status (required): draft, active, validated, invalidated, archived
Add timestamps so the app can drive review workflows:
- Created at, Last updated at (system-generated)
- Last reviewed at, Next review date (editable or derived)
Relationships
Model the flow of validation:
- One Assumption → many Evidence items
- One Assumption → many Experiments
- One Assumption → many Reviews and Comments
Required vs. optional (reduce friction)
Make only the essentials required: statement, category, owner, confidence, status. Let details like tags, impact, and links be optional so people can log assumptions quickly—and improve them later as evidence arrives.
Set Status, Confidence, and Review Rules
If your assumption log is going to stay useful, every entry needs clear meaning at a glance: where it sits in its lifecycle, how strongly you believe it, and when it should be checked again. These rules also prevent teams from quietly treating guesses as facts.
A simple, consistent lifecycle
Use one status flow for every assumption:
Draft → Active → Validated / Invalidated → Archived
- Draft: captured, but not yet agreed as something worth tracking.
- Active: the team is relying on it (or might rely on it) and intends to test or monitor it.
- Validated: evidence meets your minimum standard (defined below).
- Invalidated: evidence clearly contradicts it; keep it for learning.
- Archived: no longer relevant (product changed, market moved, strategy shifted).
Confidence scoring (1–5)
Pick a 1–5 scale and define it in plain language:
- Speculation (no evidence)
- Weak signal (one data point)
- Some support (multiple signals, still gaps)
- Strong support (consistent evidence, low doubt)
- Very strong (repeatable results, stable over time)
Make “confidence” about the strength of evidence—not how much someone wants it to be true.
Decision impact: what to validate first
Add Decision impact: Low / Medium / High. High-impact assumptions should be tested earlier because they shape pricing, positioning, go-to-market, or major build decisions.
Define what “validated” means
Write explicit criteria per assumption: what result would count, and what minimum evidence is required (e.g., 30+ survey responses, 10+ sales calls with a consistent pattern, A/B test with a predefined success metric, 3 weeks of retention data).
Revisit and review rules
Set automatic review triggers:
- Review High-impact assumptions every 2–4 weeks
- Review when core metrics shift (conversion, churn, CAC)
- Review after major product or market changes
This keeps “validated” from becoming “forever true.”
Design the User Experience and Key Screens
An assumptions-tracking app succeeds when it feels faster than a spreadsheet. Design around the few actions people repeat every week: add an assumption, update what you believe, attach what you learned, and set the next review date.
Primary flows (keep them one-click)
Aim for a tight loop:
- Create assumption: start from a template (Problem, Customer, Pricing, Channel) with sensible defaults.
- Update status: quickly move between Draft → Active → Validated/Invalidated, with an optional note.
- Attach evidence: drag-and-drop a file or paste a link, then tag it to one or more assumptions.
- Schedule review: set “next review” right after any change, so nothing goes stale.
Core screens you actually need
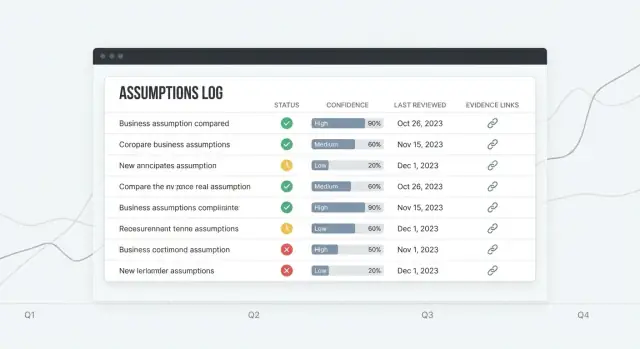
Assumptions list should be the home base: a readable table with clear columns (Status, Confidence, Owner, Last reviewed, Next review). Add a prominent “Quick add” row so new items don’t require a full form.
Assumption detail is where decisions happen: a short summary at the top, then a timeline of updates (status changes, confidence changes, comments) and a dedicated Evidence panel.
Evidence library helps reuse learning: search by tag, source, and date, then link evidence to multiple assumptions.
Dashboard should answer: “What needs attention?” Show upcoming reviews, recently changed assumptions, and high-impact items with low confidence.
Filtering, search, and clutter control
Make filters persistent and fast: category, owner, status, confidence, last reviewed date. Reduce clutter with templates, default values, and progressive disclosure (advanced fields hidden until needed).
Accessibility basics
Use high-contrast text, clear labels, and keyboard-friendly controls. Tables should support row focus, sortable headers, and readable spacing—especially for status and confidence badges.
Pick a Practical Tech Stack
An assumptions-tracking app is mostly forms, filtering, search, and an audit trail. That’s good news: you can ship value with a simple, boring stack and spend your energy on the workflow (review rules, evidence, decisions) instead of infrastructure.
A straightforward stack that works
A common, practical setup is:
- Frontend: React, often via Next.js (fast UI, routing, server rendering when useful)
- Backend: Node.js (Express/Nest) or Python (FastAPI/Django)
- Database: Postgres
If your team already knows one of these, pick that—consistency beats novelty.
If you want to prototype quickly without wiring everything by hand, a vibe-coding platform like Koder.ai can get you to a working internal tool fast: describe your data model and screens in chat, iterate in Planning Mode, and generate a React UI with a production-ready backend (Go + PostgreSQL) you can later export as source code if you decide to maintain it yourself.
Why Postgres is a great fit
Postgres handles the “connected” nature of assumption management well: assumptions belong to workspaces, have owners, link to evidence, and relate to experiments. A relational database keeps these links reliable.
It’s also index-friendly for the queries you’ll run all the time (by status, confidence, due for review, tag, owner), and it’s audit-friendly when you add version history and change logs. You can store change events in a separate table and keep them queryable for reporting.
Keep hosting and ops light
Aim for managed services:
- Managed Postgres (automatic backups, upgrades, read replicas later)
- App hosting for Next.js and your API (or a single full-stack Next.js app)
This reduces the risk that “keeping it running” consumes your week.
If you don’t want to run the infra early on, Koder.ai can also handle deployment and hosting, plus conveniences like custom domains and snapshots/rollback while you refine workflows with real users.
API approach: REST first
Start with REST endpoints for CRUD, search, and activity feeds. It’s easy to debug and document. Consider GraphQL only if you truly need complex, client-driven queries across many related objects.
Use clear environments
Plan for three environments from day one:
- Local (developer machines)
- Staging (safe place to test imports, notifications, and permissions)
- Production (real data, stricter access, monitoring)
This setup supports business assumptions tracking without overengineering your assumption log web app.
Implement Authentication, Roles, and Workspaces
If your assumption log is shared, access control needs to be boring and predictable. People should know exactly who can see, edit, or approve changes—without slowing the team down.
Authentication: start simple, add SSO when needed
For most teams, email + password is enough to ship and learn. Add Google or Microsoft SSO when you expect larger organizations, strict IT policies, or frequent onboarding/offboarding. If you support both, let admins choose per workspace.
Keep the login surface minimal: sign up, sign in, reset password, and (optionally) enforced MFA later.
Roles and permissions (Admin / Editor / Viewer)
Define roles once and make them consistent across the app:
- Admin: manage workspace settings, members, roles, and integrations; can delete records (or request deletion).
- Editor: create and edit assumptions, attach evidence, log experiments, and change status/confidence.
- Viewer: read-only access to assumptions, evidence, experiment results, and dashboards.
Make permission checks server-side (not just in the UI). If you add “approval” later, treat it as a permission, not a new role.
Workspaces: separate teams, products, and clients
A workspace is the boundary for data and membership. Each assumption, evidence item, and experiment belongs to exactly one workspace, so agencies, multi-product companies, or startups with multiple initiatives can stay organized and avoid accidental sharing.
Invites, offboarding, and minimum audit
Use email-based invites with an expiration window. On offboarding, remove access but keep history intact: past edits should still show the original actor.
At minimum, store an audit trail: who changed what and when (user ID, timestamp, object, and action). This supports trust, accountability, and easier debugging when decisions get questioned later.
Build CRUD with Version History and Change Logs
CRUD is where your assumption log web app stops being a document and starts being a system. The goal isn’t just creating and editing assumptions—it’s making every change understandable and reversible.
CRUD endpoints and UI actions
At a minimum, support these actions for assumptions and evidence:
- Create, view, edit, archive (soft-delete), and restore assumptions
- Attach evidence items (links, files, notes) and edit their metadata
- Change status (e.g., Draft → Active → Validated/Invalidated)
In the UI, keep these actions close to the assumption detail page: a clear “Edit,” a dedicated “Change status,” and an “Archive” action that’s intentionally harder to click.
Versioning: revisions vs. append-only logs
You have two practical strategies:
-
Store full revisions (a snapshot per save). This makes “restore previous” straightforward.
-
Append-only change log (event stream). Each edit writes an event like “statement changed,” “confidence changed,” “evidence attached.” This is great for auditing but requires more work to rebuild older states.
Many teams do a hybrid: snapshots for major edits + events for small actions.
Make history readable (not just stored)
Provide a timeline on each assumption:
- Who changed what, when
- A diff view for text fields (statement, hypothesis, success criteria)
- A Restore previous button on prior versions (with a confirmation)
Context: comments and decision notes
Require a short “why” note on meaningful edits (status/confidence changes, archiving). Treat it as a lightweight decision log: what changed, what evidence triggered it, and what you’ll do next.
Prevent accidental edits
Add confirmations for destructive actions:
- Status changes that close an assumption
- Archiving
- Restoring an old version (warn that it creates a new revision)
This keeps your assumption version history trustworthy—even when people move fast.
Attach Evidence and Track Experiments
Assumptions get dangerous when they sound “true” but aren’t backed by anything you can point to. Your app should let teams attach evidence and run lightweight experiments so every claim has a trail.
Evidence: what to store (without making a mess)
Support common evidence types: interview notes, survey results, product or revenue metrics, documents (PDFs, slide decks), and simple links (e.g., analytics dashboards, support tickets).
When someone attaches evidence, capture a small set of metadata so it stays usable months later:
- Source (customer name, dataset, tool, or internal doc owner)
- Date collected (and optionally date uploaded)
- Method (interview, usability test, A/B test, desk research, etc.)
- Quality / strength rating (more on this below)
To avoid duplicate uploads, model evidence as a separate entity and connect it to assumptions many-to-many: one interview note might support three assumptions, and one assumption might have ten pieces of evidence. Store the file once (or store only a link), then relate it where needed.
Experiment tracking: turn “we should test this” into a record
Add an “Experiment” object that’s easy to fill out:
- Hypothesis (what you expect and why)
- Method (what you’ll do)
- Key metric (the number you’ll watch)
- Result (what happened)
- Conclusion (keep, change, or drop the assumption)
Link experiments back to the assumptions they test, and optionally auto-attach generated evidence (charts, notes, metric snapshots).
Evidence strength: guidance that prevents false certainty
Use a simple rubric (e.g., Weak / Moderate / Strong) with tooltips:
- Weak: opinions, single anecdote, unverified link
- Moderate: multiple interviews, consistent survey signal, early metric trend
- Strong: repeated results across segments, clear metric impact, controlled experiment
The goal isn’t perfection—it’s making confidence explicit so decisions don’t rely on vibes.
Add Reminders and Review Workflows
Assumptions get stale quietly. A simple review workflow keeps your log useful by turning “we should revisit this” into a predictable habit.
Set a review cadence that matches risk
Tie review frequency to impact and confidence so you’re not treating every assumption the same.
- Weekly: high impact + low confidence (e.g., core pricing, main acquisition channel)
- Monthly: high impact + medium confidence, or medium impact + low confidence
- Quarterly (optional): low impact + high confidence
Store the next review date on the assumption, and recalculate it automatically when impact/confidence changes.
Reminders without becoming spam
Support both email and in-app notifications. Keep defaults conservative: one nudge when overdue, then a gentle follow-up.
Make notifications configurable per user and workspace:
- channel preferences (email/in-app)
- reminder frequency (daily/weekly)
- quiet hours / timezone
- opt-out for low-impact items
Digest views that drive action
Instead of sending people a long list, create focused digests:
- Needs review (overdue or due soon)
- High impact + low confidence (highest risk)
- Recent changes (assumptions edited, confidence dropped, evidence removed)
These should be first-class filters in the UI so the same logic powers both the dashboard and notifications.
Simple escalation rules
Escalation should be predictable and lightweight:
- Notify the owner when overdue.
- If still overdue after X days, notify the team lead (or workspace admin).
Log each reminder and escalation in the assumption’s activity history so teams can see what happened and when.
Create Dashboards and Reporting
Dashboards turn your assumption log into something teams actually check. The goal isn’t fancy analytics—it’s quick visibility into what’s risky, what’s stale, and what’s changing.
Dashboard KPIs that answer “Are we safe?”
Start with a small set of tiles that update automatically:
- Assumptions by status (Draft, Active, Validated, Invalidated, Archived)
- Confidence distribution (how many are 1–5, or Low/Medium/High)
- Overdue reviews (count + a direct link to the overdue list)
Pair each KPI with a click-through view so people can act, not just observe.
Trend charts (useful, but honest)
A simple line chart showing validations vs. invalidations over time helps teams spot whether learning is accelerating or stalling. Keep the messaging cautious:
- Treat trends as signals, not proof of performance.
- Show the sample size (e.g., “8 outcomes this month”) so a single week doesn’t look like a breakthrough.
Saved views for different stakeholders
Different roles ask different questions. Provide saved filters like:
- Product: assumptions tied to active discovery, grouped by product area
- Sales/CS: assumptions about pricing, objections, target segments
- Leadership: highest impact items, top risks, review health
Saved views should be shareable via a stable URL (e.g., /assumptions?view=leadership-risk).
Highlight risk: high impact + weak evidence
Create a “Risk Radar” table that surfaces items where Impact is High but Evidence strength is Low (or confidence is low). This becomes your agenda for planning and pre-mortems.
Exportable summaries for meetings
Make reporting portable:
- One-click export of a view to PDF/CSV
- A “Weekly Assumption Summary” that lists: top changes, new invalidations, and overdue reviews
This keeps the app present in planning without forcing everyone to log in mid-meeting.
Support Imports, Exports, and Integrations
A tracking app only works if it fits into how teams already operate. Imports and exports help you start quickly and keep ownership of your data, while lightweight integrations reduce manual copying—without turning your MVP into an integration platform.
Exports that people actually use
Start with CSV export for three tables: assumptions, evidence/experiments, and change logs. Keep the columns predictable (IDs, statement, status, confidence, tags, owner, last reviewed, timestamps).
Add small UX touches:
- Export current view (filters applied) and full workspace
- Let users choose whether to include archived items
- Include a stable Assumption ID so spreadsheets can be merged later
Importing from spreadsheets (without the pain)
Most teams begin with a messy Google Sheet. Provide an import flow that supports:
- Upload CSV
- Column mapping (e.g., “Hypothesis” → Statement, “Risk” → Impact)
- Validation with clear errors (missing required fields, unknown statuses, invalid dates)
- A preview showing how many assumptions will be created vs. updated
Treat import as a first-class feature: it’s often the fastest way to get adoption. Document the expected format and rules in /help/assumptions.
Optional integrations: simple, not endless
Keep integrations optional so the core app stays simple. Two practical patterns:
- Webhooks: fire events like
assumption.created,status.changed,review.overdue. - Link-out references: store URLs for Jira tickets, Notion docs, or research folders as “Related links” on an assumption.
For immediate value, support a basic Slack alert integration (via webhook URL) that posts when a high-impact assumption changes status or when reviews are overdue. This gives teams awareness without forcing them to change tools.
Cover Security, Privacy, and Data Protection Basics
Security and privacy are product features for an assumption log. People will paste links, notes from calls, and internal decisions—so design for “safe by default,” even in an early version.
Data protection basics
Use TLS everywhere (HTTPS only). Redirect HTTP to HTTPS and set secure cookies (HttpOnly, Secure, SameSite).
Store passwords using a modern hashing algorithm like Argon2id (preferred) or bcrypt with a strong cost factor. Never store plaintext passwords, and don’t log authentication tokens.
Apply least-privilege access throughout:
- Separate roles (admin, editor, viewer) and check permissions on every write action.
- Use scoped API keys for integrations and let users revoke them.
- Restrict database credentials so the app cannot access tables it doesn’t need.
Row-level access rules (workspaces)
Most data leaks in multi-tenant apps are authorization bugs. Make workspace isolation a first-class rule:
- Every record (assumption, evidence, experiment, comment) must include
workspace_id. - Enforce access at the database layer with row-level security (RLS) or equivalent policies, not only in application code.
- In tests, create two workspaces and verify that a user from workspace A cannot read, search, export, or guess IDs from workspace B.
Backups and retention (what you will implement)
Define a simple plan you can execute:
- Automated daily database backups stored in a separate location.
- A retention policy (for example: keep 30 days of daily backups and 12 months of monthly backups).
- A quarterly restore drill: restore to a staging environment and validate key flows.
Logging and handling sensitive data
Be deliberate about what gets stored. Avoid placing secrets in evidence notes (API keys, passwords, private links). If users might paste them anyway, add warnings and consider automatic redaction for common patterns.
Keep logs minimal: don’t log full request bodies for endpoints that accept notes or attachments. If you need diagnostics, log metadata (workspace ID, record ID, error codes) instead.
Privacy when storing interview notes
Interview notes can include personal data. Provide a way to:
- Mark fields as “contains personal data” and restrict who can view them.
- Delete or anonymize notes on request.
- Document what you store and why in a short privacy note (link from
/settingsor/help).
Launch, Monitor, and Plan the Next Iteration
Shipping an assumptions app is less about “done” and more about getting it into real workflows safely, then learning from usage.
A practical deployment checklist
Before you open it to users, run a small, repeatable checklist:
- Apply database migrations (and verify they’re reversible).
- Load seed data (statuses, confidence levels, review cadences).
- Create the first admin account and a default workspace.
- Confirm email/notification settings for review reminders.
- Enable basic backups and verify restore once.
If you have a staging environment, practice the release there first—especially anything that touches version history and change logs.
Monitor errors and performance (lightweight)
Start simple: you want visibility without weeks of setup.
Use an error tracker (e.g., Sentry/Rollbar) to capture crashes, failed API calls, and background job errors. Add basic performance monitoring (APM or server metrics) to spot slow pages like dashboards and reports.
Testing that protects core rules
Focus tests where mistakes are costly:
- Unit tests for status transitions, confidence rules, and review scheduling.
- Integration tests for the main flows: create assumption → attach evidence → log experiment → change status → see audit trail.
Onboarding that makes the app “click”
Provide templates and sample assumptions so new users aren’t staring at an empty screen. A short guided tour (3–5 steps) should highlight: where to add evidence, how reviews work, and how to read the decision log.
Plan the next iteration
After launch, prioritize enhancements based on real behavior:
- Scoring models (impact × uncertainty, or custom confidence formulas).
- Approval flows for high-risk changes.
- Optional AI-assisted summaries of evidence and experiment outcomes.
If you’re iterating rapidly, consider tooling that reduces turnaround time between “we should add this workflow” and “it’s live for users.” For example, teams often use Koder.ai to draft new screens and backend changes from a chat brief, then rely on snapshots and rollback to ship experiments safely—and export the code once the product direction is clear.
FAQ
What is a business assumption in the context of an assumption-tracking app?
Track a single, testable belief your team is acting on before it’s fully proven (e.g., market demand, pricing willingness, onboarding feasibility). The point is to make it explicit, owned, and reviewable so guesses don’t quietly turn into “facts.”
Why do teams lose track of assumptions (and why does an app help)?
Because assumptions scatter across docs, tickets, and chat, then drift as people change roles. A dedicated log centralizes the “latest truth,” prevents repeated debates/experiments, and makes what’s still unproven visible.
Who should use an assumption-tracking app, and how big should the MVP be?
Start with a lightweight “assumption log” used weekly by product, founders, growth, research, or sales leaders.
Keep the MVP small:
- Capture assumptions fast
- Attach evidence/experiments
- Schedule reviews
- Show what needs attention (dashboard)
Expand only when real usage demands it.
What core data model should I implement first?
A practical core is five objects:
- Assumption (the claim)
- Evidence (links/files/notes/metrics)
- Experiment (structured test that creates evidence)
- Review (periodic checkpoint)
- Comment (light discussion)
This model supports traceability without overcomplicating early builds.
Which fields should be required vs. optional on an Assumption?
Require only what makes an assumption actionable:
- Statement, Category, Owner, Confidence, Status
Make everything else optional (tags, impact, links) to reduce friction. Add timestamps like last reviewed and next review to drive reminders and workflow.
How should I define status, confidence, and impact so the team uses them consistently?
Use one consistent flow and define it clearly:
- Draft → Active → Validated / Invalidated / Archived
Pair it with a confidence scale (e.g., 1–5) tied to evidence strength, not enthusiasm. Add Decision impact (Low/Medium/High) to prioritize what to test first.
What does “validated” mean, and how do we set evidence criteria?
Write explicit validation criteria per assumption before testing.
Examples of minimum evidence:
- 30+ survey responses with a consistent signal
- 10+ sales calls showing the same pattern
- An A/B test with a predefined success metric
- 3 weeks of retention data meeting a target
This prevents “validated” from meaning “someone feels good about it.”
What screens and user flows are essential for a first version?
Include:
- Assumptions list (table + quick add)
- Assumption detail (summary + timeline + evidence panel)
- Evidence library (searchable, reusable)
- Dashboard (due reviews, high-impact/low-confidence)
Optimize for weekly actions: add, update status/confidence, attach evidence, schedule next review.
What tech stack is practical for building this kind of app?
Use a boring, reliable stack:
- Frontend: React / Next.js
- Backend: Node.js (Express/Nest) or Python (FastAPI/Django)
- DB: Postgres
Postgres fits relational links (assumptions ↔ evidence/experiments) and supports audit trails and indexed queries (status, owner, due-for-review). Start with REST for CRUD and activity feeds.
How should I handle authentication, roles, and workspace security?
Implement the basics early:
- Auth: email/password first; add Google/Microsoft SSO later
- Roles: Admin / Editor / Viewer with server-side checks
- Workspaces: strict data boundary (every record has
workspace_id) - Audit trail: who changed what and when
If multi-tenant, enforce workspace isolation with database policies (e.g., RLS) or equivalent safeguards.