Apr 09, 2025·8 min
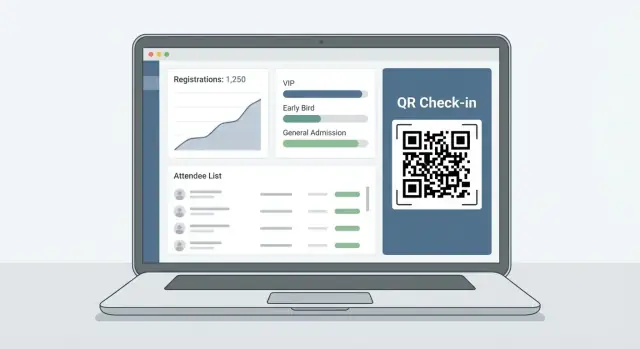
Build an Event Organizer Web App for Tickets and Attendees
A practical guide to plan, design, and ship a web app that helps event organizers manage registrations, ticket sales, attendees, emails, and check-in.
Clarify Goals, Users, and Scope
Before choosing features or a tech stack, get painfully clear on who you’re building for and what “success” looks like. This prevents a ticketing platform from turning into a collection of half-finished tools.
Define the users and the main job-to-be-done
Start by naming your primary customer, because each type optimizes for different outcomes:
- Solo organizers want speed: create an event, sell tickets, and not drown in support.
- Venues care about repeatable setups, capacity control, and fast on-site operations.
- Agencies need multi-event management, client access, and clean reporting.
Write the core job in one sentence, for example: “Help organizers sell tickets and get attendees checked in with minimal effort and errors.”
Map the core workflows (end-to-end)
List the “must work” paths that define the product:
Create event → set ticket types/pricing → publish → attendee registers → payment → ticket issued → check-in via QR → exports/reporting.
If any step is missing or fragile, the app feels incomplete even if it has lots of extra features.
Set success metrics you’ll actually track
Choose a few measurable outcomes tied to the workflows:
- Checkout conversion rate (registration → completed order)
- Average check-in time per attendee and failure rate (QR scan issues)
- Refund/transfer time (request → resolved)
- Support volume per event (and top reasons)
Decide MVP vs. v1
MVP should be “useful on day one”: event creation, ticket sales, confirmations, basic check-in, and simple exports. Save nicer-to-have items (discount rules, seating maps, complex tax logic) for v1 once you’ve validated demand.
Identify constraints early
Be explicit about budget, timeline, and team skills—they determine whether you build custom everything or lean on existing services. Also note compliance needs (tax invoices, GDPR/CCPA expectations, payment rules) so you don’t redesign later under pressure.
Core Features and User Stories
Before picking screens or databases, define what the app must let people do—and who “people” are. A good event management web app usually has a few distinct roles, each with different permissions and expectations.
Roles and permissions (who can do what)
Keep it simple at first, then expand:
- Organizer: creates events, publishes tickets, manages settings, can refund/cancel.
- Staff: views attendee lists, performs QR code check-in, limited edits.
- Finance: views orders, payouts, invoices/receipts, handles chargebacks and refunds.
- Attendee: registers, pays, receives ticket, manages their own order details.
A practical rule: if someone can change money-related fields or event visibility, that should be a separate permission.
Main pages to plan (the “happy path”)
Draft the core navigation early so features don’t become random endpoints:
- Event setup (name, venue/online details, dates/timezone, capacity, policies)
- Ticket builder (types, price, sales window, limits, promo codes if needed)
- Checkout + confirmation (registration form, payment, receipt, ticket delivery)
- Order details (status, payment, refund history, attendee assignments)
- Attendee list + check-in (search, filters, scan QR, check-in log)
- Organizer dashboard (sales summary, capacity, alerts, recent activity)
User stories with testable acceptance criteria
Write short stories that you can verify in one sitting:
- Organizer publishes tickets: Given an event is in draft, when I add a “General Admission” ticket with a price and sales dates, then it appears on the public registration page and stops selling after the end date.
- Attendee buys a ticket: When payment succeeds, then an order is created, a unique ticket/QR code is issued, and a confirmation email is sent within 2 minutes.
- Staff checks in attendee: When I scan a valid QR code, then the attendee is marked “checked in,” timestamped, and the same QR cannot be used again unless I have an override permission.
Edge cases you must support
Plan these early to avoid messy patches later: sold out, duplicate orders, partial refunds, chargebacks, canceled/rescheduled events, failed email delivery, offline check-in, and transfers/reassigning tickets.
Data you’ll need to store per workflow
At minimum: event status and capacity, ticket type rules (limits, windows), order/payment status, attendee identity fields, QR code/token, and an append-only check-in log (who checked in whom, when, and on which device). This “paper trail” becomes essential when disputes happen.
Data Model for Events, Tickets, Orders, and Attendees
A clear data model is the difference between a ticketing platform that’s easy to evolve and an event registration system that constantly needs workarounds. Start by defining the “things” you’ll store (events, ticket types, orders, attendees) and the relationships between them.
Event: the source of truth
An Event should cover scheduling, limits, and publishing:
- Basics: title, description, organizer_id
- Dates: start_at, end_at, timezone (store timestamps in UTC, display using the event timezone)
- Venue: venue_name, address, city, country (or a separate Venue table if reused)
- Capacity: total_capacity (and optionally per-ticket caps)
- Status: draft, published, canceled, ended
This structure supports common attendee management needs like hiding draft events, closing sales when capacity is reached, and showing correct local times.
Ticket types: what’s being sold
A TicketType defines the offer:
- name, description, price, currency
- quantity_available (and quantity_sold)
- sales_window: sales_start_at, sales_end_at
- taxes/fees: tax_rate (or tax_id), fee_flat/fee_percent, “fees_included” flag
- add-ons: model as separate TicketTypes or an AddOn table linked to TicketType
- discount codes: a DiscountCode table (code, type percent/fixed, amount, usage_limit, valid window) linked to Event and optionally to specific TicketTypes
Orders and payments: what happened financially
Split commerce into two layers:
- Order: order_number, event_id, buyer_email, subtotal, taxes, fees, total, order_status (pending/confirmed/canceled)
- Payment: provider (Stripe, etc.), provider_payment_id, payment_status (requires_action/paid/failed/refunded), amount, captured_at
Refunds work best as separate records (Refund table) so you can do partial refunds and keep a clear audit trail. Store receipt/invoice fields (billing_name, billing_address, vat_id) on the Order.
Attendees: who holds the tickets
An Attendee (or TicketInstance) should include:
- event_id, ticket_type_id, order_id
- attendee fields (name, email, custom form answers)
- ticket assignment + transfer: assigned_to_email, transfer_token, transferred_at
- check-in: check_in_state (not_checked_in/checked_in), checked_in_at, checked_in_by
- tags/notes for staff (helpful for VIPs, accessibility requests)
Imports/exports and operational fields
Plan for CSV exports early: keep consistent field names (order_number, ticket_type, attendee_name, checked_in_at) and include badge-printing fields.
If you expect integrations later, add lightweight “webhook events” or an outbox table so your admin panel for events can safely trigger exports or API hooks without missing updates.
Tech Stack and Architecture Decisions
The best “stack” is the one your team can build, ship, and support without drama. For an event management web app, speed of iteration matters more than theoretical perfection—especially before you know your real traffic patterns.
Start simple: monolith first, split later
A single codebase (monolith) is usually the right starting point. It keeps deployment, debugging, and data access straightforward—important when you’re still validating features like ticket types, promo codes, and organizer workflows.
Split into separate services only when you have a clear reason: one part needs independent scaling, teams are tripping over each other, or deployments are becoming risky. Even then, you can often “modularize” within the monolith (separate folders/packages) long before creating microservices.
Pick a pragmatic stack
A common, proven combo looks like this:
- Frontend: React (Next.js) or Vue (Nuxt) for fast UI development and SEO-friendly event pages.
- Backend: Node.js (NestJS/Express) or Python (Django/FastAPI). Choose what your team already knows.
- Database: PostgreSQL for relational data (events, orders, attendees) and reliable transactions.
- Hosting: A managed platform (Render/Fly.io/Heroku-style) or cloud PaaS. Managed databases are worth it.
Avoid choosing tools just because they’re trendy. The “boring” option often wins when you’re on-call.
Speeding up implementation with Koder.ai (optional)
If your priority is shipping an MVP fast (event setup, checkout, ticket issuance, QR check-in, and exports), a vibe-coding platform like Koder.ai can help you get from spec to a working app through a chat-driven build process.
Koder.ai is particularly aligned with this kind of product because its default stack maps cleanly to typical ticketing needs—React on the frontend, Go + PostgreSQL on the backend—and you can use features like Planning Mode, snapshots/rollback, and source code export to iterate safely while keeping full ownership of the codebase.
Storage and email: treat as first-class dependencies
Plan where you’ll store assets like event images, generated invoices, and PDF tickets:
- Object storage (S3-compatible) for uploads and generated files.
- A CDN later if you need faster global delivery.
For email confirmations and reminders, use a dedicated provider (SendGrid, Postmark, SES). It improves deliverability and gives you logs when attendees say “I didn’t get my ticket.”
Environments and keys
Set up local, staging, and production early, each with separate:
- Payment keys, email credentials, and webhook secrets
- Databases (no copying production data into dev)
- Base URLs and callback URLs
This prevents accidental charges and keeps testing realistic.
Standards and releases
Agree on a few basics: formatting (Prettier/Black), linting, commit conventions, and a simple release flow (feature branches + code review + CI checks). Small discipline here reduces bugs in checkout and ticket delivery—where mistakes are most expensive.
UX and UI: Registration, Checkout, and Organizer Dashboard
Good UX for an event management web app is mostly about reducing uncertainty: attendees want to know what they’re buying, organizers want confidence that sales and check-ins are under control.
The attendee flow (keep it predictable)
Design a simple, repeatable path: event page → ticket selection → checkout → confirmation. Each step should answer one question:
- Event page: “Is this the right event for me?”
- Ticket selection: “Which ticket should I pick, and is it still available?”
- Checkout: “Can I pay quickly and safely?”
- Confirmation: “What happens next, and how do I enter?”
On ticket selection, make availability and rules obvious. Show remaining tickets, sale start/end times (with clear time zones), and what happens when tickets sell out (waitlist, no more sales, or contact organizer).
If you support promo codes, don’t hide the field, but don’t give it equal visual weight as the main actions.
Forms: short by default, detailed only when needed
Checkout friction is where registration drops. Keep the initial form minimal (name, email, payment) and use progressive disclosure for optional attendee questions.
Examples that work well:
- Ask “Do you need an invoice?” → reveal billing fields only if yes
- Ask “Buying for someone else?” → reveal attendee details per ticket
- Ask “Any accessibility needs?” → optional, with a short helper line
If you sell multiple tickets in one order, clearly separate buyer info (receipt, payment) from attendee info (names, check-in).
Confirmation that reduces support tickets
After payment, confirmation should include: event details, ticket summary, QR code access (or “tickets attached”), and a clear next step (“Add to calendar”, “Manage my order”). Add a link to a lightweight order management page like /orders/lookup.
Organizer dashboard: answer questions at a glance
Organizers typically open the dashboard to check three numbers: tickets sold, revenue, and check-ins. Put these at the top, then add fast filters (date, ticket type, status, refunded).
For check-in staff, mobile-first is non-negotiable: big tap targets, high contrast, and a prominent “Scan” / “Search attendee” switch. A slow, cramped interface at the door creates lines fast.
Accounts, Roles, and Permissions
Plan Before You Build
Use Planning Mode to map roles, workflows, and data models before writing anything by hand.
A ticketing app quickly becomes a shared workspace: organizers create events, finance teams handle refunds, and door staff just need to scan tickets. Clear accounts and permissions keep the experience smooth—and reduce costly mistakes.
Authentication that’s safe and simple
Support organizer and staff logins with email + password, plus optional MFA if your audience expects it.
For password resets, avoid sending passwords by email. Use one-time, time-limited reset links (for example, 15–60 minutes), store only hashed passwords, and invalidate reset tokens after use. Add rate limits and “same response” messaging so attackers can’t guess whether an email exists.
Role-based access control (RBAC)
Define roles, then apply them at the event level. Many teams run multiple events, and someone might be “finance” for one event but “viewer” for another.
Common permission buckets:
- View: read-only access to attendees, orders, and basic reports.
- Edit: manage event details, ticket types, comp tickets, and attendee edits.
- Finance: refunds, payouts, tax settings, and payment-related exports.
Keep permissions explicit (e.g., order.refund, attendee.update) rather than relying on vague “admin” logic.
Check-in staff (mobile-friendly, limited access)
Create a dedicated Check-in role that can:
- scan QR codes
- search attendees by name/email
- mark attendance and undo within rules
But cannot view revenue, issue refunds, or edit ticket prices. This makes it safe to hand a phone to temporary staff.
Audit logs for sensitive actions
Record who did what and when for actions like refunds, comping tickets, changing attendee details, or exporting attendee lists. Include the event ID, actor account, timestamp, and before/after values. Audit logs protect your team during disputes and make support far easier later.
Payments, Ticket Issuance, and QR Codes
Payments are where your app becomes “real”: money moves, expectations rise, and mistakes get expensive. Treat checkout and ticket issuance as one tightly controlled workflow with clear states and audit trails.
Pick a payment provider (and store references, not card data)
Use a provider that supports webhooks and refunds (e.g., Stripe, Adyen, PayPal). Your database should never store raw card numbers or CVV. Instead, store only provider-generated references such as:
payment_intent_id/charge_idcustomer_id(optional)receipt_url(optional)
This keeps your system simpler and reduces compliance exposure.
Model checkout as a state machine
Define order/payment states up front so support, reporting, and emails stay consistent. Common states include:
- pending (order created, awaiting payment confirmation)
- paid (provider confirms payment; tickets can be issued)
- failed (payment attempt rejected)
- expired (checkout session timed out)
- refunded and partially_refunded (track refunded amount and reason)
Use provider webhooks as the source for transitions into “paid” and “refunded,” and keep an immutable event log (even a simple order_events table) for traceability.
Issue tickets: unique codes + QR codes
Only generate tickets when an order becomes paid (or when an organizer explicitly issues comp tickets). Create a unique ticket code tied to a specific ticket/attendee record, then encode that identifier in a QR code.
Practical rule: the QR payload should be meaningless by itself (e.g., a random token or signed string), and your server validates it before admitting entry.
Discounts, free tickets, and comps
Implement discount codes with explicit rules: validity window, usage limits, eligible ticket types, and whether they stack. Free tickets and comps should still create an order record (total = 0) so reporting and attendee history remain accurate.
One source of truth for receipts and confirmations
Send receipts and confirmation emails based on the order record, not on UI “success” screens. After payment confirmation, your system should generate tickets, persist them, then send email with links to view tickets (e.g., /orders/{id}) and any QR codes.
Email Notifications and Communication
Iterate Safely
Take snapshots before big changes, and roll back quickly if a release breaks checkout.
Email is the backbone of your event registration system: it reassures buyers, delivers tickets, and reduces support requests. Treat it as a product feature, not an afterthought.
Essential templates (and what they must include)
Start with a small set of transactional templates:
- Order confirmation: event name, date/time, venue (or “online”), order summary, payment status, and a clear “View order” link.
- Ticket delivery: each ticket/attendee name, ticket type, QR code (or secure check-in link), and basic check-in instructions.
- Reminders: key logistics (doors open, parking/entry rules), and an easy way to retrieve tickets again.
- Refund/cancellation notice: refunded items, amount, timeline, and where to contact the organizer.
Keep subject lines specific (“Your tickets for {EventName}”) and avoid heavy marketing language that can hurt deliverability.
Organizer branding without deliverability problems
Let organizers add logo, accent color, and a short footer while you keep a consistent HTML structure. Use a fixed layout with “brand slots” rather than fully custom HTML. This prevents broken rendering and reduces spam signals.
From a deliverability standpoint, send from a stable address like [email protected] and use “Reply-To” for the organizer (or a verified sender identity). This gives recipients a familiar sender while still enabling conversation.
Tracking and support-friendly tools
At minimum, store email status per message: queued, sent, delivered (if your provider reports it), bounced, complaint. This powers an organizer-facing timeline and helps your team diagnose issues quickly.
Add two critical self-serve actions in the organizer dashboard:
- Resend tickets (with rate limits and an audit log).
- Update attendee email and reissue delivery—without changing the original payment/order record.
Optional SMS (permission-based)
Only add SMS if there’s a clear need (e.g., last-minute venue changes). Make it opt-in, collect consent per attendee, and keep messages strictly informational with a simple opt-out instruction.
On-Site Check-In and Attendee Lookup
The on-site check-in flow is where your app is judged in seconds. Staff need a screen that loads instantly, works in crowded venues, and answers one question: “Is this person allowed in?”
A fast check-in screen
Design a dedicated “Check-In” view (separate from the organizer dashboard). Prioritize speed and big touch targets.
Include two input modes:
- Search by name, email, order number, or ticket code, with results as-you-type.
- Scan QR using the device camera, resolving directly to a ticket/attendee record.
For offline-friendly operation, cache the attendee list for a specific event (and only what’s needed for entry) on the device. If connectivity drops, the app can still validate tickets locally and queue sync updates to send later.
Prevent double entry (with controlled overrides)
Every ticket should have a clear state: Not checked in → Checked in. Scanning a ticket that’s already used should show a strong warning with timestamp and staff member (if available).
Allow overrides only for users with explicit permission (e.g., “Check-in manager”). Overrides should require a reason note so staff can resolve disputes later.
Partial check-in for group orders and multiple ticket types
For orders with multiple tickets, support checking in one ticket at a time. Your UI should show remaining tickets and ticket types (e.g., “2 of 4 General Admission left”). This avoids forcing all-or-nothing entry when groups arrive separately.
Show helpful context
At the moment of scan/search, display:
- Ticket type and access level (VIP, workshop add-on)
- Attendee notes (dietary, special instructions)
- Accessibility needs (only if you collect them, and keep it minimal)
Log every check-in
Record a check-in event log (scan/search, device/user, time, outcome, override reason). These logs power post-event reporting and give you an audit trail when issues come up.
Reporting, Exports, and Admin Tools
Good reporting turns your app from “a place to sell tickets” into a tool organizers rely on during planning, the event day, and post-event wrap‑up.
Reports organizers actually expect
Start with a small set of high-confidence reports that answer common questions:
- Sales by ticket type: units sold, remaining (if capped), and gross vs net.
- Revenue breakdown: subtotal, discounts, fees, taxes, and payout totals.
- Order status: paid, pending, canceled, refunded, chargeback (if applicable).
- Attendance rate: checked-in attendees vs total issued tickets, split by ticket type.
Keep the numbers consistent with what the organizer sees on order receipts and payout summaries to avoid support tickets.
Filters and exports that stay useful
Reports become far more valuable with a few standard filters:
- Date range (order created, payment date, or check-in time)
- Ticket type
- Order/attendee status (paid/refunded, checked-in/not)
Offer exports in CSV (and optionally XLSX). Be explicit about what’s in each export: order ID, buyer info, attendee info, ticket type, price, taxes/fees, discount codes, and check-in timestamps.
Also clarify whether exports include PII (email/phone) and provide a “minimal” export option for sharing with partners.
Funnel metrics (lightweight, high impact)
Track a simple funnel per event: event page views → checkout started → payment completed. Even basic counts help organizers spot problems (e.g., lots of checkout starts but few paid orders) and validate promotion performance.
Admin tools for support and operations
Your internal admin panel should prioritize speed:
- Search by order ID, buyer email, attendee name, or last 4 digits (if stored via provider tokens)
- View the full order timeline (created, paid, emails sent, refunds)
- Resend confirmation email and reissue tickets
- Initiate refunds from the payment provider and record the outcome
Data retention and export policy
Document how long you retain orders, attendee records, and logs, and what happens after retention expires. Make it visible in your help docs (e.g., /help/data-retention) and inside export dialogs so organizers know what they’re downloading and storing.
Security, Privacy, and Reliability Basics
Validate the Door Experience
Prototype a mobile-first scanner and attendee lookup, with logs and override rules.
Security and reliability aren’t “later” tasks for a ticketing app. You’ll store names, emails, and often payment-related metadata—so a few foundational choices early will save painful rewrites.
Protect attendee data (least privilege + encryption)
Start with least-privilege access: organizers should only see events they own, staff should only see what they need for check-in, and admins should be tightly limited. Use role-based permissions in the backend (not just hidden UI).
Encrypt data in transit with HTTPS everywhere, including webhooks and internal services. Store secrets (API keys, webhook signing secrets, database creds) in a managed secrets store or your cloud provider’s secret manager—never in the repo or frontend.
Validate inputs and block common attacks
Treat every field as untrusted: event descriptions, attendee names, custom questions, and coupon codes.
- Prevent injection with parameterized queries/ORM safeguards.
- Prevent XSS by escaping user-generated content and using a strict Content Security Policy.
- Prevent CSRF on state-changing requests (especially if you use cookies).
- Add rate limiting on login, password reset, and “resend ticket email.”
Privacy basics you can explain to users
Collect only what you need (e.g., name and email for a ticket) and label optional fields clearly. Separate “transactional” emails (receipt, ticket, schedule changes) from marketing emails.
If you allow marketing opt-in, store explicit consent and provide easy unsubscribe links.
Backups + recovery you’ve actually tested
Backups are only real if restores work. Automate database backups, keep multiple retention windows, and schedule restore tests to a staging environment.
Write down a simple recovery checklist: who restores, where to restore, and how to verify ticket scanning still works.
Monitoring that catches problems early
Add error tracking for backend and frontend, uptime checks for key endpoints (checkout, webhook handler, check-in API), and alerts for slow queries. A small set of actionable alerts beats noisy dashboards.
Testing, Launch, and Iteration Plan
Testing and launch are where ticketing apps earn trust. A small bug in checkout or QR validation doesn’t just annoy users—it can block entry at the door. Treat this phase as part of the product, not a final hurdle.
Automated tests for critical paths
Focus on flows that directly affect money and access. Keep tests high-value and repeatable:
- Checkout: successful payment, canceled payment, failed payment, promo code edge cases.
- Ticket issuance: ticket created once per purchase, correct ticket type, email sent, PDF/PKPass link valid (if you support them).
- Check-in: QR scan accepts valid ticket, rejects already-used ticket, handles offline/latency gracefully.
- Refunds/voids: status updates, ticket invalidation, emails, and audit logs.
Add a few “contract tests” around your payment provider webhooks so payload changes don’t silently break your order state.
Staging pilot before public launch
Run a pilot with a small event (even an internal meetup). Give organizers and door staff the staging app for a real rehearsal: create event, sell a few tickets, scan people in, issue a refund, resend tickets.
Collect feedback in a simple form and record where staff hesitates—those are UI fixes worth prioritizing.
Launch checklist and operational readiness
Before going live, confirm:
- Domain + SSL, redirect rules, error pages
- Email sender setup (SPF/DKIM/DMARC) and deliverability checks
- Live payment keys and webhook endpoints
- Logging, alerts, and a way to inspect failed jobs (email send, ticket generation)
Support workflows and iteration
Prepare canned responses and internal steps for disputes, refunds, and ticket resend requests.
After launch, iterate in small batches—waitlists, seating, integrations (CRM/email), and multi-event accounts—guided by real support tickets and organizer feedback.