

Build a Website That Grows Into an Interactive Tool Over Time
Learn how to plan, design, and build a website that can evolve into an interactive tool—without rewrites. Focus on UX, data, APIs, and iteration.
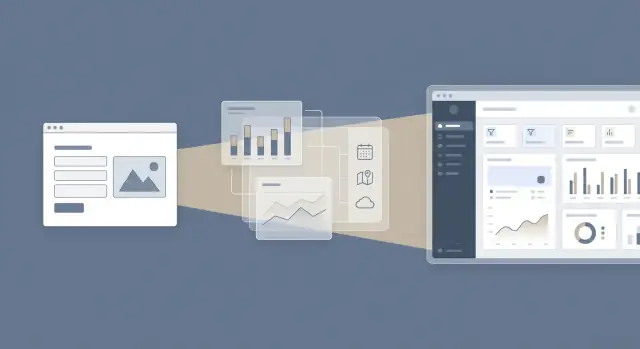
What It Means for a Website to Become a Tool
A brochure site mainly explains who you are, what you offer, and how to contact you. A website that becomes a tool helps people do something—quickly, repeatedly, and with less back-and-forth. That shift changes expectations for both users and your team.
From “read and leave” to “use and return”
For users, the experience moves from browsing pages to completing tasks. They expect clarity, feedback, saved progress, and consistent results. For your team, the work shifts from periodic content updates to ongoing product thinking: prioritizing improvements, shipping iterations, and supporting real workflows.
Common “tool” outcomes include:
- Calculators and estimators (pricing, ROI, eligibility)
- Dashboards (reports, usage, project status)
- Self-serve workflows (bookings, onboarding, requests, approvals)
- Customer or partner portals (documents, invoices, tickets, updates)
Define goals and constraints early
Before you add interactivity, align on what “tool” success looks like and what limits you’re working within:
- Timeline: Are you aiming for a quick pilot in weeks, or a staged rollout over quarters?
- Budget: Can you fund continuous improvement, not just a one-time build?
- Team skills: Who can handle UX, content, development, analytics, and support?
- Risk tolerance: How careful do you need to be around data, compliance, and uptime?
Success metrics beyond traffic
Traffic can still matter, but tools live or die on outcomes. Useful metrics include:
- Task completion rate: Can people finish the job you designed the tool for?
- Activation: Do first-time users reach the “aha” moment (e.g., create a project, run a calculation)?
- Retention: Do they come back and rely on it?
This article targets ~3,000 words overall so we can include practical examples and checklists—not just theory—while keeping each step actionable.
Start With User Tasks, Not Features
If you want your website to grow into an interactive tool, the first step isn’t a feature list—it’s clarity on what people are actually trying to get done.
Features are tempting because they’re easy to describe (“add a dashboard,” “add chat,” “add saved projects”). Tasks are harder because they force priorities. But tasks are what make your site feel useful, and they guide design, content, and the tech you’ll need later.
Identify 1–3 jobs-to-be-done
Pick the smallest set of core user jobs your site should support. Good tasks are action-oriented and specific:
- “Compare options and choose the right plan for my team.”
- “Submit details and get a clear next step.”
- “Track progress and know what’s happening without emailing support.”
If you can’t explain the task in one sentence without naming a feature, it’s probably not a task.
Map the journey: discover → evaluate → act → return
For each key task, sketch the simplest journey:
- Discover: how they arrive and what promise your page makes.
- Evaluate: what information reduces uncertainty (examples, pricing, requirements, timelines).
- Act: the moment they do the thing (submit, request, calculate, book, start).
- Return: what brings them back (saved results, status updates, history, reminders).
This keeps you from building “interactive” parts that users never reach because evaluation is unclear.
Decide which interactions matter first
Early interactions should support the primary task, not add complexity. Common first steps:
- A focused form that produces a useful result
- Saved results (even if it’s just “email me my summary” at first)
- Basic status tracking (“received → in review → complete”)
Define what “done” looks like
Every task needs a clear finish line. Define:
- Output: what the user gets (a quote range, a checklist, a confirmation, a downloadable summary).
- Confirmation: how they know it worked (receipt page, email, reference number).
- Next step: what to do immediately after (schedule, upload, invite a teammate, review).
Capture edge cases early
The first version should handle real life:
- Cancellations: can they undo a request or delete a draft?
- Errors: what happens when something fails—do they lose entered data?
- Partial completion: can they save progress, or at least return via a link?
When you start with user tasks, you get a clean roadmap: ship the smallest interaction that completes the job, then expand depth (saved history, accounts, permissions, integrations) only when it makes the job easier.
Design an Information Architecture That Can Expand
A growing website needs an information architecture (IA) that stays understandable as you add new pages, features, and “tool-like” workflows. The goal isn’t to predict everything you’ll build—it’s to create a structure that can absorb change without constant renaming, reshuffling, and broken links.
Start with a stable spine
Pick a small set of top-level sections that will remain true over time. Most teams can keep this simple:
- Product/Service: what it is, who it’s for, how it works
- Resources: education and support content
- Company: trust, story, contact
- App (later): the interactive area for signed-in users
This “spine” prevents the homepage nav from becoming a dumping ground for every new idea.
Separate marketing pages from app-like areas
When you know an interactive tool is coming, separate public marketing content from private, task-based pages early. A common pattern:
- /product (and related pages) for explaining value
- /app for interactive workflows, dashboards, and saved data
Even if /app starts as a simple prototype, the URL boundary helps you design clearer navigation, permissions, and analytics later.
Design navigation for returning users
As your site becomes a tool, many visitors stop “browsing” and start “doing.” Plan for quick return paths:
- A clear primary action (e.g., “Open app”)
- Shortcuts to frequent tasks
- Recent items and saved views once users have data
These elements can live inside /app while your public navigation stays focused.
Define content models (not just pages)
Plan your content as reusable types, so it scales:
- Pages (core marketing)
- FAQs (structured Q&A)
- Docs/help articles
- Templates/resources (downloadable or copyable)
When content types are clear, you can add filters, search, and related content without redesigning everything.
Use internal links to support decisions
Your IA should naturally route people to decision-support pages like /pricing and deeper context in /blog. This reduces support load and keeps your tool experience focused, because users can self-serve answers without leaving the site entirely.
Pick a Tech Setup Built for Change
A website that grows into a tool usually works best with a “hybrid” setup: keep your content pages fast and easy to publish, and add interactive modules only where they genuinely help users complete tasks.
A hybrid approach that doesn’t paint you into a corner
Start with content-first pages (homepage, guides, FAQs, landing pages) backed by a CMS, then attach interactive pieces—calculators, comparison tables, onboarding wizards, dashboards—as self-contained modules. This keeps early costs down while still setting you up for product-like features.
If you want to accelerate experimentation, a vibe-coding platform like Koder.ai can be useful at this stage: you can prototype interactive flows (forms, dashboards, simple portals) by describing them in chat, then iterate quickly as you validate tasks and UX. The key is the same either way—ship small modules, learn, and expand only when users prove the workflow is valuable.
Two common setups (both can work)
1) CMS + frontend components
Use a CMS for content and a modern frontend (e.g., component-based UI) for interactive modules. You can progressively add “app-like” routes later without changing how content editors work.
2) Full-stack framework + CMS
Use a full-stack framework for the application layer (routing, server logic, authentication) and connect it to a CMS for content. This is a good fit if you expect accounts, saved states, or paid features fairly soon.
Plan the upgrade path from day one
Even if you start simple, make room to add:
- Dedicated app routes (e.g., /app/...)
- A database and API endpoints for tool data
- Background jobs for imports, emails, or syncs
Practical requirements you’ll want early
Choose hosting that supports automated deployments, a staging environment, and preview links for content changes. This lets you test new modules safely before they affect real users.
Keep content and data portable
Avoid lock-in by separating concerns: content in a CMS with clean exports, structured data in your database, and integrations behind APIs. If you ever need to switch vendors, your site shouldn’t need a full rebuild to move with you.
(One practical litmus test: can you export both content and user data in sensible formats, and redeploy the app elsewhere without rewriting business logic?)
Build Interactions With Progressive Enhancement
Progressive enhancement means you build the reliable version first: content and core actions work with plain HTML and server responses. Then you layer on JavaScript to make the experience faster, smoother, and more “tool-like”—without making the site brittle.
Start with a working baseline
Make sure the essential path works even if scripts fail or a user has an older device:
- Core content is readable and navigable without JavaScript.
- Forms submit and return clear success/error messages from the server.
- Links are real links (not click handlers pretending to be links).
Once that foundation is solid, enhance it: replace full page reloads with inline updates, add client-side validation for speed, and keep the server as the source of truth.
Pick interaction patterns that scale
Some patterns age well as you add features:
- Wizards for complex tasks (break a big job into steps with a clear “Back/Next”).
- Inline validation that supports the server (show hints early, but don’t rely on it alone).
- Autosave for long inputs (save drafts in the background, with a visible status like “Saving…” → “Saved”).
Keep the UI consistent with a small design system
A tiny design system prevents your “tool” from feeling like a patchwork. Define a few reusable components (buttons, inputs, alerts, cards) plus basics like colors and spacing. This also makes enhancements easier to apply everywhere.
Design for first-run and empty states
Tools often fail at the beginning: no data, no history, no context. Plan screens that explain what to do next, provide examples, and offer a safe first action.
Accessibility basics you should treat as requirements
Ensure keyboard support, proper form labels, and clear focus states. If an interaction can’t be used without a mouse, it isn’t finished.
Create a Simple Data Model and API Foundation
A website starts feeling like a real tool when it can remember things: user inputs, saved items, history, preferences, and outcomes. That “memory” needs structure. A simple data model now prevents painful rewrites later.
Decide what you store now vs. later
Start by separating core data from nice-to-have data.
Core data is anything required to deliver value (e.g., a saved calculation, a quote request, a checklist). Nice-to-have data can wait (detailed activity logs, custom tags, advanced metadata). Storing less at the start keeps complexity down, but make sure the essentials can scale.
Define entities and relationships in plain language
Write your data model like a set of nouns and how they connect:
- Users: the people using the tool
- Projects (or workspaces): what users create and return to
- Items: the things inside a project (tasks, records, files, entries)
Then define relationships: “A user can have many projects.” “A project can contain many items.” “An item may have an owner.” This keeps everyone aligned—especially when features expand.
Introduce an API layer early
Even if your site uses the data only internally at first, treat data access as a clean API layer (a set of clear requests like “create item,” “list items,” “update status”). It makes future additions—mobile apps, integrations, dashboards—far easier because you’re not untangling data logic from page templates.
Plan export/import from day one
People trust tools that don’t lock them in. Decide early how to handle:
- Export to CSV (spreadsheets), JSON (technical exports), and PDF (reports)
- Import from CSV for onboarding and migration
Prevent “mystery fields” with ownership
Document field names and meaning (“status”, “due_date”, “owner_id”), who owns them (product, ops, or engineering), and what’s allowed (required vs optional). This small habit avoids confusing duplicates like “companyName” vs “organization” later.
Add Accounts, Permissions, and Privacy the Right Way
Accounts turn a “read-only” site into a tool people can return to. But identity, permissions, and privacy are easiest to get right when you design them before you build a bunch of screens.
Start with low-friction sign-in
If you’re early, optimize for getting users into the product with minimal friction. A magic link (email link sign-in) avoids passwords, reduces support tickets, and feels familiar.
If you later need enterprise adoption, you can add SSO (like Google Workspace or Okta) without rewriting everything—provided you treat “identity provider” as a pluggable option, not hard-coded logic.
Define roles before you design UI
Decide who can do what before you lay out pages and buttons. A simple set of roles usually covers most cases:
- Viewer: can see data
- Editor: can create and change data
- Admin: can manage settings, billing, and access
Write these rules as plain-language statements (“Editors can invite other editors, but not admins”) and use them to drive both the UI (what’s visible) and the backend (what’s allowed). Hiding a button isn’t security.
Separate public, private, and shared resources
Many tools need three clear “zones”:
- Public: marketing pages, public docs, public resources
- Private: a user’s personal items (drafts, preferences)
- Shared: team/workspace items where permissions apply
This clarity prevents accidental data exposure and makes future features—like sharing links, team workspaces, or paid tiers—much simpler.
Plan onboarding as a first task, not a tour
Onboarding should guide people to a quick win:
- create an account, 2) complete the first meaningful task, 3) understand what happens next.
Use lightweight guidance (checklists, contextual tips) and only ask for extra profile details when they’re actually needed.
Build privacy in from day one
Keep privacy-by-design practical:
- Collect the minimum data needed to deliver value
- Use clear consent language for analytics and emails
- Set retention rules (what you keep, for how long, and why)
- Make it easy to export or delete data when appropriate
Done well, accounts and permissions won’t slow you down—they’ll keep your tool trustworthy as it grows.
Plan for Integrations Without Tying Yourself in Knots
Integrations are where a “product-like website” starts feeling truly useful: data flows automatically, customers get faster service, and your team stops copying information between tabs. The trick is to plan for them early—without hardwiring your whole site to one vendor.
Start with the most likely connections
Before you write any integration code, list the systems you’re most likely to connect:
- CRM (Salesforce, HubSpot)
- Email marketing (Mailchimp, Customer.io)
- Payments (Stripe, PayPal)
- Calendar (Google/Microsoft)
- Support desk (Zendesk, Intercom)
This list helps you design integration “slots” in your UI and data model, even if you only ship one connection at first.
Keep the UI responsive with webhooks and background jobs
External APIs can be slow, rate-limited, or temporarily unavailable. Avoid making users wait on long calls.
Use webhooks to receive events (like “payment succeeded”) and background jobs to run slow tasks (syncing contacts, generating invoices) so your interface stays snappy. The UI should show clear status: “Syncing…”, “Last updated 10 minutes ago”, and what will happen next.
Design the connection experience end-to-end
Treat integrations as a user journey:
- Connect: explain what will be shared and why
- Revoke: let users disconnect cleanly (and say what stops working)
- Troubleshoot: show common errors and re-auth options
A simple “Integrations” page (e.g., /settings/integrations) becomes the home for these flows.
Store integration state safely—and plan for failure
Store tokens securely, track refresh/expiration, and keep per-account integration state (connected, paused, error).
Finally, decide your fallback behavior when a service is down: queue actions for retry, allow manual export, and never block core features just because an optional integration is having a bad day.
Measure, Learn, and Iterate With Confidence
If your website is meant to grow into a tool, you need a simple way to decide what to build next—and proof that changes actually help. The goal isn’t “more clicks.” It’s smoother task completion, fewer errors, and clearer outcomes for users.
Track user tasks (not vanity metrics)
Start by defining the handful of jobs people come to your site to do. Then track events that represent progress through those jobs.
For example, instead of focusing on pageviews, track:
- Started task (e.g., “started quote,” “began application,” “created draft”)
- Hit a blocker (validation errors, empty search results, failed uploads)
- Completed task (submitted form, booked call, exported file)
This makes it easier to spot where users drop off and which improvements will have the biggest impact.
Build feedback loops you’ll actually use
Quantitative data shows where problems happen; feedback tells you why.
Use light-touch loops such as:
- In-app prompts after completion (“Was this easy?”)
- Short surveys for specific pages or flows
- Support tags that map messages to features (“login,” “billing,” “import”) so themes are visible
Test before you build the heavy version
Run quick usability tests on prototypes (even simple clickable mockups) before engineering complex flows. Watching 5–7 people attempt a task will reveal confusing labels, missing steps, and trust issues that analytics can’t explain.
Ship safely with feature flags
Feature flags let you release changes to a small percentage of users, compare outcomes, and roll back instantly if something goes wrong. They also enable A/B testing without committing everyone to an unproven idea.
Keep a simple “product health” dashboard
Create one dashboard that answers: “Is the tool working, and are users succeeding?” Include:
- Error rate and top error types
- Page and API latency (slow spots by route)
- Drop-offs for key tasks
When measurement is tied to user success, iteration becomes calmer, faster, and more predictable.
Keep It Fast, Accessible, and Easy to Use
Speed and usability aren’t “nice to have” when a site starts behaving like a tool. If pages lag, forms feel clunky, or key actions aren’t accessible, people won’t stick around long enough to benefit from the features you’re building.
Set performance budgets (and enforce them)
Treat performance like a product requirement. Define goals for your most interactive pages and keep them visible in your roadmap:
- LCP (Largest Contentful Paint): aim for ~2.5s or better on typical mobile connections
- INP (Interaction to Next Paint): aim for <200ms so clicks and typing feel instant
- CLS (Cumulative Layout Shift): keep it low to prevent jumpy UI (target <0.1)
Budgets help teams make trade-offs intentionally—like choosing simpler components, smaller bundles, and fewer third-party scripts.
Use caching and a CDN where it matters
Content-heavy sections (docs, blog, help pages, marketing pages) should be cheap to serve and quick to load.
Cache static assets aggressively, and use a CDN so content is delivered close to the user. For dynamic pages, cache what you can (templates, partial responses, “public” data) and invalidate thoughtfully so updates don’t break trust.
Make forms and data views feel effortless
Interactive tools often fail in the “boring” places: long tables, slow search, heavy filters.
Use pagination (or infinite scroll when it truly fits), add fast search, and apply filtering without full-page reloads where possible. Keep inputs forgiving with clear errors, saved progress for multi-step forms, and sensible defaults.
Accessibility and quality gates are non-negotiable
Build with semantic HTML, clear focus states, and sufficient contrast. Follow WCAG basics early—retrofitting later is expensive.
Add quality gates to your workflow: automated tests for key flows, linting to prevent regressions, and monitoring to catch real-world slowdowns and errors before users report them.
Security, Reliability, and Long-Term Maintenance
As your website evolves into a tool, it starts to handle more data, more actions, and more expectations. Security and reliability aren’t “extras”—they’re what keeps people confident using it.
Security fundamentals you can bake in early
Start with input validation everywhere: on forms, query parameters, file uploads, and any API endpoint. Treat anything from a browser as untrusted.
Protect state-changing actions (saving, deleting, payments, invites) with CSRF defenses, and add rate limiting to login, password reset, search, and any endpoint that could be abused. Pair that with sensible password policies and secure session handling.
Reliability: plan for boring, repeatable recovery
Backups should be automatic, encrypted, and tested with a restore drill (not just “we have backups”). Define who responds to incidents, how you’ll triage, and where you’ll communicate status updates (even a simple /status page or a pinned message in your support channel).
Error handling users can live with, logs teams can use
When something fails, show a clear next step (“Try again”, “Contact support”, “Your changes weren’t saved”). Avoid cryptic codes.
Behind the scenes, log structured details your team can act on: request IDs, affected user/account, endpoint, and the exact validation error. Keep sensitive data out of logs.
Data ownership and audit trails
Decide who “owns” records (user, team, admin) and enforce it in permissions. If edits matter (settings, billing info, approvals), add an audit trail: who changed what, when, and from where.
Maintenance routines that prevent surprises
Set a monthly cadence for dependency updates, security patches, and permission reviews. Remove unused accounts and keys, rotate secrets, and document the essentials in a short runbook so maintenance stays manageable as the tool grows.
A Practical Roadmap You Can Follow
A website becomes a tool when it reliably helps people complete repeatable tasks—not just read information. The easiest way to get there is to plan in phases, so you can ship value early without painting yourself into a corner.
A phased roadmap template
Phase 1: Strong content + clear paths
Define the top user tasks, publish the minimum content needed to support them, and make navigation predictable.
Phase 2: Helpful interactions
Add lightweight interactivity (calculators, filters, comparisons, forms) using progressive enhancement so the site still works well if scripts fail.
Phase 3: Full “tool mode”
Introduce saved state (accounts, history, projects), permissions, and integrations. This is where the site starts behaving like a product.
If your team is trying to move quickly through Phase 2 into Phase 3, consider using Koder.ai to shorten the build/iterate cycle: you can describe the workflow in chat, generate a working React-based web experience with a Go + PostgreSQL backend, and then refine UX and permissions as you learn from real users. It’s also helpful for creating deployable snapshots and rolling back changes safely as your tool evolves.
“Ready to become a tool” checklist
You’re ready for Phase 3 when you have:
- Data clarity: defined entities (e.g., users, projects, submissions) and who owns them
- Authentication plan: sign-in method, password resets, and role/permission rules
- Support readiness: a feedback channel, basic help docs, and a way to reproduce issues
- Analytics you trust: key events (task completion, drop-off points) and a review cadence
The documentation pack to keep you aligned
Keep a lightweight set of living docs:
- IA map: core pages and how they connect
- Component list: reusable UI parts (forms, tables, alerts) and states
- API notes: endpoints, data fields, error rules, and versioning assumptions
Quick do/don’t
Do ship in small increments; don’t bundle “accounts + payments + integrations” into one release.
If you want a next step, use /blog/ux-checklist to validate your task flows, and /pricing to compare build approaches and ongoing support options.
FAQ
What’s the difference between a brochure website and a website that acts like a tool?
A brochure site mainly helps people understand (who you are, what you offer, how to contact you). A tool-like site helps people do something repeatedly—like calculate, submit, track, or manage—so users expect saved progress, clear feedback, and consistent outcomes.
How do I figure out what tasks my website should support first?
Start by defining 1–3 jobs-to-be-done in one sentence each (without naming features). Then map the simplest journey: discover → evaluate → act → return. Build only the smallest interaction that completes the job, and expand later.
Why should I start with user tasks instead of a feature list?
Because “interactive” features often get built but rarely used if the evaluation step is unclear. Task-first planning forces priorities, clarifies what “done” means (output, confirmation, next step), and helps you avoid shipping complexity that doesn’t improve completion rates.
What does “done” look like for an online task or workflow?
Define:
- Output: what the user gets (summary, quote range, checklist, confirmation).
- Confirmation: how they know it worked (receipt page, email, reference number).
- Next step: what to do immediately after (schedule, upload, invite, review).
If you can’t state these clearly, the tool will feel unfinished even if it “works.”
Which edge cases should I handle in the first version of a tool-like website?
Plan for:
- Cancellations/undo: delete drafts or retract requests.
- Errors: show clear messages and preserve entered data.
- Partial completion: allow save-and-return, or at least return via a link.
Handling these early prevents support load and rebuilds when real users hit real-world scenarios.
How should I structure my site’s navigation so it can expand over time?
Use a small, stable navigation “spine” (e.g., Product/Service, Resources, Company, and later App). Keep marketing pages separate from workflows by using a clear boundary like /app for interactive, signed-in areas. This reduces churn in navigation and makes permissions and analytics cleaner later.
Why separate marketing pages from an “/app” area?
It keeps responsibilities clear:
- Public pages focus on explaining value and reducing uncertainty.
- /app focuses on completing tasks, returning quickly, and managing saved data.
Even if /app starts as a prototype, the URL and navigation boundary helps you scale to accounts, permissions, and dashboards without reorganizing the whole site.
What tech stack works best for a website that will become more product-like?
A hybrid setup typically works best: publish content via a CMS and add interactive modules only where they support core tasks. Common approaches are:
- CMS + frontend components for progressive “tool” features.
- Full-stack framework + CMS if you expect accounts, saved state, or paid features soon.
Either way, plan early for staging, previews, and automated deployments.
What is progressive enhancement, and why does it matter for interactive websites?
Progressive enhancement means the essential experience works with plain HTML and server responses first (readable content, real links, working forms with server-side validation). Then you layer JavaScript for speed and polish (inline updates, client-side validation, autosave) without making the tool fragile if scripts fail.
What should I measure to know if my website-tool is working beyond traffic?
Track outcomes tied to tasks:
- Task completion rate (can users finish?).
- Activation (do first-time users reach the “aha” moment?).
- Retention (do they return and rely on it?).
Instrument events like “started task,” “hit a blocker,” and “completed task,” and review them regularly so iteration is driven by user success, not pageviews alone.