

How to Build a Website for Booking Local Services
Learn how to plan, design, and launch a website that lets customers book local services online, with scheduling, payments, and a smooth user experience.
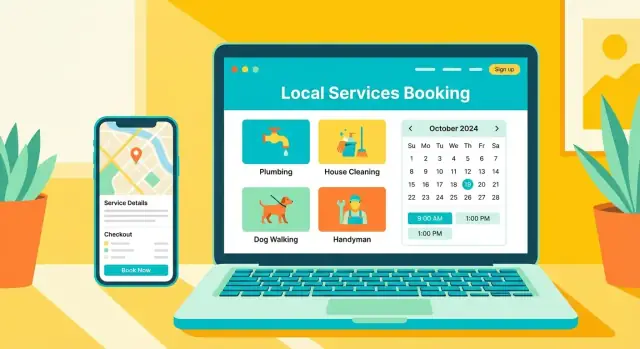
Start with the right booking model and goals
Before you choose tools or design pages, get clear on what you’re actually building. “Local services” can mean very different booking needs, and your website should reflect the reality of how the work gets delivered.
Define the services you support
List the service categories you want to offer (for example: house cleaning, tutoring, appliance repair, dog grooming, hair and beauty, wellness sessions). Then note what makes them unique:
- Do they happen at the customer’s location, at your location, or both?
- Are appointments time-based (60 minutes) or job-based ("fix leaking tap")?
- Do you need travel time or a minimum notice period?
These answers influence everything from the booking form fields to the calendar rules.
Choose your booking model
Decide whether you’re building:
- A single business website (one team, one brand, one set of policies). This is simpler and usually faster to launch.
- A multi-provider marketplace (many independent providers). This requires provider onboarding, profiles, payouts/commissions, and rules for availability and cancellations.
If you’re not sure, start as a single business and design your data so you can add multiple providers later.
Clarify your service area
Define your target city, key neighborhoods, and your service radius. Being specific helps pricing (travel fees), scheduling (time windows), and local SEO later. It also prevents wasted bookings from people outside your coverage.
Set measurable goals
Pick a few numbers that define success in the first 60–90 days:
- Bookings per week (e.g., 10/week)
- Booking conversion rate (visits → bookings)
- Repeat customer rate (how many book again)
These goals will guide trade-offs: fewer steps at checkout, clearer pricing, and policies that reduce no-shows.
Plan the site structure and the booking journey
Before you pick tools or start designing, map your site like a simple “store layout.” A clear structure reduces drop-offs and makes your local service booking website feel trustworthy.
Core pages to include (and why)
At minimum, plan these pages:
- Home: quick explanation of what you do, where you serve, and a prominent “Book now” button.
- Services: a scannable list of services with starting prices and durations.
- Service detail: full description, what’s included, add-ons, FAQs, and a direct path to booking.
- Booking: the appointment booking flow (service → date/time → details → payment → confirmation).
- Account: view, reschedule, cancel, download receipts, manage saved details.
- Contact: phone/email, service area, hours, and a short form.
If you have multiple locations or teams, consider separate Location and Staff pages later—only if they help customers choose.
Sketch the main journey (search to confirmation)
Write the journey in 6–8 steps, from “I found you on Google” to “I received confirmation.” Keep choices limited at each step:
- Pick service (and optional add-ons)
- Choose location or service area (if needed)
- Select date/time
- Enter customer details
- Pay deposit or full amount
- Confirmation page + email/SMS
Aim for a single primary path with clear back buttons. Every extra decision slows booking.
Required features vs. nice-to-haves
Start with essentials: service list, availability, confirmation messages, and basic payments. Add “nice-to-haves” only if they fit your business: filters, memberships, gift cards, or packages.
Don’t forget the admin side
Your structure must support operations: managing services, staff, schedules, orders, refunds, and customer messages. If admins can’t update availability quickly, customers will feel it immediately.
If you’re building custom, this is also where modern build tools can save time. For example, Koder.ai can help you prototype the customer booking flow plus an admin dashboard via a chat-driven build process, then export the source code when you’re ready to take it further.
Define services, pricing, and booking rules
Before you design pages or pick an online booking system, decide exactly what customers can book—and under what conditions. Clear service definitions and simple rules reduce back-and-forth, prevent scheduling headaches, and set expectations from the first click.
Describe each service like a product
For every bookable service, write a short “service card” spec. This will later map directly to your service pages and your appointment booking flow.
Include:
- Name + one-sentence outcome (what the customer gets)
- Duration (e.g., 45 minutes on-site, or 30 minutes remote)
- What’s included (materials, travel radius, number of rooms/items)
- Add-ons (extra time, premium materials, expedited service)
- Prep instructions (parking info, access notes, what to have ready)
If the service varies a lot, split it into multiple options instead of one vague listing. “House cleaning” becomes “Studio/1-bed,” “2–3 bed,” and “Deep clean,” each with clearer timing and pricing.
Decide pricing rules customers understand
Your local service booking website can support different pricing models, but your content should make the logic obvious.
Common approaches:
- Fixed price: best when the work is predictable (e.g., haircut, basic tune-up).
- Starting at: useful when scope varies; pair it with examples and a note on what changes the final price.
- Per hour: works for flexible jobs; specify minimum hours and what counts as billable time.
- Per unit: great for repeatable items (per window, per room, per pet).
Also decide how you’ll price add-ons: fixed (e.g., “+ $15”) or time-based (“+ 15 minutes”). Consistency makes checkout feel safer.
Set booking rules that protect your schedule
Booking rules are the guardrails of a service scheduling website. Define them early so you don’t promise times you can’t actually deliver.
Key rules to set:
- Lead time: how soon someone can book (e.g., “minimum 12 hours notice”).
- Buffer time: padding between jobs for travel, cleanup, or delays.
- Max daily bookings (or max hours/day): prevents overbooking during busy seasons.
If you offer on-site work, you may also need a service area rule (zip codes or radius) to avoid bookings you can’t fulfill.
Write clear cancellation and reschedule policies
Decide what happens when plans change, then show it in the same places customers make decisions:
- On the service page (near the Book button)
- Inside the booking form before final confirmation
- In the confirmation email/receipt
Keep the policy short and specific: how far in advance cancellations are allowed, whether deposits are refundable, and any reschedule limits. Clarity here reduces disputes and support requests later.
Design pages that convert local visitors
Your design job isn’t to impress—it’s to help a nearby customer quickly answer three questions: “Do you serve my area?”, “Can I trust you?”, and “How do I book?” Keep the pages focused, scannable, and mobile-first.
A local-focused homepage with clear next steps
Treat the homepage like a sign on a storefront. Put your primary call to action above the fold and repeat it as people scroll:
- Book now (for standard services)
- Call (for urgent or complex jobs)
- Get a quote (for variable pricing)
Use a short headline that says what you do and where you do it (e.g., “House cleaning in East Austin”). If phone calls matter, add a tap-to-call button and keep it visible on mobile.
Trust builders that feel real
Local services are trust-sensitive, so add proof close to the booking action:
- Recent reviews/testimonials (with first name + area if allowed)
- Before/after photos or team photos
- Clear service standards (what’s included)
- Badges that are accurate (licensed/insured, certifications)
Only mention a “guarantee” if you actually honor it—and explain it in one sentence so it doesn’t sound like marketing.
Location signals that remove doubt
Make it obvious you’re nearby. Add:
- “Areas we serve” with neighborhoods/suburbs
- A map embed on the Contact page
- A local phone number
Consider a dedicated “Service Areas” page if you cover multiple towns.
Simple navigation that matches intent
Keep the menu short and predictable: Services, Pricing, About, Contact. If you have many services, group them under Services and link each to a booking-ready page.
For next steps, drive visitors toward one action per page—and link to /contact when they’re not ready to book.
Build a smooth booking form and checkout flow
A good booking flow feels like a short conversation: the customer makes one decision at a time and always knows what happens next. Aim for speed on mobile, clear wording, and zero surprises.
Keep the form lean (and explain why)
Collect only what you need to deliver the service well:
- Name
- Phone or email (for confirmations)
- Service address (if relevant)
- Notes (optional)
If you need extra details (gate code, parking info, pet notes), ask after the booking is confirmed or make it an optional “Add details” step. This reduces drop-offs and keeps your local service booking website feeling lightweight.
Fast slot selection: date → time → details → confirmation
Make slot picking the first “real” step. Customers typically want to know availability before they invest effort in typing.
A simple, reliable order for an appointment booking flow is:
- Pick date
- Pick time
- Enter details
- Review + confirm
Keep the UI consistent: show available times only, and clearly label duration so customers understand why certain times are blocked.
Handle special cases without confusing everyone
If you offer multi-service bookings, add-ons, or recurring visits, treat them as optional layers:
- Multi-service: allow selecting more than one service and automatically adjust total duration.
- Add-ons: show quick checkboxes (“Inside fridge”, “Extra room”) with prices.
- Recurring: offer simple presets (weekly/biweekly/monthly) and show the next few dates.
This approach keeps your service scheduling website flexible while still easy for first-time visitors.
Show a clear summary before checkout
Before payment or final confirmation, display a one-screen summary:
- Services selected and duration
- Date/time
- Address
- Price breakdown (including taxes/fees)
- Key policies (cancellation window, travel charges, deposit rules)
If you take payment, the checkout should feel familiar: minimal fields, clear “Pay” button text, and an obvious “Back” option. For more on deposits and receipts, connect this flow to your payments setup section at /pricing or your dedicated help page like /help/payments.
Add scheduling and calendar management
Scheduling is the engine of a local service booking website. If it feels unreliable—showing the wrong times, missing breaks, or allowing overlaps—customers lose trust fast. The goal is simple: show only bookable slots, keep everyone’s calendars aligned, and make changes easy.
Choose your scheduling approach
You typically have three options:
- Built-in calendar (custom): best for unique rules (multiple providers, travel buffers, complex durations). Higher build cost, full control.
- Plugin/app (for common setups): faster to launch with standard features like availability, reminders, and staff calendars.
- Third-party booking API: ideal when you need proven scheduling at scale, or you plan to offer bookings across many providers.
Pick based on how many services and providers you’ll manage, and how often rules change.
Sync real availability (and keep it accurate)
Your calendar logic should account for:
- Provider availability windows (weekly hours) plus breaks (lunch, admin time)
- Holidays and special days (one-off closures or extended hours)
- Time zones (especially if customers travel or you serve nearby cities). Store times in UTC internally, display locally.
- Buffers and travel time (e.g., 15 minutes between appointments, or longer after certain services)
If providers already use Google/Outlook, consider two-way sync so personal events block out time automatically.
Confirmations and reminders
Send an immediate confirmation with the appointment details and clear next steps (arrival info, prep instructions, reschedule link). Add reminders via email and/or SMS, but make sure users explicitly opt in where required. Keep messages short and include local time.
Prevent conflicts (and handle exceptions)
Double-booking prevention should happen at the moment of checkout: temporarily “hold” a slot while the customer completes booking, then confirm it.
Also give admins a safe manual override: move an appointment, force-book a slot, or add a closure—while automatically notifying affected customers.
Set up payments, deposits, and receipts
Payments are where trust is won (or lost). Make the rules simple, show them early, and automate everything you can so customers aren’t waiting for manual confirmations.
Choose how you collect money
Pick one primary approach and explain it in plain language near the “Book” button and in the confirmation email:
- Pay upfront: best for fixed-price services (e.g., “$79 home haircut”). Fewer no-shows, cleaner accounting.
- Deposit: common for higher-value bookings (e.g., “$50 deposit, remaining balance after the job”). Reduces risk without scaring off new customers.
- Pay after service: works when pricing depends on time or materials. Consider storing a card for no-show protection.
Whatever you choose, show exactly what’s charged today and what’s charged later.
Pick a provider and store minimal data
Use a well-known payment provider that can handle cards, wallets, and refunds. In most cases you should not store card details yourself—let the provider tokenize and store them.
Collect only what you need:
- Customer name, email, phone
- Booking details (service, time, location)
- Payment status (paid/deposit due/authorized)
Make taxes, tips, coupons, and refunds predictable
If taxes apply, display them at checkout as a separate line item. If tips are relevant (beauty, cleaning), offer optional preset amounts (e.g., 10/15/20%) plus “custom.”
For coupons, show the discount before payment so customers can confirm the final total.
Write a short refund/cancellation policy and link it from checkout (e.g., /cancellation-policy). Even a few sentences helps avoid disputes.
Send confirmations and receipts automatically
Trigger two messages every time:
- Booking confirmation (time, address/service area, what’s included, reschedule link)
- Payment receipt (amount, tax, tip, deposit/balance, provider reference)
Automation reduces support tickets and makes your local service booking website feel dependable.
Create customer and admin dashboards
Dashboards turn your booking site from “a form that sends emails” into a place customers can reliably manage their appointments and your team can run daily operations without digging through messages.
Customer dashboard: self-serve without calling you
Give customers a simple account area where they can:
- View upcoming and past bookings (with address, time, and service details)
- Reschedule or cancel within your rules (cutoff times, fees, deposit handling)
- Update contact info and preferences (phone, notes like “buzz #12”)
Keep it focused. Most customers want answers to three questions: “When is it?”, “Where is it?”, and “Can I change it?” Add clear buttons for reschedule/cancel and show what happens next (refund, credit, or deposit kept).
Admin dashboard: one source of truth
Your admin area should make it easy to spot issues before they become problems:
- A bookings list with filters (today/this week, status, staff member, service)
- A calendar view for quick scheduling decisions
- Customer notes visible at a glance (access instructions, allergies, parking tips)
Add the ability to message customers from inside the booking and keep that conversation attached to the record.
Staff/provider roles for multi-person teams
If more than one person delivers services, create roles so each provider can see only their own schedule, update statuses (confirmed/in progress/completed), and add notes—without accessing financial settings or other staff data.
Action logs: fewer mistakes, easier support
Track key actions like reschedules, cancellations, payment status changes, and note edits. A simple “who changed what, when” log helps resolve disputes, train staff, and quickly debug mistakes when a customer says, “I never canceled that.”
Make the site easy to find locally (SEO)
Local SEO is what helps nearby customers discover your services at the exact moment they want to book. The goal is simple: when someone searches “service + city,” your site should show up, look credible, and make booking feel effortless.
Create SEO-friendly service pages (built for intent)
Give each core service its own page and keep it focused. Use a clear “Service + city” pattern in your page title, H1, and opening lines (without keyword stuffing). For example: “Dog grooming in Austin” or “Mobile car detailing in Tampa.”
On each service page, include:
- What’s included and how long it takes
- Starting price (or a price range) and what affects it
- The service area and travel fees (if any)
- A prominent “Book now” link to the booking flow (e.g., /book)
Add location pages (if you serve multiple areas)
If you serve several cities or neighborhoods, create location pages that are genuinely different—not copy-paste templates. Avoid duplicate content by adding local proof and details:
- Address/parking notes (if customers visit you)
- Typical travel times and availability in that area
- Area-specific FAQs and testimonials
Set up Google Business Profile and match your contact details
Your Google Business Profile often becomes your “homepage” in search results. Make sure your business name, address, and phone number match your website exactly (footer and /contact), including formatting. Inconsistencies can hurt rankings and customer trust.
Add schema markup (valid properties only)
Schema helps search engines understand your business and services. Use LocalBusiness (or a more specific subtype) and keep properties accurate.
<script type="application/ld+json">
{
  "@context": "https://schema.org",
  "@type": "LocalBusiness",
  "name": "Acme Mobile Detailing",
  "telephone": "+1-555-555-5555",
  "url": "/",
  "address": {
    "@type": "PostalAddress",
    "streetAddress": "123 Main St",
    "addressLocality": "Tampa",
    "addressRegion": "FL",
    "postalCode": "33602",
    "addressCountry": "US"
  },
  "areaServed": "Tampa, FL"
}
</script>
If you add Service schema, keep it tied to real pages and real pricing/availability.
Handle performance, security, and basic compliance
A booking site is only “easy” if it feels fast, safe, and usable for everyone. Before you add more features, lock down the basics—these issues directly affect conversions and customer trust.
Performance: make booking feel instant
Prioritize a mobile-first layout, since most local searches happen on phones. Use large tap targets (buttons, time slots, and form fields) so people can complete a booking with one thumb.
Keep load times down by compressing images, limiting heavy animations, and loading only what each page needs. A slow service list or checkout page can undo all your marketing.
Security: protect customers and staff
Use SSL (HTTPS) across the entire site, not just checkout. Turn on automatic updates for your CMS/plugins, and back up the site regularly.
For admin access, require strong passwords and enable two-factor authentication if available. Create separate staff accounts with limited permissions—most team members only need to view schedules or manage appointments, not change site settings.
Accessibility: remove friction for real people
Add accessibility basics early: good color contrast, clear labels for every input, and keyboard navigation that works through the full appointment booking flow (service → time → details → payment). Also make sure error messages are specific (for example: “Phone number is required”).
Compliance: required pages and notices
At minimum, publish a Privacy Policy and Terms. If you use cookies for analytics or ad tracking, add a cookie notice and consent option where required.
Link these pages in your footer and near checkout so customers can review them without leaving the process. If you need examples of what to include, keep them simple and plain-language, and consider adding links like /privacy and /terms.
Measure results and improve the booking experience
A booking site is never “done.” Small fixes—like clarifying pricing or reducing form steps—can increase completed bookings without adding more traffic.
Track the events that matter
Set up a simple measurement plan that matches your booking journey. At minimum, track:
- Service view (a visitor looks at a specific service)
- Booking started (they open the booking form or pick a time)
- Booking completed (they reach the confirmation page)
Also consider “micro-events” that explain drop-offs, such as date selected, deposit chosen, or payment failed.
Connect analytics without over-collecting data
Use an analytics tool plus a tag manager (for example, Google Analytics + Google Tag Manager) so you can adjust tracking without frequent code changes. Keep it privacy-friendly:
- Avoid sending names, emails, phone numbers, full addresses, or notes in analytics events.
- Prefer internal IDs (e.g.,
service_id,location_id) and general metadata (e.g.,deposit_required: true). - Create a clean “thank you” page for confirmed bookings and use it as the main conversion signal.
If you use call tracking or chat, ensure it doesn’t accidentally record sensitive details from the booking form.
Collect feedback at the right moments
Add lightweight feedback loops that don’t interrupt booking:
- Post-service survey (1–3 questions via email/SMS)
- Review requests after completion (avoid incentives unless local rules and platform policies allow it)
- A short “What stopped you?” prompt for abandoned bookings (optional and non-blocking)
Improve with careful A/B testing
Run one test at a time and define success before you start (usually booking completed rate, not clicks). Good first tests include:
- Booking button text (e.g., “Book now” vs “Check availability”)
- Pricing display (from-price vs exact price, clear deposit messaging)
- Slot layout (list vs grid, showing duration and end time)
Let tests run long enough to reach a meaningful sample, and watch for unintended effects like more failed payments or more no-shows.
For a practical pre-launch measurement pass, keep a checklist in your /launch-checklist page and update it as you learn what drives real bookings.
Test, launch, and maintain the website
Launching a booking site is less about pushing a button and more about proving that every step works the way real customers use it. A clean release also protects your reputation—especially when payments and schedules are involved.
Run an end-to-end test (like a customer)
Do a full “mystery shopper” run on both mobile and desktop:
- Find a service → pick a time → enter details → pay (or place a deposit)
- Confirmations: on-screen message + email/SMS (if you use SMS)
- Reminders: timing, wording, and correct local time zone
- Cancellations and reschedules: policy shown clearly, slots released properly
- Edge cases: double-book attempts, invalid promo codes, expired links
If possible, test with at least two staff calendars and two locations to catch routing mistakes.
Create a launch checklist + rollback plan
A simple checklist prevents last-minute surprises: domain and SSL active, analytics running, test payment mode disabled, email deliverability verified, and all key pages reviewed for typos and broken links.
Also write a rollback plan: what you’ll do if bookings fail after launch (pause online booking, switch to “request a callback,” or revert to the previous version). Keep a backup and a clear “who does what” list for the first 24 hours.
If you’re building on a platform that supports snapshots and rollback, use it. For instance, Koder.ai includes snapshot-based rollback so you can revert quickly if a booking change introduces errors right after launch.
Prepare support before you go live
Add a contact form and a short FAQ that answers the top booking questions (cancellation window, deposits, arrival instructions). Set response-time expectations (“We reply within 1 business day”) so customers don’t feel ignored.
Maintain and plan what’s next
After launch, review weekly: failed payments, abandoned bookings, and top support questions.
Common next features include memberships, packages, referral codes, and clearer pricing pages (see /pricing). Publishing helpful guides in /blog (e.g., “How to prepare for your appointment”) can reduce support load and increase bookings.
FAQ
Should I build a single business booking site or a multi-provider marketplace?
Start by defining your booking model:
- Single business: one brand, shared policies, simpler scheduling.
- Marketplace: multiple independent providers, onboarding, payouts/commissions, and per-provider availability.
If you’re unsure, launch as a single business but structure your data so adding providers later is straightforward (e.g., every booking references a provider, even if there’s only one at first).
What’s the first thing I should define before choosing booking tools?
List your services and clarify whether each one is:
- Time-based (e.g., 60-minute massage)
- Job-based (e.g., “fix leaking tap”)
Then note where it happens (on-site vs in-studio), whether travel time applies, and if you need minimum notice. These details determine your booking fields, availability rules, and how you calculate durations and buffers.
What pages does a local service booking website need?
A simple, conversion-friendly structure usually includes:
- Home with a clear “Book now” CTA
- Services (scannable list with starting prices/durations)
- Service detail pages (what’s included, add-ons, FAQs, booking link)
- Booking flow (service → time → details → payment → confirmation)
- Account (view/reschedule/cancel, receipts)
- Contact (service area, hours, short form)
Add location/staff pages only when they help customers choose.
What’s the ideal booking journey from visitor to confirmation?
Keep it to one primary path:
- Pick service (and optional add-ons)
- Confirm location/service area (if needed)
- Choose date/time
- Enter essential details
- Pay deposit or full amount (if required)
- Show confirmation + send email/SMS
Limit decisions at each step and always provide an obvious back button so users don’t abandon the flow.
How do I define services so customers know exactly what they’re booking?
Write a “service card” spec for every service:
- Name + one-sentence outcome
- Duration (on-site or remote)
- What’s included (scope limits, materials, travel radius)
- Add-ons (price or extra time)
- Prep instructions (parking, access, what to have ready)
If scope varies widely, split into multiple bookable options (e.g., “Deep clean” vs “2–3 bedroom clean”).
Which pricing model works best for local services online?
Choose a model customers can predict:
- Fixed price for predictable work
- Starting at when scope varies (add examples of what changes price)
- Per hour with clear minimums and what counts as billable time
- Per unit (per room/window/pet)
Be consistent with add-ons (fixed fee or fixed extra time), and show a clear price breakdown before checkout.
What booking rules should I set to prevent scheduling problems?
Set a few core rules:
- Lead time (e.g., minimum 12 hours notice)
- Buffer time between appointments (travel/cleanup)
- Max bookings or max hours per day
- Service area filters (zip codes/radius) for on-site work
Publish your cancellation/reschedule policy near the Book button, in the form, and in the confirmation message to reduce disputes.
How can I reduce drop-offs in the booking form?
Collect only what’s needed to deliver the service:
- Name
- Phone or email
- Address (if relevant)
- Optional notes
Ask for “nice-to-have” details (gate codes, parking tips, pet notes) after confirmation or as an optional step. Customers want to see availability first, so lead with date/time selection.
Should I take payment upfront, a deposit, or pay-after-service?
Pick one approach and explain it clearly:
- Pay upfront for fixed-price services
- Deposit for higher-value bookings
- Pay after service for variable work (consider storing a card for no-show protection)
Always show what’s charged today vs later, use a trusted payment provider (don’t store card data yourself), and automate confirmations plus receipts.
How do I make a booking website easy to find in local search results?
Focus on intent-driven pages and consistency:
- Give each core service its own page with “Service + city” phrasing in titles and openings (no keyword stuffing).
- Add genuine location pages only when content is meaningfully different.
- Set up Google Business Profile and ensure your name/address/phone match your site.
- Add valid schema (LocalBusiness, and Service only if tied to real pages).
Local SEO works best when the site makes booking easy immediately from those pages.