

How to Build a Website for a SaaS Enablement Portal
Learn how to plan, design, and build a SaaS customer enablement portal website—from content and UX to authentication, security, and analytics.
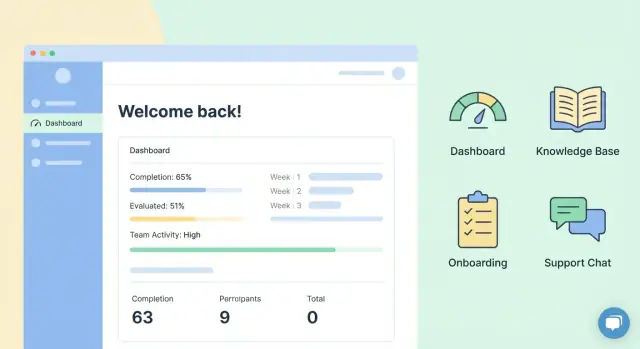
What a SaaS Customer Enablement Portal Should Do
A customer enablement portal is where customers go to successfully use your product—without waiting on your team. “Enablement” usually blends three needs: onboarding (getting set up and activated), training (learning workflows and features), and support (solving issues and finding answers).
Define “enablement” for your product
Start by writing a simple statement of what success looks like for a new customer. For example: “An admin can connect data sources, invite teammates, and publish their first report within 30 minutes.” That definition guides what the portal should include: setup guides, role-based checklists, feature walkthroughs, troubleshooting, and best‑practice examples.
The outcomes your portal should drive
A good portal is not “more content.” It should create measurable outcomes:
- Faster time-to-value (customers reach their first meaningful result sooner)
- Fewer support tickets (questions answered via self-service)
- Higher adoption (more customers use key features consistently)
To support these outcomes, the portal should make the next step obvious, reduce searching, and keep information current.
Who the portal is for
Most SaaS products have multiple audiences, and the portal should acknowledge that:
- Admins: setup, permissions, billing, integrations, governance
- End users: daily tasks, tips, how-to guides, templates
- Partners/resellers: enablement kits, co-selling resources, certification
- Internal teams: support playbooks or release notes (if you choose to include them)
Success metrics to track
Pick a small set of metrics you’ll review monthly, such as:
- Activation rate and time-to-first-value
- Feature usage of “core” actions (your adoption goals)
- Ticket deflection (views/searches vs. created tickets)
- Content effectiveness (helpful votes, bounce rate, search refinements)
When these are defined upfront, every portal decision—content, UX, and access—stays focused on helping customers succeed.
Start With Users, Tasks, and the Customer Journey
A great enablement portal isn’t a library—it’s a shortcut. Before you choose pages, tools, or templates, get clear on who the portal is for, what they’re trying to do, and when they need help.
Define 3–5 key personas (and their top tasks)
Keep personas practical: focus on goals, context, and decision power—not demographics. For a typical SaaS portal, you’ll often see some version of:
- Admin/Owner (sets up the account): connect integrations, invite teammates, set permissions, configure billing.
- End user (uses the product daily): complete core workflows, troubleshoot errors, learn “how do I…?”
- Champion/Power user (drives adoption): share best practices, roll out new features, train others.
- IT/Security (approves the tool): review compliance docs, SSO setup, data retention, vendor risk.
- Executive/Manager (measures value): dashboards, ROI guidance, renewal readiness.
For each persona, write their top 5 tasks as verbs (“Invite users,” “Export data,” “Set up SSO”). Those tasks become your portal’s primary navigation candidates.
Map the journey stages you must support
Organize needs by stage so your portal answers the right questions at the right time:
- Pre-signup: product overview, pricing basics, security summary, FAQs.
- Onboarding: quickstart, setup checklist, first-success milestones.
- Adoption: feature guides, templates, common workflows, troubleshooting.
- Expansion: advanced use cases, integrations, team rollout kits.
- Renewal: value recap guidance, reporting, support plans, roadmap notes.
Collect real questions from teams (not guesses)
Pull the most frequent and costly questions from support tickets, chat transcripts, sales calls, and CSM notes. Look for patterns like “integration setup,” “permissions confusion,” and “why is this failing?” These clusters often define your first knowledge base categories.
Decide what belongs in the portal vs. in-product vs. email
Use a simple rule:
- If it’s needed during the task, put it in‑product (tooltips, inline setup).
- If it’s reference material, put it in the portal (how‑tos, policies, videos).
- If it’s time‑sensitive, use email (activation nudges, renewal reminders) and link back to the portal for the details.
Plan Your Portal Structure and Content Types
A great enablement portal feels obvious: people land, choose the right path, and finish a task quickly. That starts with a clear structure and a small set of repeatable content types—so you can scale without turning the portal into a messy file cabinet.
Choose the core sections (and keep them stable)
Most SaaS portals work best with 4–6 top-level areas that rarely change. A common, effective set is:
- Getting Started: quick setup, first value, “day‑one” checklist
- Guides: how‑to articles grouped by feature or job‑to‑be‑done
- Academy: courses, certifications, recorded sessions
- Release Notes: what changed, what to do next, links to docs
- Support: troubleshooting, known issues, contact options
These names should match the words customers already use. If your product uses “Workspaces,” don’t label docs as “Projects.”
Plan navigation for new and advanced users
Use two layers of navigation:
- Top navigation for the stable sections above.
- Within‑section navigation that supports both skill levels: “Basics” vs “Advanced,” or “Quick wins” vs “Deep dives.”
Include a “Recommended next step” at the end of key pages (e.g., “Set up SSO,” “Invite teammates,” “Track usage”). This reduces dead ends without forcing a rigid learning path.
Define content types you can maintain
Pick a small toolkit and apply it consistently:
- Articles (one task per page)
- Checklists (setup or rollout steps)
- Videos (short, topic‑specific)
- Templates (emails, rollout plans, success plans)
- FAQs (only for truly repeated questions)
Assign ownership and review rules
Every area needs a named owner and a review cadence. Add a simple rule on each page: Owner, Last reviewed, and Next review date. This prevents zombie content and makes updates an everyday habit instead of a yearly cleanup.
Design the Portal UX for Fast Self-Service
Great enablement portals feel obvious the first time someone lands on them. The UX goal is speed: help customers find the right answer or next step in seconds, not minutes.
A homepage that answers “Where do I start?”
Treat the homepage like a control panel, not a marketing page. Include:
- A prominent search bar (top center) with a hint like “Search setup, billing, integrations…”
- Quick links to the most common tasks (e.g., “Invite teammates,” “Connect Salesforce,” “Export reports”)
- An onboarding checklist that reflects progress (3–7 steps is plenty)
- Latest updates: release notes, important changes, and upcoming webinars—kept short and skimmable
If you have multiple products or plans, add a simple “Choose your product/workspace” switcher so customers don’t hunt for the right area.
Use plain language and predictable layouts
Labels should match customer language, not internal team terms. For example, “Add users” often works better than “Provisioning,” and “Connect integrations” beats “Ecosystem.”
Keep page layouts consistent:
- Same left navigation position
- Same placement for “Last updated,” “Estimated time,” and “Next step”
- Same style for callouts (Tip / Warning / Required)
That consistency reduces cognitive load and makes the portal feel learnable.
Design for scanning, not reading
Most visitors scan. Support that behavior with:
- Short, descriptive headings (“Step 2: Add your domain”) instead of vague ones (“Configuration”)
- Numbered steps for procedures, with one action per step
- Small callouts for prerequisites and common pitfalls
When a page is long, add a sticky table of contents so customers can jump to the exact section they need.
Accessibility basics you can’t skip
A fast self-service experience must work for everyone:
- Sufficient contrast for text and buttons
- Full keyboard navigation (visible focus states, logical tab order)
- Readable font sizes and line spacing (avoid dense walls of text)
These basics also improve usability on mobile, in bright environments, and for tired users—exactly when self-service needs to be effortless.
Build a Knowledge Base That Stays Easy to Maintain
A knowledge base only works if it stays current. The goal is to make creating, updating, and retiring content routine—so your team doesn’t avoid it until it’s a mess.
Create a simple content model
Start with a small set of categories that match customer goals (not your org chart), then add tags for flexible filtering.
Define a few reusable article templates so every page feels familiar:
- How‑to (steps + expected result)
- Troubleshooting (symptom → cause → fix)
- Concept/FAQ (what it is, when to use it, common questions)
Templates reduce editing time and make it easier for readers to scan.
Set writing rules your whole team can follow
Consistency beats “perfect writing.” Publish a short style guide and link it in your editor.
Useful rules for enablement content:
- Keep steps short (one action per step)
- Use annotated screenshots sparingly, only where they clarify the UI
- Add a brief “Why it matters” note when a step affects outcomes (billing, security, data integrity)
- Include prerequisites (role required, settings enabled) near the top
Add “next best action” links
Every article should help the reader move forward. End with 2–4 relevant links such as:
- Continue setup: /onboarding/next-steps
- Related feature: /kb/feature-overview
- Troubleshooting: /kb/common-errors
- Contact support (if needed): /support
These links reduce dead ends and keep customers in self-service.
Capture feedback and issues while it’s fresh
Add a lightweight prompt at the bottom:
- “Was this helpful?” (Yes/No)
- Optional comment box and a “Report an issue” action
Route reports to a clear owner (docs, support ops, or PM) with an SLA, so fixes happen before the article becomes a liability.
Create Guided Onboarding and Learning Paths
A great enablement portal doesn’t just store articles—it actively guides customers to value. The goal is to help someone new move from “I logged in” to “I successfully set up and used the product” with minimal confusion and minimal support tickets.
Build paths by role and goal
Start with role-based tracks, because an admin’s first week looks different from an end user’s.
- Admins: setup, integrations, permissions, data import, security basics
- End users: daily workflows, creating content, running reports, collaborating
Then layer use‑case paths on top (e.g., “Automate approvals” vs. “Build a weekly report”), so customers can choose what matches their intent.
Use checklists, milestones, and time estimates
Each path should feel finite. Add a short checklist with milestones like “Connect your data source” or “Invite teammates.” Include time estimates (5 minutes, 20 minutes) to reduce hesitation and help people plan.
Keep steps small and skimmable. When possible, link each step to a single, focused guide (instead of a long catch‑all article). If you have onboarding emails or in‑app prompts, point them to the same milestones to reinforce progress.
Include setup guides and “quick wins”
Early wins reduce drop‑off. Make sure every track includes:
- Product setup guides: integrations, permissions/roles, SSO basics, data import templates
- Quick wins: first project, first report, first automation, first successful share/export
End each quick win with “What’s next?” links that naturally progress the user to the next milestone, or to a deeper course in your /help-center.
Authentication, Roles, and Access Control
Your enablement portal lives or dies on trust: customers need to quickly reach the right content, while you need confidence that private docs, training, and account data aren’t exposed.
Choose a login model that fits your content
Start by deciding what should be public versus private.
- Public + private areas works well when you want SEO‑friendly help articles, release notes, and “getting started” pages, while keeping account-specific guides, partner playbooks, or premium training behind login.
- Fully gated portal is better when most content is customer-specific (or contractual), or when you’re distributing materials to a defined set of users (customers/partners only).
If you’re unsure, default to public fundamentals (overview, onboarding basics) and gate anything tied to configuration, pricing tiers, or customer data.
Support SSO (SAML/OIDC) and define user identity fields
Enterprise customers often expect single sign-on.
- Plan for SAML 2.0 and/or OIDC depending on who you sell to.
- Decide what fields you must store to map identities reliably: typically email, full name, company/account ID, and optionally role, region, or plan tier.
Also define how you’ll handle edge cases: users who change email, duplicate accounts across subsidiaries, and invited users who haven’t activated access.
Roles and permissions: keep it simple, but explicit
Map permissions to real workflows, not org charts. A practical baseline:
- Viewer: read-only access to content and learning paths
- Editor: create/update articles and course content (with approval if needed)
- Admin: manage users, roles, integrations, and settings
- Partner: restricted access to partner-only enablement content
Where possible, add a second dimension like account-based access (only see content for your company) and tier-based access (only see your plan’s features).
Security basics users will notice
Set clear defaults: password rules, session timeout, and account recovery.
Keep recovery flows straightforward (magic link or email reset), log critical auth events, and provide a short “having trouble logging in?” page that routes users to /support with the right context.
Security and Compliance Essentials
A customer enablement portal often contains support conversations, account details, training progress, and sometimes sensitive attachments. Treat security as part of the portal’s core UX: customers should feel safe, and your team should have clear controls.
Least-privilege access (secure by default)
Start from “deny by default” and open access only where it’s needed. Define roles that match real customer teams (e.g., Owner, Admin, Member, Read‑only) and be strict about what each role can see and do.
Good defaults reduce mistakes:
- New users should have minimal permissions until explicitly granted.
- Content should be private unless it’s clearly intended as public documentation.
- Admin actions (role changes, inviting users, exporting data) should be limited to trusted roles.
Compliance readiness without overpromising
Many SaaS buyers will ask about SOC 2, GDPR, and data handling. You can prepare early—even if you’re not certified—by documenting your practices and using security-minded tooling.
Avoid claims like “SOC 2 compliant” unless you have the report. Instead, say what you actually do: encryption in transit, access controls, retention policies, and how you handle data requests.
Audit logs you’ll actually use
Audit logs are the difference between guessing and knowing. Log key portal actions with timestamps and actors:
- Logins and failed login attempts
- User invites and role changes
- Content creation/edits/publishing
- Data exports and permission changes
Make logs searchable and exportable for internal reviews.
Publish a simple security page
Create a short, plain‑English security page and link it in your footer (e.g., /security). Include:
- Where data is stored and how it’s protected
- How customers report security issues
- Your approach to privacy and data requests
- A high-level summary of controls (no sensitive details)
Integrations With Product, Support, and Customer Data
A portal feels smart when it’s connected to the systems customers already rely on. The goal isn’t to integrate everything—it’s to remove dead ends and make the next step obvious.
Connect docs, API references, and system status
If your help center, product documentation, and API docs live in different places, customers will bounce between tabs and lose context.
Link your portal navigation directly to your canonical sources (and keep the URLs stable): product docs, API docs, release notes, and your status page. If those properties are separate sites, keep the experience cohesive with consistent naming, breadcrumbs, and clear “back to portal” links (for example, /docs, /api, /status).
Plan the support handoff (without breaking flow)
Self-service works until it doesn’t—then customers want help fast.
Design a clear escalation path:
- Article → “Still stuck?” prompt with suggested next articles
- If unresolved → ticket form with the article pre-selected
- If urgent → live chat option during business hours
Pre-fill as much as you can: page URL, article ID, product area, and a short “what you tried” field. That reduces back-and-forth and helps support triage quickly. Your contact entry points can live at /contact or /support.
Sync customer context to personalize what matters
If possible, pass account context into the portal: plan tier, enabled features, region, and renewal stage. With that, you can:
- Show only relevant setup guides (e.g., SSO docs to enterprise plans)
- Hide integrations a customer can’t access yet
- Recommend onboarding checklists that match enabled features
Start small: even a plan-tier flag can dramatically improve relevance while keeping the portal simple to operate.
Search, Discovery, and Personalization
A customer enablement portal only works when people can find answers in seconds. Even the best knowledge base website fails if users have to browse for help like it’s a file cabinet. Treat search and discovery as core features of your SaaS portal website—not add-ons.
Make search the default
Put a prominent search bar on every page (especially the homepage, article pages, and your customer onboarding portal entry points). Optimize for quick intent:
- Autocomplete with popular queries, article titles, and common tasks (“reset API key”, “invite teammate”).
- Filters that match how customers think: product area, role, plan, platform, and content type (how‑to, troubleshooting, training).
- Synonyms and abbreviations so “SSO”, “single sign‑on”, and “SAML” all return the same core content.
Use “no results” as a content roadmap
Your “no results” report is one of the fastest ways to improve self-service support portal coverage. Track:
- Top queries with zero results
- Queries that lead to quick bounces
- Queries that repeatedly end in a support ticket
Turn those into action: create missing articles, expand existing pages with better headings, or add a short FAQ section to high‑traffic pages.
Keep results readable and confidence-building
Search results should reduce uncertainty. Aim for:
- Clear, task-focused titles (avoid internal jargon)
- Short summaries that show what the article answers
- Visible metadata when useful (updated date, product area, “Beginner/Advanced”)
If users can’t tell which result to click, they’ll default to submitting a ticket.
Personalize discovery without hiding content
Personalization should help users move faster, not fragment your portal. Add lightweight recommendations such as:
- Suggested articles based on popular pages and the user’s role (admin vs. end user)
- “Next best” training modules for a customer training portal (e.g., onboarding checklist → feature deep dive)
Keep an easy way to browse all content so power users can still explore beyond recommendations.
Analytics and Continuous Improvement
Your enablement portal isn’t done at launch. The fastest portals to improve are the ones that treat content like a product: measure what happens, learn why it happens, then make small changes regularly.
Track the events that show real progress
Start with a small set of key events that map to customer success, not vanity metrics.
- Article view (with article ID, category, and “was this helpful” response)
- Completion of a guide, tutorial, or course module
- Checklist done (e.g., onboarding checklist item completed)
- Support contact triggered from the portal (chat opened, ticket created, “contact support” clicked)
If you can, add context to each event: account tier, role, product plan, and whether the user arrived from in-app, email, or search.
Build dashboards that answer “Are customers getting value faster?”
A few dashboards can cover most day-to-day decisions:
- Adoption and top content: what pages are used most by new vs. existing customers
- Drop-off points: where people abandon learning paths or checklists
- Time-to-value: time from first portal visit to a meaningful milestone (first integration set up, first report created, etc.)
- Deflection indicators: which articles reduce support contacts, and which pages generate them
Keep these dashboards visible to both Support and Customer Success so improvements aren’t siloed.
Run small, controlled experiments
Use insights to try one change at a time and measure impact over 1–2 weeks:
- Publish a new onboarding path for a specific persona
- Add or adjust a CTA (“Start setup,” “Book onboarding,” “Try the template”)
- Improve headings and page structure to match what people search for
Document what you changed and what moved (completion rate, drop‑off rate, support contacts), so learning accumulates.
Use data to refresh—and retire—content
Set a lightweight monthly routine: update the few pages with high traffic and low helpfulness, and retire outdated pages that confuse users or reference old UI. A portal that’s smaller but current will usually outperform a large portal that’s stale.
Tech Stack Choices, Launch Checklist, and Roadmap
Your portal doesn’t need the perfect stack—it needs a stack that fits how fast you ship, who will maintain content, and how tightly it must connect to your product and customer data.
Choose a build approach
CMS-first (e.g., headless or traditional CMS): Best when the portal is content-heavy (articles, guides, release notes) and non-technical teams will publish often. Pair it with your existing auth/SSO and a search layer.
Portal platform (purpose-built help/academy portals): Good for teams that want common features out of the box—knowledge base, categories, learning paths, ticket deflection widgets, basic analytics—with minimal engineering. The tradeoff is less flexibility in UI and custom workflows.
Custom app (framework + APIs): Ideal when you need deep personalization, complex roles, or tight in‑product experiences. Plan for higher build time and ongoing maintenance, and be explicit about what must be custom vs. what can be bought.
If you want to validate the portal UX and information architecture quickly before committing to a full build, you can prototype it using Koder.ai. Because Koder.ai generates full applications from a chat-based workflow (commonly React on the web, Go + PostgreSQL on the backend, and Flutter for mobile), teams can spin up a working portal skeleton—navigation, role-based pages, search flows, and admin editing screens—then iterate in “planning mode” and export the source code when you’re ready to move it into your production pipeline.
Launch checklist (minimum “ready to ship”)
Before you announce the portal, run a focused QA pass:
- Content QA: accuracy, screenshots match current UI, clear “last updated” signals
- Broken links: internal navigation and any external references
- Mobile checks: key flows (search, reading, login) on small screens
- Permissions: confirm every role sees only what it should (including preview and draft content)
- Search sanity: top 20 queries return sensible results; no empty states without guidance
- Performance: pages load quickly; no oversized images or scripts
If you want a simple go/no-go gate, make a one-page checklist your team signs off on and store it in /blog or your internal wiki.
Plan governance so it doesn’t decay
Assign owners for each content area, set review dates (e.g., every 90 days), and track versioning for major guides. A lightweight content calendar (what’s new, what’s being updated, what’s being retired) prevents stale articles from piling up.
A practical 30/60/90-day roadmap
30 days: ship the core IA, top onboarding guides, and “most asked” support articles; instrument basic analytics.
60 days: improve search, add templates/playbooks, introduce role-based landing pages, and integrate with support workflows.
90 days: expand learning paths, add personalization, run A/B tests on navigation, and set up recurring content audits based on search and ticket data.
FAQ
What is a SaaS customer enablement portal (and how is it different from a help center)?
An enablement portal helps customers reach success without waiting on your team by combining:
- Onboarding: setup and first activation
- Training: learning workflows and features
- Support: troubleshooting and answers
It should be designed around outcomes like faster time-to-value, fewer tickets, and higher adoption—not just “more content.”
How do I define “enablement” for my specific product?
Write a one-sentence definition of success for a new customer, then build portal content around it.
Example: “An admin can connect data sources, invite teammates, and publish their first report within 30 minutes.”
From that, you can derive the essentials: setup guides, role-based checklists, walkthroughs, troubleshooting, and best-practice examples.
What metrics should I track to know if the portal is working?
Pick a small set you can review monthly and tie them to customer outcomes:
- Activation rate and time-to-first-value
- Usage of your core actions (adoption goals)
- Ticket deflection (search/views vs. tickets created)
- Content effectiveness (helpful votes, bounce rate, search refinements)
Instrument these early so the portal evolves based on evidence, not opinions.
Which personas should a SaaS enablement portal support?
Start with 3–5 practical personas and list their top tasks as verbs (e.g., “Invite users,” “Export data,” “Set up SSO”). Common personas include:
- Admin/Owner
- End user
- Champion/Power user
- IT/Security
- Executive/Manager
Those tasks become your primary navigation candidates and content roadmap.
How should I map portal content to the customer journey?
Organize portal content by journey stage so customers get the right help at the right time:
- Pre-signup
- Onboarding
- Adoption
- Expansion
- Renewal
Then ensure each stage has clear next steps (checklists, milestones, and “recommended next” links) to avoid dead ends.
What should go in the portal vs. in-product vs. email?
Use this rule of thumb:
- In-product: anything needed during the task (tooltips, inline setup, contextual prompts)
- Portal: reference material (how-tos, policies, videos, templates)
- Email: time-sensitive nudges (activation reminders, renewal prompts) that link back to the portal
This keeps the portal useful without forcing customers to leave critical workflows mid-task.
What’s a good structure for an enablement portal website?
Most SaaS portals work best with 4–6 stable top-level sections, such as:
- Getting Started
- Guides
- Academy
- Release Notes
- Support
Use customer language (not internal jargon), and add within-section navigation like “Basics” vs “Advanced.” End key pages with a “Recommended next step.”
How do I design the portal UX for fast self-service?
Make speed the default:
- Put a prominent search bar on the homepage and key pages
- Add quick links to common tasks (e.g., integrations, invites, exports)
- Use consistent layouts and plain-language labels
- Write for scanning: numbered steps, short headings, prerequisites near the top
For long articles, add a table of contents so users can jump to the exact section they need.
How do I keep portal content up-to-date and maintainable over time?
Keep the knowledge base maintainable with lightweight governance:
- Use a small content model (categories + tags)
- Standardize templates (How-to, Troubleshooting, Concept/FAQ)
- Add page metadata like Owner, Last reviewed, Next review date
- Include feedback prompts (“Was this helpful?” + report an issue)
This prevents stale “zombie content” and makes updates part of routine work.
What authentication, roles, and access controls should an enablement portal include?
Decide what’s public vs. gated, then keep roles explicit and simple:
- Choose public + private areas (SEO + protected content) or a fully gated portal
- Support SAML/OIDC SSO if you sell to enterprises
- Define baseline roles (Viewer, Editor, Admin, Partner) and consider account/tier-based access
- Implement basics users notice: password rules, session timeouts, straightforward recovery
Treat security as part of UX: customers should reach the right content quickly without exposing private materials.