

How to Build a Website for a SaaS Pricing Education Guide
Step-by-step plan to build a website for a SaaS pricing education guide: structure, content types, SEO, lead capture, and measuring results.
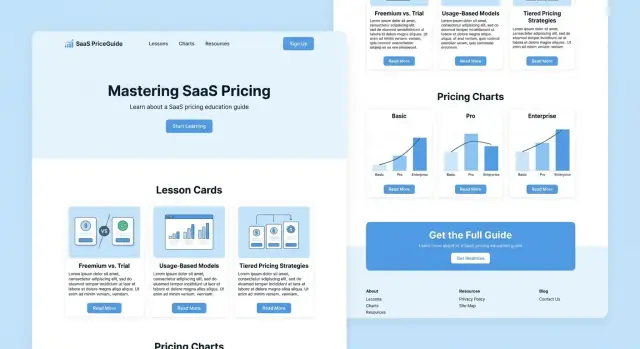
Clarify the goal and audience for the pricing guide
A pricing education guide can’t be “for everyone.” Before you choose pages, templates, or tools, decide what the website is meant to change for your business—and for whom. That’s the difference between a guide that gets bookmarked and shared and one that sits unused.
Define the primary goal (pick one first)
Most pricing guides try to do four jobs at once. You can support multiple outcomes, but you need one primary goal to steer decisions like navigation, content depth, and calls to action.
Common primary goals include:
- Educate the market (build trust and shape how prospects evaluate pricing)
- Generate leads (turn readers into subscribers or demo requests)
- Support sales (give sales a credible resource to send after calls)
- Reduce pricing questions (lower support load, prevent confusion and churn)
A quick check: if a stranger reads only the guide homepage, could they tell which goal matters most?
Pick the primary audience (and name the secondary)
Choose one primary reader and write the guide to them. Then identify a secondary audience you won’t ignore, but also won’t optimize for.
Examples:
- Founders: want frameworks, positioning, and “what to do next”
- Product marketers: want packaging logic, messaging examples, competitor comparisons
- Finance: wants unit economics, discount guardrails, revenue recognition constraints
- Sales: wants objections, talk tracks, and “why we price this way”
- Customers: want clarity, fairness, and plan-selection guidance
Write a one-sentence audience promise, like:
This guide helps B2B SaaS founders choose a pricing model and package plans without confusing buyers.
List 5–10 core questions your guide must answer
These questions become your content spine (and later, your site navigation). Aim for the questions people actually ask in calls, email threads, and chat.
Examples:
- What pricing model fits our product (per-seat, usage, tiers, hybrid)?
- How do we decide what to include in each plan?
- When should we charge for add-ons vs. bundles?
- How do we handle discounts without eroding value?
- How do we test and roll out a price change?
Set success metrics you can measure
Pick metrics that reflect your goal, not vanity traffic.
Typical success metrics:
- Newsletter sign-ups (for education and lead gen)
- Demo requests attributed to the guide (for sales support)
- Time on page / scroll depth (for content usefulness)
- Completions (lesson or chapter completion, if the guide is structured)
Decide targets up front (e.g., “3% email opt-in on the guide homepage”) so you can judge changes later.
Decide what is free vs. gated (and why)
Gating should match intent. Keep foundational explanations free so readers can trust the guide. Gate assets that save time or help implement, such as templates, calculators, or a pricing review checklist.
A good rule: teach for free; gate tools that help people implement. If you gate too early, you’ll reduce reach and weaken the guide’s credibility.
Choose the right site format and information architecture
Your pricing guide will only “teach” if readers can predict what’s next and find it quickly. Start by choosing a format that matches how people prefer to learn—and how often you’ll update content.
Pick the right format
Single long guide works best when the subject is narrow and you want a scroll-friendly, “one stop” resource. It’s simple to maintain, but harder to personalize for different roles.
Multi-page hub is usually the sweet spot for a SaaS pricing education site: a central homepage plus focused pages for each topic. It’s easier to link, update, and rank for specific queries.
Course-style lessons (modules + progress) is ideal when you want readers to commit and return—especially if you’ll add worksheets, quizzes, or gated templates.
If you’re unsure, build a hub first. You can add “course mode” navigation later without rewriting every page.
Define top-level navigation that matches intent
Keep navigation predictable and task-based. A strong default set is:
- Guide (the main curriculum)
- Templates (downloadable assets and checklists)
- Examples (pricing pages, packaging, experiments)
- Glossary (plain-English definitions)
- FAQ (common objections and decisions)
This structure supports both browsing and searching, and makes internal linking feel natural.
Map a reader journey from basics to advanced
Sketch a simple progression (e.g., fundamentals → packaging → price setting → testing → rollout). Each lesson should answer one clear question and end with a “what to do next.”
Add role-based paths so readers can self-select:
- Founders: positioning, packaging decisions, rollout risk
- Marketing: messaging, price presentation, page tests
- Finance: margin math, discount policy, governance
Plan internal links to keep readers moving
On every page, include:
- A short “Previous / Next” lesson link
- 2–4 contextual links to related concepts (e.g., glossary terms)
- A clear next-step CTA (read, download, or apply)
Done well, your information architecture becomes part of the teaching: it reduces confusion, builds momentum, and helps readers reach the content that fits their role.
Design a high-converting guide homepage
Your homepage has one job: explain what the pricing education guide helps people achieve, then move them into the right next step. Think “clarity first,” not “everything at once.”
Write a hero that earns the scroll
Draft a crisp value proposition that names the outcome and who it’s for.
Example structure:
- Promise: “Learn to price your SaaS with confidence—without guesswork.”
- Audience: “For founders, product leads, and growth teams.”
- Proof point: “Frameworks, examples, and templates used in real pricing projects.”
Keep the hero short, with one primary call to action (CTA) and one secondary CTA. Make the primary CTA match the most valuable first conversion (e.g., “Download the pricing template”).
Add a table of contents people can jump through
A guide homepage converts better when visitors can immediately see what they’ll get. Include an outline-style table of contents near the top with jump links to key sections (e.g., “Foundations,” “Packaging,” “Experimentation,” “Common mistakes”). This supports scanning and reduces bounce.
If the guide lives across multiple pages, also include links to the main modules so readers can pick their starting point.
Use credibility signals you can verify
Pricing advice is easy to doubt—so show your receipts, lightly:
- Short author bio (relevant experience only)
- A simple “Methodology” note (how you chose examples, what you tested)
- Sources and references (link out where appropriate)
Avoid vague claims like “industry-leading insights.” Specific beats fancy.
Choose primary CTAs—and repeat them intentionally
Decide on your primary CTAs early and design around them:
- Download template (best for early-stage lead capture)
- Subscribe (best for ongoing education)
- Request demo (best if the guide supports product-led sales)
Place your primary CTA in the hero, after the table of contents, and at the end of the page.
Connect the guide to your product (without making it salesy)
Add subtle, relevant pathways for readers who are ready:
- “See how we handle billing and packaging” → /pricing
- “Talk to us about your pricing model” → /demo
These links should feel like helpful next steps, not interruptions.
Plan content types and page templates
Your pricing education guide should feel consistent no matter where someone enters. The easiest way to get there is to decide (1) what kinds of content you’ll publish and (2) a small set of templates that make every page familiar.
Define your core content types
Start with a tight menu of content types that map to how people learn pricing:
- Lessons: the backbone—short, focused pages that teach one concept (e.g., value metrics, packaging, price increases)
- Case studies: real or anonymized stories showing decisions, tradeoffs, and outcomes
- Calculators: interactive tools (e.g., “price change impact,” “seat-based vs usage-based revenue”), paired with plain-language explanations
- Templates: downloadable assets like pricing interview scripts, packaging matrices, or experiment plans
- Glossary: quick definitions for pricing terms, written for non-specialists
Planning these types up front helps you avoid a guide that’s “all articles” and hard to apply.
Create consistent page templates
Pick 2–4 templates and reuse them. A practical default for lessons and case studies:
- Intro: what the reader will learn and when to use it
- Key takeaways: 3–5 bullets that summarize the page
- Examples: scenarios or simple numbers that make the concept concrete
- Next step + CTA: where to go next (another lesson) and a single conversion action (subscribe, download, request help)
For calculators and templates, add a short “How to use this” section before the CTA.
Add helpful metadata on every page
Make scanning easy by showing:
- Reading time (or “time to complete” for calculators)
- Difficulty level (Beginner / Intermediate / Advanced)
- Last updated date (builds trust and sets expectations)
These details also help you prioritize updates later.
Plan reusable components
Create a small library of components you can drop into any page:
- Callout boxes for “Common mistake,” “Pro tip,” and “Definition”
- Formula blocks that explain variables in plain English
- Comparison tables (e.g., packaging options, metric pros/cons)
Reuse improves clarity and keeps your guide looking intentional.
Write a plain-language style guide
Set rules for tone and definitions: avoid jargon, define terms on first use, prefer short sentences, and use one consistent set of labels (e.g., always “value metric,” not alternating with “pricing metric”). Link terms to your glossary using relative links like /glossary/value-metric.
Build the guide curriculum and lesson outline
A pricing education guide works best when it reads like a course: each lesson answers one question, builds on the last, and ends with a concrete output the reader can create (a worksheet, a decision, a draft page).
Start with the “core path” lessons
Begin with the topics most SaaS teams need before they can touch a pricing page. A simple sequence is:
- Packaging basics: what you sell and what’s included
- Value metrics: what you charge for (per seat, per account, per usage)
- Tiers and differentiation: how to define good/better/best without overlap
- Trials and onboarding: when free trials help vs. hurt
- Discounts and promotions: guardrails that prevent messy deal-making
- Annual plans: how to frame commitment, savings, and cash flow
For each lesson, include one practical example that readers can adapt without copying brand-specific numbers. For example: “Here are three ways a project-management tool could structure tiers,” using neutral names (Starter/Team/Business) and showing what changes (limits, collaboration features, support).
Add advanced modules for scaling
After the core path, add optional lessons for teams with more complex sales motions:
- Enterprise pricing: procurement realities, security requirements, and pricing governance
- Usage-based pricing: choosing billable events, setting caps, and avoiding surprise bills
- Migrations: moving customers from old plans to new ones with minimal churn
- Grandfathering: when to keep legacy pricing (and how to sunset it responsibly)
Include “common mistakes” to reduce confusion
A short “Common mistakes” block at the end of key lessons prevents misreads. Examples: picking a value metric customers can’t predict, creating tiers that differ only by price, or discounting before diagnosing objections.
Plan a simple glossary readers will actually use
Create a glossary page that defines terms in plain language and links back to lessons: ARPA, churn, LTV, CAC, and any domain-specific terms you introduce. Keep entries short, include a one-line example, and use consistent phrasing across the guide.
Select the tech stack and site foundations
Your tech stack should make it easy to publish, update, and organize pricing lessons without constant developer help. The goal is a stable foundation: clean pages, predictable navigation, and fast load times.
Choose a CMS approach
Pick the simplest option that still supports your team’s workflow:
- Blog CMS (e.g., WordPress, Webflow CMS, Ghost): Best if your guide is mostly articles with light structure. Fast to set up, easy editing, lots of SEO plugins.
- Headless CMS (e.g., Contentful, Sanity, Strapi): Best if you want reusable content blocks (lessons, templates, glossary terms) across multiple page types. More flexible, usually needs developer support.
- Static site generator (e.g., Astro, Next.js static export, Hugo): Best for speed and security with a more “documentation-style” guide. Great performance, but updates may require a build workflow.
If you’re unsure, start with a blog CMS and only upgrade to headless when you feel real pain: repeated formatting work, inconsistent page layouts, or lots of content reuse.
If you want to ship faster without assembling a full pipeline, a vibe-coding platform like Koder.ai can help you prototype and build the guide site (React on the web; Go + PostgreSQL on the backend) from a structured chat brief—useful when you want custom templates, calculators, and gated downloads without weeks of setup.
Define URL structure that stays tidy
A pricing education guide gets messy when URLs are improvised. Use a clear base path and consistent categories so readers can predict where they are.
Examples:
/pricing-guide/packaging/pricing-guide/value-metrics/pricing-guide/price-testing
Keep slugs short, avoid dates in URLs, and don’t rename paths often—stability helps SEO and reduces broken links.
Set up global elements for navigation
Before you publish content, lock in the sitewide elements that reduce friction:
- Header: link to the guide home, key categories, and a “Start here” page
- Footer: links to templates, glossary, and contact; add a small “last updated” note if relevant
- Search: helpful once you have more than ~20 pages; consider a lightweight solution (or built-in CMS search)
- Breadcrumbs: especially useful for multi-level topics (e.g., Guide → Packaging → Value metrics)
These foundations make your guide feel coherent and trustworthy.
Performance and accessibility basics
Fast, readable pages improve both conversions and learning outcomes.
- Performance: compress assets, enable caching/CDN where possible, and build mobile-first layouts. Avoid heavy scripts that slow down lesson pages.
- Accessibility: use proper heading order (H2, H3), strong color contrast, descriptive link text, and ensure the site works with keyboard navigation.
Treat these as non-negotiables from day one—retrofits are always harder later.
Set up SEO for discoverability and clear navigation
SEO for a pricing education guide isn’t only about ranking—it’s about helping the right readers land on the right lesson, then move through the guide without getting lost.
Create a keyword map (one primary query per page)
Start with a simple spreadsheet: each page gets one primary search query and a few close variants. This prevents pages from competing with each other (“keyword overlap”) and makes your guide feel more intentional.
For example:
- Homepage: “SaaS pricing education” (broad intro intent)
- Pillar page: “SaaS pricing strategy” (overview + framework)
- Lesson page: “value metric pricing” (specific learning intent)
- FAQ page: “pricing model FAQ” (quick answers)
Write title tags and meta descriptions that match intent
Your title tag should promise the outcome the searcher wants, and the meta description should preview what’s inside.
Good pattern:
- Title: lesson + outcome (+ audience, optional)
- Meta description: 1–2 sentences: what they’ll learn, plus a subtle reason to trust it (template, examples, checklist)
Avoid vague titles like “Pricing Guide — Part 3.” Be specific: “Value Metric Pricing: How to Pick the Right Metric for Your SaaS.”
Use structured headings and a scannable layout
Each page should have:
- One H1 that matches the page’s main topic
- Clear H2 sections for steps, examples, and common mistakes
- Short paragraphs and strong lead sentences so readers can skim
This helps readers and search engines understand the page quickly.
Set internal linking rules (hub-and-spoke)
Treat your guide homepage as the hub. Link out to pillar pages and lessons, and make every lesson link back to the hub and its parent pillar.
A simple rule:
- Hub → all pillars + “start here” path
- Pillar → its lessons
- Lesson → previous/next + pillar + hub
This improves navigation and spreads authority across the guide. You can implement this with consistent modules like “Continue the guide” and breadcrumbs.
Add schema where it helps (and keep it clean)
Use schema to clarify page type and enhance search results when relevant:
- Article schema for lessons
- FAQ schema only when you show real Q&A content on the page
Skip anything spammy or repetitive. If you publish an FAQ section, keep answers short, specific, and aligned with the page topic.
Add lead capture and gated assets without harming UX
Lead capture should feel like a helpful next step, not a toll booth. The fastest way to lose trust is to gate the core education. Instead, keep lessons readable end-to-end and use gated assets to save time for the reader.
Pick a lead magnet that fits the lesson
Choose one primary asset so your CTAs stay focused:
- A pricing template (spreadsheet or Notion doc)
- A checklist for reviewing pricing pages
- A lightweight calculator (even a simple interactive form)
- A short email mini-course that extends the guide
Tie the asset to a specific pain point in the lesson. For example, after explaining packaging, offer a “Packaging & tiers worksheet” rather than a generic “Subscribe for updates.”
Place CTAs where they feel natural
Use CTAs in spots that match intent:
- End of a lesson: the reader is done and ready to apply what they learned
- Sticky sidebar (desktop): useful when it’s subtle and doesn’t cover content
- Exit intent: only if it’s genuinely helpful and not triggered aggressively (avoid showing it repeatedly)
Keep the copy concrete: what they get, how long it takes, and the format (download, email series, access link).
Keep forms short and reduce anxiety
Ask for the minimum (often just email). Add one sentence explaining what happens next: “We’ll email you the template link immediately, plus 3 follow-up lessons over the next week. Unsubscribe anytime.”
If you need segmentation (role, company size), make it optional or defer it to a second step after the download. Every extra field should earn its place.
Consent, privacy, and trust signals
Link to /privacy near the form and confirm consent where required. Use plain language: no surprises, no hidden sales calls. Reassurances (“No spam”) work best when they’re backed by a clear description of the follow-up.
If you want to incentivize sharing the guide, consider a simple reward loop: for example, offering bonus templates or credits when readers create content or refer others. (Koder.ai runs an earn credits program and referrals, which is a useful model if your guide is part of a broader product or community motion.)
Use visuals, tools, and templates to teach pricing clearly
Pricing is easier to learn when readers can see the trade-offs. A strong pricing education guide uses consistent visuals, light interactivity, and practical templates—without turning every lesson into a wall of screenshots.
Create a simple design system (so lessons feel cohesive)
Before adding charts and tools, set a small design system that keeps every page readable and familiar:
- Type scale: one heading style for lessons, one for sub-sections, one body size for long reading
- Color use: one accent color for “key takeaway,” one for warnings (e.g., edge cases), and neutral grays for tables
- Buttons and links: consistent labels like “Download template” and “Try the calculator”
- Spacing: generous whitespace around charts and callouts so complex ideas don’t feel cramped
This consistency matters because readers often jump between topics (tiers → metrics → packaging). If each page looks different, they spend attention on navigation instead of learning.
Use charts and tables to explain tiers, metrics, and trade-offs
Aim for visuals that summarize a concept in one glance:
- Tier comparison tables that highlight what changes across tiers (limits, features, support), not marketing copy
- Metric diagrams showing how pricing scales (per seat, per usage, per outcome) and where “surprise bills” can happen
- Trade-off charts (e.g., simplicity vs. revenue capture) that help readers choose intentionally
Keep annotations short and place them next to the visual—not several paragraphs below.
Add interactive tools carefully (calculators) with clear assumptions
Calculators can teach faster than text, but only if assumptions are explicit. Put a small “Assumptions” panel directly above the inputs (currency, billing period, expected usage). Include a reset button and example presets like “Small team” and “Mid-market” so readers aren’t starting from zero.
If you offer a pricing metric simulator, show the formula in plain English and let users export results.
Include downloadable templates in accessible formats
Templates turn learning into action. Offer each download in at least two formats—Google Sheets for collaboration and PDF for printing/sharing. Useful options include:
- Tier and packaging worksheet
- Pricing metric decision matrix
- Competitive comparison table (with guidance on ethical data sourcing)
Host them behind clean, descriptive URLs like /templates and label file sizes and formats.
Provide real examples with neutral or anonymized data
Examples build trust when they’re realistic but not promotional. Use anonymized company profiles (“API-first SaaS, 50–200 employees”) and neutral numbers that demonstrate the math without implying a universal benchmark. Add a short note explaining what the example is not proving so readers don’t overgeneralize.
Measure performance and improve the guide over time
A pricing education site isn’t “done” when it ships. The real work starts once people use it. Measurement tells you where readers get value, where they get stuck, and which pages quietly drive sign-ups.
Instrument the guide with meaningful events
Pageviews alone won’t tell you whether the guide is teaching. Track a small set of actions that map to learning and conversion:
- Lesson views (and completion proxies like time on page)
- Scroll depth on long lessons (to spot early drop-offs)
- Template/tool downloads
- Form submits (newsletter, request a demo, gated assets)
Keep event names consistent so reports don’t turn into guesswork later.
Build dashboards you’ll actually check
Create one primary dashboard that answers three questions:
-
Which pages get the most traffic and engagement?
-
Where do conversions happen (and from which traffic sources)?
-
Where do people drop off in the learning path?
A simple “Top pages + Conversions + Drop-off points” view is often more useful than a complex reporting suite. If you have a recommended reading path, add a funnel report that shows progression from the homepage to the first lesson to a download or signup.
Improve with small, controlled experiments
Run simple A/B tests on high-leverage elements like CTAs and page introductions. Make only one change at a time (for example: CTA text, placement, or the first paragraph) so results are interpretable.
If you don’t have enough traffic for formal A/B tests, do sequential tests (two weeks with version A, two weeks with version B) and compare directional changes.
Collect feedback inside the content
Add lightweight prompts at the end of lessons:
- “Was this helpful?” (yes/no)
- Optional: “What’s missing?” (one short text field)
For deeper insight, use a short survey after a download to learn who’s reading (role, company stage) and what they’re trying to price.
Create an update cadence (and show it)
Set a recurring schedule to refresh examples, templates, and SEO titles. Maintain a simple changelog so returning readers trust the material is current. Updating also gives you natural moments to re-share lessons via email and social without sounding repetitive.
FAQ
What’s the first decision to make before building a SaaS pricing education website?
Start by picking one primary goal (educate the market, generate leads, support sales, or reduce pricing questions). Then write a one-sentence promise that ties outcome + audience, and sanity-check it by asking: if someone reads only the homepage, will they know what this guide is for?
How do I choose the primary audience for the pricing guide?
Choose one primary reader and optimize the guide for them, then name a secondary audience you’ll accommodate (but not design around). A practical way to stay focused is to write to the primary reader’s “next decision,” and add role-based paths for others (e.g., Founders vs Marketing vs Finance).
What core questions should a pricing education guide answer?
Pull them from real conversations: sales calls, support tickets, chat logs, and pricing-change retrospectives. Aim for 5–10 questions that can become your navigation, such as:
- Which pricing model fits us (seat, usage, tiered, hybrid)?
- What belongs in each plan?
- How should discounts work?
- How do we test and roll out changes?
Those questions become your curriculum and your internal linking structure.
Should my pricing guide be one long page, a hub, or a course?
Pick the format based on update frequency and how people learn:
- Single long guide: simple to maintain, best for narrow scope.
- Multi-page hub: best default for SaaS; easier to update, link, and rank per topic.
- Course-style lessons: best when you want repeat visits, progress tracking, and worksheets.
If you’re unsure, start with a hub and add course-like navigation later.
What navigation structure works best for a pricing education website?
Use predictable, task-based categories that match intent. A strong baseline is:
- Guide
- Templates
- Examples
- Glossary
- FAQ
Then add a simple progression (fundamentals → packaging → price setting → testing → rollout) and include Previous/Next links so readers always know what to do next.
What should the pricing guide homepage include to convert well?
Your homepage should do two things fast: explain the outcome + who it’s for, then route visitors into the next step.
Include:
- A short hero with a primary CTA and a secondary CTA
- A table of contents with jump links (or module links)
- Lightweight credibility signals (author, methodology, references)
Repeat the primary CTA intentionally: hero → after TOC → end of page.
How do I keep lessons consistent across the site?
Create 2–4 reusable page templates and stick to them. A practical lesson template is:
- Intro (what you’ll learn + when to use it)
- Key takeaways (3–5 bullets)
- Examples (scenarios or simple numbers)
- Next step + one CTA
Add metadata like reading time, difficulty, and last updated to build trust and make scanning easier.
What should be free vs gated in a pricing education guide?
Keep foundational education free, and gate assets that save time or enable implementation:
- Templates and worksheets
- Calculators
- Checklists
- Mini-courses
A useful rule: teach for free, gate tools. If you gate too early, you’ll reduce reach and weaken credibility.
What tech stack should I use to build the pricing guide site?
Start with the simplest option that matches your workflow:
- Blog CMS: fastest setup for mostly-article guides.
- Headless CMS: best when you need reusable blocks (lessons, glossary terms, templates) across multiple layouts.
- Static site generator: best performance and security, but requires a build/publish workflow.
Only “upgrade” when you feel real pain (inconsistent layouts, heavy reuse, lots of formatting overhead).
How do I measure success and improve the guide over time?
Track events that reflect learning and conversion, not just traffic:
- Lesson views + completion proxies (time on page)
- Scroll depth on long pages
- Template/tool downloads
- Form submits (subscribe, demo, gated assets)
Run small experiments on high-leverage elements (CTA text/placement, intros) and add lightweight feedback prompts like “Was this helpful?” with an optional “What’s missing?” field.