

Classroom Seating Chart Builder: Drag, Print, Update Fast
Use a classroom seating chart builder to drag and drop names, print clean layouts, and adjust seats anytime as behavior, groups, and needs change.
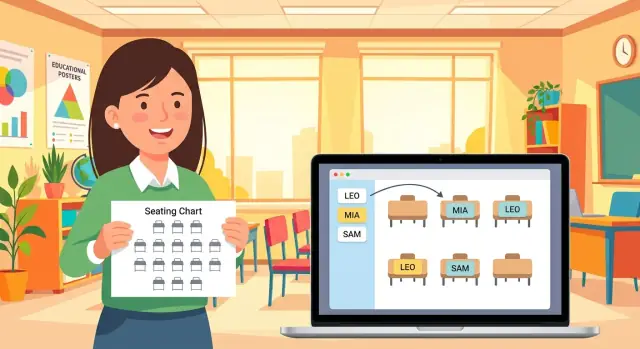
Why seating charts become a daily headache
Seating feels like a small thing until it steals time every single day. When it’s handled ad hoc ("sit wherever" or "just move for today"), the first minutes of class turn into renegotiation. That lost time adds up, and it often shows up as noise, wandering, and off-task behavior.
The same problems tend to repeat: students swap seats when your back is turned, attendance takes longer because names don’t match seats, group work gets messy because the layout changes from day to day, and behavior issues flare up when certain students end up together. You can also miss quiet support needs when you can’t quickly remember who sits near help.
Even a “good enough” chart breaks the moment real life hits. A student switches classes, a new student arrives, or someone needs a new spot for vision, hearing, mobility, or focus. Suddenly your neat plan becomes a patchwork of sticky notes, crossed-out names, and reminders you carry in your head. If you teach multiple periods, multiply that by five or six classes and it gets hard to keep anything consistent.
This is where a classroom seating chart builder should earn its keep. It should help you set up quickly, make the plan obvious for students and subs, and let you change one seat without rewriting the whole chart. It also needs to produce a clean printable seating chart you can post, hand to a substitute, or keep on a clipboard during transitions.
Keeping it simple doesn’t mean keeping it rigid. A practical chart has two modes: stable enough that students know the routine, flexible enough that you can adjust when something changes midyear. A helpful rule is to lock the layout (desks, tables, stations) and treat student names as easy-to-move pieces.
Example: you notice that after lunch, two friends in the back start whispering and missing directions. With a drag and drop seating chart, you move one student closer to you in seconds, print a fresh copy, and start tomorrow without a long class discussion.
What to look for in a seating chart builder
A good classroom seating chart builder should feel like moving sticky notes on a desk, not filling out a form. If you can’t make changes in under a minute, you’ll ignore the tool the first time a new student arrives or a seating move doesn’t work.
Start with drag-and-drop name cards that snap into seats. Snapping matters because it keeps rows neat, prevents overlaps, and makes it obvious who is unassigned. It also helps when you’re making fast changes between classes.
Layouts are the next deal-breaker. Real rooms change: testing days, group work, lab setups, or a substitute who needs something simple. The tool should let you switch between common setups (rows, pairs, pods, horseshoe) without rebuilding from scratch.
What usually makes the difference week to week is simple:
- Drag-and-drop cards that stay aligned in desks
- Layout options you can switch without retyping names
- A print view that fits on one page with readable names
- Quick edits (swap two students, add one, remove one)
- Saved versions (or history) so you can roll back after a change
Printing gets overlooked until the day you need it. Look for a clean print view with bigger text, strong contrast, and no extra clutter. A chart that prints tiny or gets cut off at the margins isn’t helpful when you’re trying to take attendance fast or hand a plan to a substitute.
Also pay attention to updates. The best tools let you drag a student to a new desk, automatically swap if needed, and keep everyone else exactly where they are. If you have to delete and re-add students to do that, mistakes creep in.
Saved versions are your safety net. When a “fresh start” seating change backfires after two days, you should be able to revert to last week’s plan without trying to remember who was where.
Before you start: gather the info that matters
A seating chart is only as good as the information you put into it. Before you open any classroom seating chart builder, take five minutes to collect details that prevent daily problems later.
Start with your non-negotiables. These are students who must sit in a certain spot or away from certain situations. Think about learning plans (IEP/504), vision and hearing needs, medical or mobility needs, and predictable behavior triggers. Add known peer conflicts, and note “best friends” who become a distraction when they sit together.
Write constraints in plain language you’ll actually use later, like “front left for board visibility,” “near door for breaks,” or “separate from Sam.” Keep it private, but keep it clear.
Next, match the layout to your real room, not the room you wish you had. A drag and drop seating chart is fastest when it mirrors your actual desks, aisles, and teaching spots. If a reading corner blocks a row, or a charging station steals space, include it. If you often switch between pairs and small groups, pick a default setup and build that first.
Decide what you want printed on each seat
The more you cram onto a printable seating chart, the harder it is to read during a busy lesson. Pick labels that help you in the moment. Many teachers do well with a simple base plus one extra signal.
Common choices include first name plus last initial, preferred name (if you use it regularly), group color or period (especially if you teach multiple classes), a short code (“front,” “pair,” “quiet”), and a little blank space for pencil notes.
Finally, choose a default rule for students you don’t know well yet. This matters most in the first weeks, when you’re still learning names and dynamics. Pick one rule that feels fair and easy to explain: alphabetical, balanced groups, or random.
A simple approach: start alphabetical for week one, then switch to balanced groups once you have a feel for who needs structure, who needs a calmer neighbor, and who should be closer to you.
How to build a drag-and-drop seating chart (step by step)
A good classroom seating chart builder should let you go from “blank room” to “ready to print” in a few minutes. The trick is to set up the room first, then place students, then add only the notes you’ll actually use.
-
Sketch the room layout first. Add desks or tables in the right general pattern (rows, pods, U-shape). Mark the teacher area, the door side, and any fixed spots like a reading corner or lab stations. If you have special seats (near an outlet, near the board), create them now.
-
Add student names in one batch. Typing one-by-one works, but pasting a roster list is faster and reduces spelling errors. Keep names consistent (for example: “Jordan P.” vs “Jordan Patel”) so you can search quickly later.
-
Drag names into seats, then check readability. Place students roughly where you want them, then zoom out and scan the whole room. If names look cramped, increase spacing or switch to last initial. Aim for a chart you can read at a glance while teaching.
-
Add quick notes without clutter. Use short tags like “front,” “near outlet,” “prefer aisle,” or “away from door.” Keep notes standard so you can scan them, not decode them.
-
Save a version, then print a clean copy. Name versions by date or unit (like “Sep Week 3”). Print a copy for your clipboard and keep a digital version you can edit when changes happen.
Example: if a student needs to sit closer for hearing, tag “front” and place them first. Build the rest around the non-negotiables so you don’t redo the whole chart.
Practical seating strategies that work in real classrooms
A seating chart works best when it supports how you actually teach, not just where desks happen to fit. Before you start dragging names around, decide what problem you’re solving this week: focus, behavior, support, group work, or quicker access for you.
Use zones instead of chasing a “perfect” layout
Think in zones and place students based on what they need most right now. You can even sketch zones on paper first, then build the chart to match.
Most rooms benefit from a quiet zone (fewer side conversations), a support zone near you for frequent check-ins, a partner-work zone where talking is expected and guided, and an independent work zone for students who do well with minimal prompts. Once zones are set, each seat has a purpose, and placement gets faster.
Balance personalities and plan your movement
Talkative students aren’t “bad seats” waiting to happen. They need structure. If two friends feed off each other, separate them by a row, an aisle, or a different zone. If a student talks to fill silence, placing them near a steady, calm classmate often works better than isolating them.
Plan your traffic paths, too. Make sure you can reach every desk quickly without squeezing past backpacks. If you can walk a clean loop around the room and keep at least one clear path to the back, you’ll give more help with less disruption.
If you can, keep one or two flexible seats easy to swap. New students, temporary moves after a conflict, testing accommodations, and rotations are much easier when you already have a “landing spot.”
Make it sub-friendly. Print a labeled chart that matches the real room (not just a pretty diagram). Simple labels like “quiet zone” or “support seats” help a sub follow your intent. If a sub sees Jordan moved into the support zone, they’re more likely to check in instead of treating it like a punishment seat.
Common mistakes and easy fixes
Most seating charts fail for simple reasons. You don’t need a whole new system, just a few checks that keep the chart readable and useful.
The most common printing problem is scale. A chart can look fine on screen and turn into tiny, cramped text on paper. Do a quick test page and make sure names are large enough to read from where you usually stand.
Other frequent issues, with quick fixes:
- Hard to read after printing: Increase font size, widen desk boxes, and add spacing so names don’t touch borders.
- Notes clutter the chart: Keep the chart to what you need fast (names, plus one simple marker if needed). Put extra notes elsewhere.
- No baseline version: Save a dated copy before you change anything.
- Layout ignores real movement: Leave space for backpacks, think about the door, and check sight lines from where you teach most.
- Too many swaps at once: Move 2-4 students, then wait a few days so you can tell what helped.
Example: if three students near the doorway keep getting distracted, don’t redesign the whole room. Keep the chart, move those seats away from the traffic path, and save the old version so you can compare.
Small, measured changes beat a “perfect” chart that nobody can follow.
How to update the chart midyear without chaos
Midyear changes are normal: new students arrive, friendships shift, schedules change, or one table becomes a daily distraction. The goal isn’t a perfect plan. It’s a plan you can adjust without burning a whole prep period.
One habit makes this easier: keep two versions saved. One is your “current” chart (the one you use). The other is a “trial week” chart (the one you test). If the trial works, it becomes current. If it flops, you roll back without trying to remember where everyone used to sit.
When a quick swap is enough
Most problems don’t need a full reshuffle. Start with a small, calm move: swap two seats, or move one student to a quieter spot. This keeps the rest of the class stable, and it makes the change feel fair instead of random.
Treat updates like tiny edits, not a redesign. One or two changes are easier for students to accept, and easier for you to evaluate.
After any change, write one short note about what changed and why. Keep it factual: “Moved Jordan away from back table to reduce calling out” or “Placed Maya near front for hearing support.” These notes keep you from repeating the same experiment later.
A calm update routine students can handle
Updates feel less dramatic when they’re predictable. A simple rhythm:
- Review the chart every 3-4 weeks (or after major schedule changes)
- Start with the smallest changes first
- Run a “trial week” before you lock it in
- Announce the timing of changes, not the reasons
- Check in after a few days: “Is this working for learning?”
Example: you notice two students chatting nonstop after lunch. Instead of moving six people, swap one of them with a student who works well independently. Note it as a one-week trial. On Friday, decide whether to keep it based on what you saw across the week, not one rough day.
Quick checklist before you print
Printing locks in small mistakes that can cause big friction later. Spend two minutes on a final check so your chart is accurate, readable, and useful when you’re standing at the door or moving around the room.
Start with names. Compare labels to your official roster, not your memory. One swapped letter can make a student feel singled out, and it makes attendance notes harder to trust.
Next, check support needs and where you actually teach from. If you spend most of your time near the board, “front row” means something different than if you teach from a side table. Make sure students who need near-teacher seating can actually see, hear, and get quick help.
Do a quick conflict scan:
- Separate high-conflict pairs by at least one seat when possible.
- Watch clusters (three friends in a row is often the issue, not just two).
- Confirm you can reach every student without squeezing through tight gaps.
- Keep clear paths to the door, pencil sharpener, and turn-in spot.
Then open print preview. If you have to squint at arm’s length, it won’t work on a clipboard during a busy period. Aim for one page, large names, and a simple layout. If it spills onto a second page, remove extra labels before shrinking the text.
Finally, save a backup before experimenting. A dated snapshot makes it easy to try a change on Monday and revert by Thursday without rebuilding the whole plan.
Example: a simple seating plan for a busy class
Picture a class of 28 students seated in 7 pods of four. The room is lively, transitions are slow, and group work often turns into side conversations. You want a plan that helps you teach, not a plan you have to babysit.
Start with one rule: spread out the “energy.” Put one talkative student in each pod instead of stacking them together. Then place students who need more check-ins closer to where you teach most (front corner, small-group table, or your usual walking path). A classroom seating chart builder helps because you can drag names around in seconds without rewriting everything.
A sample layout using pod labels (easy to reference out loud):
- Pod A (front left): Maya, Jordan, Eli, Zoey
- Pod B (front right): Noah, Ava, Liam, Sofia
- Pod C (mid left): Ethan, Grace, Lucas, Harper
- Pod D (mid right): Mia, Jackson, Chloe, Owen
- Pod E (back left): Aiden, Riley, Henry, Layla
- Pod F (back mid): Olivia, Caleb, Nora, Ben
- Pod G (back right): Sophia R., Mason, Aria, Leo
In October, a new student joins. Instead of reshuffling the whole room, choose one pod with a flexible mix (not the most fragile group) and add the student there. You might place “Sam” in Pod F, then shift one student from Pod F to Pod E after creating an open seat with a small move. It’s a small ripple, not a full reset.
Midyear, you notice Pod G is always loud during independent work. Turn Pod G into a quiet zone by placing your most independent, low-conflict students there. Then handle conflicts with small moves, like swapping two students after repeated issues (move Mason to Pod C and Lucas to Pod G).
For printing, keep it simple:
- One detailed teacher copy (brief notes like “needs proximity”)
- One substitute copy with only pod labels, student names, and a clear “FRONT” marker
The result you’re aiming for is boring in the best way: fewer interruptions, smoother transitions, and group work that starts without you negotiating every seat.
Next steps: pick a simple workflow you will actually use
A classroom seating chart builder only helps if it stays easy on a busy Tuesday. The goal isn’t the perfect chart. It’s a chart you can build, print, and revise fast without losing your place.
Decide what “done” looks like for you. For most teachers, it’s: place names quickly, print a clean copy, and make small changes anytime.
A workflow that stays manageable all year
Begin with the most basic layout you can live with today. Use it for a week, then adjust based on what you notice (focus, chatter, sight lines, support needs). Small changes beat constant reshuffles.
A lightweight routine you can repeat:
- Build a simple first draft and label a few key seats (near you, near the board, quiet zone).
- Print one copy for your clipboard and keep one “master” you can edit later.
- Observe for five school days and write short notes (2-3 words per student is enough).
- Make only 3-5 moves at a time, then test again.
- Keep it for two weeks unless there’s a safety or major behavior reason to change.
Keep versions so changes feel calm, not chaotic
Version history is the difference between “I think this helped” and “I know this helped.” Save a copy before each set of edits and name it by date or unit. That way, if a change makes things worse, you can go back without rebuilding from scratch.
A realistic example: you move two friends apart, shift one student closer to the front for attention, and place a steady peer partner next to a student who needs support. If the room feels calmer after three days, keep that version. If not, revert and try a different small tweak.
If you ever decide you want a custom tool for your exact process (layouts, printing, version snapshots, notes), Koder.ai (koder.ai) is a chat-based app builder that can help you create a simple web app tailored to your room.
Pick the simplest process you can maintain through field trips, assemblies, and substitute days. Consistency is what makes the chart work.
FAQ
What’s the fastest way to make a seating chart without wasting prep time?
Start by building the room layout once (rows, pods, U-shape), then add names as movable cards. Place the non-negotiable students first (vision, hearing, mobility, IEP/504 needs), then fill in the rest. Save a baseline version before you print so later changes are easy.
What features actually matter in a classroom seating chart builder?
Look for drag-and-drop name cards that snap into seats, a clean one-page print view, and quick edits like swap, add, and remove. Saved versions or history matters more than fancy features because it lets you roll back after a change doesn’t work. If it takes more than a minute to update, you won’t use it.
What should I print on each seat (full names, notes, group labels)?
Keep it readable at a glance: first name plus last initial is a solid default. Add only one extra signal if you need it, like a small tag (“front,” “quiet,” “near door”). If you cram too much info into each seat, you’ll stop using the chart during busy lessons.
How do I make sure the printable chart is actually readable?
Use print preview and do a quick test page before you commit. Increase font size, widen seat boxes, and remove extra labels before shrinking text. A chart that’s readable from where you usually stand beats a chart that looks nice on screen but prints tiny.
How do I update the chart midyear without creating chaos?
Treat the desk layout as fixed and student names as easy-to-move pieces. Make one small move at a time (swap two students or move one student), then give it a few days so you can tell if it helped. Save a dated version before you change anything so you can revert without guessing.
What’s a good first-week seating plan when I don’t know students yet?
Start with a default rule that feels fair and easy to explain, like alphabetical for week one. After you learn dynamics, shift to balanced groups based on focus, behavior triggers, and support needs. Small, calm adjustments work better than a full reshuffle every time something goes wrong.
How can I use seating to reduce talking and off-task behavior?
Think in zones: a quiet zone, a support zone near you, and a partner-work zone where talking is expected. Separate high-distraction pairs by an aisle or a different zone instead of isolating someone. Also plan your walking paths so you can reach every desk quickly without squeezing past backpacks.
What should I do when a new student arrives and there’s no obvious seat?
Keep one or two flexible “landing” seats open or easy to swap into, then make a small ripple move instead of reshuffling the whole class. Put the new student into a stable group, not the most fragile one, and adjust one nearby seat if needed. Save the “before” version so you can undo it if the mix isn’t working.
How do I make a seating chart that’s sub-friendly?
Give the sub a clean copy with only the essentials: student names, seat positions, and a clear “FRONT” marker. If you use zones, label them simply so a sub understands the intent without extra explanation. Avoid printing private notes on the substitute version.
What are the most common seating chart mistakes teachers make?
Changing too many seats at once is the biggest mistake because you can’t tell what helped. Another common issue is ignoring real room movement, like door traffic, backpacks, and sight lines from where you teach. Save a baseline version, make 2–4 moves, and test before you change anything else.