Jun 26, 2025·8 min
Client Intake Forms That Save to a Database (No‑Code Guide)
Learn how to build client intake forms that save submissions to a database using no-code tools. Set fields, validate data, automate follow-ups, and stay secure.
Learn how to build client intake forms that save submissions to a database using no-code tools. Set fields, validate data, automate follow-ups, and stay secure.
A “form to database” intake system is exactly what it sounds like: someone fills out a client intake form, and their answers land as a clean, structured record in a database table—ready for your team to act on.
That sounds similar to “sending responses to a spreadsheet,” but the difference shows up fast. Spreadsheets are great for quick lists, but they break down when you need consistent fields, statuses, multiple owners, file attachments, audit trails, or automations that depend on reliable structure. A database-style table enforces order: each submission becomes one record, with the same set of fields every time.
This isn’t just for tech teams. Common no-code intake workflows include:
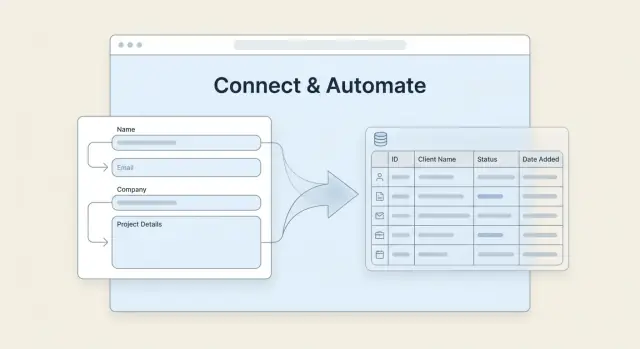
By the time you’re done, you’ll have three connected pieces:
You can think of it as: capture → organize → act.
A smooth build depends on four choices:
Get these right, and your “intake form” becomes a dependable intake system—not another messy sheet to clean up every week.
Before you open a form builder, get clear on what you’re trying to learn, what you’ll do with the answers, and who is responsible for moving the request forward. This step prevents “junk drawer” databases full of half-useful submissions.
Write down the decisions you need to make after someone submits. Examples: qualify a lead, schedule a call, create a project brief, or route a support request. Each outcome should map to one or more fields—if a question doesn’t change what you do next, it probably doesn’t belong in the first version.
How many submissions per week/month do you expect? And how many people need access to view or update records?
Low volume and a small team can work with manual review and simple notifications. Higher volume usually needs tighter validation, clearer status tracking, and permissions (who can see what) to avoid confusion.
A common mistake is treating every submission as a brand-new client. Instead, separate:
This keeps history intact: a returning client can submit multiple intakes without duplicating contact details.
Be strict. Every required field reduces completion rates.
If you’re unsure, make it optional and revisit after you see real submissions.
Write a simple “after submit” checklist:
Finally, name an intake owner. Without a single person accountable for triage, even the best client intake form turns into a pile of unclaimed requests.
Your “stack” is just three parts that need to work together: a form (where clients submit info), a database (where submissions live), and an automation layer (what happens next). You can mix-and-match, but you’ll move faster if you pick tools that already play nicely.
Hosted forms (a shareable link) are quickest to ship and easiest to use on mobile. They’re great for “send this link and fill it out” client intake.
Embedded forms live on your website (or a portal page). They look more branded and reduce context-switching, but may take a little more setup—especially if you need styling, consent checkboxes, or a multi-step flow.
Rule of thumb: start hosted if speed matters; embed when brand trust and conversion matter.
A spreadsheet-like database (tables, views, filters) is ideal when you want full control of fields, statuses, and team workflows. It’s flexible for many use cases beyond sales—project requests, onboarding, support intake, and more.
A built-in CRM database can be faster if your intake is really “lead capture → deal pipeline.” You’ll get contacts, companies, and deal stages out of the box, but you may feel boxed in if your process doesn’t match the CRM’s model.
If you’re unsure, choose the spreadsheet-like database and add a simple pipeline view later.
Native automation (built into your form/database tool) usually covers the basics: send an email, create a task, post a Slack message. It’s simpler to maintain and easier for non-technical teams.
Connectors (like workflow tools) are best when you need multi-step logic across multiple apps—CRM + email marketing + calendar + file storage—or when you want retries, branching, and better logging.
If you’re outgrowing stitched-together tools, you can also build a lightweight intake application (form, database, permissions, and workflows) in one place. For example, Koder.ai lets you vibe-code a full intake system from a chat interface—web, backend, and even mobile—while still giving you real infrastructure underneath (React on the web, Go + PostgreSQL on the backend, Flutter for mobile). It’s useful when you want custom routing rules, structured data, and role-based access without maintaining a complex development pipeline. You can export source code, deploy/host, connect a custom domain, and use snapshots/rollback as the workflow evolves.
Before you commit, sanity-check these five points:
Pick the simplest combination that meets today’s needs. You can always upgrade the workflow once the intake is reliably capturing clean data.
Before you build the form, decide where the answers will live. A clean schema makes everything else easier: reporting, follow-ups, deduping, and handoffs to your team.
Most intake systems work best with these tables:
This setup mirrors how CRMs store data, and it works whether you’re using Airtable, a Notion-style tool, or an Airtable alternative like Baserow/NocoDB.
Pick field types intentionally so your database stays searchable:
Create a unique Intake ID (auto-number or timestamp-based) on the Intakes table. In addition, decide how you’ll detect duplicates:
When a new submission arrives, your automation workflow can either link it to an existing Client record or create a new one.
Add a Status field to Intakes (and optionally Clients) to track progress:
This single field powers views like “New this week,” handoff queues for client onboarding, and triggers for a Zapier workflow or other form-to-database automation.
A client intake form only works if people actually finish it. The goal isn’t to ask everything—it’s to get the right information with the least friction, so your database stays clean and your team can act quickly.
Break long forms into clear sections so it feels manageable. A simple flow that works for most service businesses:
Keep each section focused. If someone sees 25 fields on one screen, completion rates usually drop.
Conditional logic (sometimes called “branching”) lets the form adapt. If a user selects “Website redesign,” show questions about current site URL and pages. If they choose “Consulting,” show questions about goals and decision-makers.
This reduces fatigue for the client and prevents extra “N/A” answers that clutter your database.
Any field that can be interpreted multiple ways should include a short hint or example. Good places for helper text:
Helper text is cheaper than follow-up emails.
Make only the fields required that you truly need to respond (usually name + email + the core request). Overusing required fields increases drop-offs and invites low-quality answers (“asdf”) just to get through.
After submission, show a clear confirmation message with next steps:
A strong confirmation screen reduces anxiety and cuts “Did you get my form?” follow-ups.
Once your form is collecting the right info, the next step is making sure every answer lands in the right place—cleanly and consistently. This is where many “it mostly works” systems start to drift.
List each form question and the exact database field it should populate. Be explicit about types (text, single select, date, attachment, link to another table) so your automation doesn’t guess.
A simple rule: one question should write to one primary field. If one answer needs to power reporting and messaging, store it once and derive the rest later.
Free-text fields feel flexible, but they create messy data that’s hard to filter, assign, or report on. Normalize wherever you can:
If your form tool can’t enforce formatting, do it in your automation step before saving to the database.
Many no-code stacks store uploads in the form tool (or a connected drive) and pass a link into your database. That’s usually the best approach.
Key points:
Intake systems often collect repeat submissions (people resubmit, forward the link, typo their email once). Add a dedupe step:
This one choice keeps your database clean—and makes follow-ups, reporting, and client onboarding far easier later.
Once your form is connected to a database, the next step is making it reliable. Validation keeps your data usable, tracking tells you where submissions came from, and error handling prevents “silent failures” where leads disappear.
Start with the fields that break workflows most often:
Hidden fields let you capture attribution and context automatically. Common ones:
Many form tools can prefill hidden fields from URL parameters. If not, your automation tool can add them when the submission is received.
In your database, add:
These fields make it easier to reconcile “we got your intake” claims and to see how long onboarding takes.
Database writes fail for predictable reasons: API limits, deleted fields, permission changes, or temporary outages.
Set a simple fallback:
Once your form is saving submissions into your database, the real time-saver is what happens next—without anyone copying, pasting, or remembering to “circle back.” A few simple automations can turn each intake into a clear next step for both the client and your team.
Set up an automatic message the moment a new record is created. Keep it short: confirm you received the request, share expected response time, and include any next-step link (calendar, portal, pricing page).
If you support SMS, reserve it for urgent or high-intent services—too many texts can feel intrusive.
Instead of blasting a generic “new submission” email, send a structured notification to email or Slack that includes:
This saves the team from asking “where is it?” and helps them reply faster.
Use simple rules to assign each intake to a person or queue. Common assignment logic:
Most no-code automation tools (Zapier, Make) can update an “Owner” field in your database and notify that person immediately.
A good intake system nudges you before a lead goes cold. Create a task when a record arrives, then schedule reminders:
If your database supports it, store “Next Follow-Up Date” and drive a daily “Due Today” view.
Add a simple score (0–10) based on rules like budget range, urgency, or “referred by.” High-score intakes can trigger a faster Slack ping, an SMS to on-call staff, or a priority queue.
For more ideas on keeping workflows tidy, see /blog/scale-your-no-code-intake-system.
Client intake forms often collect sensitive information—contact details, budgets, health notes, project access, and more. A few simple decisions up front can prevent accidental oversharing later.
Set role-based access in your database tool so people only see what they need:
If your tool supports it, restrict exports to a small group. Exports are the easiest way for data to end up in the wrong inbox.
Data minimization is both good practice and easier to manage. Before adding a question, ask:
Fewer fields also increases completion rates.
In the form footer, include a short consent statement and links to your privacy policy and terms (relative links like /privacy and /terms are fine). Keep it plain:
Uploads (contracts, IDs, briefs) are high-risk. Prefer built-in secure uploads that store files behind authentication. Avoid workflows that generate public, shareable file links by default. If you must share files internally, use expiring links or access-controlled folders.
Set a retention rule and document it (even in a simple internal note). Example: keep leads for 12 months for reporting, convert clients to your main CRM, and delete attachments after 90 days unless needed for delivery. Retention isn’t just compliance—it reduces what you have to protect.
Before you share your intake form publicly, run it like a real client would. Most “intake issues” aren’t technical—they’re small UX gaps, unclear questions, or automations that silently fail.
Start with at least 10–15 submissions using real-world scenarios:
As you test, confirm each submission is usable, not just “received.” If someone rushes through the form, can your team still take the next step?
Open the form on a phone (not just a resized desktop browser).
Check:
If your form feels slow or cramped on mobile, completion rates drop quickly.
Submit the form and then follow the data through every step:
Also test failure modes: turn off an integration, remove permissions, or use an invalid email to ensure errors surface somewhere your team will notice.
Create a one-page internal checklist: where to look for new submissions, how to re-send a failed email, how to merge duplicates, and who owns fixes. This avoids “everyone saw it, nobody handled it.”
For the first 1–2 weeks, track:
These numbers tell you whether to shorten the form, clarify questions, or tighten internal handoffs.
Once your intake form reliably saves to a database, the fastest wins come from how you use the data—without rebuilding the system.
Instead of one giant table, create a few focused views that answer common questions at a glance:
These views reduce “Where is this client at?” messages and make handoffs easier.
If you offer multiple services, don’t force one mega-form. Duplicate your base form + database fields, then adjust:
Keep the core fields consistent (name, email, consent, status, source) so reporting stays clean.
You don’t need a full portal to feel “premium.” A lightweight next step is to send clients a confirmation message that includes:
This cuts down on back-and-forth and improves completion rates.
Syncing is useful when it removes manual work—not just because it’s possible. Common integrations:
Start with one high-impact workflow, then expand.
For more on what to ask and when, see /blog/client-onboarding-checklist. If you want to compare plans for automations and views, check /pricing.
A spreadsheet is fine for simple lists, but it gets messy when you need reliable structure and workflow.
A database-style table helps you:
Aim for the smallest schema that supports your workflow. For most teams, start with:
This prevents duplicating contact details while preserving intake history over time.
Start with outcomes (what you’ll do next) and only require what’s needed to take that next step.
A common baseline:
Use conditional logic to hide irrelevant fields and reduce “N/A” data.
Examples:
This improves completion rates and keeps your database easier to filter and assign.
Create a simple field map before you build automation: each question → one database field.
Tips:
This prevents “it mostly works” drift as your form evolves.
Normalize anything you’ll filter, route, or report on.
Practical defaults:
Pick a primary dedupe key and decide whether to create or update records.
A common approach:
Also add an (auto-number/timestamp) so every submission is traceable even if contact info changes.
Store uploads in a secure file system (your form tool or connected drive) and save the reference in your database.
Recommended pattern:
This keeps your database lightweight while preserving access control.
Automate the few steps that prevent requests from going stale.
High-impact basics:
Keep automation simple at first, then add branching when your process is stable.
Focus on least-access, data minimization, and reliable auditing.
Practical checklist:
If a question doesn’t change routing, qualification, or the next action, leave it out of v1.
Clean field types now save hours of cleanup later.
Include clear links like /privacy and /terms where appropriate.