

How to Build a Customer Support Web App for Tickets & SLAs
Plan, design, and build a customer support web app with ticket workflows, SLA tracking, and a searchable knowledge base—plus roles, analytics, and integrations.
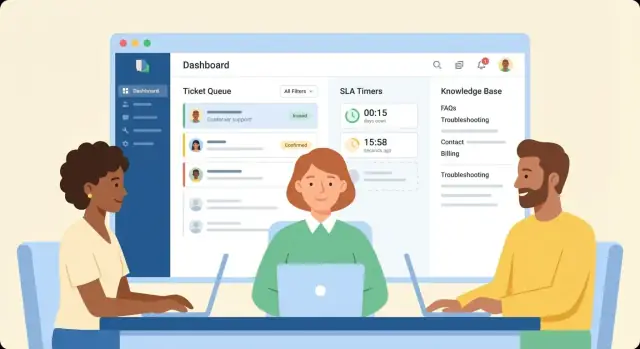
Define Goals, Users, and Scope
A ticketing product gets messy when it’s built around features instead of outcomes. Before you design fields, queues, or automations, align on who the app is for, what pain it removes, and what “good” looks like.
Identify your users (and their daily jobs)
Start by listing the roles and what each must accomplish in a normal week:
- Agents: triage, reply, solve, and document solutions quickly.
- Team leads: rebalance workload, spot stuck tickets, enforce SLAs, coach agents.
- Admins: configure channels, categories, automations, permissions, and templates.
- Customers (optional): submit requests, track status, add details, find answers in a portal.
If you skip this step, you’ll accidentally optimize for admins while agents struggle in the queue.
Write down the problems you’re solving
Keep this concrete and tied to behavior you can observe:
- Missed SLAs: tickets age silently; escalations happen too late.
- Messy queues: unclear ownership, duplicate work, and “where should this go?” confusion.
- Repeated questions: the same answers are typed over and over, slowing resolution.
Decide where the app will be used
Be explicit: is this an internal tool only, or will you also ship a customer-facing portal? Portals change requirements (authentication, permissions, content, branding, notifications).
Choose success metrics early
Pick a small set you’ll track from day one:
- Time to first reply
- Resolution time
- Deflection rate (issues solved via knowledge base instead of tickets)
Create a simple v1 scope statement
Write 5–10 sentences describing what’s in v1 (must-have workflows) and what’s later (nice-to-haves like advanced routing, AI suggestions, or deep reporting). This becomes your guardrail when requests pile up.
Design the Ticket Model and Lifecycle
Your ticket model is the “source of truth” for everything else: queues, SLAs, reporting, and what your agents see on screen. Get this right early and you’ll avoid painful migrations later.
Map a lifecycle you can explain in one sentence
Start with a clear set of states and define what each one means operationally:
- New: created, not yet triaged
- Assigned: owned by an agent or team
- In progress: actively being worked
- Waiting: blocked (customer reply, third-party, engineering)
- Solved: agent believes it’s resolved (often triggers a notification)
- Closed: final state (locked or limited edits)
Add rules for state transitions. For example, only Assigned/In progress tickets can be set to Solved, and a Closed ticket can’t reopen without creating a follow-up.
Decide how tickets enter the system
List every intake path you’ll support now (and what you’ll add later): web form, inbound email, chat, and API. Each channel should create the same ticket object, with a few channel-specific fields (like email headers or chat transcript IDs). Consistency keeps automation and reporting sane.
Pick required fields (and keep them minimal)
At minimum, require:
- Subject and description
- Requester (customer identity)
- Priority (how urgent)
- Category (what kind of issue)
Everything else can be optional or derived. A bloated form reduces completion quality and slows agents down.
Plan tags and custom fields for real teams
Use tags for lightweight filtering (e.g., “billing”, “bug”, “vip”), and custom fields when you need structured reporting or routing (e.g., “Product area”, “Order ID”, “Region”). Make sure fields can be team-scoped so one department doesn’t clutter another.
Define collaboration inside a ticket
Agents need a safe place to coordinate:
- Internal notes (not visible to customers)
- @mentions and follower/CC lists
- Linked tickets (duplicates, parent/child incidents)
Your agent UI should make these elements one click away from the main timeline.
Build Ticket Queues and Assignment Workflows
Queues and assignments are where a ticketing system stops being a shared inbox and starts behaving like an operations tool. Your goal is simple: every ticket should have an obvious “next best action,” and every agent should know what to work on right now.
Design an agent queue that answers “what’s next?”
Create a queue view that defaults to the most time-sensitive work. Common sort options that agents will actually use are:
- Priority (e.g., P1–P4)
- SLA due time (soonest first)
- Last updated (to catch stalled conversations)
Add quick filters (team, channel, product, customer tier) and a fast search. Keep the list dense: subject, requester, priority, status, SLA countdown, and assigned agent are usually enough.
Assignment rules: automatic when possible, manual when needed
Support a few assignment paths so teams can evolve without changing tools:
- Manual assignment for edge cases and training moments
- Round-robin to distribute load evenly
- Skills-based routing (language, product area, billing vs. technical)
- Team-based routing (e.g., “Payments,” “Enterprise,” “Returns”)
Make the rule decisions visible (“Assigned by: Skills → French + Billing”) so agents trust the system.
Statuses and templates that keep work moving
Statuses like Waiting on customer and Waiting on third party prevent tickets from looking “idle” when action is blocked, and they make reporting more honest.
To speed replies, include canned replies and reply templates with safe variables (name, order number, SLA date). Templates should be searchable and editable by authorized leads.
Prevent collisions (two agents, one ticket)
Add collision handling: when an agent opens a ticket, place a short-lived “view/edit lock” or “currently handled by” banner. If someone else tries to reply, warn them and require a confirm-to-send step (or block sending) to avoid duplicate, contradictory responses.
Implement SLA Rules, Timers, and Escalations
SLAs only help if everyone agrees on what’s being measured and the app enforces it consistently. Start by turning “we reply quickly” into policies your system can calculate.
Define SLA policies (what you’ll measure)
Most teams begin with two timers per ticket:
- First response time: time from ticket creation to the first agent reply (or first non-automated public response).
- Resolution time: time from ticket creation to “Solved/Closed.”
Keep policies configurable by priority, channel, or customer tier (for example: VIP gets 1-hour first response, Standard gets 8 business hours).
Decide when SLA clocks start and stop
Write down rules before you code, because edge cases pile up fast:
- Business hours vs. 24/7: define a calendar (timezone, weekdays, holidays).
- Pause states: stop the clock when the ticket is in “Waiting on customer” or “Pending external vendor.”
- Resume conditions: restart when the customer replies or the state changes back to “Open/In progress.”
Store SLA events (started, paused, resumed, breached) so you can later explain why something breached.
Make SLA status obvious in the UI
Agents shouldn’t open a ticket to learn it’s about to breach. Add:
- A countdown timer (time remaining)
- Overdue flags with clear severity (warning vs. breached)
- Optional alerts (in-app, email, or chat) when a threshold is near
Build escalation paths
Escalation should be automatic and predictable:
- Notify a team lead at 80% of the allowed time
- Reassign to an on-duty queue if it breaches
- Increase priority or add an “Escalated” tag
Plan SLA reporting
At minimum, track breach count, breach rate, and trend over time. Also log breach reasons (paused too long, wrong priority, understaffed queue) so reports lead to action, not blame.
Create a Knowledge Base That Reduces Repeated Tickets
A good knowledge base (KB) isn’t just a folder of FAQs—it’s a product feature that should measurably reduce repeated questions and speed up resolutions. Design it as part of your ticketing flow, not as a separate “documentation site.”
Structure: make content easy to maintain
Start with a simple information model that scales:
- Categories → sections → articles (easy navigation for customers and agents)
- Tags for cross-cutting topics (billing, login, integrations) without duplicating articles
- Clear ownership (who reviews what) so content stays current
Keep article templates consistent: problem statement, step-by-step fix, screenshots optional, and “If this didn’t help…” guidance that routes to the right ticket form or channel.
Search that actually finds answers
Most KB failures are search failures. Implement search with:
- Relevance tuning (title/heading boosts, freshness boosts)
- Synonyms (e.g., “invoice” ↔ “bill”, “2FA” ↔ “authentication code”)
- Typo tolerance and stemming (plural/singular)
Also index ticket subject lines (anonymized) to learn real customer wording and feed your synonyms list.
Drafts, reviews, and publishing approvals
Add a lightweight workflow: draft → review → published, with optional scheduled publishing. Store version history and include “last updated” metadata. Pair this with roles (author, reviewer, publisher) so not every agent can edit public docs.
Measure what reduces tickets
Track more than page views. Useful metrics include:
- Helpful votes (yes/no) and “what was missing?” feedback
- Deflection signals: search → article viewed → no ticket created within X hours
- Top searches with no good results (content gaps)
Link articles to tickets where work happens
Inside the agent reply composer, show suggested articles based on the ticket’s subject, tags, and detected intent. One click should insert a public link (e.g., /help/account/reset-password) or an internal snippet for faster replies.
Done well, the KB becomes your first line of support: customers resolve issues themselves, and agents handle fewer repeat tickets with higher consistency.
Set Up Roles, Permissions, and Auditability
Permissions are where a ticketing tool either stays safe and predictable—or becomes messy fast. Don’t wait until after launch to “lock it down.” Model access early so teams can move quickly without exposing sensitive tickets or letting the wrong person change system rules.
Separate roles (and keep them simple)
Start with a few clear roles and add nuance only when you see a real need:
- Agent: works tickets, adds notes, replies, updates fields.
- Lead: everything an agent can do, plus reassigning, queue management, and coaching workflows.
- Admin: system-wide settings like channels, user management, and configuration.
- Content editor: creates and publishes knowledge base articles.
- Read-only: auditing, finance, legal, or stakeholders who need visibility without changes.
Define permissions by capability
Avoid “all-or-nothing” access. Treat major actions as explicit permissions:
- View vs. edit tickets (including private notes)
- Manage macros/canned replies
- Edit SLA rules, timers, and escalation policies
- Publish/unpublish knowledge base content
This makes it easier to grant least-privilege access and to support growth (new teams, new regions, contractors).
Team-based access for sensitive queues
Some queues should be restricted by default—billing, security, VIP, or HR-related requests. Use team membership to control:
- Which queues are visible
- Who can reassign or merge tickets
- Whether customer data fields are masked
Audit logs you’ll actually use
Log key actions with who, what, when, and before/after values: assignment changes, deletions, SLA/policy edits, role changes, and KB publishing. Make logs searchable and exportable so investigations don’t require database access.
Plan multi-brand or multi-inbox early
If you support multiple brands or inboxes, decide whether users can switch contexts or whether access is partitioned. This affects permission checks and reporting and should be consistent from day one.
Design the Agent and Admin User Experience
A ticketing system succeeds or fails on how quickly agents can understand a situation and take the next action. Treat the agent workspace as your “home screen”: it should answer three questions immediately—what happened, who is this customer, and what should I do next.
The agent workspace layout
Start with a split view that keeps context visible while agents work:
- Conversation thread (email/chat/messages) with clear timestamps, attachments, and quoting.
- Customer panel with identity, plan/account tier, org, past tickets, and key notes.
- Ticket fields (status, priority, queue, assignee, tags, SLA timers) grouped logically, not scattered.
Keep the thread readable: differentiate customer vs agent vs system events, and make internal notes visually distinct so they’re never sent by mistake.
One-click actions that remove friction
Put common actions where the cursor already is—near the last message and at the top of the ticket:
- Assign / reassign
- Change status (including “waiting on customer”)
- Add internal note
- Apply macro (pre-filled reply + field updates)
Aim for “one click + optional comment” flows. If an action requires a modal, it should be short and keyboard-friendly.
Speed features for high-volume teams
High-throughput support needs shortcuts that feel predictable:
- Keyboard shortcuts for reply, note, assign to me, close, and next ticket
- Bulk actions in list views (tag, assign, close, merge)
- A fast command palette for power users
Accessibility and UI safety
Build accessibility in from day one: sufficient contrast, visible focus states, full tab navigation, and screen-reader labels for controls and timers. Also prevent costly mistakes with small safeguards: confirm destructive actions, clearly label “public reply” vs “internal note,” and show what will be sent before sending.
Admin and customer portal UX
Admins need simple, guided screens for queues, fields, automations, and templates—avoid hiding essentials behind nested settings.
If customers can submit and track issues, design a lightweight portal: create ticket, view status, add updates, and see suggested articles before submission. Keep it consistent with your public-facing brand and link it from /help.
Plan Integrations, APIs, and Omnichannel Intake
A ticketing app gets useful when it connects to the places customers already talk to you—and the tools your team relies on to resolve issues.
Start with the systems you must connect
List your “day-one” integrations and what data you need from each:
- Email (shared inboxes, forwarding rules, outbound SMTP)
- Chat (website widget, WhatsApp, Intercom-style tools)
- CRM (account context, owner, plan tier)
- Billing (subscription status, invoices, refunds)
- Identity provider (SSO via Google/Microsoft, SCIM user provisioning)
Write down which direction data flows (read-only vs. write-back) and who owns each integration internally.
Design your API and webhooks early
Even if you ship integrations later, define stable primitives now:
- API endpoints for ticket create, update, search, plus comments/messages and status changes.
- Webhooks for key events (ticket.created, ticket.updated, message.received, sla.breached) so external systems can react.
Keep authentication predictable (API keys for servers; OAuth for user-installed apps), and version the API to avoid breaking customers.
Prevent duplicate tickets with solid email threading
Email is where messy edge cases show up first. Plan how you will:
- Thread replies using Message-ID / In-Reply-To / References headers
- Parse forwarded messages and common signatures safely
- Deduplicate by detecting repeated inbound payloads (especially from mail providers)
A small investment here avoids “every reply creates a new ticket” disasters.
Handle attachments safely
Support attachments, but with guardrails: file type/size limits, secure storage, and hooks for virus scanning (or a scanning service). Consider stripping dangerous formats and never rendering untrusted HTML inline.
Document setup like a product feature
Create a short integration guide: required credentials, step-by-step configuration, troubleshooting, and test steps. If you maintain docs, link to your integration hub at /docs so admins don’t need engineering help to connect systems.
Add Analytics and Reporting for Support Performance
Analytics is where your ticketing system turns from “a place to work” into “a way to improve.” The key is to capture the right events, compute a few consistent metrics, and present them to different audiences without exposing sensitive data.
Start with an event trail (not just the current ticket state)
Store the moments that explain why a ticket looks the way it does. At minimum, track: status changes, customer and agent replies, assignments and reassignments, priority/category updates, and SLA timer events (start/stop, pauses, and breaches). This lets you answer questions like “Did we breach because we were understaffed, or because we waited on the customer?”
Keep events append-only where possible; it makes auditing and reporting more trustworthy.
Dashboards for team leads
Leads usually need operational views they can act on today:
- Backlog by queue, priority, and category
- Aging tickets (e.g., oldest open, oldest awaiting customer)
- SLA risk (tickets likely to breach within X hours)
- Agent workload (assigned count, active work, and time since last update)
Make these dashboards filterable by time range, channel, and team—without forcing managers into spreadsheets.
Reports for executives
Executives care less about individual tickets and more about trends:
- Volume by category/channel, including peak days and hours
- First response and resolution trends (median and 90th percentile)
- CSAT trends (and response rate, so scores aren’t misleading)
If you link outcomes to categories, you can justify staffing, training, or product fixes.
Filters, exports, and access controls
Add CSV export for common views, but gate it with permissions (and ideally field-level controls) to avoid leaking emails, message bodies, or customer identifiers. Log who exported what and when.
Data retention without risky promises
Define how long you keep ticket events, message content, attachments, and analytics aggregates. Prefer configurable retention settings and document what you actually delete vs. anonymize so you don’t commit to guarantees you can’t verify.
Pick a Practical Architecture and Tech Stack
A ticketing product doesn’t need a complex architecture to be effective. For most teams, a simple setup is faster to ship, easier to maintain, and still scales well.
Start with a straightforward system diagram
A practical baseline looks like this:
- Web frontend: agent/admin UI plus customer-facing forms and portal
- API backend: business rules for tickets, SLAs, users, and knowledge base
- Database: source of truth for tickets, users, events, and settings
- Background jobs: anything time-based or long-running
This “modular monolith” approach (one backend, clear modules) keeps v1 manageable while leaving room to split services later if needed.
If you want to accelerate a v1 build without reinventing your whole delivery pipeline, a vibe-coding platform like Koder.ai can help you prototype the agent dashboard, ticket lifecycle, and admin screens via chat—then export source code when you’re ready to take full control.
Know what must run in the background
Ticketing systems feel real-time, but a lot of work is asynchronous. Plan background jobs early for:
- SLA timers and escalations (e.g., “first response due in 30 minutes”)
- Notifications (email, in-app, webhooks)
- Search indexing (tickets and knowledge base articles)
- Inbound email processing (parsing, attachments, threading)
If background processing is an afterthought, SLAs become unreliable and agents lose trust.
Store data for correctness, search for speed
Use a relational database (PostgreSQL/MySQL) for core records: tickets, comments, statuses, assignments, SLA policies, and an audit/event table.
For fast searching and relevance, keep a separate search index (Elasticsearch/OpenSearch or a managed equivalent). Don’t try to make your relational database do full-text search at scale if your product depends on it.
Decide build vs buy (and why)
Three areas often save months when bought:
- Authentication: use a proven provider (SSO, MFA, password policies)
- Email delivery: transactional email service for deliverability and bounce handling
- Search: managed search if you don’t have in-house expertise
Build the things that differentiate you: workflow rules, SLA behavior, routing logic, and the agent experience.
Plan milestones with a clear v1 list
Estimate effort by milestones, not features. A solid v1 milestone list is: ticket CRUD + comments, basic assignment, SLA timers (core), email notifications, minimal reporting. Keep “nice-to-haves” (advanced automation, complex roles, deep analytics) explicitly out of scope until v1 usage proves what matters.
Cover Security, Privacy, and Reliability Basics
Security and reliability decisions are easiest (and cheapest) when you bake them in early. A support app handles sensitive conversations, attachments, and account details—so treat it like a core system, not a side tool.
Protect customer data by default
Start with encryption in transit everywhere (HTTPS/TLS), including internal service-to-service calls if you have multiple services. For data at rest, encrypt databases and object storage (attachments), and store secrets in a managed vault.
Use least-privilege access: agents should only see the tickets they’re permitted to handle, and admins should have elevated rights only when needed. Add access logging so you can answer “who viewed/exported what, and when?” without guesswork.
Choose authentication that matches your audience
Authentication isn’t one-size-fits-all. For small teams, email + password may be enough. If you’re selling to larger organizations, SSO (SAML/OIDC) can be a requirement. For lightweight customer portals, a magic link can reduce friction.
Whatever you choose, ensure sessions are secure (short-lived tokens, refresh strategy, secure cookies) and add MFA for admin accounts.
Prevent common attacks before they start
Put rate limiting on login, ticket creation, and search endpoints to slow brute-force and spam. Validate and sanitize input to prevent injection issues and unsafe HTML in comments.
If you use cookies, add CSRF protection. For APIs, apply strict CORS rules. For file uploads, scan for malware and restrict file types and sizes.
Backups, recovery, and measurable targets
Define RPO/RTO goals (how much data you can lose, how quickly you must be back). Automate backups for databases and file storage, and—crucially—test restores on a schedule. A backup you can’t restore is not a backup.
Privacy basics your users will ask for
Support apps are often subject to privacy requests. Provide a way to export and delete customer data, and document what gets removed versus retained for legal/audit reasons. Keep audit trails and access logs available to admins (see /security) so you can investigate incidents quickly.
Test, Launch, and Improve with Real Support Teams
Shipping a customer support web app isn’t the finish line—it’s the start of learning how real agents work under real pressure. The goal of testing and rollout is to protect day-to-day support while you validate that your ticketing system and SLA management behave correctly.
Write end-to-end test scenarios that match real work
Beyond unit tests, document (and automate where possible) a small set of end-to-end scenarios that reflect your highest-risk flows:
- Ticket creation: email/web form/API intake creates a ticket with the right fields, customer identity, and initial status.
- Replies and threading: customer replies attach to the correct ticket, agent replies notify the customer, internal notes stay internal.
- SLA breaches: timers start/stop correctly (e.g., pause on “Waiting on customer”), breaches trigger the right escalation, and the audit trail records what happened.
- Knowledge base search: agents can quickly find relevant articles from the ticket view, and customers see helpful suggestions before submitting.
If you have a staging environment, seed it with realistic data (customers, tags, queues, business hours) so tests don’t pass “in theory” only.
Run a pilot and collect feedback weekly
Start with a small support group (or a single queue) for 2–4 weeks. Set a weekly feedback ritual: 30 minutes to review what slowed them down, what confused customers, and which rules caused surprises.
Keep feedback structured: “What was the task?”, “What did you expect?”, “What happened?”, and “How often does this occur?” This helps you prioritize fixes that affect throughput and SLA compliance.
Create an onboarding checklist for admins and agents
Make onboarding repeatable so the rollout doesn’t depend on one person.
Include essentials like: logging in, queue views, replying vs. internal notes, assigning/mentioning, changing status, using macros, reading SLA indicators, and finding/creating KB articles. For admins: managing roles, business hours, tags, automations, and reporting basics.
Plan a staged rollout (with a rollback option)
Roll out by team, channel, or ticket type. Define a rollback path ahead of time: how you’ll temporarily switch intake back, what data might need re-syncing, and who makes the call.
Teams that build on Koder.ai often lean on snapshots and rollback during early pilots to safely iterate on workflows (queues, SLAs, and portal forms) without disrupting live operations.
Set an iteration roadmap
Once the pilot stabilizes, plan improvements in waves:
- Better automation rules (macros, triggers, auto-tagging)
- Advanced routing (skills-based assignment, load balancing)
- Richer KB workflows (article reviews, feedback loops, deflection metrics)
Treat each wave like a small release: test, pilot, measure, then expand.
FAQ
What should a first version of a support ticket app include?
Start with ticket creation, assignment, public replies, internal notes, basic statuses, and first-response and resolution timers. Add advanced routing, detailed analytics, and complex automations after agents use the first version.
Which ticket statuses do support teams need?
Use a short lifecycle such as New, Assigned, In progress, Waiting, Solved, and Closed. Define exactly who can move tickets between states, especially when solving or reopening a request.
What information should every ticket contain?
Require only the subject, description, requester, priority, and category. Add structured custom fields only when a team needs them for routing or reporting.
How should an agent ticket queue work?
Show priority, SLA due time, last update, status, requester, and assignee in the queue. Sort urgent work first and give agents quick filters for team, channel, and customer tier.
Should ticket assignment be automatic or manual?
Offer manual assignment alongside rules such as round-robin, team routing, and skills routing. Display the rule that assigned the ticket so agents understand why it reached them.
How do SLA timers work in a support app?
Track first-response time and resolution time at minimum. Set calendars, pause states, and escalation rules before building timers, then store every start, pause, resume, and breach event.
How can a knowledge base reduce support tickets?
Use categories, sections, and articles, then add search that handles common terms, typos, and alternate wording. Suggest relevant articles in the ticket composer and before customers submit a request.
What permissions does a ticketing system need?
Separate agent, lead, admin, content editor, and read-only roles. Restrict sensitive queues such as billing or security by team membership, and log changes to tickets, roles, policies, and exports.
What tech stack works for a customer support web app?
Use a relational database for tickets, users, comments, assignments, SLA policies, and event history. Run SLA checks, notifications, email processing, and indexing as background jobs; add a search index when ticket volume makes database search slow.
How should a support team test and launch the app?
Pilot the app with one queue or a small support group for two to four weeks. Test intake, email threading, internal notes, SLA pauses, breaches, and article search with realistic data, then roll out in stages with a prepared rollback path.