May 10, 2025·8 min
Create a Local Specialist Website with SEO and Trust Signals
Learn how to build a local medical specialist website that ranks in local search and earns trust with clear credentials, reviews, schema, and patient-first UX.
Learn how to build a local medical specialist website that ranks in local search and earns trust with clear credentials, reviews, schema, and patient-first UX.
Before you think about pages or SEO tools, define what a “successful” website visit looks like for your practice. A local specialist site should help the right patient (or referring office) take the next step quickly—without confusion or extra clicks.
Pick one primary conversion and design the site around it. Common options include:
Choose one primary action and treat the others as secondary. This reduces decision fatigue and improves follow-through.
Write down your core services in plain language (how patients search, not how textbooks label it). For each service, collect the 5–10 most common questions you hear:
These questions become high-value topics for service pages and FAQs—and they help you align your messaging with patient intent.
Be specific about where you want to rank and who you can realistically attract. List:
This location list will guide your page copy, titles, and local SEO signals later.
Map a simple journey: Search → Service page → Proof/trust → Action. Once you choose the primary action (call, form, or booking), every key page should support it with a clear next step and consistent wording.
Your website’s foundation should be boring—in the best way. Simple choices here make the site faster, safer, and easier to update.
Choose a domain that patients can say out loud and type correctly the first time. For most specialists, the safest options are your name (or clinic name) plus your city or specialty.
A few practical rules:
Set up a matching professional email (e.g., [email protected]) instead of a free mailbox. It looks more credible and makes staff transitions cleaner.
Hosting affects speed, uptime, and security—three things patients notice quickly (even if they can’t name them). Pick a plan that includes:
If you’re unsure, choose reputable managed hosting rather than the cheapest plan. Slow sites and downtime cost appointments.
A CMS (content management system) lets you update hours, bios, and service details without rebuilding the site. The best platform is the one that will be maintained consistently.
Decide up front:
If you need to move faster than a traditional build cycle, consider a modern “vibe-coding” workflow. For example, Koder.ai lets you create and iterate on web applications through a chat interface (with React on the front end and Go + PostgreSQL on the back end) and export source code when you need full control. That can be useful for quickly prototyping a new site structure, landing pages, or patient-intake flows—just make sure any forms, hosting, and analytics choices still meet your local privacy and healthcare compliance requirements.
Before anyone designs pages, outline your core navigation. This prevents expensive rework and ensures patients can find what they need.
Start with a simple list: Home, Services, About, Locations/Service Area, Insurance & Pricing (if applicable), Patient Forms, Reviews, Contact/Book Appointment, Privacy Policy.
A specialist website should feel obvious to patients: they arrive with a question, quickly confirm you’re the right clinician, and can book or call without hunting.
Keep your top menu short and patient-focused:
If you have multiple offices, consider a dedicated Locations hub that links to one page per site (use consistent naming like “Downtown Clinic” vs. “Main Office”). This helps visitors—and later, local SEO.
Patients shouldn’t have to return to the homepage to take the next step. Use one primary action everywhere (header + page end), such as:
Keep the wording consistent, make the button visually distinct, and link it to a dedicated page (e.g., /book or /contact).
Most patients will browse on a phone. Prioritize:
Use good contrast, clear headings, and descriptive button labels (not just “Click here”). Ensure form fields have visible labels, and keep interactive elements large enough to tap comfortably. These choices improve usability for everyone—not only visitors using assistive tech.
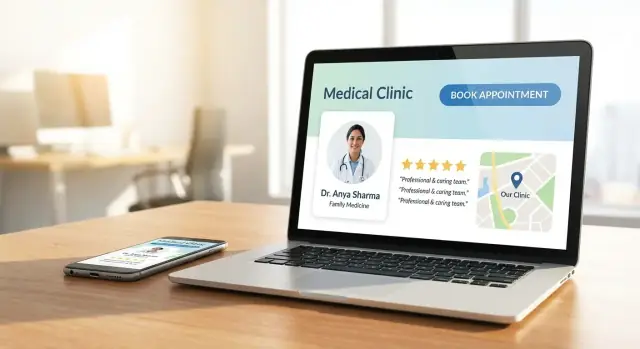
Your core pages do most of the trust-building work—often before a patient ever calls. For a local medical specialist website, prioritize clarity over cleverness: who you help, what you treat, where you’re located, and what patients should do next.
Patients typically scan, not read. Your homepage should quickly answer four questions: Am I in the right place? Can you help with my issue? Are you nearby? What’s the next step?
Include:
Add a short “What to expect” teaser (visit length, referral needs, accepted insurance if you list it accurately), and keep navigation simple.
A good service page is both educational and reassuring—without making medical promises. For each major service/condition, cover:
Write like you speak to patients in the clinic: short sections, clear headings, and a calm tone. End with a call-to-action relevant to that page (e.g., “Request an appointment for migraine evaluation”).
Patients want to know you’re qualified and that you’ll treat them well. Your About page should include:
If you have a team, include short bios and roles. Avoid generic claims like “best” or “top-rated”; use specifics instead.
Even if it’s not a “core” page in your navigation, Contact is where trust becomes action. Include hours, parking/transit guidance, and after-hours instructions (including emergency guidance when appropriate).
Patients decide quickly whether a specialist feels credible and safe. Trust signals are the small details that remove doubt: who you are, where you practice, what patients can expect, and how you handle their information.
Make it easy to verify your credentials without hunting.
Include your license(s) (state/region), board certifications, fellowships, and clinical focus/specialties. If you treat specific conditions, phrase it in plain language (e.g., “sports knee injuries” vs. only medical terms).
If you publish or teach, add a short “Publications & Teaching” section and link to profiles where appropriate (e.g., a hospital bio). Keep claims factual and up to date.
A high-quality headshot and real clinic images reduce uncertainty before a visit.
Add photos of the clinician, front desk/team, and office exterior/interior so patients recognize the location. Note consent for staff photos and avoid stock images that can feel generic.
A simple caption like “Main entrance on Oak Street—free parking behind the building” can be surprisingly reassuring.
Trust drops when pricing feels hidden.
Explain accepted insurance, self-pay options, and what patients should bring. If pricing varies, say why (tests, procedures, complexity) and offer a next step: “Call us for an estimate.” Also add a brief statement of limits: you can’t guarantee outcomes, and information on the site isn’t personal medical advice.
Policies reduce anxiety and set clear boundaries.
Create (or link to) pages for Privacy, Terms, and Cancellation/No-show policies. If you use online forms or booking, describe how messages are handled and the expected response time.
Link these in the footer so they’re always available, e.g., /privacy and /terms.
Local SEO helps patients find you when they search for a specialist nearby—and it starts with getting a few fundamentals consistently right.
Your Name, Address, and Phone (NAP) should match everywhere it appears on your site: header/footer, contact page, appointment page, and any “Find Us” blocks.
Use one official format (including suite numbers, abbreviations, and punctuation) and stick to it. Even small variations can confuse search engines and patients, especially on mobile.
Embed a map on your Contact page and, if relevant, the homepage.
Go beyond the pin: add driving and parking notes patients actually need—nearest cross streets, parking garage name, elevator access, public transit options, and entry instructions for medical buildings with multiple tenants.
If you serve multiple offices, create a dedicated page per location with unique details:
Avoid thin “copy-paste” pages. Each location page should answer: “What’s different about this office?”
Work local language into key areas—page titles, headings, and a few sentences of body text—without stuffing.
Examples that feel natural:
Also consider a short FAQ on your Services page that reflects real searches (e.g., “Do you accept patients from [Nearby City]?”). If you later expand, add a dedicated page rather than cramming every city into one paragraph.
On-page SEO is the part you control directly: the words, headings, and media on each page. For a local medical specialist website, the goal is to help search engines understand exactly what you treat, where you practice, and which page should rank for which query—without making the copy sound like it was written for algorithms.
Assign one primary keyword to each core page based on what a patient is trying to do.
For example:
Avoid forcing the same keyword onto multiple pages, or you risk competing with yourself.
Write a unique title tag and meta description for each page that matches the page topic and location.
A strong title usually includes: Service + City + Practice name (when it fits). Keep it readable and specific—like a promise you can keep.
Use one H1 per page that mirrors the page topic (“Knee Pain Treatment in Austin”). Then use H2s for the big questions patients have: who it’s for, what to expect, recovery time, fees/insurance basics, and how to book.
Keep paragraphs short. Medical pages are often read on phones, between appointments.
Images can build trust (clinic photos, clinician headshots), but they must be optimized:
dr-lee-orthopedics-austin.jpg)If your site feels slow, patients may leave before they ever reach your booking button.
Schema markup is a small layer of structured data that helps search engines understand your clinic and services. It won’t replace great content, but it can improve clarity in search results and reduce the chance of your practice being misunderstood.
For a local medical specialist website, a strong starting point is JSON-LD schema that matches what’s clearly visible on the page.
Here’s a simple example (trim to fit your real details):
{
  "@context": "https://schema.org",
  "@type": "Physician",
  "name": "Dr. Taylor Nguyen",
  "medicalSpecialty": "Dermatology",
  "telephone": "+1-555-0100",
  "url": "https://example.com/",
  "address": {
    "@type": "PostalAddress",
    "streetAddress": "123 Main St",
    "addressLocality": "Springfield",
    "addressRegion": "CA",
    "postalCode": "90000",
    "addressCountry": "US"
  },
  "openingHours": ["Mo-Fr 09:00-17:00"]
}
Review schema is heavily scrutinized. Only mark up reviews if they:
If you’re unsure, skip review markup and focus on displaying patient reviews transparently in your content.
Make it easy for search engines to crawl and index your site.
/sitemap.xml) in Google Search Console.robots.txt settings: don’t block important pages like your homepage, services, location/contact page, or booking page.Finally, run your pages through Google’s Rich Results Test and fix warnings that apply to your goals. Treat schema as “truth in a machine-readable format”—if it isn’t true on-page, don’t mark it up.
Patient decisions are heavily influenced by what they see outside your website: Google results, maps, and third-party listings. Your goal is to make those touchpoints accurate, active, and reassuring.
Claim and fully complete your Google Business Profile, then treat it like a mini “front desk.” Use your exact legal business name, correct primary category (and a few relevant secondary categories), and consistent hours (including holidays). Add photos that reduce uncertainty—exterior signage, reception area, and treatment rooms—and keep your phone number and website URL up to date.
Use GBP Posts for practical updates: new services, temporary hour changes, insurance announcements, or seasonal reminders. Keep posts informative rather than promotional, and link to a relevant page on your site (for example, /services).
Ask all patients in a consistent way—e.g., a printed card at checkout or a follow-up email. Avoid incentives and avoid “review gating” (only asking happy patients). If you use a QR code, make sure it points to your GBP review link.
When responding, protect privacy: never confirm someone is a patient or discuss conditions, dates, or treatments. A safe pattern is: thank them, acknowledge feedback generally, and invite them to call the office.
List your practice on trusted directories relevant to your specialty and region. Keep your NAP details (Name, Address, Phone) identical everywhere, including suite numbers and abbreviations. Inconsistencies can weaken local rankings and confuse patients.
Finally, keep your website aligned with these profiles—matching hours, address, and contact details—so patients see one clear answer no matter where they find you.
A specialist website should make the next step obvious: book, ask a question, or call. Patients often arrive anxious or in pain, so your conversion elements should reduce effort and uncertainty.
You typically have three good options:
If you use an online scheduler, keep the path short: choose visit type → choose time → confirm. Avoid forcing account creation unless required.
A “request an appointment” form should ask only what you need to respond:
Right under the button, add a plain-language note such as: “We respond within 1 business day.” Also include an emergencies policy: “If this is urgent, call 911 (or your local emergency number). Do not use this form for emergencies.”
Make your phone number prominent in the header and on key pages. Use a click-to-call link on mobile.
If you use call tracking, do it thoughtfully:
Use simple, patient-first buttons and repeat them where decisions happen:
Place CTAs near service descriptions, near insurance info, and at the end of each service page so patients don’t have to hunt for the next step.
Patients evaluate a specialist’s site not only by how it looks, but by how safe it feels. Clear privacy practices reduce hesitation—especially when someone is deciding whether to book.
Only ask for information you truly need to respond or schedule. The more sensitive data you collect, the more you must protect.
Avoid collecting unnecessary sensitive information via forms. For example, a “Request an appointment” form usually doesn’t need a full medical history—save that for your official intake process.
Use HTTPS everywhere so pages load securely and browsers don’t show warnings. If your site uses a CMS (like WordPress), set a routine to update plugins, themes, and the core platform. Outdated add-ons are a common cause of security issues.
If you work with a developer or agency, clarify who is responsible for ongoing updates and how quickly critical patches are applied.
If you use analytics, ad pixels, chat widgets, or embedded maps, you may need notices or consent tools depending on local rules.
Add cookie/analytics notices if required in your area, and keep your Privacy Policy easy to find in the footer. Mention what you track, why, and how patients can opt out.
Create a basic backup and recovery plan. At minimum:
Finally, if you offer online appointment booking, confirm whether your booking provider supports healthcare privacy requirements in your region and document that choice.
A specialist website isn’t “done” after launch. The clinics that win locally tend to treat the site like a living front desk: it should stay accurate, fast, and easy for patients to use.
Start by measuring patient intent—not just page views. Set up tracking for the key actions patients take when they’re ready to book:
If you use a third‑party scheduler, track the outbound booking click so you can see which pages drive appointments. This helps you decide what to improve first (often service pages and /contact).
Connect Google Search Console to see what people search for and which pages show up in results. Pay attention to:
Pair that with analytics to understand what happens on-site: which pages patients land on, where they drop off, and which pages lead to calls or bookings.
Run a page speed test monthly or after any major update. Don’t chase perfect scores—focus on changes patients actually feel:
A faster site typically improves engagement and reduces missed appointments from frustrated mobile users.
Set a recurring calendar reminder for quick updates:
If your team ships changes frequently, consider using a workflow that supports safe iteration—such as staging environments and versioned rollbacks. Platforms like Koder.ai include snapshots and rollback tooling alongside deployment/hosting, which can help you test updates (like new service pages or CTA placements) and quickly revert if something breaks.
Accuracy builds confidence. Even small updates—like new office hours or a new associate clinician—reduce friction and help patients book with fewer questions.
Choose one primary conversion and design every key page around it:
Keep other actions secondary so patients don’t hesitate or bounce.
List each core service in plain language (how patients search), then write the 5–10 questions you hear most.
Turn those into:
Start with a realistic list:
Use this list consistently in your copy (naturally), page titles, and location details so both patients and search engines understand where you practice.
Keep it simple, memorable, and future-proof:
Also set up a professional email like [email protected]—it builds credibility and makes staff transitions easier.
Choose hosting that prioritizes speed and safety:
Cheap hosting can cost you appointments through slow load times and downtime.
Use a CMS that someone will actually maintain (you, staff, or an agency). Decide up front:
A “perfect” platform that never gets updated becomes a risk.
Keep navigation predictable and patient-focused:
Then add the same primary CTA on every key page (header + end of page), and design mobile-first with tap-to-call and short forms.
Focus on specifics patients can verify:
Trust is built by clarity, not superlatives like “best.”
Start with consistency and real-world usefulness:
These basics often outperform “advanced” tactics when done well.
Use schema to make your “facts” machine-readable—only if they match what’s visible on the page.
Common starting points:
Be cautious with review schema: only mark up reviews that are genuine, visible on your site, and allowed under the platform’s rules. When in doubt, skip markup and just display reviews transparently.