

How to Build a Web App for Logistics Tracking: Drivers & Routes
Plan and build a logistics web app to track deliveries, drivers, and routes. Learn core features, data flow, maps, notifications, security, and rollout steps.
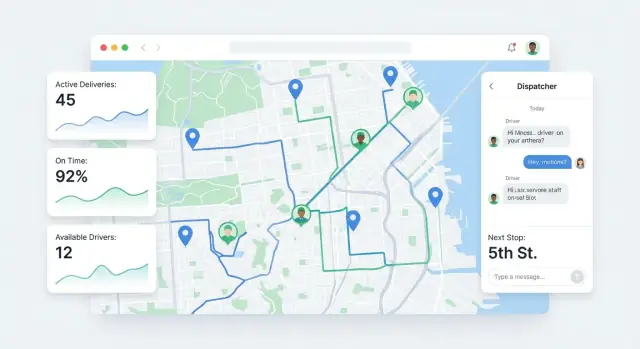
Set Goals and Define the Users
Before you sketch screens or pick a tech stack, decide what success looks like for your logistics web app. “Tracking” can mean many things, and vague goals usually lead to a cluttered product that no one loves.
Start with a clear business goal
Pick one primary business goal and a couple of supporting goals. Examples:
- Fewer late deliveries (and fewer penalty fees)
- Fewer inbound “Where is my driver?” calls
- Better visibility for dispatch when exceptions happen (traffic, delays, failed stops)
A good goal is specific enough to guide decisions. For instance, “reduce late deliveries” will push you toward accurate ETAs and exception handling—not just a prettier map.
Define the users (and what each needs)
Most delivery tracking software has multiple audiences. Define them early so you don’t build everything for one role.
- Dispatcher: needs a live dispatch dashboard, quick reassignments, and confidence in what’s happening right now.
- Driver: needs a simple workflow (start route → arrive → complete stop), minimal typing, and reliable navigation.
- Manager/Operations lead: needs performance reporting, trends over time, and accountability.
- Customer support: needs fast answers: last known status, last driver update, and the expected next step.
Choose 3 measurable outcomes
Keep it to three so your MVP stays focused. Common metrics:
- On-time delivery rate (e.g., improve from 92% to 96%)
- Failed stops / reattempt rate (wrong address, customer unavailable)
- Idle time (unplanned stops, time between deliveries)
Clarify what “tracking” means for your team
Write down the exact signals your system will capture:
- Location tracking: last known GPS point, update frequency, and “stale location” rules
- Status updates: planned → assigned → en route → arrived → delivered/failed
- Proof of delivery: photo, signature, name, timestamp, and optional notes
This definition becomes your shared contract for product decisions and team expectations.
Map the Delivery Workflow and Statuses
Before you design screens or pick tools, agree on a single “truth” for how a delivery moves through your operation. A clear workflow prevents confusion like “Is this stop still open?” or “Why can’t I reassign this job?”—and it makes reporting reliable.
The core delivery flow (end-to-end)
Most logistics teams can align on a simple backbone:
Create jobs → assign driver → navigate → deliver → close out.
Even if your business has special cases (returns, multi-drop routes, cash on delivery), keep the backbone consistent and add variations as exceptions rather than inventing a new flow for every customer.
Statuses that everyone uses the same way
Define statuses in plain language and make them mutually exclusive. A practical set is:
- Planned: job exists, not yet given to a driver
- Assigned: driver is responsible, but not moving yet
- En route: driver is heading to the next stop
- Arrived: driver reached the stop location
- Delivered: completed successfully with proof
- Failed: attempted but not completed (with a reason)
Agree on what causes each status change. For example, “En route” might be automatic when the driver taps “Start navigation,” while “Delivered” should always be explicit.
Driver and dispatcher actions (and who can do what)
Driver actions to support:
- Start shift, accept job
- Scan/confirm items, collect signature/photo
- Mark delivered or failed with a reason
Dispatcher actions to support:
- Reassign a job, edit stops
- Contact the driver (call/message shortcuts)
- Mark exceptions (e.g., customer closed, address issue)
To reduce disputes later, log every change with who, when, and why (especially for Failed and reassignment).
Design the Data Model (Deliveries, Drivers, Routes)
A clear data model is what turns a “map with dots” into dependable delivery tracking software. If you define the core objects well, your dispatch dashboard becomes easier to build, reports are accurate, and operations don’t rely on workarounds.
Deliveries (the “job”)
Model each delivery as a job that moves through statuses (planned, assigned, en route, delivered, failed, etc.). Include fields that support real dispatch decisions, not just addresses:
- Pickup and drop-off address (store normalized fields plus the original text)
- Time window (earliest/latest) for each stop
- Contact name + phone, plus delivery instructions/notes
- COD (cash on delivery) amount and payment method rules
- Priority (normal/urgent) and service type (same-day, standard)
Tip: treat pickup and drop-off as “stops” so a job can later expand to multi-stop without redesigning.
Drivers (and vehicles)
Drivers are more than a name on a route. Capture operational constraints so route optimization and dispatching stay realistic:
- Name, phone, and availability/shift hours
- Vehicle type, license plate, and capacity (weight/volume)
- Certifications (hazmat, refrigerated, liftgate) when relevant
Routes (the plan)
A route should store the ordered list of stops, plus what the system expected versus what happened:
- Ordered stops with planned ETAs and service times
- Total distance and planned duration
- Constraints (vehicle type, max hours, restricted zones)
Events / audit log (the truth)
Add an immutable event log: who changed what and when (status updates, edits, reassignments). This supports customer disputes, compliance, and “why was this late?” analysis—especially when paired with proof of delivery and exceptions.
Plan the Key Screens and User Experience
Great logistics tracking software is mostly a UX problem: the right information, at the right moment, with the fewest clicks. Before building features, sketch the core screens and decide what each user must be able to do in under 10 seconds.
Dispatcher dashboard (control center)
This is where work gets assigned and problems get handled. Make it “glanceable” and action-first:
- Today’s jobs with filters (unassigned, in progress, late, failed)
- Exceptions panel (no response, address issue, customer not home, damaged package)
- Late-risk indicator (based on schedule vs. current progress)
- One-click assign/reassign, plus bulk actions for last-minute changes
Keep the list view fast, searchable, and optimized for keyboard use.
Map view (situational awareness)
Dispatchers need a map that explains the day, not just points on a map.
Show live driver positions, stop pins, and color-coded statuses (Planned, En route, Arrived, Delivered, Failed). Add simple toggles: “show only late risk,” “show only unassigned,” and “follow driver.” Clicking a pin should open a compact stop card with ETA, notes, and next actions.
Driver view (do the next right thing)
The driver screen should focus on the next stop, not the whole plan.
Include: next stop address, instructions (gate code, drop-off notes), contact buttons (call/text dispatcher or customer), and a quick status update with minimal typing. If you support proof of delivery, keep it in the same flow (photo/signature + short note).
Manager reports (improve operations)
Managers need trends, not raw events: on-time performance, delivery time by zone, and top failure reasons. Make reports easy to export and easy to compare week over week.
Design tip: define a consistent status vocabulary and color system across every screen—this reduces training time and avoids costly misunderstandings.
Build Maps, Geocoding, and Route Planning
Maps are where your tracking app turns “a list of stops” into something dispatchers and drivers can act on. The goal isn’t fancy cartography—it’s fewer wrong turns, clearer ETAs, and faster decisions.
Pick the mapping building blocks
Most logistics web apps need the same core set of map features:
- Geocoding: convert addresses into coordinates for routing and on-map pins.
- Distance matrix: travel time and distance between many stops (critical for planning and ETAs).
- Route drawing: display the chosen path and stop sequence clearly.
- ETAs: show predicted arrival times per stop and for the whole route.
Decide early whether you’ll rely on a single provider (simpler) or abstract providers behind an internal service (more work now, flexibility later).
Don’t ignore address quality
Bad addresses are a top cause of failed deliveries. Build guardrails:
- Validation and suggestions as users type (auto-complete, standardized formatting).
- Confidence indicators (e.g., “street-level match” vs. “city-level match”).
- Manual pin placement on the map when the address is incomplete (new buildings, rural areas, warehouses with internal gates).
Store the original text address and the resolved coordinates separately so you can audit and fix recurring issues.
Route planning: manual vs. simple optimization
Start with manual ordering (drag-and-drop stops) plus practical helpers: “cluster nearby stops,” “move failed delivery to end,” or “prioritize urgent stops.” Then add basic optimization rules (nearest-next, minimize drive time, avoid backtracking) as you learn real dispatch behavior.
Support real-world constraints
Even MVP route planning should understand constraints such as:
- Time windows (customer open hours, scheduled appointments)
- Capacity (vehicle size, number of parcels)
- Restricted roads (truck limits, toll avoidance)
- Multi-depot starts/ends (hub-and-spoke operations)
If you document these constraints clearly in the UI, dispatchers will trust the plan—and know when to override it.
Implement Real-Time Driver Location Tracking
Real-time driver tracking is only useful if it’s reliable, understandable, and respectful of battery life. Before you write code, decide what “real-time” means for your operations: do dispatchers need second-by-second movement, or is “every 30–60 seconds” enough to answer customer questions and react to delays?
Choose an update frequency (and protect battery)
Higher update frequency gives smoother movement on the dispatch dashboard, but it drains battery and uses more mobile data.
A practical starting point:
- On active delivery: every 10–30 seconds (or every 50–100 meters)
- Between stops / idle: every 60–180 seconds
- App in background: slower updates unless there’s an urgent need
You can also trigger updates on meaningful events (arrived at stop, leaving stop) rather than constant pings.
Live updates vs. periodic refresh
For the dispatcher view, you have two common patterns:
- Live updates (WebSockets): locations appear immediately, great for a busy dispatch dashboard.
- Periodic refresh (polling): the browser refreshes locations every X seconds, simpler to build and often “good enough.”
Many teams start with periodic refresh and add WebSockets later when dispatch volume grows.
Store location history (not just the dot)
Don’t only keep the latest coordinate. Save track points (timestamp + lat/long + optional speed/accuracy) so you can:
- show a breadcrumb trail for a delivery window
- investigate disputes (“Where was the driver at 3:12 PM?”)
- display a clear last known location when the driver goes offline
Handle offline behavior gracefully
Mobile networks drop. The driver app should queue location events locally when the signal is lost and sync automatically when it returns. On the dashboard, mark the driver as “Last update: 7 min ago” instead of pretending the dot is current.
Done well, real-time GPS tracking builds trust: dispatch sees what’s happening, and drivers aren’t punished by unreliable connectivity.
Add Notifications, Exceptions, and Proof of Delivery
Notifications and exception handling are what turn a basic logistics web app into dependable delivery tracking software. They help your team act early, and they give customers fewer reasons to call.
Notifications that help (not spam)
Start with a small set of events that matter to operations and customers: dispatched, arriving soon, delivered, and failed delivery. Let users choose the channel—push, SMS, or email—and who receives what (dispatcher only, customer only, or both).
A practical rule: send customer-facing messages only when something changes, and keep operational messages more detailed (stop reason, contact attempts, notes).
Exception alerts and “late risk” signals
Exceptions should be triggered by clear conditions, not gut feel. Common ones in last-mile delivery:
- Late risk: ETA drifts past the promised time window.
- Missed time window: delivery isn’t completed within the agreed slot.
- Driver stopped too long: location unchanged beyond a threshold (e.g., 15–30 minutes) outside known stops.
When an exception fires, show a suggested next step in the dispatch dashboard: “call recipient,” “reassign,” or “mark as delayed.” This keeps fleet management decisions consistent.
Proof of Delivery (POD) you can trust
Proof of delivery should be easy for drivers and verifiable for disputes. Typical options:
- Signature (finger/stylus) with recipient name
- Photo (package at door / receiving area)
- Barcode/QR scan to confirm the right parcel
- Timestamp + GPS coordinate captured automatically
Store POD as part of the delivery record, and make it downloadable for customer support.
Templates, quiet hours, and configuration
Different clients want different wording. Add message templates and per-customer settings (time windows, escalation rules, and quiet hours). This makes your logistics web app adaptable without needing code changes as your delivery volume grows.
Handle Accounts, Roles, and Permissions
Accounts and access control are easy to overlook until the first dispute, the first new depot, or the first customer asks, “Who changed this delivery?” A clear permissions model prevents accidental edits, protects sensitive data, and makes the dispatch team faster.
Authentication basics (and what to add later)
Start with a simple email/password flow, but make it production-ready:
- Email verification for new users
- Password reset that expires quickly (e.g., 15–60 minutes)
- Optional two-factor authentication for admins and dispatchers
If your customers or larger clients use identity providers (Google Workspace, Microsoft Entra ID/AD), plan for SSO as an upgrade path. Even if you don’t build it in the MVP, design user records so they can later link to an SSO identity without creating duplicate accounts.
Roles: keep them few, but meaningful
Avoid creating dozens of micro-permissions at the start. Define a small set of roles that map to real jobs, then refine based on feedback.
Common roles for a logistics web app:
- Dispatcher: create/edit jobs, assign drivers, adjust ETAs
- Driver: view assigned stops, update statuses, capture proof of delivery
- Operations manager: view performance dashboards, export reports
- Admin: manage users, depots, integrations, security settings
Then decide who can do sensitive actions:
- Edit or cancel jobs after “En route” (or after “Out for delivery,” if you use that label)
- View pricing/costs and margin fields
- Export data (CSV/PDF) and access historical reports
Multi-branch (depot/team) visibility
If you have more than one depot, you’ll want tenant-like separation early:
- Users belong to a branch/depot (or multiple)
- Deliveries and drivers are scoped to a branch
- Cross-branch access is granted only to regional managers/admins
This keeps teams focused and reduces accidental changes to another depot’s work.
Auditability: an immutable event log
For disputes, chargebacks, and “why was this rerouted?” questions, build an append-only event log for key actions:
- Status changes (who, when, where)
- Driver reassignment
- Address edits and delivery window changes
- Proof of delivery uploads and signature capture
Make audit entries immutable and queryable by delivery ID and user. It’s also helpful to show a human-friendly “Activity” timeline on the delivery detail screen (see /blog/proof-of-delivery-basics if you cover POD elsewhere), so ops can resolve issues without digging into raw data.
Plan Integrations and APIs
Integrations are what turn a tracking tool into a day-to-day operations hub. Before you write code, list the systems you already rely on and decide which one is the “source of truth” for orders, customer data, and billing.
Connect the systems you already use
Most logistics teams touch several platforms: an order management system, WMS, TMS, CRM, and accounting. Decide what data you pull in (orders, addresses, time windows, item counts) and what data you push back (status updates, proof of delivery, exceptions, charges).
A simple rule: avoid double-entry. If dispatchers create jobs in an OMS, don’t force them to recreate deliveries in your logistics web app.
Design an API that matches real workflows
Keep your API centered on the objects your team understands:
- Jobs/Deliveries: create, assign, update status, attach POD
- Drivers/Vehicles: availability, assignments, device identifiers
- Tracking events: pings, stop arrivals, exceptions, timestamps
REST endpoints work well for most cases, and webhooks handle real-time updates to external systems (e.g., “delivered,” “failed delivery,” “ETA changed”). Make idempotency a requirement for status updates so retries don’t duplicate events.
Plan import/export and syncs
Even with APIs, operations teams will ask for CSV:
- Bulk import deliveries for a day
- Export POD links and timestamps for customer service
Add scheduled syncs (hourly/nightly) where needed, plus clear error reporting: what failed, why, and how to fix it.
Don’t forget device integrations
If your workflow uses barcode scanners or label printers, define how they interact with your app (scan to confirm stop, scan to verify package, print labels at depot). Start with a small supported set, document it, and expand once the MVP proves value.
Security, Privacy, and Data Retention
Tracking deliveries and drivers means handling highly sensitive operational data: customer addresses, phone numbers, signatures, and real-time GPS. A few upfront decisions here can prevent costly incidents later.
Protect sensitive data (everywhere)
At minimum, encrypt data in transit with HTTPS/TLS. For data at rest, enable encryption where your hosting provider supports it (databases, object storage for photos, backups). Store API keys and access tokens in a secure secrets manager—not in source code or shared spreadsheets.
Location privacy that matches the job
Real-time GPS is powerful, but it shouldn’t be more detailed than necessary. Many teams only need:
- approximate driver position for dispatch (e.g., “near this zone”)
- precise location only for active stops or exceptions
Define clear retention periods. For example: keep high-frequency location pings for 7–30 days, then downsample (hourly/daily points) for performance reporting.
Operational safeguards: rate limits, logs, and recovery
Add rate limiting to login, tracking, and public proof-of-delivery links to reduce abuse. Centralize logging (app events, admin actions, and API requests) so you can answer “who changed this status?” quickly.
Also plan backup and restore from day one: automated daily backups, tested restore steps, and an incident checklist your team can follow under pressure.
Compliance basics and clear policies
Collect only what you need and document why. Provide consent and notice for driver tracking, and define how you handle data access or deletion requests. A short, plain-language policy—shared internally and with customers—helps align expectations and reduces surprises later.
Testing, Pilot Launch, and Team Adoption
A logistics tracking app succeeds or fails in real life: messy addresses, late drivers, poor connectivity, and dispatchers under pressure. A solid testing plan, a careful pilot, and practical training are what turn “working software” into “software people actually use.”
Test the scenarios that break deliveries
Go beyond happy-path tests and recreate day-to-day chaos:
- Routing edge cases: multiple stops with the same street name, gated communities, restricted roads, duplicate drop-offs, and “deliver before pickup” mistakes.
- Bad addresses: missing postal codes, wrong city, apartment-only addresses, pin far from the actual entrance.
- Offline updates: driver marks a stop complete with no signal, then reconnects—ensure the app syncs reliably and avoids double updates.
- Time windows: early arrivals, late arrivals, and overlapping windows—make sure dispatch can see conflicts clearly.
Include both web (dispatch) and mobile (driver) flows, plus exception flows like failed delivery, return-to-depot, or customer not home.
Performance checks before you scale
Tracking and maps can feel slow before they actually crash. Test:
- Map rendering with many stops and routes on screen
- Large job lists (e.g., hundreds or thousands of deliveries)
- Peak-hour tracking when many drivers update location at once
Measure load times and responsiveness, then set performance targets your team can monitor.
Pilot rollout with clear success criteria
Start with one depot or one region, not the whole company. Define success criteria upfront (e.g., % of deliveries with proof of delivery, fewer “where is my driver?” calls, improved on-time rate). Collect feedback weekly, fix issues fast, then expand.
Training that fits the workday
Create a short quick-start guide, add in-app tips for first-time users, and set a clear support process: who drivers contact on the road, and how dispatch reports bugs. Adoption improves when people know exactly what to do when something goes wrong.
MVP Scope, Tech Stack, and Cost Planning
If you’re building a logistics web app for the first time, the fastest way to ship is to define a narrow MVP that proves value for dispatch and drivers, then add automation and analytics once the workflow is stable.
MVP scope: must-haves vs. nice-to-haves
Must-haves for a first release usually include: a dispatch dashboard to create deliveries and assign drivers, a driver-friendly mobile web view (or simple app) to see the stop list, basic status updates (e.g., Picked up, Arrived, Delivered), and a map view for route visibility.
Nice-to-haves that often slow teams down early: complex route optimization rules, multi-depot planning, automated customer ETAs, custom reports, and extensive integrations. Keep these out of the MVP unless you already know they drive revenue.
Typical tech choices
A practical stack for logistics app development is:
- Web frontend: React, Vue, or Angular for the dispatch dashboard
- Backend API: Node.js/TypeScript, Python (Django/FastAPI), or Java/.NET for stable CRUD + auth
- Database: PostgreSQL for core entities; Redis for caching and real-time sessions
- Real-time: WebSockets (or managed pub/sub) for driver tracking updates
- Maps/geocoding: Google Maps, Mapbox, or HERE (price and coverage vary)
A faster path to an MVP (when you want to validate quickly)
If your main challenge is speed-to-first-version, a vibe-coding approach can help you validate the workflow before investing heavily in a custom build. With Koder.ai, teams can describe the dispatcher dashboard, driver flow, statuses, and data model in chat, then generate a working web app (React) with a Go + PostgreSQL backend.
This can be especially useful for piloting:
- core CRUD for deliveries/drivers/routes
- role-based access (dispatcher/driver/manager)
- an activity timeline / audit log foundation
- snapshots and rollback while the team iterates quickly
When the MVP proves value, you can export the source code and continue with a traditional engineering pipeline, or keep deploying and hosting through the platform.
What drives cost (and surprises budgets)
The biggest cost drivers in delivery tracking software are often usage-based:
- Map tiles, geocoding, and routing requests
- SMS/WhatsApp notifications (per message)
- Photo storage for proof of delivery (plus bandwidth)
- Real-time GPS tracking infrastructure (frequency of updates + concurrency)
If you need help estimating these line items, it’s worth requesting a quick quote on /pricing or discussing your workflow on /contact.
Next features to plan (but not build first)
Once the MVP is stable, common upgrades are: customer tracking links, stronger route optimization, delivery analytics (on-time %, dwell time), and SLA reports for key accounts.
FAQ
What should I define first before building a logistics tracking web app?
Start with one primary goal (e.g., reduce late deliveries or cut “where is my driver?” calls), then define 3 measurable outcomes like on-time rate, failed stop rate, and idle time. These metrics keep your MVP focused and prevent “tracking” from turning into an unfocused map-and-features project.
What does “tracking” usually include in delivery tracking software?
Write a clear, shared definition of what your system captures:
- Location tracking: last known point, update frequency, and when a location is considered “stale”
- Status updates: planned → assigned → en route → arrived → delivered/failed
- Proof of delivery: photo/signature/name/timestamp (plus optional notes)
This becomes the contract that guides product decisions and avoids mismatched expectations across teams.
Which delivery statuses should an MVP include?
Keep statuses mutually exclusive and define exactly what triggers each change. A practical baseline is:
- Planned
- Assigned
- En route
- Arrived
- Delivered
- Failed (with a reason)
Decide which transitions are automatic (e.g., “En route” when navigation starts) vs. always explicit (e.g., “Delivered”).
What’s the simplest data model for deliveries, drivers, and routes?
Treat the delivery as a job that contains stops, so you can grow into multi-stop routing later without redesigning. Core entities to model:
- Delivery/Job: addresses (original + normalized), time windows, contacts, instructions, priority/service type, COD rules
- Driver/Vehicle: availability, shift hours, vehicle type/capacity, certifications
- Route: ordered stops, planned ETAs/service times, planned distance/duration, constraints
- Event log: append-only record of changes (who/when/why)
Why do I need an audit log if I already store the current status?
An append-only event log is your source of truth for disputes and analysis. Log:
- Status changes
- Reassignments
- Address/time window edits
- POD uploads
Include who, when, and why so support and ops can answer “what happened?” without guessing or relying on memory.
What key screens should a delivery tracking web app have?
Prioritize the screens that enable action in under 10 seconds:
- Dispatcher dashboard: fast list, filters (unassigned/late/failed), one-click assign/reassign, exceptions panel
- Map view: live driver positions, status colors, “late risk/unassigned only” toggles, compact stop card
- Driver view: next-stop focus, minimal typing, quick status updates, contact buttons, POD in the same flow
- Manager reports: trends (on-time %, failure reasons, zone performance) with easy export
How do I reduce failed deliveries caused by bad addresses?
Build guardrails around address quality:
- Autocomplete + standardized formatting
- Match confidence indicators (street-level vs city-level)
- Manual pin placement for incomplete/new/rural addresses
Also store original text and resolved coordinates separately so you can audit recurring problems and fix upstream data.
How often should drivers’ GPS locations update for “real-time” tracking?
Use a practical starting policy that balances usefulness and battery/data:
- Active delivery: every 10–30 seconds (or every 50–100 meters)
- Between stops/idle: every 60–180 seconds
- Background: slower unless needed
Combine periodic updates with event-triggered pings (arrive/leave a stop). Always show “Last update: X min ago” to avoid false confidence.
How should the system handle drivers going offline or losing signal?
Plan for unreliable connectivity:
- Queue location and status events locally when offline
- Sync automatically on reconnect
- Make status updates idempotent so retries don’t create duplicates
- On the dashboard, mark drivers as stale/offline rather than showing an assumed current position
What roles and permissions should I implement in a logistics tracking app?
Keep roles small and tied to real jobs:
- Dispatcher: create/edit jobs, assign drivers, manage exceptions
- Driver: view assigned stops, update statuses, capture POD
- Operations manager: reporting/export
- Admin: users, depots, security, integrations
Add depot/branch scoping early if you have multiple teams, and protect sensitive actions (exports, post-dispatch edits) with stricter permissions plus audit logs.