Jul 01, 2025·8 min
How to Create a Mobile App for Event Tickets & Check-Ins
Learn how to plan, design, and build a mobile app for event tickets and fast check-ins, including QR codes, offline scanning, payments, security, and launch tips.
Learn how to plan, design, and build a mobile app for event tickets and fast check-ins, including QR codes, offline scanning, payments, security, and launch tips.
Before you sketch screens or pick a QR scanner library, get clear on the problem you’re solving. Event ticketing apps often fail for straightforward reasons: tickets are hard to find, entry lines move slowly, fraud isn’t handled consistently, or staff can’t coordinate when something goes wrong.
Write down the top 2–3 pain points in plain language. Examples:
This keeps the product focused when feature requests start piling up.
Most event ticketing products contain three experiences in one:
Be explicit about who you’re serving first. A staff-first MVP can look very different from an attendee-first one.
Event type changes timing, entry patterns, and validation rules:
Pick measurable outcomes you can track:
These goals will guide every product decision that follows.
Before you choose features or screens, map the real-world journey from three angles: attendee, staff, and organizer. A clear journey map prevents “works in the office, fails at the door” surprises.
Start with the simplest path an attendee expects:
Buy/receive ticket → open the app (or email/wallet) → find the ticket fast → present QR code → get admitted.
Call out every handoff and potential delay: account creation, email delivery, low battery, no signal, and how quickly someone can locate the right ticket while standing in a queue. Decide whether attendees must log in, or whether a magic link/guest mode is acceptable.
Staff need a repeatable loop:
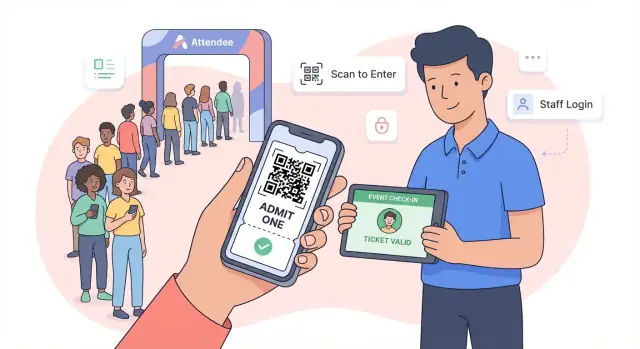
Open scanner → scan → instant result (valid/invalid/already used) → confirm entry → handle exceptions.
Map what staff see for each result. “Invalid” should explain why (wrong day, wrong gate, canceled, not found) and what to do next. Also map what happens when scanning fails: cracked screens, glare, or a printed code that’s smudged.
Organizers typically follow this path:
Create event → set ticket types and rules → assign staff roles/devices → monitor entries in real time.
Include the reporting moments that matter: expected vs. checked-in, peak times, and alerts for unusual patterns.
List edge cases now so your later design decisions support them: late arrivals, re-entry, multi-day passes, VIP/press lanes, guest list entries, ticket transfers, and “lost phone” recovery. Each edge case should have an owner (staff vs. support) and a clear resolution path.
Before you design screens or choose a scanner SDK, decide what a “valid ticket” means for your event. Clear models and rules reduce support issues, speed up entry, and make fraud harder.
Most event apps use QR code tickets because they’re fast to display, easy to scan on modern cameras, and can work well for offline check-ins.
Start with the simplest rule set that matches reality:
Tickets move through states—define them up front:
Write these rules in plain language for staff, and mirror them in the app’s scan responses.
An MVP for an event ticketing app isn’t “a smaller app.” It’s the shortest set of features that lets real people get in the door smoothly—while giving organizers confidence in counts and control.
Your attendee experience should answer three questions quickly: What’s my ticket? Where do I go? What do I need to know today?
Include:
Keep account creation optional if possible. For many events, “open email → see ticket” beats “create password.”
Staff need a single purpose: validate tickets quickly with minimal ambiguity.
Prioritize:
Admin tools should reduce radio chatter and guesswork:
Once entry is reliable, consider push notifications, maps, schedules, and exhibitor lists—useful, but not critical for day-one check-in performance.
A great check-in app feels instant: point the camera, get a clear answer, move to the next person. That only happens when your QR design, scanner UI, and validation logic are planned together.
You generally have two options:
Prefer tokens because they’re safer and easier to rotate. If someone screenshots or shares the code, you can invalidate that token without leaking personal data. Encoded data can be useful for fully offline setups, but it increases privacy risk and makes revocation harder unless you also verify a signature and maintain revocation lists.
Speed is mostly about reducing camera friction and decision time:
Duplicates happen—shared screenshots, multiple entrances, or staff mistakes. A practical rule is:
Not every QR will scan. Build a fast “Find ticket” option:
This keeps lines moving when attendees bring printed tickets, cracked phones, or dim screens.
Crowds don’t wait for Wi‑Fi. If your check-in app depends on a perfect connection, you’ll create lines, confusion, and staff workarounds. Offline-first check-ins are less about fancy tech and more about clear rules: what the scanner can do without a network, and how it “tells the truth” once it reconnects.
Define what the device downloads before doors open: the attendee list (or ticket IDs), ticket types, validation rules (date/time windows, entry limits), and any banned/refunded tickets.
When the network drops, the app should still:
Conflicts happen when the same ticket is scanned on two devices before either syncs. Pick a policy and make it visible:
Either way, sync should be incremental and reliable: retry automatically, show last sync time, and never lose local scan history.
Reduce morning chaos with a short setup flow:
Avoid vague errors. Use plain messages: “No connection — scanning will continue offline.” Add a one-screen checklist for staff: toggle airplane mode, check venue Wi‑Fi, confirm device time, verify event selected, and contact a lead if duplicates spike.
Not every check-in app needs to sell tickets. If your events already use a ticketing platform, you may only need import + validation. But if you want a full event ticketing app, payments become a product feature—not just an integration—so define scope early.
Start with card payments, because they’re broadly supported and fast to implement through providers like Stripe, Adyen, or Braintree.
Then decide whether you need local payment methods (for example, bank transfers, wallets, or region-specific options). A useful rule: add local methods only when you can clearly link them to higher conversion in the markets you operate in.
A checkout flow for digital tickets should feel like buying a coffee: minimal steps, clear totals, and immediate confirmation.
At minimum:
If you need attendee details per ticket (common for conferences), collect them after purchase as a “complete registration” step so you don’t block payment.
After successful payment, send receipts and tickets through reliable channels:
Make the QR code available offline in the attendee app so entry doesn’t depend on reception.
Taxes and invoices can turn into support pain if you treat them as an afterthought. Decide:
If you operate across regions, align early with your payment provider’s tax features (or your finance process) so confirmations and reports stay consistent.
A ticketing and check-in app handles real value (paid entry) and personal data. Getting the basics right early saves you from duplicated tickets, leaked attendee lists, and chaotic entry lines.
QR codes should not contain meaningful data like an email address or ticket type that anyone can edit. Instead, encode a secure token that your server can verify.
When the device is online, prefer server-side validation: the scanner app sends the token to your backend, which checks whether it’s valid, unused, refunded, or reassigned.
To reduce fraud, use short-lived signatures (or rotating keys) so screenshots and copied QR codes have a shorter window of usefulness. If you need to support transfers, invalidate the old token when issuing a new one.
Collect only what you truly need for entry (often: name and ticket status). If you don’t need phone numbers, don’t ask for them.
Set retention rules: decide how long you keep attendee records, scan logs, and payment history—and document it. Make exporting and deletion straightforward for admins.
Separate permissions so:
Avoid shared accounts. Even for small events, individual logins make audit trails possible.
Add guardrails that stop both automated attacks and accidental misuse:
These measures won’t slow down check-in, but they will give you a clear story when something goes wrong—and the tools to fix it quickly.
A ticketing and check-in app doesn’t need an enterprise-grade stack on day one. It needs a structure that stays reliable during peak entry, is easy to maintain, and can grow from a single event to a season of events.
You typically have three practical options:
If check-in speed and offline mode are critical, favor native or cross-platform.
If you’re moving fast with a small team, consider using a vibe-coding platform like Koder.ai to prototype the admin dashboard and core flows (attendee wallet, staff scanner UI, basic reporting) via chat—then iterate on the validation rules and offline behavior. Since Koder.ai supports modern web apps (React) and can generate backends (Go + PostgreSQL), it’s a practical way to get to a working internal MVP quickly while still keeping a code-export path for long-term ownership.
Even for an MVP, think in building blocks:
Keeping validation separate from event management makes it easier to scale check-in traffic without rewriting everything.
Decide how you’ll connect to:
Create a staging environment for test events and staff training, and a production environment for live events. This prevents test scans from polluting real analytics and lets you rehearse entry flow before doors open.
Fast check-ins are mostly a UX problem: the best scanner is the one staff can use correctly under pressure. Focus on reducing taps, making states obvious, and designing for messy real-world conditions.
Design the staff screen for speed and visibility. Use large primary buttons (e.g., Scan, Search, Manual Entry) and keep secondary actions behind a menu. High contrast, readable type, and clear icon labels help in bright sun and dim hallways.
Error states should be specific and actionable. Instead of “Invalid ticket,” show:
Aim for a “scan → confirm → next” rhythm. Patterns that save seconds per attendee:
Scanning often happens in low light, with glare, or on cracked screens. Help staff succeed with:
Small localization mistakes create big entry confusion. Localize the basics:
If you show timestamps (e.g., “Checked in at 9:03”), label the time zone or use the venue’s local time consistently across devices.
A ticketing app can look perfect in the office and still struggle at the door. Real events are messy: guests arrive in waves, staff rotate between gates, screens glare in sunlight, and Wi‑Fi drops at the worst moment. Testing should mimic that chaos so you can trust the app when it matters.
Don’t just test “does scanning work?” Test “does scanning work fast, repeatedly, across multiple devices?” Recreate peak entry periods by running many scans per minute and splitting traffic across multiple gates. Include different ticket states (valid, already used, wrong day, cancelled, VIP) so the app’s messages and actions are verified under pressure.
If you support offline ticket scanning, force poor connectivity and confirm the app behaves predictably: scans should validate locally, show clear offline indicators, and sync later without creating duplicates or losing logs.
A mock event is part load test, part staff training rehearsal. Set up the exact devices staff will use, sign in with real staff roles, and run through:
The goal is to find friction: unclear button labels, confusing error states, or admin settings that are too easy to misconfigure.
Test QR scans under different lighting conditions: bright sun, indoor low light, colored stage lights, and glare from glossy screens. Track two metrics:
These numbers help you compare builds and identify regressions after changes to the scanner, UI, or validation rules.
Before each event, use a simple checklist to reduce surprises:
If you want a deeper readiness process, pair this with your security and fraud checks in the Security, Privacy, and Fraud Prevention section.
Launching a ticketing and check-in app isn’t the finish line—it’s the start of a feedback loop. The best teams treat every event as a test run, then tighten the product and operations before the next one.
Set up a simple dashboard (even if it’s exported logs reviewed hourly) that answers: “Is entry flowing, and why not?” Track key metrics like:
Make sure your scanning app captures structured reasons for rejects, not just “invalid.” That detail becomes your roadmap.
Operational needs show up quickly once real staff use the system. Add tools that reduce back-and-forth on radios and messaging:
These features also help post-event accountability without blaming individuals.
Support is part of the product. Prepare:
Document the playbook in one place and link it from the admin area (e.g., /help/check-in).
Within 24–72 hours, run a quick retro: review issues, update validation rules, and improve onboarding for both staff and admins. Prioritize changes that increase throughput and reduce human workarounds—those are the signals your app is ready for bigger events.
Start by writing 2–3 measurable pain points (e.g., “median scan time is over 5s,” “duplicate scans are common,” “support tickets spike on event morning”). Then define success metrics like:
Use these to decide what to build (and what to postpone).
Treat it as three experiences with different priorities:
Pick who you’re serving first; a staff-first MVP is often the fastest path to shorter lines.
Event type changes validation rules and peak-load patterns:
Choose 1–2 event types to support initially so rules stay consistent and testable.
Use a simple, repeatable loop:
For “invalid,” show (wrong day, canceled/refunded, not found) and (manual lookup, switch gate/event, escalate).
Prefer a random token (e.g., UUID) that your app verifies against the server or a cached offline list.
Benefits:
Only embed richer data in the QR if you truly need fully offline validation—and then you’ll need signing and revocation strategies.
Decide in advance what the scanner can do without a network:
Before doors open, require a “download rules + list” step so staff sees “Ready for offline.”
Pick and document a conflict policy for offline periods:
In the “Already used” result, show when and where the first scan happened (time + gate/device) so staff can resolve disputes quickly.
A practical MVP is the minimum that reliably gets people through the door:
Defer “nice-to-haves” (maps, schedules, exhibitor lists) until check-in is stable.
Use layers of protection that don’t slow down scanning:
Also collect only necessary attendee data and define retention/deletion rules up front.
Test like a real venue, not an office:
Before each event, use a checklist (app versions, permissions, backup devices, offline readiness) and keep staff guidance accessible (e.g., /help/check-in).