

How to Build a Web App for Incident Tracking & Postmortems
A practical blueprint to design, build, and launch a web app for incident tracking and postmortems, from workflows to data modeling and UX.
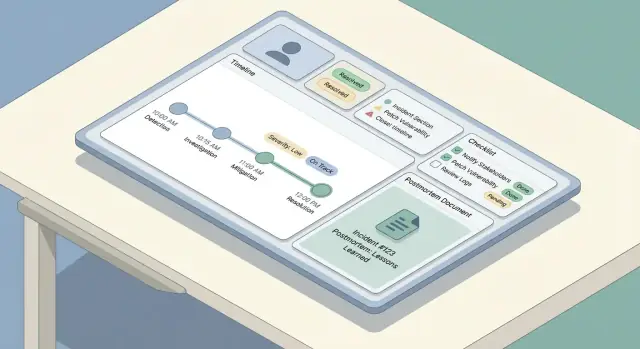
Clarify Goals, Users, and Success Metrics
Before you sketch screens or choose a database, align on what your team means by an incident tracking web app—and what “postmortem management” should accomplish. Teams often use the same words differently: for one group, an incident is any customer-reported issue; for another, it’s only a Sev-1 outage with an on-call escalation.
Define “incident tracking” for your team
Write a short definition that answers:
- What qualifies as an incident (customer impact, internal-only impact, security events, missed SLAs)?
- When does an incident “start” and “end” (first alert vs. first human acknowledgement; fully fixed vs. monitored)?
- What data is mandatory (service affected, severity, owner, timestamps, status updates)?
This definition drives your incident response workflow and prevents the app from becoming either too strict (nobody uses it) or too loose (data is inconsistent).
Define “postmortem management” (and why you’re doing it)
Decide what a postmortem is in your organization: a lightweight summary for every incident, or a full RCA only for high-severity events. Make it explicit whether the goal is learning, compliance, reducing repeat incidents, or all three.
A helpful rule: if you expect a postmortem to produce change, then your tool must support action items tracking, not just document storage.
List the problems you’re solving
Most teams build this kind of app to fix a small set of recurring pain points:
- Visibility: “What’s happening right now?” “How often does this service break?”
- Coordination: clear ownership, handoffs, and a shared incident timeline
- Learning: consistent RCA templates and a review process that actually happens
- Follow-through: action items don’t disappear after the meeting
Keep this list tight. Every feature you add should map to at least one of these problems.
Choose success metrics that match behavior
Pick a few metrics you can measure automatically from your app’s data model:
- Time to detect, acknowledge, mitigate, and resolve (your incident timeline should capture these)
- Frequency by severity, service, and root cause category
- Action-item closure rate and median time-to-close
- Quality signals: percentage of incidents with a postmortem completed within N days; percentage with clear owner and status updates
These become your operational metrics and your “definition of done” for the first release.
Clarify your users (and what each needs)
The same app serves different roles in on-call operations:
- On-call engineer: fast intake, minimal fields, easy status updates
- Incident commander: coordination view, current state, owners, checkpoints
- Managers: trends, recurring issues, follow-through on action items
- Stakeholders: clear status updates without internal noise
If you design for all of them at once, you’ll build a cluttered UI. Instead, pick a primary user for v1—and ensure everyone else can still get what they need via tailored views, dashboards, and permissions later.
Design the Incident Workflow and Roles
A clear workflow prevents two common failure modes: incidents that stall because nobody knows “what’s next,” and incidents that look “done” but never produce learning. Start by mapping your lifecycle end-to-end and then attach roles and permissions to each step.
Map the incident lifecycle
Most teams follow a simple arc: detect → triage → mitigate → resolve → learn. Your app should reflect this with a small set of predictable steps, not an endless menu of options.
Define what “done” means for each stage. For example, mitigation might mean customer impact is stopped, even if the root cause is still unknown.
Define roles and responsibilities
Keep roles explicit so people can act without waiting for meetings:
- Reporter: creates an incident, adds initial context, attaches links/logs.
- Responder: investigates, adds updates, executes mitigations.
- Incident Commander: owns coordination, assigns responders, approves severity, controls stakeholder updates.
- Reviewer: leads post-incident review, ensures postmortem quality.
Your UI should make the “current owner” visible, and your workflow should support delegation (reassigning, adding responders, rotating commander).
States and transitions
Choose required states and allowed transitions, such as Investigating → Mitigated → Resolved. Add guardrails:
- Require a severity before moving past triage.
- Require a resolution summary before marking Resolved.
- Prevent “Resolved → Investigating” unless a reopen reason is captured.
Plan communication channels
Separate internal updates (fast, tactical, can be messy) from stakeholder-facing updates (clear, time-stamped, curated). Build two update streams with different templates, visibility, and approval rules—often the commander is the only publisher for stakeholder updates.
Model the Data: Entities, Relationships, and History
A good incident tool feels “simple” in the UI because the data model underneath is consistent. Before building screens, decide what objects exist, how they relate, and what must be historically accurate.
Core entities (the objects you store)
Start with a small set of first-class objects:
- Incident: the container for everything that happened.
- Service: what you operate (API, database, mobile app), used for impact and reporting.
- Update: human-readable status updates (for internal notes and external status).
- Timeline Event: precise, timestamped facts (“alert fired”, “rolled back”, “mitigation applied”).
- Action Item: follow-ups with owners and due dates.
- Postmortem: the structured write-up (impact, root cause analysis, lessons, links).
Relationships and identifiers
Most relationships are one-to-many:
- One Incident → many Updates / Timeline Events / Action Items
- One Incident → one (or zero) Postmortem
- One Incident ↔ many Services (usually many-to-many via an “affected_services” join)
Use stable identifiers (UUIDs) for incidents and events. Humans still need a friendly key like INC-2025-0042, which you can generate from a sequence.
Metadata you’ll want later
Model these early so you can filter, search, and report:
- Severity, status (open/mitigated/resolved), tags
- Start time, end time, detection time
- Incident commander, owner team, on-call rotation (optional)
- Affected services, customer impact summary
History, retention, and auditability
Incident data is sensitive and often reviewed later. Treat edits as data—not overwrites:
- Store created_at/created_by on every record.
- For edits, keep an audit log (field changes + actor + timestamp), or version important documents (postmortem, updates).
- Decide retention up front (e.g., keep incidents forever, purge chat transcripts after N days).
This structure makes later features—search, metrics, and permissions—much easier to implement without rework.
Build Incident Intake, Updates, and Timeline
When something breaks, the app’s job is to reduce typing and increase clarity. This section covers the “write path”: how people create an incident, keep it updated, and reconstruct what happened later.
Incident intake: minimal fields, smart defaults
Keep the intake form short enough to finish while you’re troubleshooting. A good default set of required fields is:
- Title (plain language: “Checkout errors on mobile”)
- Service/System (pick from a list to avoid spelling variants)
- Severity (default based on service or time, but editable)
- Reporter (auto-fill from logged-in user)
Everything else should be optional at creation time (impact, customer ticket links, suspected cause). Use smart defaults: set start time to “now”, preselect the user’s on-call team, and offer a one-tap “Create & open incident room” action.
Fast updates: status, impact, next steps
Your update UI should be optimized for repeated, small edits. Provide a compact update panel with:
- Status (Investigating / Identified / Mitigated / Resolved)
- Impact summary (one or two sentences)
- Key notes (what changed since last update)
- Next steps (what’s being done next, by whom)
Make updates append-friendly: each update becomes a timestamped entry, not an overwrite of previous text.
Timeline: automatic history plus manual events
Build a timeline that mixes:
- Auto-captured events: field changes (severity, status), assignees, links added, resolution time
- Manual events: “Deployed hotfix”, “Rolled back”, “DB failover started”
This creates a reliable narrative without forcing people to remember to log every click.
Design for speed on mobile
During an outage, many updates happen from a phone. Prioritize a fast, low-friction screen: large touch targets, a single scrolling page, offline-friendly drafts, and one-tap actions like “Post update” and “Copy incident link”.
Add Severity, Checklists, and Supporting Context
Severity is the “speed dial” of incident response: it tells people how urgently to act, how widely to communicate, and what trade-offs are acceptable.
Define severity levels (and what they imply)
Avoid vague labels like “high/medium/low.” Make each severity level map to clear operational expectations—especially response time and communication cadence.
For example:
- SEV1 (Critical): user-facing outage or major safety/security risk. Page immediately, open an incident bridge/chat, update stakeholders every 15–30 minutes, and consider a public status update.
- SEV2 (Major): partial outage or severe degradation. Respond quickly, coordinate in chat, update stakeholders every 30–60 minutes.
- SEV3 (Minor): limited impact, workaround available. Handle during business hours if appropriate, update at key milestones.
- SEV4 (Info): no immediate impact; track as an operational issue.
Make these rules visible in the UI wherever severity is chosen, so responders don’t need to hunt through documentation.
Add responder checklists that match your workflow
Checklists reduce cognitive load when people are stressed. Keep them short, actionable, and tied to roles.
A useful pattern is a few sections:
- Triage: confirm customer impact, identify blast radius, set severity, assign incident lead.
- Mitigation: validate rollback/feature flag actions, verify recovery signals, monitor for regression.
- Comms: notify support, post internal update, decide on /status update, capture customer-facing messaging.
Make checklist items timestamped and attributable, so they become part of the incident record.
Link supporting artifacts (so context isn’t lost)
Incidents rarely live in one tool. Your app should let responders attach links to:
- Dashboards and specific charts
- Log queries
- Tickets/issues
- Chat threads or war-room channels
- Runbooks and playbooks
Prefer “typed” links (e.g., Runbook, Ticket) so they can be filtered later.
Capture SLA/SLO impact when relevant
If your org tracks reliability targets, add lightweight fields such as SLO affected (yes/no), estimated error budget burn, and customer SLA risk. Keep them optional—but easy to fill during or right after the incident, when details are freshest.
Create Postmortem Templates and Review Flow
A good postmortem is easy to start, hard to forget, and consistent across teams. The simplest way to get there is to provide a default template (with minimal required fields) and auto-fill it from the incident record so people spend time thinking—not retyping.
A practical postmortem template (what to include)
Your built-in template should balance structure with flexibility:
- Summary: What happened in plain language (2–5 sentences).
- Impact: Who/what was affected, how long, user-visible symptoms, and business impact (orders delayed, error rate, SLAs breached).
- Root cause: The primary technical/process cause. Keep it factual, not blame-focused.
- Contributing factors: Secondary issues (monitoring gaps, unclear ownership, risky change timing).
- What went well / what went wrong / where we got lucky: Prompts that produce honest, actionable reflections.
Make “Root cause” optional early on if you want faster publishing, but require it before final approval.
Auto-link the postmortem to the incident timeline
The postmortem shouldn’t be a separate document floating around. When a postmortem is created, automatically attach:
- The incident timeline (key updates, status changes, mitigation steps)
- Participants (incident commander, responders, comms)
- Artifacts (related tickets, dashboards, logs links—stored as references)
Use these to pre-fill the postmortem sections. For example, the “Impact” block can start with the incident’s start/end times and current severity, while “What we did” can pull from timeline entries.
Review and approval flow that supports learning
Add a lightweight workflow so postmortems don’t stall:
- Draft (created automatically at incident close, or manually)
- In Review (assigned reviewers—often IC + service owner)
- Approved (locked summary + decision notes captured)
- Published (shared internally; optionally linked to a customer-facing update)
At each step, capture decision notes: what changed, why it changed, and who approved it. This avoids “silent edits” and makes future audits or learning reviews much easier.
If you want to keep the UI simple, treat reviews like comments with explicit outcomes (Approve / Request changes) and store the final approval as an immutable record.
For teams that need it, link “Published” to your status updates workflow (see /blog/integrations-status-updates) without copying content by hand.
Track Action Items Through to Completion
Postmortems only reduce future incidents if the follow-up work actually happens. Treat action items as first-class objects in your app—not a paragraph at the bottom of a document.
Define action items as structured records
Each action item should have consistent fields so it can be tracked and measured:
- Owner (single accountable person, even if execution is shared)
- Due date (and optional “start not before”)
- Priority (e.g., P0–P3 or High/Medium/Low)
- Status (Open, In progress, Blocked, Done, Won’t do)
- Verification criteria (how you’ll confirm the fix worked)
Add small but useful metadata: tags (e.g., “monitoring”, “docs”), component/service, and “created from” (incident ID and postmortem ID).
Make work easy to find across incidents
Don’t trap action items inside a single postmortem page. Provide:
- Global search by owner, service, tag, and status
- Filters like “overdue”, “due this week”, “blocked”, “high priority”
- Simple reporting: counts by team/service, completion rate, average time to close
This turns follow-ups into an operational queue rather than scattered notes.
Recurring work and external links (optional)
Some tasks repeat (quarterly game days, runbook reviews). Support a recurring template that generates new items on a schedule, while keeping each occurrence independently trackable.
If teams already use another tracker, allow an action item to include an external reference link and external ID, while keeping your app as the source for incident linkage and verification.
Reminders and escalation rules
Build lightweight nudges: notify owners as due dates approach, flag overdue items to a team lead, and surface chronic overdue patterns in reports. Keep rules configurable so teams can match their on-call operations and workload reality.
Permissions, Access Control, and Auditability
Incidents and postmortems often contain sensitive details—customer identifiers, internal IPs, security findings, or vendor issues. Clear access rules keep the tool useful for collaboration without turning it into a data leak.
Define permission levels
Start with a small, understandable set of roles:
- View-only (stakeholders): can read incident summaries, timelines, and final postmortems, but can’t edit. Ideal for leadership, customer support, and partner teams.
- Editors (responders): can create incidents, add updates, manage timelines, and draft postmortems.
- Admins (owners): can manage roles, configure templates, connect integrations, and resolve access disputes.
If you have multiple teams, consider scoping roles by service/team (e.g., “Payments Editors”) rather than granting broad global access.
Decide what’s private vs. shareable
Classify content early, before people build habits:
- Internal-only fields: customer PII, security investigation notes, raw logs, internal chat transcripts.
- Shareable fields: high-level impact, start/end times, mitigations, public status updates.
A practical pattern is to mark sections as Internal or Shareable and enforce it in exports and status pages. Security incidents may require a separate incident type with stricter defaults.
Audit logs you can trust
For every change to incidents and postmortems, record: who changed it, what changed, and when. Include edits to severity, timestamps, impact, and “final” approvals. Make audit logs searchable and non-editable.
Authentication and session safety
Support strong auth out of the box: email + MFA or magic link, and add SSO (SAML/OIDC) if your users expect it. Use short-lived sessions, secure cookies, CSRF protection, and automatic session revocation on role changes. For more rollout considerations, see /blog/testing-rollout-continuous-improvement.
UX: Dashboards, Search, and Navigation
When an incident is active, people scan—not read. Your UX should make the current state obvious in seconds, while still letting responders drill into details without getting lost.
Core screens to design first
Start with three screens that cover most workflows:
- Incident list (dashboard): a single table or card list showing status badge, severity, title, impacted service(s), owner/incident commander, last update time, and duration.
- Incident detail: the home base for everything about one incident—summary, current status, key links, participants, and action panel.
- Timeline view: a chronological feed of updates and events (alerts, manual notes, status changes), with large, readable timestamps.
A simple rule: the incident detail page should answer “What’s happening right now?” at the top, and “How did we get here?” below.
Filtering and search that responders actually use
Incidents pile up quickly, so make discovery fast and forgiving:
- Quick filters: service, severity, status (open/mitigating/resolved/postmortem due), tag, date range, and owner.
- Search across: title, incident ID, affected components, and tags.
Offer saved views like My open incidents or Sev-1 this week so on-call engineers don’t rebuild filters every shift.
Status badges and “current state” consistency
Use consistent, color-safe badges across the app (and avoid subtle shades that fail under stress). Keep the same status vocabulary everywhere: list, detail header, and timeline events.
At a glance, responders should see:
- Current status + severity
- Last update time (and who posted it)
- Next checkpoint (e.g., “Next update due in 8 min” if you support update cadence)
Readability under pressure
Prioritize scannability:
- Large timestamps and clear section headers
- Sticky incident header while scrolling
- Collapsible sections for noisy data (raw alerts, long logs)
- Keyboard-friendly navigation (/, n/p for next/prev incident)
Design for the worst moment: if someone is sleep-deprived and paging through their phone, the UI should still guide them to the right action fast.
Integrations: Alerts, Chat, Ticketing, and Status Updates
Integrations are what turn an incident tracker from “a place to write notes” into the system your team actually runs incidents in. Start by listing the systems you must connect: monitoring/observability (PagerDuty/Opsgenie, Datadog, CloudWatch), chat (Slack/Teams), email, ticketing (Jira/ServiceNow), and a status page.
Choose the integration style
Most teams end up with a mix:
- Inbound webhooks for alerts and chat commands (fast, near real-time, low operational cost).
- Polling when a tool can’t push events, but keep intervals conservative and cache results.
- Manual linking as a fallback (paste an alert URL, attach a ticket key), which also protects you when APIs are down.
Prevent duplicate incidents (idempotency)
Alerts are noisy, retried, and often arrive out of order. Define a stable idempotency key per provider event (for example: provider + alert_id + occurrence_id), and store it with a unique constraint. For deduplication, decide rules like “same service + same signature within 15 minutes” should append to an existing incident rather than create a new one.
Define boundaries and failure modes
Be explicit about what your app owns versus what stays in the source tool:
- Your app can own the incident record, timeline, roles, and postmortem.
- The ticket system might own work execution and approvals.
When an integration fails, degrade gracefully: queue retries, surface a warning on the incident (“Slack posting delayed”), and always allow operators to continue manually.
Status updates without extra work
Treat status updates as a first-class output: a structured “Update” action in your UI should be able to publish to chat, append to the incident timeline, and optionally sync to the status page—without asking the responder to write the same message three times.
Architecture and Tech Stack Choices
Your incident tool is a “during-an-outage” system, so favor simplicity and reliability over novelty. The best stack is usually the one your team can build, debug, and operate at 2 a.m. with confidence.
Pick a stack your team can own
Start with what your engineers already ship in production. A mainstream web framework (Rails, Django, Laravel, Spring, Express/Nest, ASP.NET) is typically a safer bet than a brand-new framework that only one person understands.
For data storage, a relational database (PostgreSQL/MySQL) fits incident records well: incidents, updates, participants, action items, and postmortems all benefit from transactions and clear relationships. Add Redis only if you truly need caching, queues, or ephemeral locks.
Hosting can be as simple as a managed platform (Render/Fly/Heroku-like) or your existing cloud (AWS/GCP/Azure). Prefer managed databases and managed backups if possible.
Real-time: websockets vs. periodic refresh
Active incidents feel better with real-time updates, but you don’t always need websockets on day one.
- Periodic refresh (polling) is easier to implement and operate. For many teams, updating the incident timeline every 10–30 seconds is “good enough.”
- Websockets/SSE become valuable when you have many concurrent viewers, fast-moving updates, or want chat-like collaboration.
A practical approach: design the API/events so you can start with polling and upgrade to websockets later without rewriting the UI.
Observability for the incident tool itself
If this app fails during an incident, it becomes part of the incident. Add:
- Structured logs (who changed what, and request context)
- Metrics (latency, error rate, queue depth, websocket connections)
- Error tracking (uncaught exceptions, frontend crash reporting)
Backups, migrations, and your own disaster recovery
Treat this like a production system:
- Automated daily backups (and regular restore tests)
- Safe schema migrations (expand/contract patterns, migration CI checks)
- A minimal DR plan: how to bring it up in a new region/account, and how to access data if the primary environment is down
A faster way to prototype (without committing to the wrong design)
If you want to validate the workflow and screens before investing in a full build, a vibe-coding approach can work well: use a tool like Koder.ai to generate a working prototype from a detailed chat specification, then iterate with responders during tabletop exercises. Because Koder.ai can produce real React frontends with a Go + PostgreSQL backend (and supports source code export), you can treat early versions as “throwaway prototypes” or as a starting point your team can harden—without losing the learnings you gathered from real incident simulations.
Testing, Rollout, and Continuous Improvement
Shipping an incident tracking app without rehearsal is a gamble. The best teams treat the tool like any other operational system: test the critical paths, run realistic drills, roll out gradually, and keep tuning based on real usage.
Test the critical paths end to end
Focus first on the flows people will rely on during high stress:
- Create an incident, assign severity, and notify responders
- Post updates (including status changes), verify ordering in the incident timeline, and ensure edits are clearly marked
- Resolve and close the incident, then generate a postmortem from the final state
- Confirm that links and references (services, owners, tickets, chat threads) remain intact throughout
Add regression tests that validate what must not break: timestamps, time zones, and event ordering. Incidents are narratives—if the timeline is wrong, trust is gone.
Verify permissions and auditability
Permission bugs are operational and security risks. Write tests that prove:
- Only authorized roles can change severity, edit key fields, or close incidents
- View-only users can’t access restricted incidents
- Every sensitive action leaves an audit trail (who, what, when), and the audit log can’t be edited
Also test “near misses,” like a user losing access mid-incident or a team reorg changing group membership.
Run tabletop exercises with real responders
Before broad rollout, run tabletop simulations using your app as the source of truth. Pick scenarios your org recognizes (e.g., partial outage, data delay, third-party failure). Watch for friction: confusing fields, missing context, too many clicks, unclear ownership.
Capture feedback immediately and turn it into small, fast improvements.
Roll out with a pilot and a feedback loop
Start with one pilot team and a few pre-built templates (incident types, checklists, postmortem formats). Provide short training and a one-page “how we run incidents” guide linked from the app (e.g., /docs/incident-process).
Track adoption metrics and iterate on friction points: time-to-create, % incidents with updates, postmortem completion rate, and action-item closure time. Treat these as product metrics—not compliance metrics—and keep improving every release.
FAQ
How do we define an “incident” so the app doesn’t become unusable or inconsistent?
Start by writing a concrete definition your org agrees on:
- What qualifies (customer impact, security, SLA/SLO breach, internal-only)
- When it starts/ends (first alert vs. acknowledgement; fixed vs. monitored)
- What fields are mandatory (service, severity, owner, timestamps, status)
That definition should map directly to your workflow states and required fields so data stays consistent without becoming burdensome.
What should “postmortem management” include in a v1 product?
Treat postmortems as a workflow, not a document:
- Decide which incidents require a postmortem (all vs. Sev-1/2 only)
- Use a default template and auto-fill from incident data (timeline, participants, artifacts)
- Add a review state (Draft → In Review → Approved → Published)
- Make action items first-class so follow-through is measurable
If you expect change, you need action-item tracking and reminders—not just storage.
What are the must-have features for the first release of an incident tracking web app?
A practical v1 set is:
- Incident intake (title, service, severity, reporter; everything else optional)
- Fast updates (status, impact summary, key notes, next steps)
- A combined timeline (auto-captured changes + manual events)
- Basic roles/ownership (commander/owner visible)
- Postmortem creation tied to incident closure
- Action items with owner, due date, status
Skip advanced automation until these flows work smoothly under stress.
How should we design incident states and transitions?
Use a small number of predictable stages aligned to how teams actually work:
- Detect → Triage → Mitigate → Resolve → Learn
Define “done” for each stage, then add guardrails:
- Require severity before leaving triage
- Require a resolution summary before marking resolved
- Require a reopen reason for Resolved → Investigating
This prevents stalled incidents and improves the quality of later analysis.
Which roles should the app support, and how do we keep responsibilities clear?
Model a few clear roles and tie them to permissions:
- Reporter: create the incident and add initial context
- Responder: add updates, timeline events, mitigations
- Incident Commander: assign responders, approve severity, control stakeholder updates
- Reviewer: manage postmortem quality and approval
Make the current owner/commander unmistakable in the UI and allow delegation (reassign, rotate commander).
What data entities should we model, and what relationships matter most?
Keep the data model small but structured:
- Incident
- Service
- Update (internal vs stakeholder-facing)
- Timeline Event (timestamped facts)
- Action Item
- Postmortem
Use stable identifiers (UUIDs) plus a human-friendly key (e.g., INC-2025-0042). Treat edits as history with created_at/created_by and an audit log for changes.
How do we handle internal notes versus stakeholder-facing status updates?
Separate streams and apply different rules:
- Internal updates: tactical, high volume, can be messy
- Stakeholder updates: curated, time-stamped, often commander-approved
Implement different templates/visibility, and store both in the incident record so you can reconstruct decisions later without leaking sensitive details.
How should we define and use severity levels in the app?
Define severity levels with explicit expectations (response urgency and comms cadence). For example:
- SEV1: page immediately; updates every 15–30 minutes
- SEV2: respond quickly; updates every 30–60 minutes
- SEV3: limited impact; milestone updates
- SEV4: informational tracking
Surface the rules in the UI wherever severity is chosen so responders don’t need external docs during an outage.
How do we ensure postmortem action items actually get completed?
Treat action items as structured records, not free text:
- Owner (one accountable person)
- Due date
- Priority
- Status (Open/In progress/Blocked/Done/Won’t do)
- Verification criteria
Then provide global views (overdue, due soon, by owner/service) and lightweight reminders/escalation so follow-ups don’t vanish after the review meeting.
How do we prevent integrations (alerts/webhooks) from creating duplicate incidents?
Use provider-specific idempotency keys and dedup rules:
- Store a unique key like
provider + alert_id + occurrence_id - Decide when new alerts append vs. create (e.g., same service + signature within 15 minutes)
- Handle out-of-order and retry storms by making webhook processing idempotent
Always allow manual linking as a fallback when APIs or integrations fail.