Jun 28, 2025·8 min
Create a Web App to Track Internal Policy Acceptances
Learn how to plan and build a web app that tracks employee policy acknowledgements with roles, reminders, version history, and audit-ready reports.
Learn how to plan and build a web app that tracks employee policy acknowledgements with roles, reminders, version history, and audit-ready reports.
Policy acceptance tracking is the process of recording that a specific person has acknowledged a specific internal policy, under a specific version, at a specific time. Think “employee policy acknowledgements,” but stored in a way that’s searchable, consistent, and easy to prove later.
Different teams care for different reasons:
Email threads and “reply to confirm” workflows feel simple—until you need clean proof.
Common failure modes include:
Your web app should produce audit-ready acceptance records: a clear, tamper-resistant answer to:
This is often a practical e-signature alternative for internal policies where a formal signature tool would be overkill.
Start with an MVP that captures the essentials (policy, version, user, timestamp) and supports basic reminders. Once that works, add automation (SSO, access control, escalations) and stronger reporting and exports as needs mature.
Before you design screens or pick a tech stack, align on who the system is for and what “accepted” means legally and operationally in your organization. This prevents rework later when HR, Security, and Legal notice gaps.
Most policy acceptance tracking tools serve four core audiences:
Capture each group’s success criteria. For example, Security may care about “acceptance within 7 days of hire,” while HR may care about “applies to specific locations.”
Be explicit about the required proof level:
Write down the rule: is acceptance valid if the policy text was available but not opened? Or must the user scroll/view?
Start with the policies you know you’ll track: Code of Conduct, Information Security, Remote Work, NDA addendum, and any local/regulatory acknowledgements. Note whether policies differ by country, entity, role, or employment type (employee vs contractor).
At minimum, confirm expectations for:
If you already have related processes (onboarding checklists, HRIS workflows), note them now so you can design for integration later.
A clear workflow keeps acknowledgements consistent and audit-friendly. Start with the simplest path, then add optional steps only when you have a reason (regulatory, risk, or training needs).
Publish policy: An admin marks a policy as “Active” and sets an effective date.
Notify employees: The system sends an email/Slack/Teams message with a link to the policy.
Employee accepts: The employee logs in, reads the policy, and clicks “I acknowledge.” Record the timestamp and the policy version.
Report: Compliance or HR views completion rates and exports a list of acceptances.
This flow is enough for many organizations—especially when you can reliably prove who accepted which version when.
Quizzes or comprehension checks
Use a short quiz when the policy affects safety, finance, or regulated conduct. Store quiz score and pass/fail, and decide whether acceptance is allowed without passing.
Re-accept on updates
When a policy changes, decide whether it’s a minor edit (no re-accept) or a material change (requires re-accept). A practical approach is to trigger re-accept only when the publisher selects “requires acknowledgement” for the new version.
Manager follow-up
If you need manager visibility, add a lightweight view where managers see who is overdue and can nudge or record exceptions.
Define a standard acceptance window (for example, 14 days from notification) and escalation rules such as:
Keep exceptions explicit: leave-of-absence, contractors, or role-based exclusions.
For higher-risk policies, you may require acknowledgement before using certain tools (e.g., expense system, customer data platform). If you do this, document it in the workflow: “If overdue, restrict access” vs. “Allow access but escalate.” Choose the least disruptive option that still reduces risk.
If you want acceptance records that hold up in an audit or internal review, each acceptance must point to an exact, unchanging policy version. “I accepted the Code of Conduct” is vague; “I accepted Code of Conduct v3.2 (effective 2025-01-01)” is verifiable.
Policies often get edited after publishing (typos, formatting fixes, clarifications). If your app only stores “the latest text,” older acceptances can silently shift underneath employees’ records.
Instead, create a new version every time the policy is published and store that version as read-only:
This makes “what the employee saw” reproducible later, even if the policy is updated.
Keep policy content separate from policy identity. A stable Policy ID (e.g., HR-COC-001) ties all versions together.
For each published version, store:
This metadata also builds trust: employees can see what’s new and why they’re being asked to acknowledge again.
Not every edit should trigger a new acceptance cycle. Define a simple rule set:
Implement this as a “re-accept required” flag per version, with a short reason shown on the acceptance screen.
A clear data model is what makes policy acceptance tracking reliable, searchable, and audit-ready. The goal is simple: at any time you should be able to answer “who needed to accept what, by when, and what proof do we have?”
At minimum, plan for these objects (names can vary by tech stack):
Model status per user per version, not just per policy:
To support targeted assignments, store department/location either on the User record or via join tables (Departments, Locations, UserDepartments).
In Acceptances, capture:
A policy acceptance app is only as trustworthy as its identity and permissions. You want every “I agree” tied to the right person, and you want clear controls over who can change what.
For most mid-size and large organizations, use Single Sign-On so identities match your HR/IT source of truth:
If you support both, prefer SSO when available and keep password login as a fallback for contractors or pilot teams.
Keep roles simple and aligned to real responsibilities:
Define a few hard rules in your authorization layer:
When a user leaves, do not delete acceptance records. Instead:
Good UX turns “we have a policy portal” into “people actually complete acknowledgements on time.” Keep the number of screens small, make next steps obvious, and make it easy to prove what happened later.
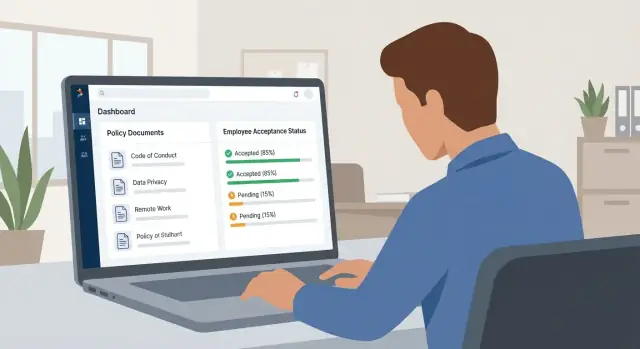
1) My Policies (dashboard)
This is the home screen most people will use. Show assigned policies with:
Add simple filters for “Overdue” and “Completed,” plus search for larger organizations.
2) Read & Accept
Keep the reading experience distraction-free. Include the policy title, version, effective date, and a prominent acknowledgment section at the end.
If you display a PDF, make it readable on mobile: a responsive viewer, zoom controls, and a fallback “Download PDF” link. Consider also offering an HTML version for accessibility.
3) Acceptance History
Employees should be able to see what they accepted and when. Include policy name, version, acceptance date/time, and a link to the accepted version. This reduces support requests like “Can you confirm I completed this?”
1) Policy editor
Admins need to create a policy record, upload content, and write a short summary (“What changed?”) for future re-acceptance cycles.
2) Publish & assign audience
Separate drafting from publishing. The publish screen should make it hard to accidentally send the wrong version and should clearly show who will be assigned (departments, locations, roles, or “all employees”).
A simple “Team Completion” page is often enough: completion rate, overdue list, and a one-click way to send follow-ups.
Use clear, plain language in UI labels, ensure keyboard navigation works, support screen readers (proper headings and button labels), and keep contrast high. Design mobile-first layouts so employees can complete acknowledgements without a laptop.
An audit trail is only useful if it’s credible. Auditors (and internal investigators) want a tamper-resistant story: which policy version was presented, who received it, what actions happened, and when.
A strong trail has four characteristics:
At minimum, capture:
You can also add events like “policy archived,” “user deactivated,” or “deadline changed,” but keep the core events consistent and searchable.
Avoid features that undermine trust:
A “read” signal (page opened, scrolled, time-on-page) is a read receipt. It can help with training and UX, but it doesn’t prove agreement.
An acceptance is stronger because it records an explicit action (checkbox + submit, typed name, or “I acknowledge” button) tied to a specific policy version. Optimize around explicit acknowledgements and treat read receipts as supplemental metadata.
Notifications are the difference between “we published a policy” and “we can prove employees accepted it.” Treat messaging as part of the workflow, not an afterthought.
Most teams use more than one channel:
Let admins enable/disable channels per policy campaign so low-risk updates don’t spam the company.
A good cadence is predictable and limited. Example: send an initial notice, a reminder after 3 days, then weekly until the due date.
Define stop conditions clearly:
For overdue users, add escalation steps (employee → manager → compliance mailbox). Escalations should be time-based (e.g., 7 days overdue) and always include the due date.
Create templates that automatically include:
Keep copy short, specific, and consistent across channels.
If your workforce is multilingual, store template translations and send based on the user’s preferred language. At minimum, localize subject lines and calls-to-action, and fall back to a default language when a translation is missing.
Reporting is where your policy acceptance tracking app becomes a practical compliance tool. The goal isn’t to bury people in charts—it’s to answer recurring questions quickly: “Are we done?”, “Who’s late?”, and “Can we prove it for this specific policy version?”
Start with metrics that map directly to action:
Keep these metrics visible on a single dashboard so HR/Compliance can see status at a glance.
Make every number clickable so users can drill into the underlying people and records. Common filters:
If you support contractors or multiple worker types, add a filter for worker type only if it’s needed for assignments and reporting.
Exports are often the fastest way to satisfy an internal audit request:
Design the audit packet so it can be saved as PDF in one click. If you have a separate audit-trail page, link it from the packet (for example: “View full event history”).
Reporting shouldn’t encourage collecting extra personal data “just in case.” Only report what you need to prove acceptance and manage follow-ups:
A lean reporting layer is easier to secure and usually more than enough for compliance.
A policy acceptance app becomes a source of truth during audits and HR disputes, so treat it like a system of record. Make security and retention decisions explicit, documented, and easy to explain.
Use HTTPS everywhere (including internal environments) and enable HSTS so browsers won’t downgrade to HTTP.
Harden sessions: secure, httpOnly cookies, short idle timeouts for admin users, CSRF protection, and safe password reset flows (even if you primarily use SSO). Log out across devices when someone is offboarded.
Apply least-privilege access. Most employees only need to view policies and submit acknowledgements. Reserve policy publishing, version changes, and exports for a small set of roles, and review those assignments periodically.
Avoid “nice-to-have” tracking (precise device fingerprints, continuous location, excessive IP history) unless you have a clear compliance reason. For many organizations, storing the user ID, timestamp, policy version, and minimal metadata is enough.
If you do record IP address or user agent for fraud prevention, be transparent: state what you capture, why, and how long you keep it. Make sure internal notices and privacy documentation match the app’s actual behavior.
Define retention by record type: policy documents, acceptance events, admin actions, and exports. Keep acceptance records for a period that matches your legal/HR requirements, then delete or anonymize them consistently.
Document retention settings in an admin-readable place (and ideally an internal page like /security) so you can answer “how long do you keep this?” without digging through code.
Back up both the database and uploaded policy files, and test restores on a schedule. Keep an audit-friendly backup trail (when, where, and whether it succeeded). To help prove integrity after recovery, store immutable identifiers for records (unique IDs and created-at timestamps) and restrict who can overwrite or purge data.
Your first release should answer one question: “Can we prove who accepted which policy version, and when?” Keep everything else optional.
MVP scope (4–6 weeks for a small team):
If you want to move faster than a traditional build, a vibe-coding workflow can help: for example, Koder.ai lets you generate the core app (React UI, Go backend, PostgreSQL) from a chat-driven specification, then iterate with planning mode, snapshots/rollback, and source-code export when you’re ready to own the codebase.
Pick a stack that’s easy to hire for and straightforward to deploy:
Phase 1 (MVP): acknowledgements, versioning, exports, basic reminders.
Phase 2: HRIS directory sync (e.g., Workday/BambooHR) for automatic provisioning and group mapping; manager views; escalations.
Phase 3: richer reporting, API integrations, and policy authoring improvements.
Integration ideas: sync user attributes from HRIS nightly; create tickets in Jira/ServiceNow when deadlines pass; expose plan tiers and limits on /pricing; add a related explainer post like /blog/policy-versioning-best-practices.
Policy acceptance tracking records an explicit acknowledgement tied to a specific person, a specific policy version, and a specific timestamp. It’s designed to be searchable and audit-ready—unlike email replies or scattered PDFs, which are hard to version, report on, and prove later.
Start with the minimum proof you need:
Decide and document whether “policy was accessible” is enough, or whether you require viewing/scrolling before the acknowledgement button enables.
Versioning is what makes your evidence defensible. Each published policy should create an immutable version (e.g., v3.2 effective 2025-01-01), and acceptances must reference that version. Otherwise, edits to “the latest text” can silently change what someone supposedly agreed to.
A practical MVP data model usually includes:
This structure lets you answer: who was targeted, what version they needed, and what proof exists.
At minimum, store:
Optionally (if justified by privacy policy): IP address and user agent. Avoid storing extra personal data “just in case.”
Use SSO (OIDC/SAML) when possible so identity matches your source of truth and offboarding is reliable. Keep roles simple:
Also log exports and restrict who can publish or retire versions.
Typical workflow:
Add optional steps only when needed (quiz, manager follow-up, escalations).
Define a standard window (e.g., 14 days) and automate a limited cadence:
Stop reminders immediately on acceptance, exemption, deprovisioning, or campaign close. Keep exceptions explicit (leave, contractors, out-of-scope roles).
Essential employee-facing screens:
Admin screens should separate drafting from publishing/assignment to prevent sending the wrong version.
Core reports should answer: “Are we done?”, “Who’s late?”, and “Can we prove this version?” Include:
Consider an “audit packet” view per policy version that can be saved as a PDF for reviews.