Jun 02, 2025·8 min
Create a Web App to Manage Cross‑Team Communication Requests
Learn how to plan, design, and build a web app that collects, routes, and tracks cross-team communication requests with clear ownership, statuses, and SLAs.
Define the Problem and Scope
Before you build anything, get specific about what you’re trying to fix. “Cross-team communication” can mean everything from a quick Slack message to a full product launch announcement. If the scope is fuzzy, the app will either turn into a dumping ground—or nobody will use it.
What is a “communication request” here?
Write a simple definition people can remember, plus a few examples and non-examples. Typical request types include:
- Customer-facing announcements (maintenance, policy changes)
- Support reply approvals for sensitive cases
- Release notes and changelogs
- Sales enablement updates (new pricing, positioning)
- Executive or legal-reviewed statements
Also document what does not belong (e.g., ad-hoc brainstorming, general FYI updates, or “can you hop on a call?”). A crisp boundary prevents the system from becoming a generic inbox.
Who is involved, and what role do they play?
List the teams that touch requests and the responsibility each one holds:
- Requester (submits the need, provides context and assets)
- Approver (confirms priority, risk, compliance, and messaging)
- Executor (writes/produces the content, publishes or sends it)
- Reviewer (final check for accuracy, tone, and brand)
If a role varies by request type (e.g., Legal only for certain topics), capture that now—this will guide routing rules later.
How will you know it worked?
Pick a few measurable outcomes, such as:
- Fewer “any update?” pings in chat
- Faster turnaround time from submission to publish
- Fewer missed or duplicated requests
Finally, write down today’s pain points in plain language: unclear ownership, missing info, last‑minute asks, and requests hidden in DMs. This becomes your baseline—and your justification for change.
Map the Workflow and User Stories
Before you build, align stakeholders on how a request moves from “someone needs help” to “work delivered.” A simple workflow map prevents accidental complexity and highlights where handoffs tend to break.
User stories (keep them specific)
Here are five starter stories you can adapt:
- As a requester, I submit a short brief and immediately see who owns it and when I can expect a due date.
- As a triage owner, I can quickly validate the request, ask one follow-up question, or reject it with a clear reason.
- As an approver, I can review the request, approve/decline, and leave a comment that becomes part of the record.
- As a scheduler/publisher, I can place approved work on a calendar, detect conflicts, and confirm the publish date.
- As a stakeholder, I can track status and updates without chasing people in chat.
Map the request lifecycle
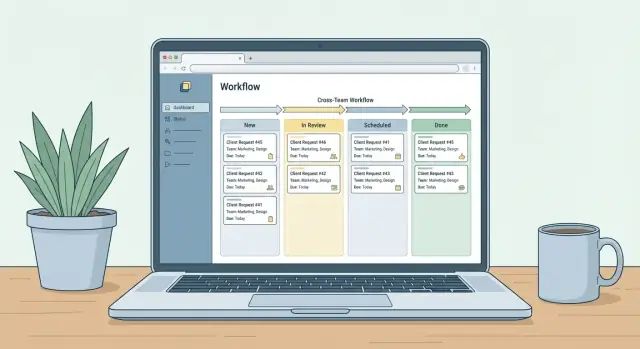
A common lifecycle for a cross-team communication request management web app looks like:
submit → triage → approve → schedule → publish → close
For each step, write down:
- Entry criteria (what must be true to start)
- Owner (person or role)
- Expected outcome (what “done” means)
- Allowed exits (advance, return for edits, reject)
Configurable vs. fixed decisions
Make these configurable: teams, categories, priorities, and intake questions by category. Keep fixed (at least initially): the core statuses and the definition of “closed.” Too much configurability early makes reporting and training harder.
Highest-risk steps to design carefully
Watch for failure points: approvals that stall, scheduling conflicts across channels, and compliance/legal reviews that require audit trails and strict ownership. These risks should directly shape your workflow rules and status transitions.
Design the Intake Form (Get the Right Info Up Front)
A request app only works if the intake form consistently captures a usable brief. The goal isn’t to ask for everything—it’s to ask for the right things so your team doesn’t spend days chasing clarifications.
Start with the minimum viable brief
Keep the first screen tight. At minimum, collect:
- Request title (one sentence summary)
- Description (what you need and why)
- Audience (who should receive this)
- Channel (email, in‑app, social, press, etc.)
- Desired date (when it must go out)
- Attachments (draft copy, creative, screenshots, legal notes)
Add short helper text under each field, like: “Audience example: ‘All US customers on Pro plan’.” These micro-examples reduce back-and-forth more than long guidelines.
Add helpful fields that prevent rework
Once the basics are stable, include fields that make prioritization and coordination easier:
- Priority (e.g., Low/Medium/High)
- Business impact (what changes if this doesn’t ship)
- Links (PRD, Jira ticket, analytics, brand doc)
- Stakeholders (approver and informed parties)
- Language/region (if localization or regional rules apply)
Use conditional questions to stay short and thorough
Conditional logic keeps the form lightweight. Examples:
- If Channel = Press, ask for spokesperson, embargo date, and media list.
- If Audience includes Customers, ask for segmentation criteria and support readiness.
Validate for completeness (without being annoying)
Use clear validation rules: required fields, date can’t be in the past, attachments required for “High” priority, and character minimums for the description.
When you reject a submission, return it with specific guidance (e.g., “Add target audience and link to source ticket”), so requesters learn the expected standard over time.
Create Statuses, Ownership, and Clear Rules
A request management web app only works when everyone trusts the status. That means the app must be the single source of truth—not a “real status” hidden in side conversations, DMs, or email threads.
Define a simple, shared status set
Keep statuses few, unambiguous, and tied to actions. A practical default set for cross-team communication requests is:
- New — submitted and awaiting triage
- Needs Info — blocked until the requester provides missing details
- In Review — being evaluated for feasibility, priority, or policy
- Approved — accepted and ready to plan
- Scheduled — assigned to a time/date or sprint
- Done — delivered and closed
- Rejected — declined with a recorded reason
The key is that each status answers: What happens next, and who is waiting on whom?
Assign owners per step (so nothing floats)
Every status should have a clear “owner” role:
- Triage owner (often a rotating on-call) ensures every New request is handled quickly.
- Approver makes the go/no-go decision during In Review.
- Assignee owns delivery once Approved/Scheduled.
Ownership prevents the common failure mode where everyone is “involved” but nobody is responsible.
Write rules that prevent status chaos
Add lightweight rules directly into the app:
- Who can move a request (e.g., only triage can move out of New; only approvers can set Approved/Rejected).
- When it can be reopened (e.g., allow reopening from Done only within 14 days, and require a reason).
- What’s required per transition (e.g., moving to Scheduled requires a date; moving to Rejected requires a rationale).
These rules keep reporting accurate, reduce back-and-forth, and make handoffs between teams predictable.
Plan Data Model and Key Fields
A clear data model keeps your request system flexible as new teams, request types, and approval steps appear. Aim for a small set of core tables that can support many workflows, rather than creating a new schema for every team.
Core tables (start simple)
At minimum, plan these:
- Users: name, email, role, active flag
- Teams: team name, default SLA policy, routing rules
- Requests: the “ticket” itself (details below)
- Comments: threaded discussion tied to a request
- Attachments: files or links, with uploader and timestamp
- StatusHistory: every status change (and ideally owner changes too)
This structure supports handoffs between teams and makes reporting far easier than relying on “current state only.”
Key fields on the Request record
Your Requests table should capture the routing and accountability basics:
- requesting_team and/or requester_user
- category (campaign, announcement, press, legal review, etc.)
- priority (or impact/urgency)
- due_date (what the requester needs)
- sla_target_at (calculated deadline based on SLA policy)
- current_status
- current_owner_user (or owner team + assignee)
Consider also: summary/title, description, requested channels (email, Slack, intranet), and required assets.
Tags + search for real-world filtering
Add tags (many-to-many) and a searchable_text field (or indexed columns) so teams can filter queues quickly and report on trends (e.g., “product-launch” or “executive-urgent”).
Auditability isn’t optional
Plan for audit needs up front:
- Store created_at / updated_at / closed_at timestamps
- Keep StatusHistory with who changed what, when
- Preserve prior values for critical fields (status, owner, due dates)
When stakeholders ask, “Why was this late?” you’ll have a clear answer without digging through chat logs.
Design the Main Screens and Navigation
Prototype your request workflow
Prototype intake forms, queues, and roles quickly, then iterate with stakeholders.
Good navigation isn’t decoration—it’s how you prevent “Where do I check this?” messages from becoming the real workflow. Design screens around the roles people naturally take in request work, and keep each view focused on the next action.
Requester view (submit and follow up)
The requester experience should feel like tracking a package: clear, calm, and always current. After submission, show a single request page with status, owner, target dates, and the next expected step.
Make it easy to:
- Submit a request and attach assets
- See progress over time (a simple timeline works)
- Respond quickly to Needs Info with comments/files
- Get updates without hunting (email + in-app)
Triage view (queue and decisions)
This is the control room. Default to a queue dashboard with filters (team, category, status, priority) and bulk actions.
Include:
- A prioritized queue with “time in status” visible
- Quick assign and reassign
- Duplicate detection (match on title + requester + links)
- Priority and due-date controls that don’t require opening each request
Executor view (do the work)
Executors need a personal workload screen: “What’s mine, what’s next, what’s at risk?” Show upcoming deadlines, dependencies, and an assets checklist to avoid back-and-forth.
Admin view (configure without breaking flow)
Admins should manage teams, categories, permissions, and SLAs from one settings area. Keep advanced options one click away, and provide safe defaults.
Navigation that stays consistent
Use a left nav (or top tabs) that maps to role-based areas: Requests, Queue, My Work, Reports, Settings. If a user has multiple roles, show all relevant sections but keep the first screen role-appropriate (for example, triagers land on Queue).
Permissions, Security, and Auditability
Permissions aren’t just “IT requirements”—they’re how you prevent accidental oversharing and keep requests moving without confusion. Start simple, then tighten as you learn what teams actually need.
Role-based access (keep it predictable)
Define a small set of roles and make each one obvious in the UI:
- Requester: can submit, view their own requests, respond to questions, and see status.
- Team member (fulfiller): can view the queue for their team, comment, request changes, and update status.
- Approver: can approve/reject specific steps (for example, comms sign-off or legal review).
- Admin: manages templates, fields, teams, and permission rules.
Avoid “special cases” at first. If someone needs extra access, treat it as a role change—not a one-off exception.
Protect sensitive requests without slowing everyone down
Use team-based visibility by default: a request is visible to the requester plus the assigned team(s). Then add two options:
- Private fields (e.g., budget, employee details) visible only to specific roles.
- Restricted requests where only a named group can access the full record.
This keeps most work collaborative while protecting edge cases.
Decide how guests work (if any)
If you need external reviewers or occasional stakeholders, choose one model:
- View-only links with expiration (good for sharing a final draft).
- Required accounts (better for approvals, comments, and traceability).
Mixing both can work, but document when each is allowed.
Auditability: make accountability automatic
Log key actions with timestamp and actor: status changes, edits to critical fields, approvals/rejections, and final publish confirmation. Make the audit trail easy to export for compliance, and visible enough that teams trust the history without needing to “ask around.”
Notifications and Reminders That Don’t Create Noise
Make your build pay back
Share what you built with Koder.ai and earn credits for content or referrals.
Notifications should move a request forward—not create a second inbox people learn to ignore. The goal is simple: tell the right person the right thing at the right time, with a clear next step.
Notify only on key workflow events
Start with a short set of events that directly change what someone should do next:
- Submitted (confirmation to requester + “what happens next”)
- Assigned (owner gets context + link to the request)
- Needs Info (requester gets specific questions and a deadline)
- Approved/declined (requester + downstream team if relevant)
- Due soon and overdue (owner + optional manager escalation)
If an event doesn’t trigger action, keep it in the activity log instead of pushing it as a notification.
Pick 1–2 channels and get them right
Avoid blasting updates everywhere. Most teams succeed by starting with one primary channel (often email) plus one real-time channel (Slack/Teams) for owners.
A practical rule: use real-time messages for work you own, and email for visibility and records. In-app notifications are useful once people are living in the tool daily.
Reminder rules that reduce noise
Reminders should be predictable and configurable:
- Daily or twice-weekly digests for “needs info” and “waiting on you” items
- Quiet hours (no pings after hours; send next morning)
- Escalate only after a clear threshold (e.g., 48 hours overdue)
Use templates so updates are actionable
Templates keep messages consistent and scannable. Each notification should include:
- Request title + ID
- Current status and owner
- What changed
- One clear CTA link (e.g., “Add info”, “Review”, “Mark complete”)
This makes every message feel like progress—rather than noise.
SLAs, Due Dates, and Scheduling
If requests don’t ship on time, the cause is usually unclear expectations: “How long should this take?” and “By when?” Build timing into the workflow so it’s visible, consistent, and fair.
Define SLAs by request type
Set service-level expectations that match the work involved. For example:
- Announcements: 5 business days
- Newsletter items: 3 business days
- Executive comms: 10 business days
Make the SLA field-driven: the moment a requester selects a request type, the app can display the expected lead time and the earliest feasible publish date.
Auto-calculate target dates
Avoid manual math. Store two dates:
- Desired publish date (what the requester wants)
- Target completion date (what the team commits to)
Then calculate the target date using the request type’s lead time (business days) and any required steps (e.g., approvals). If someone changes the publish date, the app should immediately update the target date and flag “tight timeline” when the requester’s date is earlier than the earliest feasible date.
Scheduling to prevent collisions
A queue alone won’t show conflicts. Add a simple calendar/schedule view that groups items by publish date and channel (email, intranet, social, etc.). This helps teams spot overload (too many sends on Tuesday) and negotiate alternatives before work starts.
Track reasons for delays
When a request slips, capture a single “delay reason” so reporting is actionable: waiting on requester, waiting on approvals, capacity, or scope change. Over time, this turns missed deadlines into fixable patterns rather than recurring surprises.
Build an MVP and Choose a Practical Tech Approach
The fastest way to get value is to ship a small, usable MVP that replaces ad-hoc chats and spreadsheets—without trying to solve every edge case.
Start with an MVP that people will actually use
Aim for the smallest set of features that supports a complete request lifecycle:
- An intake form that captures the essentials (request type, audience, deadline, priority, attachments)
- A shared request queue (one place to see “what’s waiting”)
- Simple statuses aligned to your workflow (for example: New → In Review → Approved → Scheduled → Done, with Needs Info and Rejected as side paths)
- Comments and @mentions for clarifications
- Basic notifications (confirmation to requester, assignment to owner, status changes)
If you can do those well, you’ll reduce back-and-forth immediately and create a single source of truth.
Pick a stack that fits your team (not your wishlist)
Choose the approach that matches your skills, speed needs, and governance:
- Low-code (fastest delivery): great for forms + approvals + simple dashboards.
- Internal tools platforms: strong for authenticated apps with tables, filters, and admin panels.
- Full-stack build: best when you need custom integrations, complex permissions, or heavy automation.
If you want to accelerate the full-stack route without reverting to brittle spreadsheets, platforms like Koder.ai can be useful for getting a working internal app from a structured chat-based spec. You can prototype the intake form, queue, roles/permissions, and dashboards quickly, then iterate with stakeholders—while still keeping the option to export source code and deploy with your own policies.
Implement search and filters early
Even at 50–100 requests, people need to slice the queue by team, status, due date, and priority. Add filters from day one so the tool doesn’t turn into a scroll-fest.
Add analytics later (once data is clean)
After the workflow is stable, layer on reporting: throughput, cycle time, backlog size, and SLA hit rate. You’ll get better insights once teams consistently use the same statuses and due-date rules.
Launch, Adoption, and Iteration Plan
Go from prototype to production
Host and deploy your internal tool with your own policies and custom domains.
A request management web app only works if people actually use it—and keep using it. Treat the first release as a learning phase, not a grand rollout. Your goal is to establish the new “source of truth” for cross-team communication requests, then tighten the workflow based on real behavior.
Start with a small pilot
Pilot with 1–2 teams and 1–2 request categories. Pick teams that have frequent handoffs and a manager who can reinforce the process. Keep volume manageable so you can respond quickly to issues and build trust.
During the pilot, run the old process in parallel only when absolutely necessary. If updates keep happening in chat or email, the app will never become the default.
Publish lightweight guidelines
Create simple guidelines that answer:
- What should be submitted (and what shouldn’t)
- Required lead time (for example, “72 hours for standard requests”)
- Where updates live (the app, not DMs)
Pin the guidelines in your team hub and link to them from the app (for example, /help/requests). Make them short enough that people will actually read them.
Build a feedback loop you can act on
Collect feedback weekly from requesters and owners. Ask specifically about missing fields, confusing statuses, and notification spam. Pair this with a quick review of real requests: where did people hesitate, abandon, or bypass the workflow?
Iterate without breaking habits
Iterate in small, predictable changes: adjust form fields, SLAs, and permissions based on real usage. Announce changes in one place, with a “what changed / why it changed” note. Stability builds adoption; constant rework erodes it.
If you want this to stick, measure adoption (requests submitted through the app vs. outside), cycle time, and rework. Then use those results to prioritize your next iteration.
Measure Results and Improve Over Time
Launching your request management web app isn’t the finish line—it’s the start of a feedback loop. If you don’t measure the system, it can slowly turn into a “black box” where teams stop trusting statuses and go back to side messages.
Start with dashboards people actually use
Create a small set of views that answer the daily questions:
- Open requests (what’s in the queue right now)
- Overdue (past due date or SLA)
- Upcoming (due soon so teams can plan)
- Workload by team/owner (to spot bottlenecks and uneven distribution)
Keep these dashboards visible and consistent. If teams can’t understand them in 10 seconds, they won’t check them.
Review metrics monthly—and decide what to change
Pick a recurring monthly meeting (30–45 minutes) with representatives from the main teams. Use it to review a short, stable set of metrics, such as:
- Average time to first response
- Average time to completion
- SLA hit rate
- Reopen rate (requests that bounce back)
- Volume by request type
End the meeting with specific decisions: adjust SLAs, clarify intake questions, refine statuses, or shift ownership rules. Document changes in a simple changelog so people know what’s different.
Maintain a lightweight taxonomy
A request taxonomy is helpful only if it stays small. Aim for a handful of categories plus optional tags. Avoid creating hundreds of types that require constant policing.
Plan enhancements based on evidence
Once the basics are stable, prioritize improvements that reduce manual work:
- Templates for repeatable requests
- Integrations (chat, email, calendar, ticketing)
- Approvals driven by policy (only when needed)
- An API for reporting or creating requests from other tools
Let usage and metrics—not opinions—decide what you build next.