

How to Create a Web App for SaaS Trial Conversions
Learn how to build a web app that tracks SaaS trial users, measures activation, and improves conversions with events, dashboards, cohorts, and experiments.
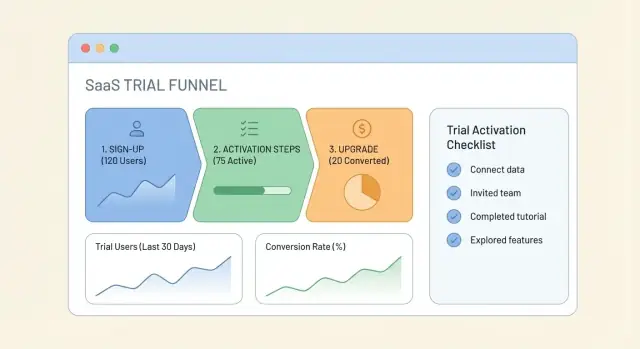
What this web app should solve (and who it’s for)
The goal of this web app is straightforward: increase SaaS trial conversion by improving activation. In practice, that means helping more trial users reach the “aha” moment quickly, consistently, and with fewer dead ends.
Instead of being “another analytics tool,” the app should connect three jobs in one place:
1) Track what matters in the trial
Capture the key actions that indicate meaningful progress (e.g., created first project, invited a teammate, connected an integration). Not every click—just the handful of events that map to activation and purchase intent.
2) Analyze where people get stuck
Turn raw activity into clear answers: which steps are completed, which are skipped, and where drop-off happens. This is where your activation funnel, onboarding checklist progress, and segment comparisons live.
3) Trigger actions when behavior signals risk or readiness
Help your team act on insights, not just view them. For example: nudge users who haven’t reached step 2 by day 2, or alert sales when a high-fit account hits activation but hasn’t upgraded. If you already have messaging tools, this can stay lightweight—send events/webhooks or create tasks.
Who will use it
- Product managers: decide which onboarding steps matter and whether activation is improving.
- Growth/marketing: run campaigns and experiments tied to activation milestones.
- Support/CS: spot struggling trial accounts and prioritize outreach.
- Sales (if applicable): focus on accounts showing strong intent, not just sign-ups.
The weekly questions it should answer
A good rule: if the app can answer these quickly, it’s doing its job.
- Are we improving trial-to-paid conversion week over week?
- What percent of new trials reach activation, and how long does it take?
- Which onboarding step causes the biggest drop-off?
- Which channels/segments activate and upgrade best (and worst)?
- Which accounts should get a nudge or human follow-up this week?
If you want, you can link this overview to your metric definitions section later (e.g., /blog/define-activation-metrics) so teams align on the same “activation” meaning.
Define activation and conversion metrics that matter
Before you build dashboards or automate nudges, get clear on what you’re actually trying to improve. Trial programs often fail not because the product is bad, but because “success” is vague.
Trial conversion vs. activation
Trial conversion is a business outcome: a trial user becomes a paying customer (or requests an invoice, starts a subscription, etc.). It’s binary, lagging, and often influenced by pricing, procurement, or sales follow-up.
Activation is a product outcome: a trial user reaches the “aha” moment that proves your app can deliver value for them. It’s leading, happens earlier, and is more actionable for product and onboarding.
A healthy program improves activation first—because activation is what makes conversion likely.
Pick 1–3 activation outcomes (not 10)
Choose a small set of actions that reliably predict long-term use. Good activation outcomes are specific, measurable, and tied to value (not vanity clicks). Examples:
- First project created (user starts real work)
- Imported data / connected integration (user brings their world into the app)
- Invited a teammate (signals collaboration and stickiness)
Avoid “Logged in” or “Visited settings” unless they truly correlate with upgrades.
Set targets: rate and time-to-activate
Define success with two numbers:
- Activation rate: % of trials who reach activation within the trial window (e.g., 35% activate).
- Time-to-activate (TTA): median time from signup to activation (e.g., under 20 minutes or within 1 day).
Together, these metrics ensure you’re not just activating “some” users—you’re doing it fast enough for a trial to matter.
Document assumptions and what “good” looks like
Write down:
- Why each activation outcome indicates value (your hypothesis)
- What “good” vs. “bad” looks like by segment (e.g., self-serve vs. sales-assisted)
- Any constraints that affect conversion (annual billing, security review, team approval)
This turns metrics into a shared contract—so later, when you change onboarding or pricing, you’ll know what moved and why.
Design the trial-to-paid funnel and activation checklist
A trial-to-paid funnel is the story of how someone goes from “curious” to “confident enough to pay.” Your job is to make that story short, clear, and measurable—so you can see where people get stuck and fix it.
Map the trial journey (from signup to upgrade)
Start by writing the expected journey in plain language:
Signup → first login → onboarding setup → key action (the “aha” moment) → repeat use → upgrade decision
The “key action” is the single moment where users first feel the value of your product (for example: creating their first project, inviting a teammate, importing data, or publishing something). If you can’t name it, the funnel will be fuzzy and your onboarding will be guesswork.
Build a minimum viable onboarding checklist
Your checklist should include only the steps required to reach the key action—nothing that’s merely “nice to have.” A good activation checklist is usually 3–7 items and mixes setup with value.
Example structure:
- Confirm account basics (email verified, workspace created)
- Connect the one required integration (if applicable)
- Create/import the first real object (project, list, campaign, etc.)
- Complete the key action (send, publish, share, automate)
- See an outcome (report generated, message delivered, time saved)
Make each item binary (done/not done). If you can’t tell whether it’s complete from an event, it’s too vague.
Identify drop-offs and common blockers
For each step, list what commonly prevents users from moving forward:
- Confusion: unclear labels, too many choices
- Friction: long forms, required fields too early
- Missing prerequisites: no data to import, no teammate to invite
- Timing: the step requires approval or information they don’t have yet
This becomes your prioritized fix list—and later, your trigger list for nudges.
Turn the journey into a named funnel
Convert the journey into funnel steps with clear, consistent names. Keep them user-centric and action-based:
Signed Up → Activated (Key Action Completed) → Returned (2nd session) → Engaged (Repeated Key Action) → Upgraded
If you later build a /blog/product-analytics-plan, these step names should match the events you track so dashboards stay readable and decisions stay fast.
Create an event tracking plan (what to track and why)
If you don’t decide in advance what “progress” looks like, you’ll end up with noisy analytics and unclear answers. A tracking plan is a lightweight contract between product, marketing, and engineering: these are the events we collect, the fields they include, and what we’ll use them for.
Start with a small set of high-signal events
Track only what you’ll actually act on. For SaaS trial conversion, a simple starter set usually includes:
- Page views for key surfaces (pricing, onboarding, upgrade/paywall)
- Key actions that represent activation steps (invite teammate, connect integration, create first project)
- Errors that block progress (API errors, validation failures, failed payments)
- Paywall/upgrade views (upgrade modal opened, checkout started)
Define properties that explain “who” and “under what conditions”
Events without properties can’t answer why one segment converts better than another. Useful properties include:
plan(trial, starter, pro)role(owner, admin, member)device(desktop, mobile)source(utm_source or acquisition channel)company_size(1, 2–10, 11–50, 50+)
Keep properties consistent across events so you can segment any funnel step the same way.
Standardize naming so data stays usable
Use a clear convention such as:
- Events: verb_noun in past tense, e.g.
project_created,integration_connected - Properties: snake_case, e.g.
company_size,signup_source - Avoid duplicates like
Upgrade Clickedvsclicked_upgrade
A simple tracking plan table (share this with the team)
| Event name | When it fires | Key properties | Why it matters |
|---|---|---|---|
signup_completed | account created | source, company_size, device | baseline trial volume + channel quality |
onboarding_checklist_viewed | checklist opened | role | measures exposure to activation guidance |
activation_step_completed | each checklist step done | step_name, role | identifies which steps drive activation |
paywall_viewed | upgrade screen/modal shown | trigger, plan | shows intent + where friction starts |
checkout_started | billing flow begins | plan, billing_period | leading indicator for conversion |
error_shown | blocking error displayed | error_code, surface | prioritizes fixes that unblock upgrades |
Once this is agreed, you can wire it into dashboards and alerts (see /blog/funnel-dashboards) without reinventing definitions later.
Pick a simple architecture for data collection and analysis
You don’t need a “big data” stack to understand trial conversion. A small, clear architecture is easier to implement correctly—and easier to trust when you’re making product decisions.
The basic building blocks
At minimum, plan for five pieces:
- Frontend: emits product events (e.g., “created workspace”, “invited teammate”) with a stable user/trial identifier.
- API: validates events, attaches server-side context (plan, trial status), and prevents spoofing.
- Database: stores source-of-truth entities (accounts, trials, subscriptions) plus raw events.
- Background jobs: aggregate metrics, build funnel tables, and compute cohorts/retention on a schedule.
- Dashboards: a BI tool or simple internal pages that read aggregated tables, not raw events.
A useful rule: raw events are for debugging; aggregated tables are for reporting.
If you’re trying to ship an internal version fast, a vibe-coding platform like Koder.ai can help you scaffold the React UI, a Go API, and PostgreSQL schema from a written spec—then iterate on funnels, checklists, and dashboards via chat while still keeping the option to export source code later.
What should be real-time vs. daily batch
Real-time is only necessary when it changes the user experience:
- Real-time: onboarding nudges, “activation checklist” progress, trial expiration warnings, in-app prompts.
- Daily batch: funnel conversion rates, cohort retention, segment comparisons, weekly trend charts.
This split keeps costs and complexity down while still supporting timely onboarding.
A simple data flow you can explain
Design the pipeline so a non-technical teammate can repeat it back:
App → ingestion endpoint → raw event store → scheduled aggregation → metrics tables → dashboards
Add lightweight observability at each step (event volume checks, schema validation failures, job run status) so you can catch gaps before they distort conversion numbers.
Privacy and permission boundaries (decide early)
Define what data you will never collect (e.g., passwords, full message contents) and what is allowed (feature usage, timestamps, device type). Separate access:
- Product/team dashboards: aggregated metrics.
- Engineering/debugging: limited raw event access.
Also decide retention (e.g., delete raw events after 90 days) and document it so analytics doesn’t quietly turn into a compliance risk.
Design the data model for trials, events, and outcomes
A good data model makes trial conversion work repeatable: you can answer “who’s stuck?”, “what did they do?”, and “what happened next?” without custom queries every week. Store core objects (people, accounts, trials) separately from behavioral data (events) and business results (outcomes).
Core entities to store (and why)
At minimum, model these as first-class records:
- User: the individual (email, name, role, status).
- Account/Workspace: the tenant boundary (plan, industry, size, owner, status).
- Membership: connects users to accounts (role + permissions).
- Trial: the evaluation window (start/end, source, trial variant, current state).
- Subscription: paid status and lifecycle (provider ids, plan, start/end, cancellation reason).
- Event: every meaningful action (event name, time, actor, properties).
- Message/Nudge: onboarding emails/in-app prompts you send (template, channel, sent/seen/clicked).
This separation lets you report on conversion without mixing billing logic into product usage data.
Model funnel steps and activation milestones as data
Instead of hardcoding “activated” in a single boolean, create:
- FunnelStep (e.g., “Invited teammate”, “Connected integration”) with ordering and rules.
- ActivationMilestone (e.g., “Created first project”) with thresholds (count/time window).
- TrialProgress that records when an account reached each step/milestone.
This makes your activation checklist editable without migrations, and supports multiple products or personas.
Multi-tenant separation and access control
Treat account_id as a required field on every record that can be tenant-specific (trials, events, messages, progress). Enforce it in queries and indexes. If you have admin users, keep that access explicit via roles on Membership, not implicit by email domain.
Retention policies and deletion support
Plan deletion from day one:
- Soft-delete users/accounts (keep ids for referential integrity).
- Hard-delete/anonymize personal fields (email, IP, device ids) while keeping aggregated outcomes.
- Add timestamps like created_at, deleted_at, and a data_retention_expires_at to drive automated cleanup.
With this structure, you can confidently connect “what they did” (events) to “what you want” (activation and upgrades) across the full trial lifecycle.
Implement event ingestion you can trust
If your event stream is flaky, every funnel chart becomes an argument: “Did users drop off—or did tracking break?” Trustworthy ingestion is less about fancy tools and more about predictable rules—accept only good data, store it safely, and make failures visible.
Build a reliable collector API
Your collector should be a small, boring endpoint (e.g., POST /events) that does four things well:
- Validate every request: required fields (event name, timestamp, user/trial identifiers), allowed values, and reasonable timestamp bounds.
- Authenticate sources: use an API key per environment (prod/staging) and rotate keys when needed.
- Rate limit to protect reliability: cap requests per key/IP so one buggy release doesn’t overwhelm your pipeline.
- Version the schema: include
schema_versionso you can evolve event properties without breaking old clients.
A practical minimum event payload:
{
  "event_name": "activation_step_completed",
  "occurred_at": "2025-12-26T12:34:56Z",
  "user_id": "u_123",
  "trial_id": "t_456",
  "properties": {"step": "invite_teammate"},
  "event_id": "01J..."
}
Support client-side and server-side tracking
Use client-side events for UI actions (clicked, viewed, checklist interactions). Use server-side events for outcomes you must trust (subscription upgraded, payment failed, data imported). When both exist, prefer server-side as the source of truth and treat client-side as diagnostic context.
Retries, deduplication, and late events
Networks fail and browsers close. Make ingestion resilient:
- Retries: clients can retry safely if you make requests idempotent.
- Deduplication: require a unique
event_idand ignore duplicates within a window. - Late events: accept older timestamps (within a limit) but store both
occurred_atandreceived_atso reporting stays accurate.
Monitoring and alerts
Add basic checks that catch silent failures:
- Track ingestion success rate, validation error rate, queue/backlog size, and processing latency.
- Alert when success rate drops, errors spike, or latency exceeds a threshold.
The goal is simple: when someone asks “can we trust this funnel?”, you can answer “yes”—and prove it.
Build dashboards for funnel health and activation progress
Dashboards are where trial conversion stops being a “feeling” and becomes a set of decisions. Your goal isn’t to track everything—it’s to make the trial-to-paid path visible, highlight where people get stuck, and make it easy to investigate real accounts behind the numbers.
1) Funnel health: step-by-step conversion with drop-offs
Start with a single funnel view that mirrors your trial experience. Each step should show:
- Users/accounts entering the step
- Conversion to the next step (%)
- Drop-off count and drop-off (%)
Keep the steps aligned to behavior, not pageviews (e.g., “Created first project,” “Invited teammate,” “Connected integration,” “Hit activation milestone,” “Clicked upgrade,” “Completed payment”). If you show both unique accounts and unique users, you can spot cases where one champion is active but the team never adopts.
2) Activation and upgrade speed: time-to-X distributions
Averages hide problems. Add two distribution charts:
- Time-to-activate (first trial touch → activation milestone)
- Time-to-upgrade (trial start → paid)
Use percentiles (P50/P75/P90) so you can see if a subset is taking far longer than expected. A widening tail often signals onboarding friction, unclear value, or missing follow-up.
3) Filters that match how you grow
Every dashboard should support quick slicing by cohort so you can answer “who is this happening to?” without exporting data:
- Acquisition source (organic, paid, partner)
- Plan/trial type (self-serve, sales-assisted)
- Segment (company size, role, industry)
- Date range (trial start week/month)
Default to trial start date as the cohort anchor so comparisons stay fair.
4) Drill-down for investigation and action
Charts should link to a list of the actual users/accounts behind a slice (e.g., “Dropped at step 3,” “>7 days to activate”). Include key columns: signup date, source, current step, last activity timestamp, activation checklist progress, and owner (if sales-assigned). This turns a dashboard from reporting into a workflow—support can reach out, product can watch session replays, and marketing can see which channels bring high-intent trials.
Add cohorts and retention views to find what drives upgrades
Funnels tell you where users drop off. Cohorts and retention views tell you who is dropping off—and whether they ever come back. This is the difference between “trial conversion is down” and “conversion is down for users from LinkedIn who signed up to evaluate integrations.”
Define cohorts that match real buying behavior
Start with a few cohort dimensions you can reliably capture and keep consistent over time:
- Signup week (or month) to spot changes after product releases or pricing updates.
- Acquisition channel (paid search, organic, partner, referral) to compare lead quality.
- Persona (role/team) if you ask during signup or infer from firmographic data.
- Use case (what they’re trying to accomplish) from an onboarding question or first-flow selection.
Keep the list short at first. Too many cohort types creates analysis noise and slows decisions.
Compare activation and conversion across cohorts
For each cohort, compare:
- Activation rate (did they complete the key “aha” actions?)
- Time-to-activation (same activation, but faster often converts better)
- Trial-to-paid conversion rate (the outcome)
This quickly highlights what to fix. Example: one channel may have high signup volume but low activation—suggesting your promise in ads doesn’t match the product’s first-run experience.
Track retention signals during the trial
Upgrades rarely happen from a single session. Add a retention view focused on trial health, such as:
- Return visits (D1/D3/D7 return during a 14-day trial)
- Repeat key action (did they perform the core action 2+ times?)
- Team invite / collaboration (if relevant)
Look for cohorts that activate once but don’t return—those users often need better guidance, templates, or reminders.
Make insights shareable with exports
Ensure every cohort and retention report supports export (CSV is usually enough) so teams can share findings, attach data to weekly updates, or run deeper analysis. Exports also help when you want to compare your product analytics with billing data or CRM notes later.
Trigger onboarding nudges based on behavior
Behavior-based nudges work best when they feel like timely help, not reminders. The goal is simple: detect when a trial user is close to value (or stuck) and guide them to the next meaningful step.
Start with a small rules engine
You don’t need AI to begin—just clear “if user did X and not Y, then nudge” rules tied to your activation checklist.
IF created_project = true AND invited_teammate = false AFTER 24h
THEN show banner “Invite a teammate to collaborate”

IF connected_integration = false AND viewed_integrations_page = true
THEN tooltip “Connect your first integration in 2 minutes”
Keep rules readable and editable (even if only your team sees them). Prioritize 5–10 rules that address the most common drop-off points.
Use the right channel for the job
Different nudges fit different moments:
- In-app banners for “do this next” prompts when the user is already active.
- Tooltips for guidance on a specific screen or feature.
- Checklists to make progress visible and reduce overwhelm.
- Email for re-engagement when they haven’t returned.
Make sure each message points to one action and uses the user’s context (their role, plan, or what they’ve already completed).
Add frequency caps and quiet hours
Set guardrails so nudges don’t turn into spam. A practical default is “no more than 1–2 nudges per day per user,” plus quiet hours based on their timezone. Also add suppression rules (e.g., don’t send upgrade prompts to users still struggling with setup).
Log every send and measure impact
Treat nudges like product features: log what was sent, when, and why (rule ID, channel, variant). Then measure whether it moved the right metric—completion of an activation step, return-to-app, or trial-to-paid conversion—so you can keep what works and retire what doesn’t.
Connect trial lifecycle to billing and upgrade flows
Your product analytics and onboarding work only pays off if the trial lifecycle is wired to billing. The goal is simple: every “trial moment” in your app should map to a billing state—and vice versa—so you can measure conversion accurately and avoid confusing user experiences.
Integrate billing events as first-class product events
At minimum, send these billing events into the same tracking stream as your in-app events:
- Trial start (source, plan, seat count)
- Trial end (scheduled date and actual end)
- Upgrade / subscription created (plan, interval, coupon, revenue)
- Cancellation (immediate vs end-of-period, reason if available)
This lets you connect “did they reach value?” with “did they pay?” instead of guessing from page views alone.
Design upgrade prompts around value moments
Upgrade prompts perform better when they’re triggered by intent and progress, not just a day counter. Examples:
- User completes the activation checklist item that proves value (e.g., “Invite a teammate”) → show an upgrade prompt that unlocks the next step.
- User hits a limit (projects, exports, automations) → show a contextual paywall with the specific benefit they’re trying to access.
Also track paywall views and /pricing visits as explicit funnel steps, so you can see where users hesitate.
Handle expiry states without breaking trust
Define what happens at trial end and track it:
- Grace period (extra days to convert)
- Downgrade to a free tier
- Limited access (read-only, capped usage)
Make the state visible in-app (“Trial ends in 2 days”) and ensure the upgrade flow is one click away from the moment they feel the loss—not buried behind navigation.
Run experiments to improve activation and trial conversion
Experiments help you turn “we think this will work” into measurable improvement. Keep them small, focused, and tied to one clear moment in the trial: the first-run experience, a key activation step, or the upgrade decision.
Start with simple, high-leverage tests
Begin with A/B tests that change one thing at a time:
- Onboarding checklist wording (“Connect your data source” vs “Import your first file”)
- Order of steps (setup first vs value-first demo content)
- Nudges (an in-app tip after a failed action, a reminder after 24 hours of inactivity)
- Upgrade prompts (timing, placement, and the plan shown by default)
These are easy to ship, low risk, and often produce outsized gains because they affect every new trial.
If you need to move quickly from hypothesis to a working variant (e.g., a new checklist UI plus event instrumentation), teams often prototype this kind of workflow in Koder.ai and then refine the winning approach—especially when you want a full-stack baseline (React + Go + PostgreSQL) without rebuilding your internal tooling from scratch.
Define success metrics and guardrails up front
Before you launch, write down:
- Primary success metric: usually activation rate, time-to-activation, or trial-to-paid conversion
- Secondary metrics: completion of a key onboarding step, engagement frequency, support tickets per trial
- Guardrails: opt-out rate, churn shortly after upgrade, refund requests, or negative NPS signals
Also define who is included (e.g., only new trials started after the experiment begins) and how long you’ll run it.
Avoid common experiment pitfalls
Watch out for:
- Too-small samples: you’ll “win” randomly and regress later
- Peeking: stopping early because the graph looks good today
- Biased segments: testing on power users or one acquisition channel only
If you must segment, plan it ahead of time and treat it as a separate analysis.
Document learnings so results compound
For every test, keep a short log: hypothesis, variants, dates, target segment, results, and the decision. Link the log to the shipped change and your dashboard so future you can explain why conversion moved. A simple internal page (or /blog/experiment-notes if public) prevents repeating the same tests with different names.
FAQ
What’s the difference between activation and trial-to-paid conversion?
Activation is a leading product metric: the trial user reaches the “aha” moment that proves value.
Trial-to-paid conversion is a lagging business outcome: they start a subscription/pay.
Improve activation first because it’s earlier, more controllable, and usually increases conversion downstream.
How do I choose the right activation metrics for my SaaS trial?
Pick 1–3 outcomes that strongly predict long-term use, such as:
- Creating the first real object (project, campaign, workspace)
- Importing data or connecting a required integration
- Inviting a teammate (if collaboration drives retention)
Avoid vanity events like “logged in” unless you’ve proven they correlate with upgrades. For more, align on definitions in /blog/define-activation-metrics.
What targets should we set for activation: rate, speed, or both?
Use two numbers:
- Activation rate: % of trials that activate within the trial window
- Time-to-activate (TTA): median (and ideally P75/P90) time from signup to activation
These together prevent “we’re activating some users” from hiding the fact that most users activate too slowly to matter.
How do I build a minimum viable onboarding checklist tied to activation?
Keep it 3–7 binary steps that are required to reach the key action. A practical pattern is:
- Account basics (workspace created, email verified)
- One required integration (if applicable)
- Create/import first real object
- Complete the key action (send/publish/share/automate)
- See an outcome (report generated, message delivered)
If you can’t measure a step as done/not done from an event, the step is too vague.
What events should we track to understand where trials get stuck?
Start with a small, high-signal set you’ll actually use:
- Key activation steps (e.g.,
project_created,integration_connected) - Upgrade intent signals (e.g.,
paywall_viewed,checkout_started) - Blocking failures (e.g.,
error_shown)
Track properties that explain who and under what conditions (source, role, company_size, plan), and standardize naming so dashboards stay readable.
What should be real-time vs. batch when measuring trial activation?
A simple rule is:
- Real-time only when it changes the user experience (checklist progress, in-app nudges, expiry warnings)
- Daily batch for reporting (weekly funnel trends, cohort comparisons, retention)
This keeps the system reliable and cheap while still enabling timely interventions.
How do we make event ingestion trustworthy and debuggable?
Use a small collector endpoint (e.g., POST /events) that supports:
- Validation (required fields, allowed values)
- Authentication (API keys per environment)
- Idempotency + dedupe (
event_id) - Schema versioning (
schema_version) - Monitoring (success rate, validation error rate, processing latency)
Also capture both occurred_at and received_at so late events don’t distort time-based metrics.
What data model works best for trials, events, and activation milestones?
Model three layers separately:
- Core objects: user, account/workspace, membership, trial, subscription
- Behavior: raw events with
account_id/trial_id - Outcomes/progress: funnel steps, milestones, and timestamps when each was reached
This avoids hardcoding “activated = true” and lets you change your checklist without migrations, while keeping multi-tenant access control clean.
What dashboards should we build to manage the trial-to-paid funnel?
Build dashboards that answer weekly decisions:
- Funnel step conversion + drop-offs (behavioral steps, not just pageviews)
- Time-to-activate and time-to-upgrade distributions (P50/P75/P90)
- Filters by source, plan/trial type, segment, and cohort start date
- Drill-down lists of real accounts behind any slice (who is stuck and where)
If you need a reference structure for funnel naming and reporting, keep it consistent with /blog/funnel-dashboards.
How do we trigger onboarding nudges without spamming trial users?
Start with 5–10 simple rules tied to your checklist:
- If they did X but not Y after N hours/days → nudge the next step
- If they hit a limit or show intent (paywall/checkout) → route to upgrade help or sales
Use the right channel (in-app when active, email when inactive), add frequency caps, and log every send so you can measure impact on step completion and conversion.