

How to Build a Web App for Digital Asset & Media Management
Learn how to plan, build, and launch a web app for managing digital assets—uploads, metadata, search, permissions, workflows, and secure storage.
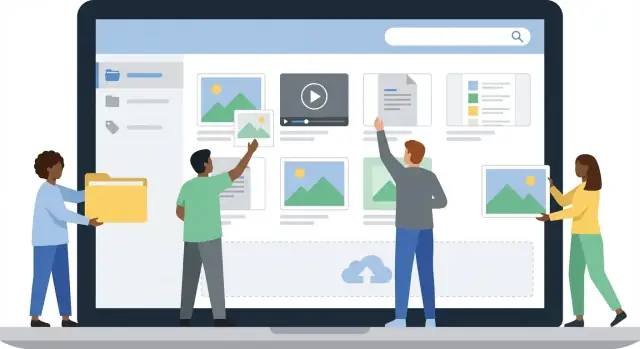
Start With Goals, Users, and Asset Types
Before you pick tools or design screens, get clear on what you’re actually managing—and why. “Digital assets” can mean very different things depending on the team: product photos, ad videos, podcast audio, sales decks, PDFs, Figma files, brand guidelines, and even legal releases. If you don’t define this up front, you’ll end up building for “everything” and satisfying no one.
Define your asset universe
Write down the asset types you’ll support in version 1 and what “done” looks like for each. For example, a video might require a caption file and usage rights, while a design file may need a linked exported PNG for quick preview.
Map teams to daily jobs
List the teams involved (marketing, sales, product, legal, agencies) and describe their repetitive tasks:
- Uploading new assets after a campaign shoot
- Finding “the latest approved” logo
- Reusing last quarter’s ads with correct rights
- Sharing a selection with a partner
- Auditing what was used where
This helps you avoid building only for the people who upload, while ignoring the larger group who mostly search, review, and download.
Set measurable goals
Turn pain into metrics: reduce time to find an asset, increase reuse rate, cut duplicates, and speed up approvals. Even simple baselines (e.g., “average time to find a banner is 6 minutes”) will keep product decisions grounded.
Decide: media library or full DAM
A basic media library focuses on storage + search + sharing. A full DAM adds governance and workflows (reviews, approvals, permissions, audit trails). Choosing the right ambition early prevents scope creep.
Common pitfalls to avoid
Unclear ownership (“who maintains metadata?”), inconsistent naming, and missing key fields (rights, campaign, region) can quietly ruin adoption. Treat these as product requirements, not housekeeping.
Choose the Right Scope for Version 1
A digital asset management web app can expand quickly: more file types, more workflows, more integrations, more governance. Version 1 should focus on the smallest set of DAM features that prove value for real users—and create a clear path to iterate.
If you’re moving fast with a small team, it can help to prototype the core flows (upload → tag → search → share → approve) end-to-end before investing in deep integrations. Teams sometimes use a vibe-coding platform like Koder.ai to iterate on a working React + Go + PostgreSQL baseline quickly, then export the source code to continue development in-house.
Start with 3–5 core user stories
Write a handful of user stories that describe the work people must complete end-to-end. For example:
- Upload assets in bulk (drag-and-drop), see progress, and avoid duplicates.
- Tag or add basic metadata so assets can be found later.
- Search and filter by a few key fields (type, owner, status).
- Share a link with the right access level (view/download).
- Approve or reject assets before they’re used publicly.
If a feature doesn’t support one of these stories, it’s likely not needed in v1.
Decide “must-have” vs “nice-to-have”
A useful rule: v1 must reduce time spent hunting for files and prevent obvious misuse. “Nice-to-have” items (advanced AI tagging, complex automation, many integrations, custom dashboards) can wait until you’ve validated usage.
Define the asset lifecycle
Even a simple lifecycle prevents confusion. Document something like: create → review → publish → update → retire. Then map what’s required at each step (who can edit, what status labels exist, what happens when an asset is retired).
Plan success metrics before you build
Decide how you’ll measure adoption after launch: number of weekly active users, uploads per week, searches performed, time-to-find, approvals completed, and share-link usage. Add analytics events tied to the core stories.
Make constraints explicit
List constraints upfront: budget, timeline, team skills, compliance needs (e.g., retention policies, audit requirements), and any security expectations. Clear constraints make scope decisions easier—and prevent v1 from turning into “everything, all at once.”
Design Uploads, Imports, and File Handling
Uploading is the first “moment of truth” for a digital asset management web app. If it’s slow, confusing, or error-prone, people won’t trust the library—no matter how good search is later.
Support the right ways to add files
Most teams need more than a single upload button. Plan for:
- Drag-and-drop for day-to-day use (including folder upload where browsers allow it)
- Bulk import for migrations (zip, CSV + file mapping, or admin-only import screens)
- API uploads for other systems (CMS, PIM, creative tools)
- Optional cloud sync connectors (e.g., pulling from S3, Google Drive) if it’s a core use case
Make the experience consistent: show progress, queue multiple items, and allow canceling.
Set formats, limits, and validation early
Define allowed formats and size limits per asset type (images, videos/codecs, audio, PDFs, design files). Validate twice:
- In the client (fast feedback: “Note: 2 GB max”)
- On the server (security and correctness)
Don’t forget edge cases: corrupted files, wrong file extensions, and “video plays but has an unsupported codec.”
Deduplication: prevent accidental clutter
Decide your policy:
- Strict dedupe (same hash = same file; reject or link to existing)
- Soft warnings (“This looks identical—upload anyway?”)
- “Similar files” detection (optional, heavier; can wait for later versions)
Hashing (e.g., SHA-256) is a practical baseline, but consider whether filename + size checks are enough for early versions.
Reliability: failures, retries, and resumable uploads
Uploads fail in real life—mobile networks, VPNs, big video files. Use resumable uploads (multipart/chunked) for large assets, plus automatic retries with clear error messages. Always keep a server-side record of upload state so users can resume later.
Originals vs derived files
Treat the original file as immutable and store it separately from derived renditions (thumbnails, previews, transcodes). This makes re-processing safe when you change settings, and it simplifies permissions (e.g., share preview but restrict original download).
Model Metadata, Tags, and Collections
Metadata is what turns “a folder of files” into a usable media library. If you model it well early, search and permissions get simpler, and your team spends less time asking, “Which logo is the latest one?”
Define your metadata model (required vs optional)
Start by separating fields you must have to make an asset usable from fields that are “nice to have.” Keep required fields minimal so uploads don’t feel like paperwork.
Common required fields:
- Title or display name
- Asset type (image, video, document, audio)
- Owner/team
- Status (draft, approved, archived)
Common optional fields:
- Description
- Product/SKU
- Campaign name
- Location, talent, photographer, etc.
A practical rule: make a field required only if someone would routinely block a request without it.
Plan tagging: free-form, controlled, or both
Free-form tags are fast and match how people think (“holiday”, “banner”, “green”). Controlled vocabularies are consistent and prevent duplicates (“USA” vs “United States” vs “US”). Many teams use both:
- Controlled tags for core business dimensions (brand, region, channel, product line)
- Free-form tags for ad-hoc discovery and personal workflows
If you allow free-form tags, add guardrails: autocomplete suggestions, merging duplicates, and a way to promote a popular free-form tag into the controlled list.
Add structure: collections, folders, projects
Different structures solve different problems:
- Folders: familiar, good for import parity, but can turn into “where did we put it?”
- Collections: curated sets where one asset can live in many places (e.g., “Spring Launch”, “Homepage Hero Options”)
- Projects/Campaigns: time-bound workspaces with contributors, approvals, and a clear start/end
Favor collections/projects when reuse matters.
Include rights and usage fields
Rights metadata prevents accidental misuse. At minimum, capture:
- License type and source
- Usage expiry date
- Allowed regions/channels
- Rights holder/owner and proof (link to contract)
Make expiry actionable (warnings, automatic status change, or hiding from public sharing).
Automate metadata extraction
Auto-fill what the file already knows: EXIF/IPTC (camera, captions), duration, codec, resolution, frame rate, file size, and checksum. Store extracted values separately from human-edited fields so you can reprocess assets without overwriting intentional edits.
Build Search, Filters, and Smart Browsing
Search is the moment of truth in a digital asset management web app: if people can’t find what they need in seconds, they’ll rebuild files from scratch or stash copies in random folders.
Start with predictable keyword search
Version 1 should support simple keyword search across:
- Filename and file extension
- Tags
- Core metadata (title, description, client/campaign, product, rights/license notes)
Make the default behavior forgiving: partial matches, case-insensitive, and tolerant of separators (e.g., “Spring-2025” should match “spring 2025”). If you can, highlight matched terms in results so users instantly see why a file appeared.
Add the filters people actually use
Filters turn “I know it’s in here somewhere” into a quick path. Common high-value filters for media library management include:
- Asset type (image, video, audio, document)
- Date range (uploaded/created)
- Uploader/owner
- Campaign/project
- License status (approved/expired/unknown)
- File size
- Orientation (portrait/landscape/square) and dimensions for images
Design filters so they can stack (type + campaign + date) and so users can clear them in one click.
Sorting: keep it simple, make it consistent
Offer a few sorting options that match real workflows: relevance (when searching), newest, most used/downloaded, and last updated. If “relevance” is available, explain it subtly (e.g., “Matches in title rank higher”).
Saved searches and smart collections
Saved searches (“Videos uploaded this month by the Social team”) reduce repeated work. Smart collections are saved searches with a name and optional sharing, so teams can browse instead of re-filtering every time.
Previews and quick actions from results
From the results grid/list, users should be able to preview and take key actions without extra clicks: download, share, and edit metadata. Keep destructive actions (delete, unpublish) behind an asset detail view with confirmation and permissions.
Set Up Roles, Permissions, and Audit Trails
Permissions are easiest to get right when you treat them as product features, not an afterthought. A media library often holds sensitive brand files, licensed content, and in-progress work—so you need clear rules for who can see what, and who can change it.
Define roles people recognize
Start with a small set of roles and map them to real tasks:
- Admin: manages users, roles, security settings, and system-wide libraries.
- Editor: uploads, edits metadata, creates collections, and can request/perform approvals.
- Viewer: searches, previews, and downloads assets they have access to.
- External guest: limited access, usually to specific shared assets or collections.
Keep the role names simple and avoid “custom roles” until customers ask for them.
Plan permission levels (scope matters)
Most teams need at least three layers of access:
- Library-wide: default access to everything in a workspace.
- Collection-based: access to a subset (e.g., “Press Kit 2026” or “Product Photos – Approved”).
- Asset-level sharing: one-off shares for a single file without exposing the whole collection.
Design your UI so users can always answer: “Who can see this?” in one glance.
Authentication and MFA choices
Pick an approach that fits your audience:
- Email/password for broad compatibility
- SSO (SAML/OIDC) for companies
- Magic links for lightweight guest access
If you expect enterprise use, plan for MFA and session controls early (device logout, session timeouts).
Audit trails and safe deletion
Add audit logs for key events: upload, download, delete, share link created, permission changes, and metadata edits. Make logs searchable and exportable.
For deletion, prefer soft delete with a retention window (e.g., 30–90 days) and a restore flow. It reduces panic, prevents accidental loss, and supports compliance workflows later.
Pick Storage, Delivery, and Security Foundations
Your storage and delivery choices will quietly shape performance, cost, and how safe your media library feels to users. Nail the basics early, and you’ll avoid painful migrations later.
Separate “files” from “facts”
Most teams do best with two layers:
- Object storage for binaries (images, videos, PDFs). It scales well, supports large files, and is cost-effective.
- A database for metadata (titles, tags, rights info, who uploaded what, relationships). Keep this structured so search and permissions stay fast.
Store only references (URLs/keys) to the object storage in your database—don’t put the actual files in the DB.
Previews, thumbnails, and where they’re served
Full-resolution originals are often too heavy for everyday browsing. Plan a separate path for:
- Thumbnails for grid views
- Previews (watermarked images, lower-bitrate video snippets)
A common approach is: originals in a “private” bucket, previews in a “public (or signed)” location. Even if previews are accessible, keep them tied to authorization rules (for example, time-limited signed URLs) when content is sensitive.
CDN for speed (and predictable load)
A CDN in front of previews (and sometimes downloads) makes browsing feel instant for global teams and reduces load on your origin storage. Decide early which paths are CDN-cached (e.g., /previews/*) and which must stay uncached or strictly signed.
Encryption and secret management
- Encrypt in transit with HTTPS everywhere.
- Encrypt at rest for object storage and databases.
- Store credentials in a secrets manager (not in code or CI logs), and rotate keys on a schedule.
Backups and disaster recovery (realistic targets)
Define targets like RPO (how much data you can lose) and RTO (how quickly you need to recover). For example, “RPO: 24 hours, RTO: 4 hours” is more believable than “zero downtime.” Make sure you can restore both metadata and file access paths—not just one.
Handle Media Processing and Renditions
Uploads are only the start. A useful media library generates “renditions” (derived files) so people can browse quickly, share safely, and download the right format without manual editing.
What processing typically includes
Most systems run a predictable set of tasks:
- Thumbnail generation for fast grid views and previews
- Image resizing (small/medium/large) and format conversion
- Video transcoding (for playback-friendly MP4/HLS) and poster frame extraction
- Optional audio waveform previews for podcasts or voice clips
Synchronous vs background jobs
Keep the upload flow snappy by doing minimal work synchronously (virus scan, basic validation, storing the original). Everything heavier should run as background jobs using a queue and worker process.
Key mechanics to plan early:
- Retries with backoff for flaky encoders or temporary storage errors
- Idempotency (re-running a job shouldn’t create duplicates)
- Clear failure handling (mark as failed, store error message, allow retry)
This design is especially important for large videos, where transcoding can take minutes.
UI status and user actions
Treat processing status as part of the product, not an internal detail. In the library and asset detail view, show states like Processing, Ready, and Failed.
When something fails, offer simple actions: Retry, Replace file, or Download original (if available), plus a short, human-readable error.
Rendition rules and formats
Define standard rules per asset type: target sizes, crops, and formats (e.g., WebP/AVIF for web delivery, PNG for transparency). For video, decide default resolutions and whether to generate a lightweight preview.
If needed for compliance or previews, add watermarking (brand) or redaction (blur sensitive regions) as explicit workflow steps rather than a hidden transformation.
Add Versioning, Reviews, and Approvals
Versioning is what keeps a media library usable over time. Without it, teams overwrite files, lose history, and break links in websites, emails, and design files.
Define clear version rules
Start by deciding what counts as a new version versus a new asset. A practical rule:
- New version: same creative, same purpose (e.g., color correction, cropped variant, updated legal line, re-encoded video).
- New asset: meaningfully different creative or usage (e.g., new campaign concept, different product, different language master that must be tracked separately).
Write these rules down and show them directly in the upload UI (“Upload as new version” vs “Create new asset”).
Compare and rollback (basic, but essential)
At minimum, support:
- Viewing a version timeline (who uploaded what, when)
- Restoring an older version as the “current” one
Comparison can be lightweight: show side-by-side previews for images, and key technical metadata for video/audio (duration, resolution, codec). You don’t need pixel-perfect diffing to deliver value.
Add review and approval states
Keep workflow simple and explicit:
- Draft → In review → Approved or Rejected
Gate external sharing and “final” downloads on the Approved status. If an approved asset receives a new version, decide whether it automatically returns to Draft (common for compliance-heavy teams) or stays Approved until someone changes it.
Comments and notes tied to versions
Make feedback actionable by attaching comments to:
- The asset overall (general guidance)
- A specific version ("Approve v3", "Fix logo spacing in v2")
Prevent broken links with stable IDs
Use stable asset IDs in URLs and embeds (e.g., /assets/12345). The ID stays the same while the “current version” can change. If someone needs a specific version, provide a versioned link (e.g., /assets/12345?version=3) so old references can remain reproducible.
Plan the UX: Library Views, Asset Details, and Batch Actions
A digital asset management web app succeeds or fails on how quickly people can find, understand, and act on assets. Start by designing a few “everyday” screens that feel familiar and stay consistent across the product.
Core screens to design first
Library grid/list view is your home base. Show clear thumbnails, filenames, key metadata (type, owner, updated date), and obvious selection controls. Offer a grid for visual browsing and a list for metadata-heavy work.
Asset detail page should answer: “What is this, is it the right file, and what can I do next?” Include a large preview, download options, key metadata, tags, usage notes, and a lightweight activity panel (uploaded by, last edited, shared with).
Upload/import flow should be fast and forgiving: drag-and-drop, progress indicators, and prompts to add alt text and basic metadata before publishing.
Admin/settings can be simple in v1: user management, permission defaults, and metadata rules.
Navigation that stays simple
Give people predictable entry points:
- Recent
- Favorites
- Shared with me
- Collections
These reduce reliance on perfect tagging and help new users build habits.
Accessibility basics (plan them early)
Support keyboard navigation for the library and dialogs, maintain readable contrast, and add “alt text required” prompts for image assets. Treat accessibility as a default, not an add-on.
Batch actions without accidents
Batch actions (tag, move, download) are where time savings happen. Make multi-select easy, show a clear count of selected items, and add safety confirmations for risky actions (move, delete, permission changes). When possible, provide an Undo after completion.
Empty states and onboarding
Empty states should teach: explain what belongs here, include a single primary action (Upload, Create collection), and add a short tip like “Try searching by campaign name or tag.” A first-time walkthrough can highlight filters, selection, and sharing in under a minute.
Enable Sharing, APIs, and Integrations
A media library is most useful when assets can safely move between the places people already work. Sharing and integrations reduce “download, rename, re-upload” habits that create duplicates and broken links.
Sharing that stays under control
Start with share links that feel simple for recipients but remain predictable for admins. A good baseline is:
- Expiration dates (hours, days, or on a specific date)
- Password protection (optional, but easy to toggle)
- Permissions: view-only, download allowed, or download specific renditions only
- Revocation: one click to disable a link instantly
For external stakeholders, consider a “review-only” experience where they can comment or approve without seeing internal metadata or unrelated collections.
Delivery URLs and embeds for “approved” assets
If your team reuses the same logo, product images, or campaign videos across channels, provide stable delivery URLs (or embed snippets) for assets marked as approved.
Keep access controls in mind: signed URLs for private files, token-based embeds for partners, and the ability to swap a file while keeping the same URL when a new approved version replaces the old.
An API that matches real workflows
Design your API around common tasks, not database tables. At minimum, support assets, metadata, search, and permissions:
- Create/upload, read, update metadata, archive/delete
- List collections, add/remove assets
- Search with filters (type, tags, owner, date, status)
- Generate share links and manage expirations
Add webhooks for events like “asset uploaded,” “metadata changed,” “approved,” or “rendition ready” so other systems can react automatically.
Practical integrations to plan early
Define the first integrations based on where assets originate and where they’re published: CMS and e-commerce (publishing), design tools (creation), and Slack/Teams (notifications on approvals, comments, or failed processing).
If you’re offering this as a product, make integrations and API access part of your packaging—link to /pricing for plans and /contact for integration support or custom work.
Test, Launch, and Improve With Feedback
A media management app can look “done” in demos and still fail in real life—usually because edge cases show up under real permissions, real file types, and real workloads. Treat testing and launch as part of the product, not a final checkbox.
Create a practical testing checklist
Build a checklist that mirrors how people actually use your digital asset management web app:
- Uploads & imports: large files, slow connections, duplicate filenames, retry behavior, canceled uploads, virus/malware scan results.
- Permissions: who can view, download, edit metadata, delete, and share—test across roles and across collections.
- Search & filters: typos, partial matches, tag filters, “no results” states, and performance on large libraries.
- Processing: thumbnails, renditions, video transcodes, failed jobs, reprocessing, and correct status indicators.
- Sharing: public links, expiration dates, password protection, and what happens when an asset is moved or replaced.
Plan monitoring before you ship
Monitoring keeps small issues from becoming support fires:
- Error tracking: front-end and back-end errors grouped by release.
- Job queue health: stuck workers, backlog growth, and processing time percentiles.
- Storage usage: total growth, unusually large uploads, and hot folders/collections.
- Performance: slow searches, time to first thumbnail, and download latency.
Define analytics events that answer real questions
Instrument events like upload started/completed, search performed, filter applied, downloaded, shared, and approval granted/rejected. Pair events with role and collection (when allowed) to see where workflows stall.
Prepare launch steps and support flow
Plan your migration/import process, create short training materials, and define a clear support path (help center, internal champions, escalation). A simple /help page and a “report an issue” button reduce friction immediately.
Set a post-launch roadmap based on feedback
Within the first 2–4 weeks, review support tickets + analytics to prioritize: advanced search refinements, AI-assisted tagging, and compliance upgrades (retention rules, audit exports, or tighter sharing controls).
If you want to accelerate iterations on that roadmap, consider building small experimental slices (like a new approval flow or smarter search UI) in parallel. Platforms like Koder.ai can be useful here: you can prototype features via chat, ship a working React front end with a Go + PostgreSQL backend, and keep control by exporting the source code when you’re ready to harden and scale it.
FAQ
What should I clarify before building a digital asset management (DAM) web app?
Start by listing the asset types you’ll support in v1 and the teams who touch them (marketing, sales, legal, agencies). Then turn pain into metrics—like time-to-find, duplicate rate, reuse rate, and approval time—so scope decisions stay grounded.
How do I decide between a simple media library and a full DAM?
A media library typically covers storage, search, basic metadata, and sharing. A full DAM adds governance: approval workflows, permissions at multiple levels, audit trails, and rights/usage controls. Choose the “ambition level” early to avoid scope creep.
What features belong in version 1 vs later versions?
Pick 3–5 end-to-end user stories and build only what’s required to complete them. A practical v1 set is:
- Bulk upload with progress + dedupe checks
- Basic metadata/tagging
- Keyword search + a few high-value filters
- Share links with access control
- Simple review/approve flow (if required)
Defer advanced AI tagging, complex automation, and many integrations until usage is validated.
How should I design uploads so users trust the system?
Support drag-and-drop for daily use, plus a migration path (zip import or CSV mapping) for admin-led onboarding. For large files, use resumable (chunked/multipart) uploads with retries, clear error messages, and a server-side upload state so users can resume later.
What file validation and format rules should a DAM enforce?
Validate twice:
- Client-side for fast feedback (size/format limits)
- Server-side for security and correctness
Plan for corrupted files, mismatched extensions, and unsupported codecs. Keep the original file immutable and generate derived previews/thumbnails separately.
How do I prevent duplicates without frustrating users?
Use content hashing (e.g., SHA-256) as a reliable baseline. Then choose a policy:
- Strict: block identical re-uploads
- Soft: warn and allow override
In early versions, strict hash-based dedupe often delivers the most benefit with the least complexity.
What metadata should be required vs optional?
Keep required fields minimal, and separate “must-have” from “nice-to-have.” Common required fields:
- Title/display name
- Asset type
- Owner/team
- Status (draft/approved/archived)
Add rights metadata (license source, expiry, allowed regions/channels) early, because it affects sharing and compliance.
Should I use free-form tags, controlled vocabularies, or both?
Use a hybrid approach:
- Controlled vocabularies for core business dimensions (brand, region, channel)
- Free-form tags for fast discovery
Add guardrails like autocomplete, duplicate-merge tools, and a way to promote popular free-form tags into the controlled list.
What makes search and filtering work well in a DAM web app?
Start with forgiving keyword search across filename, tags, and core metadata (case-insensitive, partial matches, tolerant of separators). Add only the filters people actually use—asset type, date range, owner, campaign/project, and license status—and make filters stackable with one-click “clear all.”
How should roles, permissions, and audit trails be set up?
Implement recognizable roles (Admin, Editor, Viewer, External guest) and access scopes (library-wide, collection-based, asset-level shares). Add audit logs for uploads/downloads/shares/permission changes, and prefer soft delete with a retention window to reduce accidental loss and support compliance.