Jul 26, 2025·8 min
How to Build a Web App to Track Business Process Exceptions
Learn the steps to design, build, and launch a web app that logs, routes, and resolves business process exceptions with clear workflows and reporting.
What business process exceptions are (and why track them)
A business process exception is anything that breaks the “happy path” of a routine workflow—an event that needs human attention because the standard rules didn’t cover it, or because something went wrong.
Think of exceptions as the operational equivalent of “edge cases,” but for everyday business work.
Relatable examples
Exceptions show up in almost every department:
- Invoice mismatch: the invoice total doesn’t match the purchase order, quantities differ, or a line item is missing.
- Missing approval: a contract is executed without the right sign-off, or an expense is submitted above a limit without approval.
- Late shipment: delivery missed the promised date, a partial shipment arrived, or the wrong SKU was shipped.
These aren’t “rare.” They’re common—and they create delays, rework, and frustration when you don’t have a clear way to capture and resolve them.
Why spreadsheets and email threads fail
Many teams start with a shared spreadsheet plus emails or chat messages. It works—until it doesn’t.
A spreadsheet row can tell you what happened, but often loses the rest:
- Lost context: key details live in inboxes (screenshots, vendor replies, approvals), not attached to the record.
- No clear ownership: people assume someone else is handling it, especially when exceptions cross teams.
- Weak history: it’s hard to see who changed what and why, which matters when questions come up later.
Over time, the spreadsheet becomes a mixed bag of partial updates, duplicate entries, and “status” fields nobody trusts.
What you gain by tracking exceptions properly
A simple exception tracking app (an incident/issue log tailored to your process) creates immediate operational value:
- Faster resolution: the right person gets notified, supporting info stays with the exception, and status is visible.
- Fewer repeats: patterns emerge (same vendor, same step, same approval gap), so you can fix root causes.
- Clear accountability: every exception has an owner, due dates (SLA/targets), and a documented outcome.
Set expectations: start simple and iterate
You don’t need a perfect workflow on day one. Start by capturing the basics—what happened, who owns it, current status, and next step—then evolve your fields, routing, and reporting as you learn which exceptions repeat and which data actually drives decisions.
Define users, scope, and success metrics
Before you sketch screens or pick tools, get crisp on who the app serves, what it will cover in version 1, and how you’ll know it’s working. This prevents an “exception tracking app” from turning into a generic ticketing system.
Identify the primary roles
Most exception workflows need a handful of clear actors:
- Requester: logs the exception and provides context (what happened, when, impact).
- Approver: decides whether an exception is acceptable and under what conditions.
- Resolver: fixes the issue, performs the workaround, or updates data.
- Process owner: accountable for the underlying process and prevention actions.
- Auditor/viewer: read-only access for oversight and compliance checks.
For each role, write down 2–3 key permissions (create, approve, reassign, close, export) and the decisions they’re responsible for.
Clarify the goals
Keep goals practical and observable. Common goals include:
- Capture exceptions consistently (same minimum data every time).
- Assign clear ownership so nothing sits unworked.
- Document decisions (why an exception was approved/denied, by whom).
- Reduce repeats by tracking root cause and prevention actions.
Decide what’s in scope for v1
Pick 1–2 high-volume workflows where exceptions happen often and the cost of delay is real (e.g., invoice mismatches, order holds, onboarding missing documents). Avoid starting with “all business processes.” A narrow scope lets you standardize categories, statuses, and approval rules faster.
Write 3–5 success metrics
Define metrics you can measure from day one:
- Time to resolution (median, and % within SLA)
- Reopen rate (quality of closure)
- Exception volume by type (top drivers)
- Approval cycle time (request → decision)
- Repeat exceptions linked to the same root cause
These metrics become your baseline for iteration and justify future automation.
Map the exception lifecycle and statuses
A clear lifecycle keeps everyone aligned on where an exception is, who owns it, and what should happen next. Keep statuses few, unambiguous, and tied to real actions.
A practical default lifecycle
Created → Triage → Review → Decision → Resolution → Closed
- Created: An exception is logged with the minimum required details.
- Triage: Someone validates it, assigns ownership, and sets urgency.
- Review: The right team gathers evidence and evaluates options.
- Decision: Approve/deny the exception (or request changes) with a recorded rationale.
- Resolution: The corrective action is executed and verified.
- Closed: The record is finalized for reporting and audit.
Define “done” with entry/exit criteria
Write down what must be true to enter and exit each stage:
- Created (exit): Required fields complete; category selected; requester identified.
- Triage (exit): Owner assigned; impact + due date set; duplicates checked.
- Review (exit): Evidence attached; stakeholders consulted; recommendation documented.
- Decision (exit): Decision recorded; approver identified; conditions (if any) captured.
- Resolution (exit): Actions completed; outcome validated; SLA met or breach reason logged.
- Closed (exit): Final notes added; no open tasks; audit trail complete.
Escalation rules that prevent stagnation
Add automatic escalation when an exception is overdue (past due date/SLA), blocked (waiting on an external dependency too long), or high impact (severity threshold). Escalation can mean: notify a manager, re-route to a higher approval level, or raise priority.
Reopen and duplicate handling
- Reopen when the same exception resurfaces (e.g., fix failed). Require a reason, and send it back to Triage or Review.
- Duplicate when two records describe the same underlying issue. Mark one as the “primary,” link the duplicates, and close duplicates with a “Merged” outcome so reporting stays accurate.
Design the data model and required fields
A good exception tracking app stands or falls on its data model. If you keep the structure too loose, reporting becomes unreliable. If you over-structure it, users won’t enter data consistently. Aim for a small set of required fields and a larger set of optional, well-defined fields.
Core entities to include
Start with a few core records that cover most real-world scenarios:
- Exception: the main record (what happened, where, and what needs to be resolved).
- Comment: discussion, clarifications, and progress updates.
- Attachment: screenshots, PDFs, emails, exports.
- Task: discrete actions assigned to specific owners.
- Decision: approvals/denials, policy exceptions, or closure decisions.
- Category: a controlled list that keeps reporting clean.
- User: reporters, assignees, approvers, and viewers.
Required fields (keep this short)
Make the following mandatory on every Exception:
- Title and description (plain language, what happened and why it matters)
- Category
- Impact (e.g., financial, customer, compliance, operational)
- Process area (e.g., invoicing, fulfillment, returns)
- Due date (or target resolution date)
Structured values you should standardize
Use controlled values rather than free text for:
- Status (Created, Triage, Review, Decision, Resolution, Closed)
- Priority (Low/Medium/High/Urgent)
- Root cause (Human error, system defect, missing data, vendor issue, unclear policy)
- Resolution type (Corrected data, refund issued, workaround, process updated, training, no action)
Linking and traceability
Plan fields for connecting exceptions to real business objects:
- Affected record references (Order ID, invoice ID, customer ID)
- External system IDs (ERP ticket, CRM case)
- Related exceptions (duplicates, recurring patterns, parent/child)
These links make it easier to spot repeat issues and build accurate reporting later.
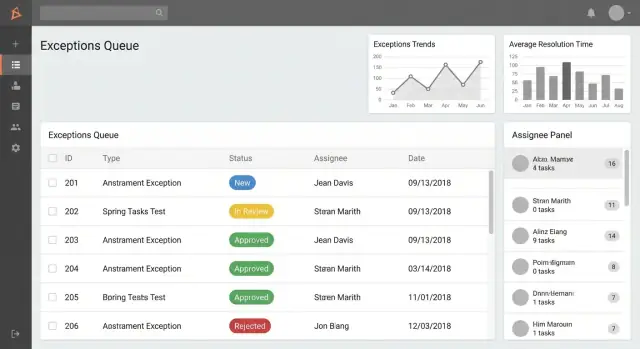
Plan the user experience and core screens
A good exception tracking app feels like a shared inbox: everyone can quickly see what needs attention, what’s blocked, and what’s overdue. Start by designing a small set of screens that cover 90% of daily work, then add power features (advanced reporting, integrations) later.
Core screens to design first
1) Exception list / queue (home screen)
This is where users live. Make it fast, scannable, and action-oriented.
Create role-based queues such as:
- My exceptions (created by or assigned to me)
- Needs my approval (items waiting on a decision)
- Overdue (past SLA or target date)
Add search and filters that match how people talk about work:
- Status, category, process area
- Date range (created, due, closed)
- Assignee / team
2) Create exception form
Keep the first step lightweight: a few required fields, with optional details under “More.” Consider saving drafts and allowing “unknown” values (e.g., “assignee TBD”) to avoid workarounds.
3) Exception detail page
This should answer “What happened? What’s next? Who owns it?” Include:
- Summary, status, owner/assignee, due date/SLA
- Clear primary actions (Assign, Request approval, Close)
- A side panel for key metadata
Collaboration basics (without turning into chat)
Include:
- Comments with @mentions to pull in the right people
- Attachments for evidence (screenshots, PDFs)
- An activity timeline that records changes (status updates, reassignment, approvals) so users don’t need to ask “who changed this?”
Admin settings (minimal but necessary)
Provide a small admin area to manage categories, process areas, SLA targets, and notification rules—so operations teams can evolve the app without a redeploy.
Choose a tech approach and architecture
Create Role Based Queues
Create queues and permissions so each role sees only what they need.
This is where you balance speed, flexibility, and long-term maintainability. The “right” answer depends on how complex your exception lifecycle is, how many teams will use the tool, and how strict your audit requirements are.
Three practical build approaches
1) Custom build (full control). You build the UI, API, database, and integrations from scratch. This works well when you need tailored workflows (routing, SLAs, audit trail, ERP/ticketing integrations) and expect to evolve the process over time. The tradeoff is higher upfront cost and the need for ongoing engineering support.
2) Low-code (fastest to launch). Internal app builders can produce forms, tables, and basic approvals quickly. This is ideal for a pilot or a single-department rollout. The tradeoff: you may hit limits on complex permissions, custom reporting, performance at scale, or data portability.
3) Vibe-coding / agent-assisted build (fast iteration with real code). If you want speed without giving up a maintainable codebase, a platform like Koder.ai can help you create a working web app from a chat-driven spec—then export the source code when you need full control. Teams commonly use it to generate the initial React UI and a Go + PostgreSQL backend quickly, iterate in “planning mode,” and rely on snapshots/rollback while the workflow stabilizes.
A simple, scalable architecture
Aim for a clear separation of concerns:
- Web UI for users to submit, review, and resolve exceptions
- API that enforces validation, permissions, and workflow rules
- Database that stores exceptions, comments, attachments metadata, decisions, tasks, and audit events
- Background jobs for notifications, escalations, SLA timers, and scheduled reports
This structure stays understandable as the app grows and makes it easier to add integrations later.
Hosting and environments
Plan for at least dev → staging → prod. Staging should mirror prod (especially auth and email) so you can test routing, SLAs, and reporting safely before release.
If you’re aiming to reduce ops overhead early, consider a platform that includes deployment and hosting out of the box (Koder.ai, for example, supports deployment/hosting, custom domains, and global AWS regions)—then revisit a bespoke setup once the workflow is proven.
Cost and complexity tradeoffs
Low-code reduces time-to-first-version, but customization and compliance needs can increase costs later (workarounds, add-ons, vendor constraints). Custom builds cost more initially, but can be cheaper over time if exception handling is core to operations. A middle path—shipping quickly, validating the workflow, and keeping a clear migration path (e.g., via code export)—often provides the best cost-to-control ratio.
Set up authentication, roles, and access control
Exception records often include sensitive details (customer names, financial adjustments, policy breaches). If access is too loose, you risk privacy issues and “shadow edits” that weaken trust in the system.
Sign-in and secure sessions
Start with proven authentication rather than building your own passwords. If your organization already has an identity provider, use SSO (SAML/OIDC) so users sign in with their work account and you inherit existing controls like MFA and account offboarding.
Regardless of SSO or email login, make session handling a first-class feature: short-lived sessions, secure cookies, CSRF protection for browser apps, and automatic logout after inactivity for high-risk roles. Also log authentication events (login, logout, failed attempts) so you can investigate unusual activity.
Roles and permissions (what each person can do)
Define roles in plain business terms and tie them to actions in the app. A typical starting point:
- Reporter: create exceptions, add notes/attachments, view own items
- Assignee/Resolver: edit fields, propose resolution, update status
- Approver/Manager: approve or reject, request more info, close items
- Admin: configure the system (not day-to-day processing)
Be explicit about who can delete. Many teams disable hard deletes and allow only admins to archive, preserving history.
Record-level access (who can see which exceptions)
Beyond roles, add rules that limit visibility by department, team, location, or process area. Common patterns:
- Users can view items they created plus items assigned to their team
- Managers can view all items within their org unit
- Compliance/audit roles can view across units, read-only
This prevents “open browsing” while still enabling collaboration.
Admin capabilities you’ll need
Admins should be able to manage categories and subcategories, SLA rules (due dates, escalation thresholds), notification templates, and user role assignments. Keep admin actions auditable and require elevated confirmation for high-impact changes (like SLA edits), since these settings affect reporting and accountability.
Build workflows, routing, and notifications
Standardize Categories for Reporting
Set up categories, causes, and resolution types that make reporting reliable.
Workflows are what turn a simple “log” into an exception tracking app people can rely on. The goal is predictable movement: every exception should have a clear owner, next step, and deadline.
Routing rules: who gets what, and when
Start with a small set of routing rules that are easy to explain. You can route by:
- Category (e.g., data quality, policy deviation, system outage)
- Impact (financial amount, customer count, severity)
- Process area (AP/AR, onboarding, fulfillment)
- Thresholds (e.g., “Amount > $10,000” or “High severity”)
Keep rules deterministic: if multiple rules match, define a priority order. Also include a safe fallback (e.g., route to an “Exception Triage” queue) so nothing is left unassigned.
Approvals: simple, multi-step, and overrides
Many exceptions need an approval before they’re accepted, remediated, or closed.
Design for two common patterns:
- Single approver: one person approves/rejects (fastest to implement).
- Multi-step approval: a sequence such as Manager → Compliance → Finance.
Be explicit about who can override (and under what conditions). If overrides are allowed, require a reason and record it in the audit trail (e.g., “Approved by override due to SLA risk”).
Notifications that don’t create noise
Add email and in-app notifications for moments that change ownership or urgency:
- Assignment and reassignment
- New comments or mentions
- Approval requested / approved / rejected
- Overdue items and “due soon” reminders
Let users control optional notifications, but keep critical ones (assignment, overdue) on by default.
Make resolution work visible with tasks/checklists
Exceptions often fail because the work happens “off to the side.” Add lightweight tasks or checklists tied to the exception: each task has an owner, due date, and status. This makes progress trackable, improves handoffs, and gives managers a real-time view of what’s blocking closure.
Add reporting and operational dashboards
Reporting is where an exception tracking app stops being a “log” and becomes an operational tool. The goal is to help leaders spot patterns early, and help teams decide what to work on next—without opening every record one by one.
Standard reports to include
Start with a small set of reports that answer common questions reliably:
- Volume over time (daily/weekly/monthly): are exceptions rising, falling, or seasonal?
- By category/cause: which types of exceptions create the most disruption?
- By team/owner: where is the workload concentrated?
- By status: how much is in each stage (Created, Triage, Review, Decision, Resolution, Closed)?
Keep charts simple (line for trends, bar for breakdowns). The main value is consistency—users should trust that the report matches what they’d see in the exception list.
Performance and SLA tracking
Add operational metrics that reflect service health:
- Average resolution time (and median, if possible)
- SLA breach rate (percentage of exceptions exceeding target)
- Backlog size (open exceptions) and aging (how long items have been open)
If you store timestamps like created_at, assigned_at, and resolved_at, these metrics become straightforward and explainable.
Drill-down, exports, and scheduled summaries
Every chart should support drill-down: clicking a bar or segment takes the user to the filtered exception list (e.g., “Category = Shipping, Status = Open”). This keeps dashboards actionable.
For sharing and offline analysis, provide CSV export from both the list and key reports. If stakeholders want regular visibility, add scheduled summaries (weekly email or in-app digest) that highlight trend changes, top categories, and SLA breaches, with links back to the filtered views (e.g., /exceptions?status=open&category=shipping).
Ensure auditability and compliance basics
If your exception tracking app influences approvals, payments, customer outcomes, or regulatory reporting, you’ll eventually need to answer: “Who did what, when, and why?” Building auditability from day one prevents painful retrofits and gives teams confidence that the record can be trusted.
Capture an activity log you can’t argue with
Create a complete activity log for every exception record. Log the actor (user or system), timestamp (with timezone), action type (created, field changed, status transitioned), and the before/after values.
Keep the log append-only. Edits should add new events rather than overwrite history. If you must correct a mistake, record a “correction” event with an explanation.
Store decisions with reasons and evidence
Approvals and rejections should be first-class events, not just a status change. Capture:
- Decision (approved/denied/returned)
- Reason code + free-text note (required for key decisions)
- Attachments (screenshots, PDFs, emails) and who uploaded them
This makes reviews faster and reduces back-and-forth when someone asks why an exception was accepted.
Retention and deletion rules (set them intentionally)
Define how long exceptions, attachments, and logs are retained. For many organizations, a safe default is:
- Retain records and audit events for a fixed period (e.g., 3–7 years)
- Restrict deletion to a small admin group, with mandatory justification
- Prefer “soft delete” (hidden from normal views) while keeping the audit trail intact
Align the policy with internal governance and any legal requirements.
Design for reviews and audits
Auditors and compliance reviewers need speed and clarity. Add filters specifically for review work: by date range, owner/team, status, reason codes, SLA breach, and approval outcomes.
Provide printable summaries and exportable reports that include the immutable history (timeline of events, decision notes, and attachments list). A good rule: if you can’t reconstruct the full story from the record and its log, the system isn’t audit-ready.
Test, pilot, and roll out
Build an Exception Tracker
Build your exception tracker in Koder.ai from a simple chat, then iterate safely.
Testing and rollout are where an exception tracking app stops being “a nice idea” and starts becoming a dependable tool people trust. Focus on the few flows that happen every day, then widen the net.
Test the key flows end to end
Create a simple test script (a spreadsheet is fine) that walks through the full lifecycle:
- Create an exception, attach a file, and confirm required fields are enforced.
- Assign it to the right person/team and verify they can see it immediately.
- Approve and reject paths: make sure each decision captures a reason and timestamp.
- Close the exception and confirm it becomes read-only (or limited-edit) as intended.
- Reopen it and ensure the history/audit trail clearly shows what changed.
Include “real life” variations: changing priority, reassignments, and overdue items so you can verify SLA and resolution time calculations.
Add validation and error handling that prevents bad data
Most reporting issues come from inconsistent inputs. Add guardrails early:
- Required fields (e.g., process area, exception type, owner, due date).
- File upload limits (size/type) with clear messages.
- Duplicate detection (e.g., same customer/order/date) with a “link to existing” option.
- Safe handling of edge cases: missing assignee, invalid dates, deleted users.
Also test unhappy paths: network interruptions, expired sessions, and permissions errors.
Run a pilot with one team first
Pick a team with enough volume to learn quickly, but small enough to adjust fast. Pilot for 2–4 weeks, then review:
- Are the fields capturing what people actually need?
- Do statuses match the way work happens?
- Are notifications helpful—or noisy?
Make changes weekly, but freeze the workflow for the final week to stabilize.
Roll out with a lightweight launch kit
Keep rollout simple:
- A one-page “How we use the app” guide (statuses, ownership rules, SLAs).
- A short training session (15–30 minutes) plus a recording.
- A launch checklist: access/roles, default routing, templates, and a support contact.
After launch, monitor adoption and backlog health daily for the first week, then weekly.
Maintain, improve, and scale over time
Shipping the app is the start of the real work: keeping the exception log accurate, fast, and aligned with how the business actually operates.
Monitor usage and bottlenecks
Treat your exception flow like an operational pipeline. Review where items stall (by status, team, and owner), which categories dominate volume, and whether SLAs are realistic.
A simple monthly check is often enough:
- Median and 90th percentile resolution time by category
- “Aging” counts (e.g., open > 7/30/60 days)
- Reopen rates and “sent back” loops
- Top fields left blank (signals UX friction)
Use these findings to tune status definitions, required fields, and routing rules—without constantly adding complexity.
Maintain an iteration backlog
Create a lightweight backlog that captures requests from operators, approvers, and compliance. Typical items include:
- New fields (only when reporting or decisions truly need them)
- Automations (auto-assign based on category, due-date defaults)
- Templates for common exception types
- Small UI fixes that reduce misclassification
Prioritize changes that reduce cycle time or prevent recurring exceptions.
Integrations: start safe, then deepen
Integrations can multiply value, but they also increase risk and maintenance. Start with read-only links:
- Store external record IDs (ERP/CRM/ticketing)
- Deep-link to the source system (e.g., order, customer, invoice)
Once stable, move to selective write-backs (status updates, comments) and event-based syncing.
Set clear ownership
Assign owners for the parts that change most:
- Category taxonomy (and when to merge/retire categories)
- SLA definitions and escalation rules
- Workflow/routing rules and notification policies
When ownership is explicit, the app stays trustworthy as volume grows and teams reorganize.
A note on keeping build velocity high
Exception tracking is rarely “done”—it evolves as teams learn what should be prevented, automated, or escalated. If you expect frequent workflow changes, choose an approach that makes iteration safe (feature flags, staging, rollback) and keeps you in control of the code and data. Platforms like Koder.ai are often used here to ship an initial version quickly (Free/Pro tiers are enough for pilots), then grow into Business/Enterprise needs as governance, access control, and deployment requirements become stricter.