

Create a Founder Website for Open Build Logs (Step-by-Step)
Learn how to create a founder website that supports open build logs: structure, platforms, writing workflow, SEO, email signup, and launch checklist.
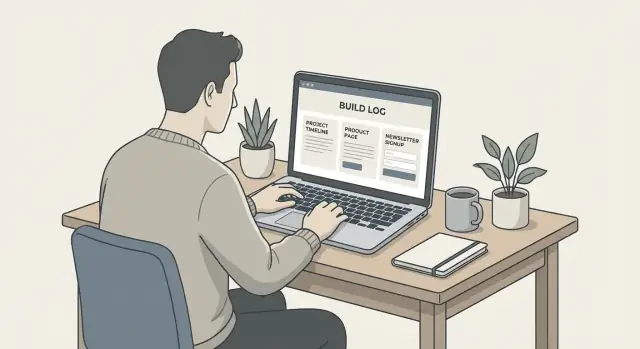
What an Open Build Log Website Should Do
An open build log is a public record of how you’re building your product—what you shipped, what broke, what you learned, and what you’re trying next. It’s not a polished marketing page or a “success story.” It’s closer to a lab notebook that other humans can follow.
Done well, a build log website becomes a single, trustworthy home for your progress. People can understand what you’re building, see momentum over time, and decide whether they want to join you as a user, collaborator, or supporter.
The real reasons founders publish build logs
Most founders start build logs for one of these outcomes:
- Transparency and trust: showing your work builds credibility faster than claims.
- Learning in public: writing clarifies decisions, and readers often share better approaches.
- Marketing without the hard sell: frequent, specific updates keep your product top of mind.
- Hiring and partnerships: the log signals how you think and how you execute.
- User feedback loops: you can surface ideas early and validate direction before you overbuild.
A good build log website should support all of these without turning every post into a pitch.
Who you’re writing for
Be explicit about your audience so your posts stay focused:
- Early users who want to know what’s changing and why.
- Other founders/builders who care about process and lessons.
- Investors and advisors who look for clarity, traction, and decision quality.
- Community peers who may share, comment, or contribute.
You don’t need to satisfy everyone in every post—but you should know who you’re prioritizing.
Set expectations (and boundaries) upfront
Readers stick around when they know what to expect. Consider stating:
- Posting frequency: weekly, biweekly, or “when something meaningful ships.”
- Honesty policy: what you’ll share even when it’s messy (missed goals, reversals, mistakes).
- What you won’t share: customer-identifying info, private financial details, security-sensitive items, or anything covered by NDAs.
That balance—open, consistent, and responsibly selective—is what makes an open build log sustainable.
Define Your Goals and Success Metrics
Before you touch design or tooling, decide what you want the site to do. Open build logs work best when they’re not just “updates,” but a clear path for the right readers to follow.
The primary jobs your site should handle
Write down the top 2–3 things a visitor should be able to do within a minute:
- Read the latest update (and quickly scan older posts)
- Understand what you’re building and who it’s for (a simple “What is this?” explanation)
- Contact you (email, social, or a lightweight form)
If a page doesn’t support one of those jobs, it’s optional.
Pick 1–2 success metrics (and ignore the rest)
Open build logs attract the wrong kind of pressure if you measure everything. Choose one or two metrics that match your current stage:
- Email signups (best when you’re early and building an audience)
- Demo requests / waitlist joins (best when you’re validating demand)
- Replies to updates (best when you want feedback and conversations)
Avoid vanity metrics as your “north star.” Pageviews are useful, but they don’t tell you whether you’re building trust.
Choose a cadence you can keep
Consistency beats intensity. Pick a schedule that fits your life for the next 3 months:
- Weekly if you have momentum and time
- Biweekly for most founders
- Monthly if you’re heads-down (still fine)
A smaller post shipped on time is better than a deep dive that never ships.
Decide your tone and format
Be intentional: technical vs. non-technical, and short updates vs. deep dives. You can mix both, but choose a default so readers know what to expect—and so writing doesn’t become a weekly debate with yourself.
Simple Site Structure That Works for Build Logs
A build log site works best when readers can answer three questions quickly: What are you building? What’s new? How can I follow along? Keeping the structure simple also keeps your publishing routine light.
A sitemap you can keep forever
Start with a small set of pages and let the content do the heavy lifting:
- Home: quick summary of the product, latest update, and one primary CTA.
- Build Log: the main feed and archive of posts.
- Now: what you’re focused on this month (short, honest, updated occasionally).
- About: who you are and why you’re building this.
- Product: what it does, who it’s for, current status.
- Contact: one clear way to reach you.
Put the build log at /build-log
Make the build log a dedicated hub at /build-log. Treat it like a timeline:
- Default view: newest posts first.
- An archive view (month/year or “page 2, 3…”) for binge readers.
- Tags for common themes (e.g., /build-log/tags/pricing, /build-log/tags/launch, /build-log/tags/bugs).
This keeps every update findable without forcing readers to dig through your Home page.
CTAs that feel natural
Use clear, optional calls-to-action in predictable spots (top nav and end of posts):
- Newsletter (follow updates)
- Waitlist (get early access)
- Request access (if you’re onboarding manually)
- Book a call (for B2B or consulting-style products)
Navigation built for mobile scanning
Keep the top navigation to 4–6 items, use short labels (“Build Log,” “Product,” “Now”), and make the primary CTA a single button. On mobile, readers should reach your latest post and your follow CTA within one thumb scroll.
Choose a Platform: Hosted Blog, CMS, or Static Site
Picking a platform is less about “what’s best” and more about what you’ll actually use every week. Open build logs work when publishing is frictionless.
Option 1: Hosted blog (easy)
Examples: Medium, Substack, Ghost(Pro), Beehiiv.
You get the quickest setup and the least maintenance. Editing is smooth, publishing is one click, and newsletters often come bundled.
The tradeoff is control: design and site structure can be limited, and some platforms make it harder to own your audience (or move your content later). Speed is usually fine, but you’re tied to their templates and features.
Option 2: CMS (flexible)
Examples: WordPress, Webflow CMS, Ghost (self-hosted), Squarespace.
A CMS gives you a “real website” feel: custom pages (About, Now, Changelog), categories/tags, and better control over layout. The editing workflow is still friendly for non-technical founders, especially if you’ll publish often.
Tradeoffs: slightly higher cost, more settings to manage, and occasional upkeep (updates, plugins, or template changes depending on the tool).
Practical default for most non-technical founders: a hosted CMS (like Webflow CMS, Squarespace, or managed WordPress). You’ll get a custom domain, a clean publishing flow, and enough control to make the site feel like yours—without becoming your own IT department.
Option 3: Static site (fast)
Examples: Hugo, Jekyll, Next.js + MDX.
Static sites can be extremely fast and inexpensive to host. They also give full design control.
The tradeoff is the workflow: you’re often writing in Markdown, using Git, and deploying changes. That’s great if you enjoy developer tools—or if your product is already code-first. It’s not great if publishing needs to happen from your phone between meetings.
A fourth option: generate the site from a chat interface
If your main blocker is time (not technical ability), consider using a vibe-coding tool to generate the site structure and iterate by conversation. For example, Koder.ai can create a simple founder website (Home, Build Log, About, Contact), wire up clean URLs, and help you evolve layout and components quickly—while still letting you export source code later if you want to take full control.
What to check before you choose
Before committing, confirm you can do these basics:
- Use a custom domain (and keep it if you move platforms)
- Generate an RSS feed (still valuable for build-log followers)
- Edit SEO fields per post (title, meta description, canonical URL)
- Keep clean URLs (e.g., /build-log/01-signup-flow)
- Export your content (so you’re not locked in)
If two options feel close, choose the one that makes posting feel easiest. Consistency beats perfect tooling.
Set Up the Basics: Domain, Hosting, and URLs
This is the “plumbing” that makes your build log feel real: a stable domain, secure browsing, and URLs that won’t change every time you tweak your site.
What to buy and set up (the minimal stack)
Buy a domain you can keep for years (often your name or company name). Then:
- DNS: Point the domain to your host (usually by updating A/AAAA records or a CNAME). Keep it simple: one root domain (example.com) and optionally www.
- SSL (HTTPS): Turn on a free certificate (most hosts provide this). If your site isn’t on HTTPS, some readers won’t trust it—and browsers may warn them.
- Hosting: Pick something that matches your platform.
- Hosted blog/CMS: hosting is bundled.
- Static site: use a static host (fast, cheap, low maintenance).
Essential pages to publish on day one
Even if they’re short, publish:
- Home (what the build log is, who it’s for)
- About (who you are, what you’re building, why)
- Build Log / Blog index (a list of posts)
- Now or Status (optional, one-paragraph current focus)
- Contact (email or a simple form)
Create a URL pattern you won’t regret
Choose a consistent post URL style and stick to it:
- Simple:
/build-log/how-we-chose-pricing - With dates (optional):
/build-log/2025-01-15-pricing-experiment
Avoid changing URLs later; it breaks links and search history.
Don’t skip a 404 page (and add search if you can)
Create a friendly 404 that:
- explains the page may have moved
- links back to Home and Build Log
If your platform supports it, enable basic site search so readers can find past experiments quickly.
Design for Readability and Trust
Your build log is only as useful as it is readable. A clean design doesn’t have to look “fancy”—it has to feel calm, predictable, and easy to scan when someone is deciding whether to invest their attention.
Start with a clean, readable template
Pick a simple theme and resist heavy customization. Prioritize readable type (16–18px body text), generous line-height, and plenty of whitespace. Strong headings make it easy for readers to skim updates and jump to what matters.
A good default: one column, limited max width, and obvious link styles. If you add a dark mode, make sure it’s equally legible.
Add quick context on every post
Trust builds faster when readers immediately understand what they’re looking at. Near the top of each build log entry, add a small “context block” that answers:
- What you’re building (one sentence)
- Who it’s for (your ideal user)
- What changed since the last update (a short summary)
This helps first-time visitors and makes returning readers feel oriented.
Include an author box that invites conversation
At the end of posts, include a short author box: who you are, what you’re building, and 1–2 clear contact paths (email, X/LinkedIn, or a simple /contact page). Keep it human and brief—your goal is to make it easy for the right people to reach you.
Cover accessibility basics
Accessibility is part of credibility. Ensure adequate color contrast, sensible font sizes, and visible focus states for keyboard users. Use descriptive alt text for images and screenshots (especially charts), and avoid conveying key information with color alone.
Create a Build Log Format You Can Maintain
Consistency beats perfection. A build log format should be easy to repeat when you’re tired, busy, or not feeling inspired—because that’s when most founder blogs quietly stop.
A simple, repeatable entry template
Use the same structure every time so readers know what to expect, and you spend less energy deciding how to write.
Template: Goal → Progress → Metrics → Learnings → Next
You can keep each section short:
- Goal: One sentence on what you intended to achieve.
- Progress: What you shipped or changed (even if it’s small).
- Metrics: A few numbers that show movement (signups, activation, retention, revenue, replies).
- Learnings: What surprised you, what didn’t work, what you’d repeat.
- Next: The next 1–3 actions, not a huge roadmap.
If you already publish updates elsewhere, you can turn them into posts using the same structure. That makes posting feel like “formatting” rather than “writing.”
Show the work (without writing a novel)
A little evidence goes a long way for trust. When possible, include:
- A screenshot of the UI change, a chart, or a customer message (with names removed)
- A short demo clip (10–30 seconds) of the new flow
- A mini changelog-style list (3–7 bullets) for quick scanning
These elements help non-technical readers understand progress instantly, even if they don’t read every paragraph.
Share lessons, protect details
Open doesn’t mean exposing everything. A good rule: share what you learned and what you’ll do next, but keep private anything that could hurt customers, your team, or negotiations.
Examples of what to keep private: specific pricing negotiations, personal data, security details, employee performance, or anything under NDA. You can still write: “We heard the same objection in five calls, so we changed the onboarding copy,” without quoting anyone directly.
Add lightweight tags for navigation
Tags make your archive useful over time. Start with a small set and reuse them:
Shipping, Customer calls, Experiments, Hiring, Fundraising
Over time, readers can filter by what they care about—and you’ll have an easier time spotting patterns in your own decisions.
Build a Writing and Publishing Workflow
A build log only works if you can publish consistently without turning it into a second job. The goal is to reduce “blank page” time and make each post feel like a repeatable routine.
A simple editorial workflow
Keep your workflow lightweight and visible. A basic loop is enough:
-
Idea list → capture anything worth sharing (wins, failures, decisions, numbers, screenshots).
-
Outline → pick one idea and turn it into 5–7 bullets (problem, what you tried, result, what’s next).
-
Draft → write the post in one sitting when possible. Don’t polish early.
-
Publish → add title, links, and a clear “next step” for readers.
-
Share → one short post on the channels you already use, linking back to your site.
Capture tools that prevent lost context
Most founders don’t lack stories—they lose details. Set up a few “capture paths” you’ll actually use:
- Notes app (one running note called “Build Log Ideas”) for quick bullets.
- Voice memos for walks or post-meeting debriefs; transcribe later if helpful.
- A screenshots folder (or album) for charts, UI changes, customer quotes, and milestones.
When you sit down to write, these artifacts become your outline.
Batch what you can, not everything
Batching reduces overhead:
- Write two drafts at once when you’re in the groove (even if the second is rough).
- Schedule posts so you’re not forced to “finish today or miss a week.”
- Reuse visuals: the same screenshot can support a blog post, a newsletter blurb, and a social update.
A lightweight pre-publish checklist
Before you hit publish, run a fast review so quality stays steady:
- Links: do they work, and do internal links point to the right /blog/... page?
- Spelling & headings: fix obvious errors; keep headings skimmable.
- CTA: one clear next step (reply, try a demo, join the list).
- Featured image: optional, but if you use one, make it consistent and readable.
The best workflow is the one you’ll follow on a busy week. Keep it simple, keep it repeatable, and let consistency do the compounding.
Add Newsletter Signup Without Being Pushy
A newsletter is the easiest way to keep readers close without turning your build log into a sales funnel. The trick is to make the signup feel like a convenience feature: “If you want the next update, here’s how to get it.”
Put the signup where it helps
Add an email signup on your Home page and after each post. On the Home page, it works as a gentle “stay in touch” option for first-time visitors. After a post, it catches people at the moment they’ve decided your updates are worth following.
Keep the form minimal (email + button). If you ask for a name, make it optional.
Offer a simple lead magnet
Skip big promises and PDFs. A straightforward lead magnet works best for open build logs:
- “Get new build logs by email.”
That’s it. It matches the intent of the reader and doesn’t create extra work for you.
Set expectations up front
Right next to the form, tell people what they’ll receive and how often. For example:
“I send 1–2 emails per month with new build logs, decisions, and results. No spam. Unsubscribe anytime.”
This reduces hesitation and attracts subscribers who actually want the content you plan to publish.
Send a welcome email that’s actually useful
Create a short welcome email that:
- thanks them for subscribing
- links to your best 3 build log posts (so they can binge-read)
- includes one clear link to /product for context (not a hard sell)
This single email often does more to build trust than weeks of social posting.
SEO for Build Logs: Get Found Over Time
Build logs aren’t usually “viral” content—and that’s fine. SEO for build logs is about being consistently discoverable when someone searches for the exact problem you’re working on, the tool you’re building, or the journey you’re documenting.
Pick a small set of keywords you can actually win
Skip giant keywords like “startup” or “SaaS.” Instead, choose a few core phrases that match your product and your posts:
- Your category + intent: “inventory app for freelancers”, “CRM for coaches”
- Build-log style topics: “build log”, “weekly update”, “changelog”, “behind the scenes”
- Problem keywords: “how to track X”, “alternatives to Y”, “best way to do Z”
Use those phrases naturally in your post titles, intro paragraphs, and headings. You don’t need to force them into every post—just be consistent.
Titles, meta descriptions, and stable URLs
Search results are mostly driven by your title and snippet.
Write titles that say what the reader gets, plus context:
- “Build Log: How We Shipped Team Invites in 3 Days”
- “Week 12 Build Log: Pricing Tests and What Broke”
Keep URLs short, readable, and stable. If your platform allows it, avoid dates in the URL so older posts don’t feel irrelevant later.
Meta descriptions should be plain, specific, and under ~160 characters. Treat them like a promise: what will the reader learn, and who is it for?
Internal links: connect your story
Build logs often reference earlier decisions. Make that connection explicit with internal links.
Link:
- Between related posts (e.g., pricing experiments → the week you launched pricing)
- To key pages like /pricing, /about, /now, and your “Start here” page
- From older posts to newer follow-ups (so the archive stays alive)
A simple rule: every build log should link to at least one older post and one “business” page.
RSS + sitemap: make indexing easy
An RSS feed helps readers (and some tools) follow along without social media. Many platforms generate it automatically; if not, create one and link it in your footer.
Also publish a simple sitemap (often at /sitemap.xml). It’s a small setup step that helps search engines discover new posts faster and understand your site structure.
If you want a deeper checklist later, add a short “SEO basics” note to your publishing workflow so each post ships with the essentials, not as an afterthought.
Analytics: Measure What Readers Actually Do
Analytics shouldn’t be a scoreboard for pageviews. For open build logs, it’s a feedback tool: which updates attract the right readers, which topics build trust, and which posts turn curiosity into action.
Pick privacy-friendly analytics (and keep it simple)
Choose a tool that collects the minimum you need and doesn’t rely on invasive tracking. A lightweight setup is often enough for a founder site: one script, a short dashboard, and clear definitions.
Before you install anything, write down what “success” means for your build logs. For many founders that’s not “more traffic,” but “more of the right people taking the next step.”
Track actions that matter
Set up goals/events around intent, not vanity metrics. Common high-signal actions:
- Newsletter signup confirmations
- Clicks on your contact link (or email address)
- Demo/intro requests (button clicks or form submissions)
- Clicks to key pages like /pricing or /about
If you share posts on social, tag links with UTMs so you can tell what actually drives engaged readers. Example:
/blog/2025-01-build-log?utm_source=x&utm_medium=social&utm_campaign=build_log
That lets you compare channels based on outcomes (signups, contact clicks), not just visits.
Create a monthly review habit
Once a month, do a 30-minute review and capture notes in your own log. Focus on:
- Top posts by engaged time (or scroll depth), not only views
- Search queries that are starting to bring traffic (topics to expand)
- Conversion paths: which posts lead to signups or contact clicks
Then make one small change: update internal links in your best post, add a clearer call-to-action, or write a follow-up answering the most common query. Over time, this turns analytics into steady compounding improvements—without turning your founder website into a numbers obsession.
Launch, Maintenance, and Community Feedback
A build log site is never really “done”—but it should feel dependable from day one. A clean launch plus light, consistent maintenance is what keeps readers coming back (and keeps you from dreading updates).
A practical launch checklist
Before you share the link widely, do a quick pass that catches the most common credibility killers:
- Mobile test: read a full post on your phone. Check font size, spacing, and tap targets.
- Broken links: click your nav, recent posts, and any calls to action.
- Share preview: paste a URL into a social preview tool and confirm the title/description look right (Open Graph/Twitter cards).
- Backups / version history: if you use a CMS, enable backups; if you use Git, push everything and tag a release.
Keep it fast and easy to read
Performance is part of trust. You don’t need fancy optimization—just avoid the usual slowdowns:
- Use compressed images (and prefer modern formats when possible).
- Enable lazy loading so long posts don’t load everything at once.
- Stick to simple fonts and minimal third-party scripts.
If you have a /now or /updates page, it can double as a lightweight “what’s new” feed without extra overhead.
Legal basics (only what you need)
If you collect emails, run analytics, or use cookies, add simple legal pages:
- /privacy
- a cookie notice (if applicable)
Keep them plain-language and honest—no need to overcomplicate.
Invite feedback without creating a moderation job
Community input is fuel, but comments can become a second product.
If you want the simplest option, use a reply-to email: “Hit reply if you spot an issue or have an idea.” It’s low-friction and private.
If you do add comments, set expectations: light moderation, clear rules, and a way to report problems.
Maintenance rhythm
Pick a cadence you can keep: a monthly link check, occasional refresh of your “Start Here” page, and small improvements as you notice friction. Consistency beats perfection.
FAQ
What is an open build log, and how is it different from a marketing blog?
An open build log is a public, ongoing record of what you’re building—what shipped, what broke, what you learned, and what you’re trying next. It’s closer to a lab notebook than a polished case study, and it works best when it stays specific and honest (not promotional).
Why do founders publish build logs in the first place?
Aim for outcomes like:
- Building trust through transparency
- Learning faster via public feedback
- Staying top-of-mind without hard selling
- Attracting collaborators, hires, or partners
Pick 1–2 primary goals so your site structure, CTAs, and analytics stay focused.
Who should I write my build log for?
Write primarily for one group at a time (you can rotate):
- Early users (what changed and why)
- Other builders (process and lessons)
- Investors/advisors (clarity and decision quality)
- Community peers (discussion and sharing)
If you try to satisfy everyone in every post, the writing usually becomes vague.
What should I avoid sharing in an open build log?
State your boundaries early so the log is sustainable. Common “do not share” areas:
- Customer-identifying information
- Security-sensitive details
- Private financials or negotiation specifics
- Anything under NDA
You can still share the lesson and the decision without exposing harmful details.
What pages should a build log website have on day one?
A durable starter sitemap is:
- Home (what it is + latest update + one CTA)
- /build-log (feed + archive)
- /now (current focus)
- /product (what it does + status)
- /about (who you are + why)
- /contact (one clear method)
Keep it small so publishing stays the main work.
Where should the build log live, and how should it be organized?
Use /build-log as the hub with:
- Newest-first feed
- An archive (pagination or month/year)
- A small tag system (e.g., shipping, experiments, bugs)
This makes updates easy to browse without burying them on the Home page.
Should I use a hosted blog, a CMS, or a static site for my build log?
Choose based on which workflow you’ll actually keep:
- Hosted blog: fastest setup, least maintenance, less control
- CMS: good balance of flexibility and easy editing
- Static site: maximum speed/control, more technical publishing workflow
Before deciding, confirm custom domain, RSS, clean URLs, SEO fields, and content export.
How should I structure URLs for build log posts?
Pick a URL pattern you can keep for years, like:
/build-log/how-we-chose-pricing
Optional: include dates, but only if you’re confident you won’t want to change them later. Avoid changing URLs after publishing—broken links and lost search history compound over time.
What’s a simple build log post template I can maintain?
Use a repeatable structure like:
- Goal → Progress → Metrics → Learnings → Next
Keep sections short. The point is consistency: a small post shipped on time beats a “perfect” deep dive that never publishes.
What analytics should I track for a build log site?
Track actions that signal intent, not just traffic:
- Newsletter signup confirmations
- Contact link clicks or form submissions
- Clicks to key pages (e.g., /product, /pricing, /about)
Do a 30-minute monthly review, then make one improvement (better internal links, clearer CTA, or a follow-up post answering the most common question).