

Create a Website for a Product Adoption Playbook That Activates
Learn how to plan, build, and launch a playbook website that guides users from first login to power use with clear steps, assets, and metrics.
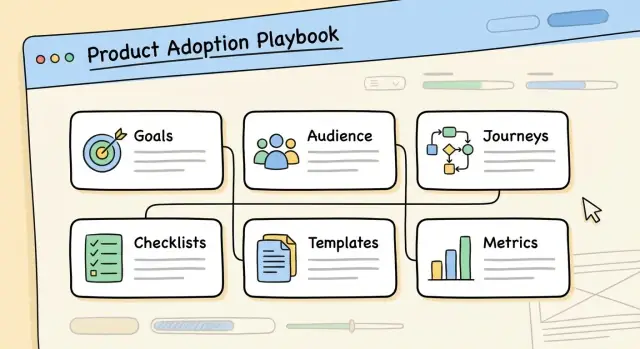
What a Product Adoption Playbook Website Should Do
A product adoption playbook website is a dedicated, easy-to-navigate site that turns “how we drive adoption” into repeatable steps. It’s not just a help center and not just internal documentation—it’s the shared source of truth that helps customers and customer-facing teams move from first login to meaningful, habitual use.
Who it serves (and why that matters)
A good adoption website is built for multiple audiences at once:
- End users who want to complete a task without getting stuck
- Admins/owners who need setup guidance, governance tips, and rollout plans
- Champions who lead enablement inside their organization
- Customer Success / Support / Sales who need consistent, approved guidance to share
When you design for these roles intentionally, you stop forcing everyone through the same generic “user onboarding” path.
The outcomes it should drive
A well-designed adoption website aims for practical business results:
- Faster activation: users reach the “aha” moment sooner because steps, prerequisites, and decision points are clear
- Fewer support tickets: predictable questions are answered with checklists, troubleshooting, and clear next actions
- Clearer roles: admins, champions, and end users know what they own, what to expect, and how success is measured
It also supports customer success enablement by giving teams ready-to-send guidance: activation checklists, playbook templates, rollout emails, training plans, and quick diagnostics.
What you’ll be able to build by the end of this guide
By the end, you’ll be able to design an adoption website that:
- Organizes content into a usable product adoption playbook (not a pile of articles)
- Helps readers self-select the right path by role and use case
- Uses repeatable formats like recipes, checklists, and templates
- Connects to in-app guidance so the website and the product reinforce each other
- Includes basic adoption metrics so you can see what’s working and improve it over time
Think of it as a practical “activation engine”: a website that makes adoption easier to execute, easier to scale, and easier to keep consistent.
Identify Your Audiences and Their Jobs-to-Be-Done
A product adoption playbook website works best when it’s written for specific people trying to get specific outcomes. “All users” is not an audience; it’s a guarantee you’ll answer nobody’s real questions.
Core audiences you should plan for
Most adoption websites serve a mix of these groups:
- End users (people doing the day-to-day work)
- Admins (setup, permissions, security, integrations)
- Champions (internal power users driving rollout and training)
- Customer Success (CS) (enablement, adoption plans, QBR prep)
- Sales engineers / solution consultants (proof-of-value, technical validation)
How needs differ by role
Roles don’t just prefer different wording; they have different “jobs-to-be-done.”
- Admins need confidence in setup and governance: configuration, data rules, access control, and what to standardize across teams.
- End users need quick wins in their daily workflow: “How do I complete task X faster?” with minimal context switching.
- Champions need rollout tools: training paths, internal comms copy, enablement decks, and ways to handle resistance.
- CS needs a repeatable plan: what to recommend first, what to measure, and how to spot early risk.
- Sales engineers need clarity on technical fit: integrations, limitations, and how to run a clean evaluation.
The top questions people ask during adoption
Build your navigation and page templates around the questions users are already typing (or asking on calls).
- End users: “What’s the fastest way to do my first task?” “What does ‘good’ look like?” “How do I fix common mistakes?”
- Admins: “What needs to be configured before rollout?” “Who should get which permissions?” “How do we keep data consistent?”
- Champions: “What’s the rollout plan for week 1–4?” “How do I train different teams?” “What objections should I expect?”
- CS: “Which milestones predict activation?” “What’s the renewal-risk signal?” “What’s the standard adoption checklist?”
- Sales engineers: “What’s required for SSO/API/integrations?” “What are the constraints?” “What’s the evaluation checklist?”
When each audience can immediately find their job and next step, your playbook website becomes a practical tool—not a document people skim once and forget.
Map the Adoption Journey and the Key Milestones
A product adoption playbook website works best when it mirrors how people actually succeed with your product—not how your org is structured. Start by mapping the journey from “just signed up” to “can’t imagine working without it,” then define the milestones that prove progress.
Define the stages that matter
Use clear, observable stages so anyone reading the playbook can quickly locate what’s next:
- First value: the first meaningful outcome (not “created an account”).
- Setup: prerequisites that remove friction later (permissions, integrations, data import).
- Activation: the moment the product becomes useful for the core job (often 1–3 key actions).
- Habit: repeated usage that fits into a weekly rhythm.
- Expansion: adding more people, workflows, or paid capabilities.
For each stage, write down (1) the user goal, (2) what “done” looks like, and (3) common blockers.
Create 2–4 “golden paths”
Most playbook websites get messy because they try to serve everyone with one generic flow. Instead, define a small set of “golden paths” that cover the majority of successful adoption patterns, such as:
- Individual user path: from sign-up → first value → habit.
- Team admin path: from workspace setup → inviting teammates → governance → expansion.
Each golden path should have a small number of milestones, written as outcomes (e.g., “team invited and permissions set”) rather than features (e.g., “used the invite screen”).
Document the entry points to the journey
People don’t start from the same place. In your playbook website, explicitly list and tag the most common entry points—trial, sales demo, onboarding email, and in-app prompt—and note what readers should do first in each scenario. This keeps users from feeling lost and makes your guidance feel personal from the first click.
Choose a Website Structure That’s Easy to Navigate
A product adoption playbook only works if people can find the next step in seconds. The structure should feel familiar, stay consistent across pages, and avoid “where am I?” moments.
A simple, repeatable hierarchy
Start with a small set of top-level sections that match how people look for help. A practical default is:
- Home: what this playbook is, who it’s for, and the quickest ways in
- Getting Started: the minimum path to first success (setup, first project, first win)
- Use Cases: “I want to do X” pages (not feature tours)
- Roles: guidance tailored to Admins, Champions, and End Users
- Resources: checklists, templates, examples, and downloadable assets
- Metrics: what “good adoption” means and how to track it
This hierarchy makes the site easy to scan and keeps content ownership clear (each section has a purpose).
Keep navigation predictable and shallow
Avoid deep nesting and clever menu labels. Aim for a user to reach any page in two to three clicks from the top navigation.
Use consistent page patterns (same sidebar behavior, same “Next step” placement, same terminology). When you must group content, prefer simple category pages over multiple layers of sub-menus.
Add a strong “Start here” path and search
New users need a guided entry point. Add a prominent “Start here” button on Home that leads to:
- A quick orientation (what you’ll achieve)
- A short checklist (5–7 steps)
- The first recommended use case
Also include site search in the header. Search is the fastest route for returning users and support teams, especially when they remember a term but not the page location. Add lightweight filters (Role, Use Case, Stage) so results feel immediately relevant.
Done well, the structure disappears—and the playbook feels like a clear path instead of a pile of pages.
Write Playbook Pages as Step-by-Step Recipes
A good product adoption playbook page shouldn’t read like documentation. It should read like a recipe: a clear goal, what you need before you start, the exact steps to follow, and a way to confirm you did it correctly. This format reduces back-and-forth in support, speeds up onboarding, and makes adoption work repeatable across teams.
Use a standard page format
Use the same structure on every page so readers instantly know where to look.
- Goal: One sentence that describes the outcome (not the feature). Example: “Invite your team and assign the right access so they can start using the workspace.”
- Prerequisites: What must already be true (permissions, data, tools, time estimate). Keep it short and specific.
- Steps: The numbered procedure, written for a busy person.
- Proof of completion: A quick check that confirms success (what they should see, which email arrives, what status changes).
When possible, add a small “Common mistakes” note at the end (1–3 items) to prevent predictable errors.
Write steps with action-based headings
People skim. Make every heading a verb phrase that matches the action they’re about to take.
Good examples:
- Create the workspace
- Invite teammates
- Assign roles
- Verify access
Under each numbered step, keep the instructions tight: one idea per sentence, and avoid product jargon unless you define it once.
Add annotated visuals that reduce confusion
If you include screenshots or short clips, make them do real work:
- Use simple annotations (circles, arrows, 1–2 word labels) to show exactly where to click.
- Prefer short clips for multi-step UI flows, and screenshots for single actions.
- Make sure each visual matches the current UI and reflects the role described (admin vs end user).
End the page by restating the proof of completion so the reader can confidently move to the next playbook step.
Build a Library of Checklists, Templates, and Assets
A playbook website gets used when it saves people time. Your fastest way to do that is a practical library of ready-to-run assets: checklists, templates, and “copy-paste” snippets that teams can apply in minutes.
Start with two core checklists: setup and activation
Create both web-based checklists (easy to scan, searchable) and downloadable versions (for offline planning). Keep them short, with clear “done” criteria.
Example checklist sections:
- Setup checklist: access, permissions, data connections, key settings, security basics.
- Activation checklist: first value moment, must-complete actions, verification steps, and who signs off.
Each item should answer: what to do, where to do it, how to confirm it worked.
Provide templates that match real rollout work
Teams often struggle with communication and coordination more than product clicks. Add templates that reduce that friction:
- Email sequences for different audiences (admins, champions, end users)
- Internal rollout notes (Slack/Teams posts, stakeholder updates, FAQ blurbs)
- Training agendas for 30/60/90-minute sessions, including timing, objectives, and materials needed
Make templates editable, with placeholders like {team_name}, {deadline}, {benefit_statement}.
Add “copy-paste” snippets people can ship today
Include short blocks users can drop into their tools:
- Prompts for champions to gather feedback
- Announcement copy for launches and reminders
- Success criteria statements (for example: “Activation is complete when X% of users do Y within Z days.”)
Finally, tag every asset by role, use case, and stage (Setup, Launch, Adoption) so visitors can find the right item without hunting.
Organize Content Around Use Cases, Not Features
A playbook website works best when it mirrors how people think about outcomes. Most users don’t wake up wanting to “use Feature X.” They want to finish a task, solve a problem, or hit a milestone. Organizing content around use cases makes the site easier to scan, easier to share internally, and more likely to drive real activation.
Start with 3–6 core use cases
Pick a short list of the most common, high-value reasons customers adopt your product. Keep it tight: too many options makes people hesitate. A good set includes the “first win” use case plus a few deeper workflows that expand usage after onboarding.
Examples of use-case categories (not features): onboarding a team, launching a workflow, improving reporting, standardizing a process, or reducing manual work.
Create a consistent “use case page” template
Every use case page should answer three questions quickly:
- Who it’s for: role, team, or maturity level (new admin vs. power user)
- When to use it: triggers and scenarios (e.g., “after you’ve imported data,” “when you need approvals”)
- Required setup: what must be true before starting (permissions, integrations, data, naming conventions)
Then move into the “recipe” itself: clear steps that lead to a measurable outcome.
Tie each use case to the exact features and steps
Use-case pages should still be specific about features—but only in service of the outcome. For each step, name the feature involved and what the user should do inside it. This keeps readers from bouncing between vague guidance and separate feature docs.
A simple pattern that works:
- Goal for this step (what success looks like)
- Feature to use (the part of the product)
- Action (what to click/configure)
- Checkpoint (how to confirm it worked)
This approach turns your playbook website into an outcome-driven map: users choose a use case, follow a path, and reach a result—without needing to understand your full feature set first.
Add Role-Based Tracks for Admins, Champions, and End Users
A product adoption playbook website works better when it respects reality: different people adopt the same product for different reasons, with different permissions, time constraints, and success criteria. Role-based tracks let each audience find “their path” without wading through everything else.
Admin track: set the foundation safely
Admins usually care about getting the system working correctly and protecting the organization. Give them a clear sequence that starts with prerequisites and ends with validation.
Include pages like:
- Admin setup checklist: account provisioning, environment setup, integrations, and initial configuration.
- Permissions and data access basics: role definitions, least-privilege recommendations, who can view/export data, and what to do before inviting users.
- Security essentials (as relevant): SSO setup, MFA, audit logs, retention settings, and a “security review ready” checklist.
- Go-live verification: test user creation, sample workflow run, and a short acceptance checklist.
Keep each page action-oriented with “What you need,” “Steps,” and “How to confirm it worked.”
Champion track: enable internal rollout owners
Champions are internal trainers, rollout leads, or power users who make adoption stick. Create “champion enablement” pages that help them teach and coordinate.
Cover:
- Rollout plan template: audience segments, timing, and communication cadence.
- Training kit: a 15-minute starter agenda, demo script, FAQs, and common objections.
- Office hours playbook: how to collect issues, triage them, and escalate.
- Success signals: what to monitor week 1 vs. week 4, plus a simple reporting rhythm.
End-user track: complete real workflows fast
End users want to finish tasks, not learn features. Structure this track around daily workflows with short, guided steps.
Examples:
- End-user workflows: “Complete your first task,” “Collaborate with a teammate,” “Find and export what you need.”
- Manager reporting: “View team activity,” “Build a weekly report,” “Share insights with stakeholders.”
Finally, add a track selector at the top of the site and on key pages, so people can switch roles instantly without losing their place.
Connect the Website to In-App Guidance and Onboarding
A playbook website is where people understand the “why” and the full workflow. In-app guidance is where they complete the “now.” When the two are connected, users don’t just read steps—they finish them.
Decide what belongs on the website vs. in the product
Use the website for context and decision-making:
- The goal of the workflow, when to use it, and expected outcomes
- Prerequisites (permissions, data needed, integrations)
- Step-by-step instructions with screenshots and troubleshooting
Use in-product guidance for immediate, lightweight direction:
- Tooltips for definitions and one-field explanations
- Tours for first-time orientation (keep them short)
- Nudges for next-best actions (e.g., “Invite a teammate,” “Create your first project”)
If a user needs more than a couple of clicks to complete the step, the website should carry the detailed explanation, while the product provides the prompt and the shortcut.
Match language to the UI—every time
Adoption breaks when the page says “Create Workspace” but the button says “New Space.” Align your playbook wording to the product labels:
- Button names, menu paths, and field labels
- Role names and permission titles
- Statuses and error messages users will see
Create a simple “UI terms” glossary and treat it as a single source of truth.
Build clear handoffs in both directions
Each playbook page should end with an obvious next action: “Do this now in the product.” Likewise, in-app prompts should offer an escape hatch: “Need the full steps? Open the playbook.”
Design these handoffs around milestones (first project, first invite, first report) so users always know what completion looks like and what to do next.
Define Success Metrics and How You’ll Measure Adoption
A product adoption playbook website only works if you can tell whether it’s changing behavior. Define a small set of metrics, tie them to clear milestones, and publish a simple reporting view so the team reviews progress consistently.
The minimum metrics to track
Keep the “starter set” tight and actionable:
- Activation rate: the percentage of new accounts/users who reach your activation milestone (your “aha” moment) within a defined window (for example, 7 or 14 days).
- Time to First Value (TTFV): how long it takes, on average, for a user to experience the first meaningful outcome. Shorter is better.
- Feature adoption: usage of the key behaviors that predict retention (for example, using a core workflow weekly, setting up an integration, inviting collaborators). Track it as a rate (percent of accounts/users) and a frequency (how often).
If you want one extra metric, add drop-off by milestone (where people stall). It’s usually the fastest way to identify what to fix on the playbook site.
Define “done” for every milestone
Your playbook pages should reference milestones that have measurable completion criteria. Write them so anyone can verify them.
Examples of strong completion criteria:
- Account setup complete: profile saved + required settings configured.
- First value achieved: user completed the primary workflow and received a visible output (report generated, project launched, request submitted).
- Team enabled: at least 2 additional users invited and one collaborator action completed.
- Key feature adopted: feature used X times or by Y% of users in an account within Z days.
Create a reporting page and a review cadence
Add a “Reporting” page to the playbook website with:
- The current definitions for each metric and milestone
- A simple dashboard snapshot (weekly trend + last 30 days)
- Breakdowns by role (admin/champion/end user) and segment (plan, industry, region)
- A short “Insights and actions” log (what changed, what you’ll try next)
Set a cadence: weekly for onboarding/activation health, and monthly for deeper feature adoption and cohort trends. This turns measurement into routine, not a one-off project.
Set Governance: Ownership, Updates, and Quality Control
A playbook website only works if people trust it. Governance is what keeps it accurate, current, and easy to maintain—without turning every edit into a bottleneck.
Set clear ownership (and a simple approval path)
Start with named owners, not teams. A practical model is:
- Primary owner (Program Lead): manages the backlog, prioritizes updates, and ensures consistency.
- Authors: usually Customer Success Enablement, Product Marketing, or Support—who can write in plain language.
- Reviewers: Product (accuracy), Support/CS (real-world fit), and Legal/Security when needed.
- Approver: one person who can publish quickly (often the Program Lead or Head of CS Enablement).
Keep the workflow lightweight. If every page needs three approvals, updates will stall and the site will go stale.
Make freshness visible with versioning and “last updated” notes
Add a “Last updated” line on key pages (recipes, checklists, templates, onboarding tracks). Readers use it as a confidence signal, and it nudges the team to refresh content.
For bigger changes, add a simple version note (e.g., “v2: updated steps for new navigation”). You don’t need heavy documentation—just enough to explain what changed and why.
Create an intake process for new requests
Most good playbook content starts as a repeated question. Set up one intake channel (a form or ticket type) that Support, CS, and Product can use.
Standardize the request fields:
- What problem is happening?
- Who is impacted (role/segment)?
- What success looks like?
- Any existing assets (screenshots, scripts, templates)?
Triaging weekly is usually enough. Tag requests by urgency (bug/confusion, upcoming launch, top support driver), and publish in small batches so the website keeps improving without big rewrites.
Launch, Promote, and Iterate the Playbook Website
A playbook website only creates adoption if people can find it, trust it, and return to it. Treat launch as the start of an improvement loop: publish, promote, learn, and update on a predictable rhythm.
Plan a practical launch checklist
Before you announce anything, run a quick-but-thorough quality pass so early visitors don’t bounce.
- Link and navigation QA: click every primary path, table of contents item, and “next step” button. Fix dead ends and confusing loops.
- Readability check: tighten long sentences, ensure headings match the page’s promise, and keep steps scannable.
- Mobile checks: verify spacing, accordions, and tables work on small screens. If a checklist is hard to use on a phone, adoption suffers.
- Search readiness: confirm titles, headings, and short page summaries are clear. Make sure the site is indexable (no accidental blocks), and that key terms like “onboarding,” “checklist,” and common use cases appear naturally.
- Analytics baseline: add tracking for page views, search terms, and clicks on templates so you can measure what actually helps.
Promote through the paths people already use
Promotion works best when it’s embedded into existing customer and employee habits.
Add prominent entry points from high-traffic areas like your Pricing page, Blog, Help content, and key product pages. For customers, mention the playbook in onboarding emails and customer success messages, pointing them to the most relevant “first win” recipe rather than a generic homepage.
Internally, share a short “how to use this site” note with Sales, Support, and Customer Success so they can consistently direct people to the right page during calls and tickets.
Collect feedback and iterate monthly
Keep feedback lightweight: a one-question “Was this helpful?” prompt, a short “What were you trying to do?” field, and an optional contact box. Pair that with a monthly review where you:
- update outdated steps and screenshots
- add missing templates requested by teams
- improve pages with high exits or repeated searches
Small, steady edits beat big rewrites—and the site stays aligned with how people actually adopt your product.
FAQ
What is a product adoption playbook website (and how is it different from a help center)?
A product adoption playbook website is a dedicated site that turns your adoption strategy into repeatable, role-specific steps. It sits between a help center and internal docs: it helps customers execute adoption (setup → activation → habit) and helps CS/Support/Sales share consistent, approved guidance.
Who should the playbook website serve?
Build for distinct roles with different jobs-to-be-done:
- End users: finish a task fast with minimal context
- Admins: setup, permissions, governance, integrations
- Champions: rollout plans, training kits, comms templates
- CS/Support/Sales engineers: repeatable guidance, evaluation checklists, troubleshooting
Designing for “everyone” usually means nobody finds their next step quickly.
What outcomes should an adoption playbook website drive?
Prioritize measurable outcomes tied to adoption:
- Faster activation (users reach the “aha” milestone sooner)
- Fewer support tickets (common issues solved via checklists and troubleshooting)
- Clearer ownership (admins vs champions vs end users know what to do)
If you can’t link content to a milestone, it’s likely “nice-to-have” documentation.
How do I map the adoption journey into stages and milestones?
Map stages that are observable and easy to verify:
- First value (first meaningful outcome)
- Setup (prereqs that prevent later friction)
- Activation (1–3 key actions that make the product useful)
- Habit (weekly rhythm)
- Expansion (more users/workflows/capabilities)
For each stage, define the goal, “done” criteria, and common blockers.
What are “golden paths,” and how many should I create?
Limit to 2–4 paths that cover most successful adoption patterns (e.g., Individual user path, Team admin path). Write milestones as outcomes, not features:
- “Team invited and permissions set” (good)
- “Used the invite screen” (too feature-centric)
Keep paths short so readers can finish them without getting lost.
What site structure and navigation works best for a playbook website?
Use a simple, familiar hierarchy such as:
- Home (what this is + quickest ways in)
- Getting Started (minimum path to first success)
- Use Cases (“I want to do X”)
- Roles (Admin/Champion/End user tracks)
- Resources (templates, checklists)
- Metrics (definitions and reporting)
Aim for any page to be reachable in 2–3 clicks and include header search with filters like Role/Stage/Use Case.
How should individual playbook pages be written so they’re actually usable?
Use a repeatable “recipe” format:
- Goal (outcome in one sentence)
- Prerequisites (permissions, data, time estimate)
- Steps (numbered, skimmable, action-oriented)
- Proof of completion (what confirms success)
Add 1–3 common mistakes at the end to prevent predictable errors and reduce back-and-forth.
What checklists and templates should I include first?
Start with the assets that save time immediately:
- Setup checklist (access, permissions, integrations, security basics)
- Activation checklist (must-complete actions + verification)
- Rollout templates (emails, Slack/Teams posts, training agendas)
- Copy-paste snippets (announcements, feedback prompts, success criteria)
Tag every asset by role, use case, and stage so people can find what they need quickly.
How do I connect the website to in-app guidance without duplicating everything?
Put detailed context on the website, and lightweight prompts in the product:
- Website: goals, prerequisites, troubleshooting, step-by-step workflows
- In-app: tooltips, short tours, and “next-best action” nudges
Create two-way handoffs:
- Playbook page ends with “Do this now in the product.”
- In-app prompt links to the full playbook steps.
Also match the playbook language to UI labels exactly (button names, role names, statuses).
How do I keep the playbook accurate over time and measure whether it’s working?
Keep governance lightweight but explicit:
- Assign a primary owner (program lead) plus authors and reviewers
- Add “Last updated” on key pages and simple version notes for major changes
- Use one intake channel (form/ticket type) for repeated questions and requests
For iteration, track basics (page views, search terms, template clicks) and review:
- Weekly for activation health
- Monthly for content updates and adoption trends