

How AI Turns Written Specs into Real Features and Screens
Learn how AI interprets plain-language instructions, plans UX flows, generates UI and code, and iterates with feedback to deliver working features and screens.
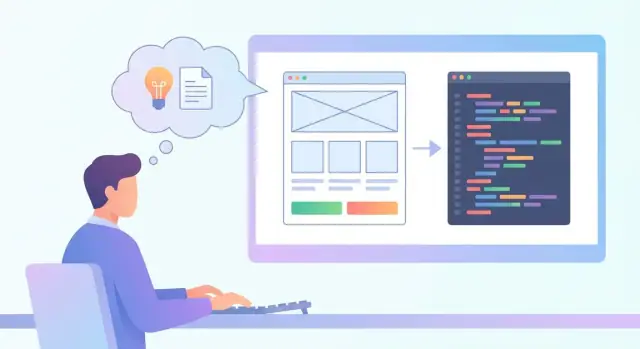
What It Means to Build from Written Instructions
“Written instructions” are the words you already use to explain what you want built—captured in a form that an AI (and a team) can act on.
In practice, the goal isn’t perfect prose. It’s clear intent (what outcome you want) plus clear boundaries (what’s allowed, what’s not), so the system doesn’t have to guess.
What counts as “written instructions”
These can be formal or informal:
- Notes and messages: “Add a button to resend the confirmation email.”
- User stories: “As a customer, I want to save my shipping addresses so checkout is faster.”
- Acceptance criteria: “Given I’m logged in, when I click ‘Save’, then the address appears in my list and is used as the default.”
- Edge cases and constraints: “Don’t allow PO boxes,” “Must work on mobile,” “Store data in GDPR-compliant regions.”
The key is that the text describes outcomes and constraints. When both are present, AI can reliably propose screens, flows, and implementation details without inventing business rules.
What “working features and screens” actually means
A working feature is more than a mockup. Typically it includes:
- UI screens: layouts, form fields, buttons, error states
- Navigation and flows: where users start, where they go next, what happens on success/failure
- Logic and rules: validations, permissions, calculations, status changes
- Data: what gets stored, retrieved, and updated (and when)
For example, “saved addresses” isn’t just a page—it’s a set of screens (list, add/edit), rules (required fields, default address), and wiring (API calls, state updates).
The AI-assisted build loop
Most teams end up in a simple cycle:
Describe → generate → review → refine
You provide the spec, the AI proposes UI/UX and implementation, you review for accuracy and product fit, then you refine requirements until the result matches what you meant.
If you use a vibe-coding platform like Koder.ai, this loop often becomes even tighter because you can stay in one place: describe the feature in chat, generate the app changes, then iterate quickly with targeted follow-ups (and revert if needed).
Setting expectations
AI can speed up drafting screens, suggesting flows, and producing code, but people still:
- make product decisions and trade-offs
- verify correctness against requirements
- test real behavior (especially edge cases)
- ensure quality, safety, and consistency with the rest of the product
Think of AI as an accelerator for turning text into a first (and second) draft—while humans remain responsible for the final result.
The Inputs AI Can Use (and What Makes Them Clear)
AI is flexible about formats, but picky about clarity. It can work from a single paragraph, a bullet list, a PRD snippet, or a set of user stories—as long as intent and constraints are explicit.
Good inputs (the “raw materials”)
The most useful starting points usually include:
- A user story: who needs what, and why (e.g., “As a store manager, I want to approve refunds so I can control losses”).
- Target audience: internal team, paying customers, admins, first-time users, etc.
- Constraints: mobile-first, must support dark mode, must work offline, must match an existing design system, performance limits.
- Success criteria: how you’ll know it’s done (e.g., “refund approval takes under 30 seconds and logs an audit entry”).
These elements tell the AI what you’re building and what ‘good’ looks like, which reduces back-and-forth.
The key details AI needs to avoid guessing
When requirements are missing, the AI fills gaps with defaults that may not match your business rules. Include:
- Roles and permissions: who can view, create, edit, delete, approve.
- Data fields: what information is stored, validation rules, required vs optional.
- States and transitions: draft → submitted → approved → rejected, plus who can move between states.
- Edge cases: duplicates, empty states, slow networks, partial data, error handling.
Before/after: vague vs concrete
Vague: “Add a checkout screen and make it simple.”
Concrete: “Add a checkout flow for logged-in users. Steps: Address → Shipping → Payment → Review. Support card + Apple Pay. Save up to 3 addresses per user. Show tax and shipping before payment. If payment fails, keep the cart and show a retry option. Success = order created, receipt emailed, and inventory decremented.”
Why specificity reduces rework and surprises
Clear inputs help the AI produce screens, copy, validation, and logic that align with real constraints. You get fewer mismatched assumptions, fewer redesign cycles, and a faster path from a first draft to something your team can actually review, test, and ship.
Step 1: Understanding Intent and Requirements
Before AI can generate screens or write code, it has to figure out what you mean, not just what you wrote. This step is essentially “reading” your spec like a product manager: extracting goals, the people involved, and the rules that make the feature correct.
How AI extracts intent from plain text
Most specs contain a few recurring building blocks:
- Goals: what success looks like (“reduce drop-offs during signup”).
- Actors: who does things (“guest user”, “admin”, “team member”).
- Actions: what they do (“create”, “edit”, “approve”, “export”).
- Objects: what actions happen to (“account”, “invoice”, “project”, “comment”).
- Rules: what must be true (“email must be unique”, “admins can delete any post”).
When these are clear, AI can translate text into a structured understanding that later steps can turn into flows, screens, data, and logic.
Mapping phrases to product concepts
AI also recognizes common product patterns and maps everyday phrasing to implementation concepts. For example:
- “Create account” often implies an authentication flow (signup form, email verification, password reset).
- “Dashboard” typically implies an overview screen (summary metrics, recent activity, shortcuts).
- “Invite teammates” suggests roles/permissions and an invitation system.
This mapping is useful because it turns vague nouns into concrete building blocks that designers and engineers use.
Spotting missing info and asking the right questions
Even good specs leave gaps. AI can flag what’s missing and propose clarification questions like:
- “What roles exist, and what can each role access?”
- “What happens if a user already has an account?”
- “Which fields are required, and what are the validation rules?”
Handling ambiguity with defaults (and explicit assumptions)
Sometimes you want progress even without answers. AI can choose reasonable defaults (e.g., standard password rules, typical dashboard widgets) while marking assumptions for review.
The key is visibility: assumptions should be listed clearly so a human can confirm or correct them before anything ships.
Step 2: Turning Text into a Feature Plan
Once the intent is clear, the next move is to turn a written spec into something you can actually build: a feature plan. You’re not looking for code yet—you’re looking for structure.
Map requirements to screens and journeys
A good plan starts by translating sentences into screens, navigation, and user journeys.
For example: “Users can save items to a wishlist and view it later” usually implies (1) a product detail interaction, (2) a wishlist screen, and (3) a way to reach it from the main nav.
Ask the AI to list the screens and then describe the “happy path” journey, plus a couple of common detours (not logged in, item removed, empty list).
Break the work into buildable tasks
Next, have the AI split the feature into tasks teams recognize:
- UI components (buttons, forms, empty states, loading states)
- API endpoints (e.g., create/remove/list)
- Validations and rules (limits, required fields, permissions)
- Edge cases (duplicates, offline, conflicts)
This is also where vague requirements get exposed. If the spec doesn’t say what happens when a user tries to save the same item twice, the plan should surface that question.
Define acceptance criteria (what “done” looks like)
Keep acceptance criteria in plain language. Example:
- When a logged-in user taps “Save,” the item appears in Wishlist within 2 seconds.
- If the user is logged out, they’re prompted to sign in and return to the same item.
- Wishlist shows an empty state with a link back to browsing.
Keep scope under control
Ask the AI to label items as must-have vs nice-to-have (e.g., “share wishlist” might be nice-to-have). This prevents the plan from quietly expanding beyond the original spec.
Step 3: Generating Screens, Layouts, and UX Flows
With a feature plan in hand, AI can help turn text into a concrete “screen map” and an early UI draft. The goal isn’t pixel-perfect design on the first try—it’s a shared, inspectable model of what users will see and do.
Draft the screen list and user flow
Start by describing the happy path as a short story: what the user wants, where they start, what they tap, and what success looks like. From that, AI can propose the minimum set of screens (and what belongs on each).
Then ask for common alternatives: “What if they’re not logged in?”, “What if they have no results?”, “What if they abandon halfway?”. This is how you avoid building a UI that only works in demos.
Generate wireframes or UI drafts from your description
If your spec includes layout hints (e.g., “header with search, results list with filters, primary CTA at the bottom”), AI can produce a structured draft such as:
- a wireframe outline (sections and hierarchy)
- component suggestions (cards, tables, tabs, modals)
- sample copy (button labels, helper text, empty-state messaging)
The best prompts include content priorities (“show price and availability above description”), interaction rules (“filters persist across sessions”), and constraints (“mobile-first; works with one thumb”).
Design the key UI states (where most specs are vague)
A working product needs more than the “normal” screen. Have AI enumerate and define the states you’ll implement:
- Loading: skeletons vs. spinners, what stays clickable
- Empty: what message appears, and what next action you offer
- Error: friendly wording, retry behavior, fallback options
- Success: confirmation, next steps, and whether to toast or redirect
- Permissions: what you ask for, when you ask, and what happens if denied
These state decisions directly affect development effort and user trust.
Keep everything consistent with a simple design system
AI can help enforce consistency by proposing reusable components and rules: type scale, spacing tokens, button styles, and form patterns.
If you already have components, link to your internal guidelines (e.g., /design-system) and ask the AI to reuse them rather than inventing new patterns.
Step 4: Translating Features into Data and Rules
Next, translate “what the app should do” into what the app should store and what it should allow. This is where written specs become a concrete data model and a set of business rules.
Identify the key entities
AI starts by pulling out the “nouns” and key concepts in your text and treating them as entities. For example, “Users can create Projects and add Tasks, and managers approve time entries” suggests entities such as User, Project, Task, and TimeEntry.
Propose fields, relationships, and constraints
For each entity, AI suggests the fields you’ll need (and flags what’s missing):
- Fields: name, status, dates, amounts, notes, attachments
- Relationships: a Project has many Tasks; a Task belongs to a Project; a User owns many Projects
- Constraints: required vs optional fields, uniqueness (e.g., email), formats (e.g., ISO dates), allowed values (e.g., status = Draft/In Review/Approved)
It should also call out implied edge cases, like “Only one active subscription per account” (a uniqueness constraint) or “Order total must equal sum of line items” (a calculated validation).
Define validations and business rules in plain language
Good output keeps rules readable, not buried in code. Examples:
- “A Task can’t be marked Done unless it has an assignee.”
- “Refunds are allowed within 30 days of payment, unless the order is disputed.”
- “Managers can approve time entries only for projects they oversee.”
Plan the data lifecycle
Finally, map how records change over time: create, update, delete, and what to do instead of deleting (soft delete). AI can also propose audit trails (who changed what, when) and history/versioning when the spec needs traceability.
Step 5: Producing the Code for UI and Logic
Now you can generate the “first working draft” of code: the UI people click, and the logic that makes it behave correctly.
If you’re using Koder.ai, this typically means the platform generates a coherent full-stack implementation (web, backend, database) from your chat-driven spec, with the option to export source code when you want to continue in a traditional workflow.
Frontend: components, forms, routing, and state
From a spec like “Add a ‘Create Project’ screen with name, owner, and visibility,” AI can scaffold:
- A page component (layout, headings, helper text)
- A form with validation rules (required fields, character limits)
- Routing (e.g., /projects/new) and navigation links
- State handling (loading, success, error, disabled submit)
It can also generate reusable building blocks (e.g., a <ProjectForm /> used for both create and edit), so the code stays consistent.
Backend: endpoints, services, and permission checks
On the server side, AI can draft the basic “contract” for the feature:
- Endpoints (POST /api/projects, GET /api/projects/:id)
- Service methods that apply business rules (e.g., unique name per workspace)
- Permission checks (who can create, who can edit)
The key is tying backend logic to the spec’s rules (“Only admins can set visibility to private”) rather than just saving whatever the UI sends.
Connecting UI to data: API calls, caching, and errors
AI can wire the UI to your API client (fetch/Axios/React Query, etc.), including caching and retries where appropriate. It should also generate user-friendly error handling: field-level messages for validation errors and a clear fallback for network failures.
// Example: submit handler with loading + error state
async function onSubmit(values) {
  setStatus({ loading: true, error: null });
  try {
    await api.post('/api/projects', values);
    router.push('/projects');
  } catch (e) {
    setStatus({ loading: false, error: 'Could not create project. Try again.' });
  }
}
Keeping code maintainable
Generated code is most useful when it follows your conventions: clear naming, predictable folder structure, small functions, and shared utilities (validators, API clients, permission helpers).
If you have a style guide or preferred patterns, reference them explicitly and link to internal docs like /engineering/frontend or /engineering/api-guidelines.
Step 6: Wiring Everything into a Working Feature
By this point you have screens, UI components, data shapes, and business rules. “Wiring” is where those pieces actually talk to each other: buttons trigger actions, actions call backend endpoints, responses update the UI, and permissions decide what people can see.
Navigation: making screens reachable
AI can connect screens according to the written spec by creating routes (URLs or app paths), defining what happens after key actions, and passing the right context between pages.
For example: “After saving, return to the list and highlight the new item” becomes a concrete flow—submit form → await success → navigate to list → show a toast and focus the new row.
Authentication, roles, and access control
Specs often mention roles (“Admin can edit, Viewer can only read”). Wiring means enforcing that in more than one place:
- UI rules: hide or disable actions users can’t take
- API rules: reject requests that violate permissions
- Data scoping: ensure users only see items they’re allowed to see
AI is helpful here because it can generate consistent checks across the app (not just one screen), reducing the risk of “it looks locked, but the endpoint still works.”
Environment configuration without leaking secrets
Most features depend on configuration: API base URLs, analytics keys, feature flags, storage buckets, etc. AI can set up separate settings for dev/staging/prod while keeping secrets out of the codebase.
Typical outputs include:
.envtemplates (safe placeholders)- config loaders that read from environment variables
- clear notes on what must be set in deployment, not committed to Git
Verifying end-to-end behavior
The goal is a full loop: “click → request → response → UI update.” AI can add the missing glue code (loading states, error handling, retries) and generate simple checks such as:
- clicking “Save” sends the expected payload
- success updates the UI and cache/state
- errors show a user-friendly message and keep inputs intact
This is where a feature stops being a mock and starts behaving like a real product.
Step 7: Testing and Debugging with AI Assistance
Once a feature is “working,” test it the same way a real user (and a messy real world) will. AI helps by turning written acceptance criteria into concrete checks—and by speeding up the tedious parts of debugging.
Generate tests directly from acceptance criteria
If your spec says, “A user can reset their password and sees a confirmation message,” AI can propose test cases that match that statement at multiple levels:
- Unit tests: validate small rules (e.g., password length, token expiry).
- Integration tests: confirm systems talk correctly (e.g., reset email request creates a token in the database).
- UI checks: verify behavior (e.g., success toast appears; button disables during submission).
The trick is to feed AI the exact acceptance criteria plus minimal context: feature name, key screens, and any existing test conventions in your codebase.
Explore edge cases before users do
Specs usually describe the happy path. AI is useful for brainstorming the “what if” scenarios that cause support tickets:
- Invalid input: empty fields, weird characters, very long text, past dates.
- Slow or flaky network: retries, timeouts, double-submits, offline mode.
- Conflicting updates: two tabs open, two admins editing the same record, stale cached data.
You don’t need to implement every edge case immediately, but you should decide which ones matter for your product’s risk level.
Use AI to diagnose failures faster
When a test fails, give AI what a developer would ask for anyway: the failing assertion, relevant logs, stack traces, and exact reproduction steps.
AI can then:
- suggest likely causes (e.g., race conditions, missing mock data, timezone issues)
- point to suspicious code paths
- propose a minimal fix and a follow-up test so the bug doesn’t return
Treat its suggestions as hypotheses. Confirm them by rerunning the test and checking behavior in the UI.
A simple QA checklist for non-technical reviewers
For quick review cycles, keep a short checklist:
- Can I complete the main task end-to-end?
- Do error messages explain what to do next?
- Does it behave sensibly on slow internet (no duplicates, no lost work)?
- Do permissions look right (who can see/edit what)?
- Do results persist after refresh and on another device/account?
Step 8: Iteration—From First Draft to Production-Ready
The first AI-generated draft is usually “good enough to react to,” not “ready to ship.” Iteration is where you turn a plausible feature into a reliable one—by tightening requirements, correcting edge cases, and making changes in small, reviewable steps.
How feedback loops work (prompts, diffs, targeted changes)
A healthy loop looks like: generate → review → ask for a specific change → compare what changed → repeat.
Instead of re-prompting for the entire app, aim for targeted updates. Ask the AI to modify only one piece (a screen, a component, a validation rule, a query) and return a diff or a clearly marked “before/after.” This makes it easier to confirm the change solved the issue without accidentally breaking something else.
If your workflow supports it, keep changes in small commits and review them like you would a teammate’s pull request: scan the diff, run the app, and verify the behavior.
Platforms like Koder.ai also benefit from this approach: use “planning mode” (or an equivalent step) to agree on scope and flows first, then generate, then iterate in narrow slices—and rely on snapshots/rollback when experimentation goes sideways.
The best way to request changes
Vague requests (“make it nicer,” “fix the flow”) create vague results. Strong change requests reference:
- A screen: “Checkout → Payment screen”
- A state: “When the card is declined” or “When the cart is empty”
- Expected behavior: “Show an inline error, keep the user on the same screen, and preserve the form values”
Add acceptance criteria when possible: “The ‘Pay’ button is disabled until required fields are valid” or “If shipping country changes, recalculate tax immediately.”
Versioning and reviewing: what changed and why
Treat AI output as code you own. Require short change notes alongside updates: what changed, why it changed, and what to test.
When an AI suggests refactors, ask it to explain the intent and list potential risks (for example, “this changes validation timing” or “this alters API response handling”).
Knowing when to stop iterating
Iteration ends when you hit clear release criteria. Define boundaries:
- Scope: what’s included in this release vs. postponed
- Quality bar: key flows verified, error states covered, analytics/events (if needed) in place
- Stability: no known critical bugs, and changes are no longer improving outcomes materially
At that point, freeze the spec, ship, and plan the next iteration as a new, scoped change request.
Limitations, Safety, and Best Practices
AI can turn written specs into surprisingly complete features, but it’s not a substitute for judgment. Treat AI output as a draft that needs review—especially when it touches user data, payments, or permissions.
Privacy and sensitive data (what not to paste)
Assume anything you paste into a prompt could be stored or reviewed. Don’t include:
- API keys, private tokens, passwords, or secrets from .env files
- Real customer data (emails, addresses, phone numbers), support tickets, or chat transcripts
- Proprietary code you’re not allowed to share, internal financials, or legal documents
If you need realism, anonymize: replace names with placeholders, scramble IDs, and describe patterns (“10k users, 3 roles”) instead of raw exports.
Security basics AI can help enforce
AI is useful for generating baseline security checks, but you still need to verify them.
- Input validation: define required fields, formats, and server-side checks (not only UI checks).
- Auth checks: specify who can view/edit/delete each resource; require authorization on every endpoint.
- Least privilege: roles should start minimal; add permissions intentionally. Ask AI to list permissions per role and map them to actions.
Common limitations to watch for
- Hallucinated APIs: AI may reference endpoints, SDK methods, or database tables that don’t exist. Confirm against your actual stack.
- Inconsistent requirements: small wording differences can create conflicting behavior (e.g., “admins can edit all” vs “owners only”). Keep a single source of truth.
- Design drift: UI may change from screen to screen. Lock down a design system (spacing, colors, components) and restate it when prompting.
A practical checklist for better prompts and safer results
Before you ask for code or screens, include:
- Goal and non-goals (what success looks like)
- User roles and permissions
- Data model: key entities + required fields
- Edge cases (empty states, errors, loading)
- Constraints: tech stack, routing, styling system, accessibility needs
- Acceptance criteria: testable “done” statements
Next steps
Once you have a draft prototype, schedule a quick review: compare it to your roadmap, decide what ships now vs later, and document changes.
If you want help turning drafts into a plan, see /pricing or browse related guides in /blog. If you’re exploring chat-driven development, Koder.ai is designed for this workflow: turn written specs into working web, backend, and mobile features, iterate quickly, and export the source code when you’re ready.
FAQ
What are “written instructions” in an AI-assisted build process?
“Written instructions” are any text that clearly states intent (the outcome you want) and boundaries (constraints, rules, and what’s not allowed). That can be a quick Slack message, a PRD snippet, user stories, acceptance criteria, or a list of edge cases—what matters is clarity, not formality.
What does “working features and screens” actually mean (beyond mockups)?
A “working” feature usually includes more than visuals:
- UI screens (including error/empty/loading states)
- Navigation and user flows (success and failure paths)
- Business logic (validations, permissions, calculations)
- Data wiring (create/read/update, persistence)
A mockup shows appearance; a working feature behaves correctly end-to-end.
What is the typical AI-assisted build loop?
Most teams use a simple iteration loop:
- Describe the feature (goal, users, constraints)
- Generate a draft (screens/flow/code)
- Review for correctness and product fit
- Refine the spec/prompt and repeat
The speed comes from quick drafts; the quality comes from disciplined review and iteration.
What details should I include so the AI doesn’t guess critical behavior?
AI can move fast, but it will guess if you don’t specify:
- Roles and permissions (who can do what)
- Required fields and validation rules
- States and transitions (draft → submitted → approved)
- Edge cases (duplicates, empty states, slow networks)
Including these upfront reduces rework and prevents “reasonable defaults” that don’t match your business.
What are the best “raw materials” to give the AI at the start?
Start with four elements:
- User story (who, what, why)
- Target audience (customers, admins, internal users)
- Constraints (mobile-first, design system, performance, compliance)
- Success criteria (how you’ll know it’s done)
This gives the AI both direction and a quality bar, not just a feature idea.
How do I turn a vague request into a concrete spec the AI can build from?
Concrete specs define:
- Steps and flow (e.g., Address → Shipping → Payment → Review)
- Supported methods/options (e.g., card + Apple Pay)
- Limits (e.g., save up to 3 addresses)
- Error handling (what happens if payment fails)
- Clear “done” outcomes (order created, receipt emailed, inventory updated)
These specifics translate directly into screens, rules, and API behavior.
What should a “feature plan” include before generating code?
Ask the AI to produce a feature plan before code:
- List required screens and the happy-path journey
- Add common detours (logged out, empty list, item removed)
- Break work into UI components, endpoints, validations, and edge cases
- Label must-have vs nice-to-have
This exposes missing requirements early, when changes are cheap.
Which UI states should I make the AI specify to avoid demo-only screens?
Request explicit definitions for each key screen state:
- Loading behavior (skeleton vs spinner)
- Empty states (message + next action)
- Error states (inline vs global, retry behavior)
- Success states (toast vs redirect, confirmation text)
- Permissions states (hide vs disable, what to show instead)
Most production bugs and UX issues come from missing state handling, not the happy path.
How does AI translate a written spec into data models and business rules?
AI usually extracts entities (the “nouns”) and then proposes:
- Fields (required/optional, formats)
- Relationships (has-many, belongs-to)
- Constraints (uniqueness, allowed status values)
- Plain-language business rules (what must be true)
Have it also describe the data lifecycle: create/update/soft-delete and whether you need audit trails or history.
What are the key limitations and safety practices when using AI to generate features?
Treat AI output as a draft and set guardrails:
- Don’t paste secrets, real customer data, or private tokens
- Verify auth checks and server-side validation on every endpoint
- Watch for hallucinated APIs or inconsistent requirements
- Keep changes small and review diffs (one screen/rule at a time)
Use AI to accelerate iteration, but keep humans accountable for correctness, security, and quality.