

How to Build a Mobile App for Personal Asset Tracking
Learn how to plan, design, and build a personal asset tracking mobile app—from MVP scope and data model to security, sync, testing, and launch.
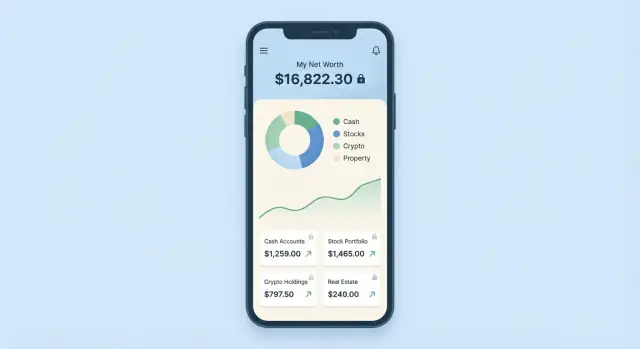
Clarify the Problem and MVP Scope
Before you build a mobile app, decide what problem you’re solving. “Personal asset tracking app” can mean very different things: a net worth tracker for balances, an asset inventory for items and documents, or a hybrid of both. The clearer the goal, the easier it is to design screens, data fields, and a launchable MVP.
Pick one primary goal
Choose the main job the app should do on day one:
- Net worth tracking: totals across accounts and assets, with value over time.
- Item inventory: a catalog of what you own, with photos, receipts, and serial numbers.
- Both: possible, but only if you keep each side lightweight in the first release.
If you try to do all three perfectly, the MVP will drag.
Define who it’s for
Target users shape everything from onboarding to sharing:
- Self-use: fastest to ship; simplest permissions and setup.
- Families: needs shared access, roles, and easy “add item” flows.
- Small teams (e.g., small business): often expects audit trails and export.
For an MVP, pick one. You can expand later once you learn what people actually use.
Decide what you track (and what “tracking” means)
List your initial asset types: cash, bank accounts, investments, crypto, property, vehicles, and valuables.
Then define “tracking” for each type. Is it:
- Value over time (manual updates, price feeds later)
- Documents (receipts, warranties, titles)
- Ownership (who owns it, joint vs. personal)
- Reminders (insurance renewal, tax dates, maintenance)
Set hard MVP boundaries
A good MVP is a focused promise. Example: “Track 5–7 asset types, add assets in under 60 seconds, and see a simple total value.” Save advanced imports, integrations, and complex reporting for the next iteration.
User Stories and Core Flows
Before you design screens or pick a tech stack, write down what people are actually trying to do. A personal asset tracking app succeeds when everyday actions feel quick and trustworthy.
Simple user stories (start with these)
Here are 10 practical user stories you can use as a baseline:
- As a user, I want to add an asset (cash, car, crypto, property) so I can track what I own.
- As a user, I want to choose a category and tags so I can keep my inventory organized.
- As a user, I want to set a current value and currency so my totals are accurate.
- As a user, I want to update an asset’s value over time so I can see changes.
- As a user, I want to attach a photo/receipt so I can prove ownership later.
- As a user, I want to record notes (serial number, location, condition) so I can remember details.
- As a user, I want to search and filter assets so I can find items fast.
- As a user, I want to see a summary (total value, by category) so I understand my net worth snapshot.
- As a user, I want to export my asset list so I can share it with an accountant/insurer.
- As a user, I want to delete/archive an asset so my list stays clean.
Map the primary flows (keep them short)
Focus on five flows you’ll design first:
- Onboarding → pick base currency, set privacy options, optionally add first asset.
- Add asset → choose category → enter value → add optional details (photos, notes).
- View summary → totals + breakdown → tap into category list.
- Edit asset → update value/details → save → reflect in summary.
- Export → choose format (CSV/PDF) → confirm → share/save.
Edge cases to plan for early
- Shared ownership (50/50 with a partner) and how it affects totals.
- Multiple currencies and whether you store a “home currency” conversion.
- Duplicates (same item added twice) and a lightweight way to merge or flag.
Define success metrics and prioritize
Pick a small set of metrics so you don’t guess later: assets added in week 1, weekly active users, 4-week retention, and % of users who export.
Then convert stories into a feature list:
- Must: add/edit assets, summary, search, export.
- Should: receipts, value history, multi-currency.
- Could: shared ownership, advanced insights, integrations.
This keeps your MVP focused while still leaving room for upgrades after release.
UX Basics: Simple Screens Users Will Actually Use
Great UX for a personal asset tracking app is mostly about reducing effort. People open the app to quickly check “where am I at?” or to add something they just bought—so every screen should feel obvious and fast.
MVP screens (keep it tight)
For an MVP, you can cover most needs with five screens:
- Home: net worth summary, recent changes, and quick actions (Add Asset).
- Assets: searchable list with filters (by category, owner, status).
- Asset Detail: key fields, valuation history, notes, and attachments.
- Add / Edit Asset: a focused form that’s quick to finish.
- Settings: currency, privacy options (e.g., app lock), export/import entry points.
Navigation: tabs vs. drawer
If you’re working with a small number of primary destinations (Home, Assets, Settings), bottom tabs are usually the most discoverable. Use a drawer only when you have many secondary areas (reports, integrations, multiple profiles) that would clutter tabs.
Make “Add asset” feel effortless
The add flow should require only the essentials:
- Name, Category, and Value (or “unknown”)
Everything else can be optional with smart defaults: auto-set currency from settings, default category based on last used, and quick pickers for common assets (Car, Laptop, Jewelry). Consider a “Save + Add Another” button for batch entry.
Accessibility and first-time clarity
Design for real-world use: readable font sizes, strong contrast, and large tap targets (especially for category chips and action buttons). Support dynamic text sizing, and avoid relying on color alone to communicate status.
Empty states matter: when the asset list is empty, show a friendly prompt with one clear action (“Add your first asset”) and 1–2 onboarding tips (e.g., “Start with big categories: Home, Vehicles, Savings”).
Data Model: Assets, Valuations, and Categories
A clear data model keeps your MVP simple now, and prevents painful rewrites later when users ask for history, charts, or imports. For a personal asset tracking app, think in terms of things people own (assets) and how their value changes over time (valuations).
Core entities (what you need to store)
At minimum, define these entities:
- User: profile + settings (especially base currency).
- Asset: the item being tracked (car, brokerage account, laptop, rental property, crypto wallet).
- AssetType / Category: a structured way to group assets (Cash, Investments, Real Estate, Vehicles, Collectibles). Keep this editable.
- Valuation: a dated value snapshot for an asset (supports history and charts).
- Account / Institution (optional for MVP): where the asset “lives” (Bank of X, Coinbase, Vanguard). Helpful for imports and grouping.
- Attachment (optional): photos, receipts, PDFs (warranty, appraisal), stored with metadata.
Required fields (MVP-friendly)
For each Asset, keep required fields small and consistent:
- name (e.g., “Toyota Corolla 2017”)
- category / asset type
- currency (the asset’s native currency)
- purchase price (optional but valuable for gains)
- current value (usually the latest valuation)
Add flexible fields that reduce future edge cases:
- tags (e.g., “joint”, “insured”, “rental”)
- notes (free text for context)
Valuations as a time series (not a single number)
Avoid storing only one “current value.” Model Valuation as a time series:
- asset_id
- date (or timestamp)
- value
- currency (if different from asset currency)
- source (manual, import, estimate)
Your UI can still show one number by taking the latest valuation, but you’ll also unlock trends, history, and “net worth over time” without redesigning the database.
Multi-currency: base currency + exchange rates
Most users want a single total. Support this by storing:
- a base currency per user
- exchange rates (daily is enough for an MVP)
Keep original values in the asset’s currency, then convert for totals and charts. This keeps imports accurate and avoids rounding errors over time.
Architecture Choices: Native, Cross-Platform, and Backend
Architecture is where you decide what you’re building on and where the data will live. These choices affect performance, cost, and how painful updates will be a year from now.
Native vs. cross-platform
Native (Swift for iOS, Kotlin for Android) usually gives the smoothest UI, best battery efficiency, and easiest access to platform features (Face ID/biometrics, widgets, background tasks). The trade-off is essentially two apps to maintain.
Cross-platform (React Native, Flutter) can be faster and cheaper for an MVP because you share most code across iOS and Android. The trade-off is occasional platform quirks and more dependency management. For an asset tracking app, cross-platform is often a solid default—unless you’re planning heavy OS-specific features.
Where your data lives
You typically have three options:
- On-device only: simplest privacy story, no server costs, works fully offline. Downside: switching phones or losing a device can mean losing data unless you add exports.
- Cloud sync: users can restore data and use multiple devices. Downside: higher security requirements and ongoing backend maintenance.
- Hybrid (local + cloud): best user experience for most people—fast offline use with optional sync.
Local database for offline mode
Even a simple app benefits from a local database (SQLite-based options like Room on Android, Core Data on iOS, or cross-platform wrappers). Plan for migrations early so you can add fields like “purchase price” or “valuation source” later without breaking existing users.
Backend: only if you truly need it
Add a lightweight backend if you need sync, sharing (family assets), integrations, or server-side reminders. Document the trade-offs—speed, cost, complexity, maintenance—and keep the MVP architecture intentionally boring.
If you want to move fast without committing to a long custom build pipeline upfront, a vibe-coding platform like Koder.ai can help you prototype the full stack (UI + API + database) from a chat-based spec. It’s especially handy for planning an MVP, iterating on schemas (assets/valuations/attachments), and rolling back changes using snapshots if you realize a data model decision was wrong.
Data Entry and Import: Make Tracking Low-Effort
If logging assets feels like doing taxes, people will quit. Your MVP should assume users will add just a few items at a time—and make that fast.
Start with manual entry (but keep it short)
For an MVP, manual entry is enough. Aim for a single, compact form with only what’s needed to identify the asset and estimate value:
- Name (required)
- Category (optional but helpful)
- Quantity (optional)
- Value and currency (optional)
- Notes/photo (optional)
Everything else can be “advanced.” If the user doesn’t know a number, let them leave it blank and continue.
Optional scanning to reduce typing
Scanning features are great, but they should be optional upgrades—not requirements.
- Barcode/QR scan: useful for electronics, appliances, collectibles, or storage labels.
- Receipt photo: attach proof of purchase without forcing data extraction.
- Document capture: for warranties, appraisals, vehicle papers, or insurance documents.
Even without OCR, a photo attachment adds value and reduces friction.
Imports: CSV, copy/paste, and bulk add
Many users already have a spreadsheet. Offer a simple CSV template they can fill in, plus a “paste table” flow for quick copy/paste from Notes or Sheets. For manual bulk add, support “add another” with defaults (same category/currency) to speed up repeated entries.
Valuations: feeds as an add-on, not a dependency
Automatic price feeds make sense mainly for stocks and crypto. Treat them as an optional integration, and keep manual value entry as the baseline for everything else (home items, vehicles, art).
Missing data and stale values
Be explicit about unknowns. Use states like “Value unknown” or “Last updated 6 months ago” and allow partial entries. When values are stale, show gentle prompts to update rather than blocking insights.
Security and Privacy for Financial-Like Data
A personal asset tracking app may not be a bank app, but users will treat it like one. If they’re entering home values, account balances, or serial numbers, they expect the same level of care: minimal collection, clear controls, and strong protection on the device.
Decide whether sign-in is optional
Don’t force an account just to open the app. For many people, “offline-only, stored on my phone” is a feature.
A good MVP approach:
- No sign-in required for basic tracking on one device.
- Optional sign-in only if the user wants sync/backup across devices.
If you do offer sign-in, be clear that it’s for syncing—not for “using the app.”
Protect data where it lives
Start with two layers:
- Secure device storage for secrets (tokens, keys) using Keychain (iOS) / Keystore (Android).
- Encryption at rest for the local database or sensitive fields (especially balances, account IDs, and notes).
If you store anything in your backend for sync, encrypt it there too and separate user identity data from asset records where possible.
Use least-privilege permissions
Only ask for permissions at the moment they’re needed, and only for the smallest scope.
Examples:
- Request camera access when the user taps “Scan receipt” or “Add photo.”
- Request photo library access only when they choose “Pick from library.”
If a feature works without a permission, don’t ask for it.
Give users practical privacy controls
People often track shared or sensitive info, so add simple controls that match real situations:
- App lock (PIN/biometric) for quick protection.
- Hide balances (mask amounts until tapped) for “showing someone a list” without revealing totals.
- Export and delete options (download a file, delete a category, or wipe all data).
Explain what you store and where
Write in-app, plain-English explanations such as:
- What is stored on-device vs. in the cloud (only if sync is enabled).
- Whether photos/attachments are uploaded.
- How to fully delete data (and what happens to backups).
This can be a short “Privacy” screen in Settings plus a link to your policy (e.g., /privacy). Clear expectations reduce support issues and build trust early.
Reminders, Notifications, and Simple Insights
Reminders and lightweight insights are where a personal asset tracking app starts to feel “alive”—without turning into a noisy finance dashboard. The goal is to help users stay current and spot changes quickly, with minimal setup.
Reminders that feel genuinely useful
Start with a small set of alerts that match real-life moments:
- Valuation reminders (e.g., “Update car value every 90 days”)
- Insurance renewals (home, auto, jewelry riders)
- Warranty end dates (appliances, electronics, tools)
Keep notification controls granular. Let users toggle reminders per type, set frequency, and choose a quiet window. A simple rule: if a reminder can’t be explained in one sentence, it’s probably not MVP.
Insights users can understand in seconds
Avoid a wall of charts. Begin with 2–3 views that answer common questions:
- Net worth trend (simple line, monthly points)
- Allocation by category (housing, vehicles, collectibles, cash-like, etc.)
- Upcoming dates (renewals, warranties, scheduled revaluations)
These are easy to scan, easy to verify, and useful even with a small asset list.
Make calculations transparent
Trust comes from clarity. Whenever you show “Net Worth,” include a “What’s included?” link or inline note, such as:
- Included: assets marked “active” with a current valuation
- Excluded: archived items, items missing a value, shared assets (if user opts out)
Also show the exact valuation method (manual, imported, estimated) next to each asset so users understand why numbers changed.
Offline Mode and Sync Strategy
Offline support is a feature users feel immediately: they can add an item in a basement, update a valuation on a plane, or pull up a warranty receipt in a parking garage. For a personal asset tracking app, aim for offline-first—the app should treat the device database as the source of truth and sync opportunistically.
Offline-first fundamentals
Make sure all key actions work without internet:
- Add/edit/delete assets, categories, and valuations
- Search and filter the inventory
- View totals and basic insights (cached and computed locally)
- Attach and view photos/receipts stored on the device
This requires a local database (e.g., SQLite) and a clear “pending changes” queue for operations that haven’t synced yet.
Cloud sync and conflict handling
If you offer cloud sync (multi-device, backup), define conflicts upfront. Two common approaches:
- Last edit wins: simplest, but can overwrite changes silently.
- Merge with prompts: safer for important fields, but adds UX work.
A practical hybrid: last edit wins for low-risk fields (notes), but prompt when both versions changed a key field (value, currency, category).
Attachments: device-only vs. cloud
Attachments often dominate storage and bandwidth. Decide early:
- Device-only: best for privacy and speed; no cross-device access.
- Cloud: enables restore/sync; requires encryption strategy and quotas.
Set clear limits (e.g., max photo size, max attachments per asset) and compress images before upload.
Efficient sync (without battery drain)
Sync should be event-driven and conservative: batch changes, use exponential backoff on failures, and avoid constant background polling. Sync on app open, on explicit user action, and when the OS grants background time.
Test the messy reality
Build a test checklist: airplane mode, switching Wi‑Fi to LTE mid-sync, slow networks, and repeated app restarts. Add a visible sync status (“Up to date”, “Syncing…”, “Needs attention”) so users trust what they’re seeing.
Testing Plan: Reliability Over Fancy Features
A personal asset tracking app earns trust by getting the basics right every time: accurate totals, predictable behavior offline, and no “mystery” data loss. A lightweight, repeatable test plan is more valuable than a long list of experimental features.
1) Unit tests for the math that users rely on
Start with automated tests for the logic that affects net worth and reports:
- Totals and subtotals across categories (including empty states)
- Currency conversion and rounding rules (e.g., consistent decimal precision)
- Validation (negative values, missing fields, invalid dates, duplicate identifiers)
These tests are fast to run and catch regressions when you tweak the data model or import rules.
2) Flow tests across real devices and screen sizes
Manually (or with simple UI automation) test the critical user journeys on multiple screen sizes:
- Add an asset → attach a receipt → edit value → see updated totals
- Import data → review mapped fields → confirm → undo if needed
- Backup/restore → verify counts and totals match before/after
Pay special attention to small screens, large text settings, and one-handed usability.
3) Performance sanity checks
You don’t need a lab setup—just realistic stress cases:
- Large asset lists (hundreds or thousands)
- Many attachments per asset
- Searching, filtering, and sorting under load
Track slow screens and fix the worst offenders first.
4) Beta feedback + pre-release checklist
Recruit a small beta group to flag confusing steps (“Where do I edit currency?” “Did my import work?”). Then run a pre-release checklist focused on:
- Permission prompts (camera, photos, files)
- Crash-free sessions
- Backups and restores working end-to-end
- Basic data integrity after upgrades
Launch, Support, and Long-Term Maintenance
Shipping your personal asset tracking app isn’t the finish line—it’s the point where real users meet real devices, weird edge cases, and high expectations around trust. A smooth launch and a clear support plan can prevent small issues (like a broken import file) from turning into app-store damage.
App store readiness (before you submit)
App stores reward clarity. Prepare your listing assets early so launch doesn’t become a scramble.
- Screenshots that explain the core value fast: “Add asset,” “Update value,” “See totals,” “Export/backup.”
- A description that matches the MVP: Don’t promise integrations or automatic sync if it’s not in the first release.
- Privacy details you can stand behind: Be explicit about what data is stored on-device vs. in the cloud, whether you collect analytics, and how users can delete their data.
If you’re adding login or cloud sync, verify you meet each platform’s requirements for account deletion and data handling.
Support that feels human (and scales)
Set up two things on day one:
- Crash reporting (to find problems you can’t reproduce). Keep it lightweight and privacy-aware.
- A simple support channel—an in-app “Contact support” link and a public support email. Add a short form that captures device model, OS version, and what the user was doing.
Also add a small “Help” area that covers common questions: importing, categories, editing historical values, and what totals mean.
Backup/export: trust builder, not a “nice-to-have”
People won’t commit to an asset inventory or net worth tracker if they feel locked in. Plan export early:
- CSV export for spreadsheets and easy migration
- PDF summary for sharing or record keeping
- A clear explanation of what’s included (assets, categories, valuation history, notes)
Even if you don’t offer full cloud sync yet, reliable export reduces churn and support requests.
Roadmap: MVP now, automation later
Publish a simple roadmap so expectations stay realistic. For example: MVP focuses on manual tracking and import; later phases can add integrations, bank feeds, price lookups, and smarter insights. Link it from your settings screen or a page like /roadmap.
Maintenance: schedule it like a product feature
Budget time every month (or at least quarterly) for:
- OS updates (new permissions, notification changes, background limits)
- Dependency upgrades (security fixes, SDK changes)
- Performance checks (slow lists, large photo attachments, export speed)
If you’re building with a platform that supports snapshots and rollback (for example, Koder.ai), treat it as part of your maintenance strategy: you can ship faster, then quickly revert risky changes while you fix issues—without blocking users for days.
Long-term reliability is what turns a one-time download into a daily-use personal asset tracking app.
Measure, Learn, and Improve After Release
Shipping your personal asset tracking app is the start of the feedback loop, not the finish line. The goal is to learn what helps people keep their inventory current—and what makes them abandon it.
Track only what you need (and explain it)
Keep analytics focused on essentials: feature usage (e.g., add asset, edit asset, import), retention (day 1/7/30), and where people drop off in the core flow. Avoid collecting sensitive content like asset names, notes, or exact values.
Add a clear “What we collect” note in your onboarding or settings, and link to your privacy details (for example, /privacy). If you offer opt-out, make it easy to find.
Ask for feedback at the right moment
Instead of interrupting users randomly, prompt for feedback after meaningful milestones:
- After they add their first 5 assets
- After they complete an import
- After they update valuations for the first time
Use short, specific prompts like: “Was anything confusing about adding an asset?” Include a quick rating plus an optional comment box. If you have a help page, link to it directly (e.g., /help) so people can self-serve.
Maintain a backlog that separates “fix” from “expand”
Create one backlog, but tag items as:
- Bugs/reliability (crashes, sync issues, data loss risks)
- UX friction (too many steps, unclear labels)
- New features (integrations, advanced insights)
This prevents shiny new features from stealing time from the basics that keep trust high.
Iterate on the add/edit flow first
Most value comes from ongoing updates. Review your analytics and feedback specifically around add/edit:
- How many taps does it take to save?
- Do people abandon at “category” or “valuation”?
- Are defaults and “last used” values helping?
Small improvements—better defaults, fewer required fields, smarter search—often move retention more than new charts.
Plan your post-release cadence
Set a lightweight rhythm: weekly triage, biweekly bug-fix releases, and monthly UX improvements. When you later write up your progress (or update your launch notes), include examples and screenshots to show what changed—without turning every release into a big redesign.
If you’re sharing what you learned publicly, consider programs that reward builder content: for example, Koder.ai offers an earn-credits approach for creating content about the platform or referring new users—useful if you’re funding an MVP and want your development process to pay for part of the tooling.
FAQ
What should I clarify before building a personal asset tracking app?
Start by choosing one primary job for day one:
- Net worth tracking (totals and value over time)
- Item inventory (photos, receipts, serial numbers)
- A lightweight hybrid (only if both sides stay minimal)
Then define who it’s for (self, families, or small teams) and set hard MVP boundaries like “add an asset in under 60 seconds” and “support 5–7 asset types.”
What features belong in the MVP for an asset tracking app?
A practical MVP usually includes:
- Add/edit assets with a small required field set
- Search and filters
- A simple summary (total + by category)
- Export (CSV and/or PDF)
Treat receipts/attachments, valuation history, and multi-currency as “should-have” if you can implement them without slowing the core flows.
What are the most important user flows to design first?
Design your first release around five core flows:
- Onboarding (base currency, privacy options)
- Add asset (category → value → optional details)
- View summary (totals and breakdown)
- Edit asset (update value/details)
- Export (CSV/PDF share or save)
If these are fast and reliable offline, most users will feel the app is “complete” even without advanced integrations.
Which edge cases should I plan for early?
Plan for them early because they affect your data model and totals:
- Shared ownership: store an owner/percentage and decide how it impacts totals.
- Multiple currencies: store the asset’s native currency and convert to a user base currency for summaries.
- Duplicates: add lightweight detection (same name + serial number + category) and a simple merge/flag flow.
These edge cases are easier to support upfront than to retrofit after users have lots of data.
What screens do I need for a simple but usable MVP UX?
Keep the MVP to five screens:
- Home (summary + quick actions)
- Assets list (search + filters)
- Asset detail (key fields, attachments, valuation history)
- Add/Edit asset (short form)
- Settings (currency, privacy, export/import)
Make “Add asset” require only Name, Category, and Value (or allow “unknown”), with everything else optional.
How should I model asset values—one current value or valuation history?
Use a time-series model:
- Asset = the thing being tracked (car, account, laptop)
- Valuation = dated snapshots of value (value + date + currency + source)
Even if the UI shows only the latest value, storing valuations as snapshots prevents painful rewrites later when you add trends, charts, or historical exports.
How should an MVP handle multiple currencies and totals?
A solid MVP approach:
- Store each asset in its native currency.
- Store a base currency per user.
- Store (or fetch) exchange rates (daily is usually enough).
Compute totals by converting to base currency at a defined rate (and record which rate/date you used). This avoids rounding drift and keeps imports consistent.
Should I build native or cross-platform, and do I need a backend?
Choose based on your team and roadmap:
- Cross-platform (React Native/Flutter): often fastest for an MVP; shared code for iOS/Android.
- Native (Swift/Kotlin): best platform polish and easier access to OS features, but effectively two apps.
For data storage, an offline-first local database is usually a win (fast, reliable). Add a backend only if you truly need sync, sharing, or server-side reminders.
How can I make data entry and importing low-effort?
Start with manual entry and optimize for speed:
- Short form with smart defaults (last-used category, base currency)
- “Save + add another” for batch entry
- Optional attachments (receipt photo, document capture) without forcing OCR
Add imports as a practical upgrade: a CSV template and a copy/paste “paste table” flow for users who already track assets in spreadsheets.
What security and privacy measures should an asset tracking app include?
Treat it like financial data even if it’s “just inventory”:
- Allow no sign-in for on-device-only use; offer optional sign-in only for sync/backup.
- Use Keychain/Keystore for secrets and encrypt sensitive local data where appropriate.
- Ask permissions only when needed (camera when scanning, photos when picking).
- Provide practical controls: app lock, hide balances, export/delete.
Also explain clearly what’s stored on-device vs. in the cloud and link to your policy (e.g., /privacy).