Jun 24, 2025·8 min
How to Build a Website for a Software Tool With Interactive Demos
Plan, design, and launch a software tool website with interactive demos that educate users fast, reduce sales friction, and improve signups with clear CTAs.
Plan, design, and launch a software tool website with interactive demos that educate users fast, reduce sales friction, and improve signups with clear CTAs.
An interactive demo website isn’t just a prettier brochure. Its job is to help a visitor experience your product quickly enough to decide: “Yes, this solves my problem—and I can see how.”
Depending on your product and audience, an interactive demo can take a few forms:
What it’s not: a long video that tells users what would happen “if you clicked here.” Interactive means the visitor gets to do something.
Before you design pages or build flows, define the business results your demo website is responsible for. Common outcomes include:
Your interactive demo should support the outcome. Sometimes that means sending a visitor to /pricing, sometimes to /demo, and sometimes directly into a trial.
Different segments arrive with different “first questions.” For example: end users want to know how it fits their daily workflow, managers care about ROI and adoption, and technical evaluators look for integrations and security.
Your site should route each group to the right demo entry point.
Next, we’ll break down the website structure that supports demos, how to choose the right demo type and placement, how to write conversion-focused messaging, how to track demo engagement, and how to launch and improve over time.
An interactive demo only works when it answers the visitor’s real question: “Is this for someone like me, and will it solve my problem?” Before you design screens or flows, decide who you’re speaking to and what you want them to understand within the first minute.
Choose the smallest set of personas that drives most revenue and product adoption. Common picks for B2B tools are:
Write their top 3–5 questions in plain language. Your demo should visibly answer them, not just claim it in copy.
List the core jobs your product helps someone complete (not features). For each job, identify the exact moment where the value clicks—the aha moment. Examples:
Build the demo to reach that moment quickly, with minimal setup and minimal reading.
Most websites need just three primary paths:
Use a clear order: who it’s for → what it does → why it’s different. If you can’t say that in two short sentences above the fold, the demo will have to do too much work later.
A website with interactive demos works best when the structure answers one question on every page: “What should I try next?” Navigation and page templates should make the demo feel like a natural step—not a separate destination.
Homepage
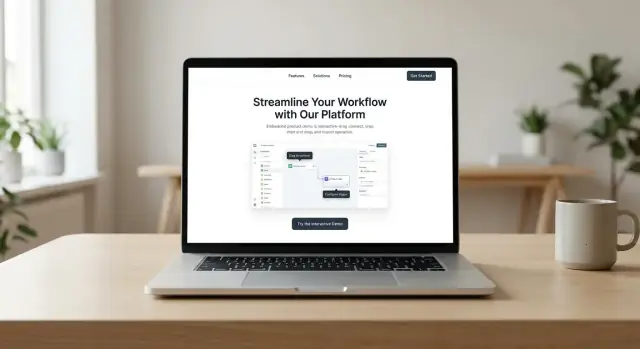
Lead with a crisp value proposition, then offer a primary entry into the demo (for example, “Try the product in your browser”). Add social proof close to that entry—logos, a short testimonial, or key metrics—and keep one primary CTA consistent.
Product pages
Organize features by outcomes (e.g., “Reduce review time,” “Prevent errors,” “Report faster”) instead of a long feature list. For each outcome, include a mini demo snippet.
If an interactive demo can’t load (mobile, privacy tools), provide a GIF or short clip fallback so visitors still understand the value.
Use-case pages
Create role- or industry-focused pages (e.g., “For Operations,” “For Finance,” “For Agencies”) that tee up a tailored demo flow. These pages should quickly confirm relevance, then link directly into the matching experience—avoid sending everyone back to a generic demo.
Pricing page
Make tiers and included features easy to scan, add a focused FAQ, and include a “See this in a demo” link for each tier so buyers can validate differences without guessing.
Trust pages
Publish simple security, privacy, and compliance basics (and support expectations). Even a lightweight /security and /privacy page can prevent demo drop-off.
Add a /resources hub that points to docs, a help center, templates, and onboarding guides. Tie resources back into demos (“Try this template inside the demo”) to keep learning hands-on.
Your homepage has one job: help the right visitor understand what they’ll get, and let them experience it quickly.
Lead with outcome + audience + time-to-value—not a feature pile.
Example pattern:
“Close month-end reports for multi-entity teams in 15 minutes—not 2 days.”
Follow with one supporting line that names the category and removes ambiguity (what it is and who it’s for). Then put the primary action where eyes already are.
If your homepage includes a demo entry point (embed, modal, or “guided tour”), place the primary CTA right next to it:
This reduces decision friction: visitors can explore now, or commit if they’re ready.
Use scannable headers and tight sections. After every big claim, add proof immediately so visitors don’t have to hunt for credibility:
The sequence matters: claim → proof → next step.
On longer homepages, a sticky CTA can help, but ensure it doesn’t cover the demo (especially on mobile). Consider a compact bar with a single action (“Try the demo”) that collapses when the demo is in view.
Not everyone can (or wants to) use an interactive demo. Provide a clear alternative near the demo entry:
This keeps the page inclusive—and prevents lost conversions when the demo isn’t the right fit for the moment.
The best interactive demo is the one a first-time visitor can finish quickly—and that mirrors how they’ll actually use your product. Before you build anything, decide the format and the location on your site so the experience feels intentional (not bolted on).
Different formats suit different products and buyer stages:
If your product requires complex setup, a prefilled workspace usually creates the quickest “I get it” moment.
Placement affects both engagement and performance:
Many teams use a teaser embed on the homepage plus a dedicated /demo page for the full experience.
Plan 1–3 demo scenarios based on top use cases (not a feature catalog). Add progress indicators, back/next controls, and a clear end-state: “Start free,” “Book a call,” or “Get pricing.”
Interactive demos can feel cramped on small screens. Consider a lighter flow, larger tap targets, or a fallback option (like a short video) so mobile visitors still understand the value.
A great interactive demo feels like a guided win, not a feature tour. The goal is to help visitors reach an “aha” quickly, then give them a clear path to go deeper if they want.
Before you build anything, write the demo as a sequence of small moments. For each step, define:
Keep the language concrete: “Create a project,” “Invite a teammate,” “Generate a report”—not “Leverage collaboration capabilities.”
Aim for 5–8 steps for the “core” flow. Show a meaningful outcome early (e.g., a dashboard updating, an automation firing, a report appearing), then offer an optional “advanced” branch for power features.
Use progressive depth: teach one concept per step, and avoid asking for multiple decisions at once.
Good demo data tells a simple story: a company name, a few records, clear labels, and believable numbers. Avoid anything sensitive, proprietary, or too close to a real customer. Visitors should instantly understand what they’re looking at.
Use tooltips sparingly, plus short “why this matters” notes when a step might feel arbitrary. For deeper explanations, link out to optional content like /docs/getting-started or /blog/demo-onboarding.
Don’t let the demo end on a dead screen. Close with one primary CTA (start trial or create account) and 1–2 secondary options (book a call, read the setup guide at /docs/setup), aligned to what the user just achieved.
A great interactive demo can still underperform if the surrounding UI feels inconsistent, slow, or hard to use. Treat the demo as part of your product experience: the same attention to polish should apply to the page it lives on.
Use a simple design system and stick to it across the site and the demo container: colors, typography, spacing, buttons, form fields, and icon style. Consistency reduces cognitive load—visitors focus on the value, not on relearning how your interface works.
If your product has a UI kit, borrow it. If not, define a small set of components (primary button, secondary button, input, card, modal) and reuse them everywhere.
Interactive demos often fail silently because they ship too much code. Keep the initial load light and let the demo “earn” heavier assets.
A demo that starts quickly feels trustworthy. A demo that stutters feels risky.
Accessibility isn’t only for compliance—it directly improves usability for everyone.
Ensure:
Place lightweight proof close to the demo entry point: customer logos (if allowed), a short testimonial, a rating badge, or a one-line result (e.g., “Cut onboarding time by 32%”). Keep it brief—your demo should remain the hero.
Users will forgive “loading,” but not confusion. Add clear loading, empty, and error states:
Choosing how to build your interactive demo is a trade-off between speed, realism, and ongoing effort. The best approach depends on how complex your product is and how much “real” functionality a visitor needs to feel confident.
Overlay-based tour tools sit on top of your UI (or a replica) and guide users with tooltips, highlights, and step prompts.
They’re ideal when your goal is to explain navigation, key concepts, and the “why” behind features—without needing a functioning backend. They’re also easy to A/B test and update as copy changes.
The main limitation is authenticity: visitors can’t truly generate outputs, integrate data, or test edge cases.
A sandbox is a dedicated demo environment with a safe backend and seeded data (example accounts, dashboards, sample projects). This is the closest experience to using your product.
To keep it manageable, design a “golden path” dataset that reliably demonstrates outcomes (not just clicks). Consider automatic resets (e.g., nightly) so the demo never degrades.
This option is more engineering work, but it can pay off for complex B2B tools where buyers need proof, not promises.
These demos use a pre-recorded flow with click hotspots. Users feel like they’re exploring, but you control every step.
This is a strong alternative when your UI changes frequently or when you want predictable performance on any device. The downside is reduced flexibility: anything outside the scripted path won’t work.
If you’re iterating quickly, tools like Koder.ai can be useful for prototyping demo experiences and microsites without standing up a full engineering pipeline. Because Koder.ai is a vibe-coding platform that builds web apps through chat (typically React on the frontend, Go + PostgreSQL on the backend), teams can spin up a demo route (like /demo), experiment with guided flows, and then export source code when it’s time to harden and integrate.
This doesn’t replace the need for a properly isolated sandbox for production-grade demos—but it can shorten the “idea → usable demo” loop, which matters a lot when messaging and flows are still changing.
Interactive demos can become an attack surface. At minimum:
Also watch performance: demos should load quickly and handle retries gracefully—nothing kills interest faster than a stalled “try it now.”
Version demos alongside product releases. Treat the demo like a product surface: it needs QA, changelogs, and ownership.
Schedule monthly checks to confirm:
Interactive demos feel great when you watch them—but you need data to know whether they’re actually moving visitors toward signup, trial, or a sales call. Measure both engagement (are people using the demo?) and impact (does it change conversion rates?).
Start simple and be consistent. For most demo websites, these events give you a clear picture without creating tracking chaos:
Name events clearly (e.g., demo_started, demo_step_viewed, demo_completed) and include properties like demo type, use case, traffic source, and device.
Set up a funnel that matches real intent:
Page view → demo start → demo completion → signup/trial/booking
Look for two signals: where the biggest drop-off happens (often a specific step), and which traffic sources produce completions—not just starts.
Run A/B tests on the highest-leverage surfaces: homepage headline, primary CTA label, and demo entry points (hero button vs. in-page module vs. exit-intent). Keep tests focused and track the same funnel metrics so results stay comparable.
Recordings can reveal confusion that analytics won’t. Mask inputs, avoid capturing sensitive data, and provide opt-outs where required. If you add recordings, document it in your privacy policy (link from the footer).
A lightweight dashboard should show: demo start rate, completion rate, top drop-off steps, CTA click-through, and top converting traffic sources. Review weekly, then feed insights into your next iteration (see /blog/launch-checklist-and-continuous-improvement).
SEO for a demo-driven website isn’t about chasing traffic—it’s about attracting people who are already looking for a solution like yours and getting them into the demo quickly.
Pick one primary keyword per page (for example, “interactive product demos” on a dedicated demo page, and your “software tool website” angle on the homepage). Keep the page focused so it’s obvious what the visitor should do next.
Make internal links explicit and helpful. Your core pages should naturally point to /demo (try it now) and /pricing (understand cost) without making users hunt for them.
Create a small set of supporting articles that answer real evaluation questions:
Keep claims accurate and specific—avoid vague superlatives. If you mention results, explain the context (team size, timeframe, prerequisites) or present them as examples.
Structured data can improve how you appear in search results. Common choices:
Turn your interactive demo into short clips for social posts and email onboarding. A 20–40 second “show, don’t tell” snippet often earns the click better than a long feature list—and it should always point back to /demo.
Templates, checklists, or example projects can work—if they help someone succeed inside the demo. If a lead magnet distracts from trying the product, it’s hurting conversions, not helping.
A great interactive demo creates momentum—your job is to turn that momentum into the right next step for each visitor. One CTA isn’t enough because not everyone is ready to buy (or buy the same way).
Place multiple, clearly differentiated actions near the demo and at the end of key demo moments:
Keep labels literal. “Get started” is vague; “Start free trial” isn’t.
Route people based on signals you already have (page, demo path, company size, selected use case). A simple rule-of-thumb:
If you use scheduling, link directly to /book-a-demo or the relevant calendar step instead of sending visitors back to a generic /contact page.
Add a short qualification form only when necessary (e.g., booking a call, requesting pricing, enterprise demo). Keep it minimal: name, work email, company, and one dropdown like “Team size.” Avoid long multi-step forms unless you truly need the data.
Add reassurance right next to the CTA—but only if true: “No credit card required,” “Cancel anytime,” “Takes 2 minutes.”
After the demo, don’t drop people at a dead end. Send them to a dedicated page with:
This is where marketing hands off to product (trial) or sales (call) without losing momentum.
Launching an interactive demo website is less like “publish and forget” and more like opening a new storefront: you want everything working on day one, then you improve based on what real visitors do.
Before you announce the site, run a tight QA pass focused on the demo experience:
Add a lightweight prompt at the end (or after key steps): “Was this demo helpful?” with a yes/no plus an optional text field.
When someone says “no,” ask one follow-up: What were you trying to do? This quickly reveals friction points like confusing terminology, missing context, or a step that doesn’t match the product UI.
Treat demo scripts as living assets. Set a simple routine (e.g., monthly review plus a same-week update whenever the product UI changes). Keep a small changelog so marketing, product, and sales stay aligned.
Too many steps, an unclear “end” CTA, slow loading, and mismatched messaging are the biggest conversion killers. If people finish the demo but don’t know what to do next, the demo did its job—and the page didn’t.
Make it easy to continue the journey: point visitors to /pricing, /blog, and /docs (if available) based on their intent.
If you’re building and iterating fast, consider prototyping the demo flow (and even the supporting pages) in a tool like Koder.ai first, then exporting the source code once you’ve validated the “aha moment” and conversion path. "}
An interactive demo website should help visitors experience value fast so they can decide whether the product fits their problem.
In practice, it should:
A true interactive demo lets visitors do something—click through a realistic UI, complete a guided task, or try a sandbox workflow.
It’s not just a long video saying “imagine you clicked here.” If the user can’t interact (click/type/choose), it’s not an interactive demo.
Start by choosing 1–2 primary personas (e.g., end user + manager) and writing their top questions in plain language.
Then make sure your demo visibly answers them—through actions and outcomes—not just claims in copy.
Map your jobs-to-be-done and define the exact moment where value clicks (the “aha moment”).
Design the demo so users reach it with minimal setup:
Most demo-driven sites work best with three primary paths:
Keep these paths consistent in navigation and CTAs so every page answers: “What should I try next?”
Use the format that matches your product complexity and buyer stage:
If setup is complex, a often creates the fastest “I get it” moment.
Common placements and when they work best:
/demo): best for focus, instructions, and clean trackingA practical combo is a small teaser embed on the homepage plus a full experience on .
Aim for 5–8 steps in the core flow and write it like a mini story:
Front-load a quick win, teach one concept per step, and offer an optional “advanced” branch instead of cramming everything into one path.
Interactive demos commonly fail due to performance, so treat speed as part of trust.
Practical fixes:
Track both engagement and impact with a simple funnel:
Page view → demo start → demo completion → CTA click (trial/booking)
Useful events include:
demo_started/demodemo_step_vieweddemo_completedReview drop-off steps weekly, and use insights to update the script, CTA placement, or messaging.