

How to Create a Mobile App for Simple Inventory Snapshots
Learn how to build a lightweight mobile app for inventory snapshots: capture photos, counts, and notes, work offline, sync safely, and export simple reports.
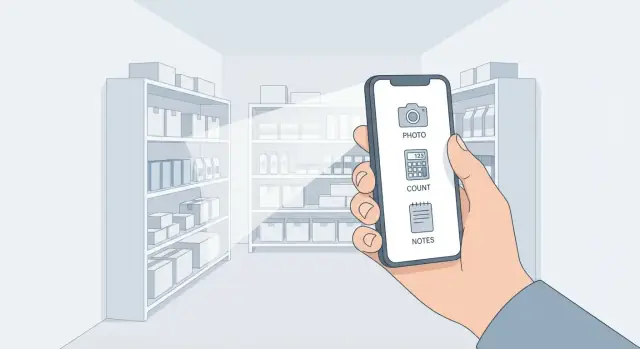
What a Simple Inventory Snapshot App Does
An inventory snapshot is a fast, lightweight record of what’s on hand at a specific moment—usually a quick count plus evidence photos. Think “prove and remember what I saw,” not “perfect, perpetual inventory.” Each snapshot typically captures: item (or category), quantity, location, time, and one or more photos to back it up.
Where snapshots are useful
Snapshot apps shine when you need a quick answer and a trail you can trust:
- Stock checks: “Do we have enough of X right now?”
- Delivery verification: confirm received quantities with photos (and note exceptions).
- Shelf audits: document planogram compliance, out-of-stocks, or damaged goods.
Because snapshots are quick, they work well for small teams, a single location, pop-up storage, or field staff who visit multiple sites and need a consistent way to report.
What it is (and isn’t)
A simple inventory snapshot app is not trying to replace a full ERP or WMS. It usually won’t manage purchasing, complex bin logic, multi-warehouse transfers, or automated reordering. Instead, it focuses on creating reliable, timestamped “moments” you can review, share, or export.
What “success” looks like
You can define clear success metrics from day one:
- Time per check: can a user complete a snapshot in under a minute?
- Error rate: fewer miscounts and fewer “which item was this?” questions thanks to photos.
- Adoption: how many checks get done consistently (daily/weekly) without reminders?
If the app makes checks faster, clearer, and easier to repeat, it’s doing its job.
Users, Jobs to Be Done, and MVP Scope
A simple inventory snapshot app succeeds when it fits the real people doing the work—not when it tries to be a full inventory system. Start by naming the primary users and the job they’re trying to finish quickly.
Primary users and their goals
- Store associate: record what’s on a shelf (fast), flag gaps, move on.
- Manager: verify counts, spot issues across areas, share a quick summary.
- Owner/operator: confirm checks happened and see trends without digging.
5–8 user stories to anchor the MVP
- As an associate, I can capture a shelf photo and enter a count in under 30 seconds.
- As an associate, I can scan a barcode to identify an item and avoid typos.
- As a manager, I can review today’s snapshots by location (aisle/bin/room) and approve them.
- As an associate, I can work offline and see a clear indicator that changes are saved locally.
- As a manager, I can export snapshots to CSV to send to finance or a supplier.
- As an owner, I can see who captured what and when for basic accountability.
- As an associate, I can add a note (“damaged,” “misplaced,” “needs reorder”) to explain anomalies.
MVP scope: must-have vs nice-to-have
Must-have: create snapshot (photo + item + count + location + timestamp), quick item lookup (barcode or search), offline capture with safe sync, basic user roles, export/share.
Nice-to-have (later): automatic reorder suggestions, full catalog management, integrations with POS/ERP, advanced analytics, multi-step approvals.
Environments and constraints to design for
Plan for warehouse aisles, retail floors, back offices, and on-the-road counts.
Assume constraints: poor connectivity, one-handed use, gloves, low light, and limited time between customer tasks.
Data Model: Keep It Small but Useful
A simple inventory snapshot app succeeds when the record is easy to capture and reliable to interpret later. Start with one core entity—the Snapshot—and let everything else support it.
The core record: Snapshot
Think of a Snapshot as a single, timestamped observation:
- Who captured it (user)
- When it was captured (created time; optionally submitted time)
- Where it happened (location or site/room/bin)
- What was observed (item identifier + quantity)
- Evidence (photos, notes)
Keep the Snapshot as the parent record so you can export, review, and audit consistently.
Item identifiers: choose what you can trust
You don’t need a full catalog at MVP stage, but you do need a way to identify items. Support at least one of these and allow fallback:
- SKU (good for internal item lists)
- Barcode (good for quick capture)
- Custom code (asset tags, internal labels)
- Free text (safety net when nothing else exists)
Store both the raw input (what the user typed/scanned) and a normalized value (if you validate against a list).
Fields that matter (and nothing extra)
At minimum, each Snapshot should include: quantity, unit, condition, notes, tags, and location. Make condition a short set (e.g., New/Good/Damaged/Missing) so reports stay clean.
Photos: attach with clear rules
Allow multiple photos per snapshot (wide shot + close-up label). Apply predictable compression (e.g., max dimension + quality setting) and store metadata (capture time) so evidence remains useful without bloating sync.
A simple status flow
Use a small lifecycle to keep half-finished records separate from confirmed ones:
draft → submitted → reviewed
This adds clarity without introducing heavyweight approvals in the MVP.
UX for Quick Capture (The 30-Second Snapshot)
A simple inventory snapshot app lives or dies on speed. The user is usually standing in a stockroom aisle, holding a box, with limited time and attention. The UX goal is to get a reliable count and visual proof without making the user “manage data.”
The fast capture flow
Design one primary, always-available path that can be completed in roughly 30 seconds:
Select item → enter count → take photo → save.
Keep the screen focused on the next action only. After saving, show a lightweight confirmation (e.g., “Saved to Location A”) and immediately tee up the next item.
Input methods that don’t slow people down
Default to the fastest count entry for your audience:
- Keypad for quick numeric entry (with a big “Done/Save” button)
- Stepper (+/–) for small quantities or quick adjustments
- Voice note (optional) for exceptions (“box damaged,” “moved to shelf 3”)—but don’t force transcription during capture
Speed features users will notice
A few small conveniences remove repeated work:
- Recent items (last 10–20)
- Favorites for high-frequency products
- Templates by location (pre-filled lists) so users can tap through a known set
Design for mistakes, not perfect behavior
People will mis-tap, miscount, or photograph the wrong item. Provide:
- Undo right after save
- Edit history (what changed, when)
- Clear validation (“Count must be 0 or more”) without blocking the user unnecessarily
Accessibility basics
Use large tap targets, readable contrast, and predictable layouts. A fast app should also be comfortable: one-handed operation, clear labels, and a camera button that’s easy to hit even with gloves.
Item Identification: Barcode, SKU Search, or Manual Entry
Fast inventory snapshots depend on how quickly a user can identify an item. Most apps do best by supporting three paths—scan, search, and manual entry—so the flow doesn’t break when one method fails.
Option 1: Barcode scanning (fastest when it works)
Scanning is ideal for consumer goods and packaged items. Set realistic expectations: camera scanning needs good lighting, a steady hand, and a clear, unwrinkled label. Older phones may struggle with focus, and some barcodes (tiny, glossy, curved bottles) will fail more often.
Support the most common formats first (typically EAN/UPC). If you plan to scan Code 128/39 (common in warehouses), validate early—format support varies by scanning library.
Option 2: SKU search (best for internal catalogs)
Search is reliable when your inventory uses internal SKUs that aren’t always barcoded. Keep it forgiving: partial matches, recent items, and a short “suggested” list based on the last location or job.
Option 3: Manual entry (the always-available fallback)
Manual entry should be one screen, not a form marathon: item name (or SKU), quantity, and optional photo. This also supports unlabeled assets.
When scanning fails: don’t trap the user
After a failed scan, offer immediate fallbacks: type SKU, search by name, or choose from a short list (recent items, items in this location).
QR codes for locations (optional but powerful)
Consider QR codes for aisle/bin labels. Scanning a location first can speed up snapshots and reduce mistakes, especially in storerooms and trucks.
Minimal item catalog strategy
For an MVP, start ad-hoc: create items as you go, then allow import later via CSV (see /blog/reports-exports). If the business already has a product list, add import early—but keep the on-device catalog lightweight to avoid slow search and sync.
Offline Mode and Sync Without Surprises
Offline mode isn’t a “nice to have” for an inventory snapshot app—warehouses, basements, and back rooms often have poor reception. The goal is simple: users can capture a complete snapshot with no signal, and nothing gets lost or duplicated when the phone reconnects.
Define what works offline
Be explicit about offline behavior:
- Create snapshots (items, counts, notes, photos) fully offline.
- Edit anything that hasn’t synced yet.
- Queue submissions automatically, with a clear status like Saved on device → Waiting to sync → Uploaded.
A small banner or icon is enough—users just need confidence their work is safe.
Local storage that won’t break
Use an on-device database (for items, counts, timestamps, and statuses) plus a file cache for photos. Photos should be stored locally at capture time, then uploaded later. Keep photo sizes reasonable (compression) so a single audit doesn’t fill up storage.
Conflicts, explained like a human
Conflicts happen when two people update the same item before syncing. Keep the rule easy to understand:
- If two updates collide, show both versions and label them by who and when.
- Default to latest update wins, but allow a supervisor to pick the correct one.
Avoid silent overwrites.
Sync triggers users can control
Offer:
- Manual sync button (always available).
- Background sync when the app opens or connectivity returns.
- Optional Wi‑Fi only syncing for photo-heavy uploads.
Data retention after upload
After a successful upload, keep local copies for a defined period (for example, 7–30 days) to support quick review and re-exports, then auto-clean to free space. Always keep a lightweight history (timestamps and totals) even if photos are removed.
Permissions, Security, and Audit Trails
Inventory snapshots are simple by design, but they still need clear controls. The goal is to protect data without slowing down capture.
Roles and permissions (keep it minimal)
Start with three basic roles:
- Staff (capture): create snapshots, add items, attach photos, and leave notes.
- Manager (review/export): view all snapshots, approve or flag issues, and export/share reports.
- Admin (settings): manage locations, user access, retention rules, and integration settings.
This prevents “everyone can edit everything,” while avoiding complex permission matrices.
Sign-in options
Choose an approach that matches your environment:
- Email + password: familiar and works everywhere; add password reset.
- Magic link / one-time code: fewer password problems; great for occasional users.
- SSO (optional): useful for larger orgs (e.g., Okta/Microsoft), but usually not needed for an MVP.
If devices are shared, add a fast “switch user” flow so the audit trail stays accurate.
Device security basics
Even lightweight apps should support:
- PIN/biometric unlock inside the app (especially on shared devices)
- Auto-lock after a short idle time
- Secure storage for tokens and cached data (avoid storing plain-text credentials)
Also plan for lost devices: a simple “sign out everywhere” or token revocation helps.
Photo privacy and sensitive capture
Photos are valuable evidence, but they can accidentally include:
- People (faces), badges, or screens
- Paperwork with customer data, invoices, or pricing
Add a short in-app reminder (“Avoid people and documents”) and provide a way to delete/replace a photo if it was captured by mistake.
Audit trails: know who changed what and when
At minimum, record:
- Created by / created at (snapshot, item, photo)
- Edited by / edited at (quantity changes, notes, status)
- Deleted by / deleted at (soft-delete is safer than permanent removal)
A simple “History” view per snapshot builds trust and makes reviews faster.
Reports, Exports, and Sharing Snapshots
A snapshot app earns trust when people can use the captured data outside the app—quickly, without cleanup. Reports and exports don’t need to be fancy in the MVP, but they must be consistent and predictable.
Minimum exports that teams actually open
Start with the formats operations teams ask for most:
- CSV (the universal “works everywhere” option)
- Excel-friendly CSV (same file type, but with safe headers, UTF-8, and clear date/time formatting)
- PDF summary (optional) for a one-page “what happened” handoff
Keep the columns stable across releases. Changing column names later breaks spreadsheets and downstream processes.
Report views that answer real questions
Instead of complex dashboards, provide a few focused views people can filter:
- By date (today vs. last week’s count)
- By location (stockroom, truck, store aisle)
- By item (SKU/barcode, name, category)
- By user (who captured what)
- Discrepancies (expected vs. counted, missing items, unexpected items)
Keep filters simple: date range, location, and “only discrepancies” cover most needs.
Photos in reports: helpful, not heavy
Photos are often the proof. In exports, include:
- A photo link (best for CSV/Excel)
- A small thumbnail in PDF where practical
If photos are large, export references rather than embedding everything. That keeps files shareable.
Sharing now, integrations later
For MVP, support a basic Share action (send file via email or messaging from the device). Plan richer integrations later—cloud drive folders, webhooks, or an API—so you don’t block launch.
Manager review that doesn’t slow the team
Add a lightweight workflow: a manager can approve, comment, or request recapture. Requests should point to the exact item/location/date so the person in the field can re-do it without guessing.
Choosing a Build Approach (No-Code vs Cross-Platform vs Native)
Your build approach should match what the app must do on day one: capture a quick inventory snapshot (often with photos), work offline, and sync reliably.
Option 1: No-code / low-code
No-code tools can work if your snapshot is mostly form entry (location, item name, quantity, notes) and you can live with limited offline support.
Choose this when:
- Budget is tight and you need a pilot fast
- Camera use is basic (single photo per item, no custom workflow)
- Offline is “nice to have,” not mandatory
Trade-off: barcode scanning, background sync, and audit-friendly controls can be hard or impossible.
Option 2: Cross-platform (one app for iOS + Android)
Cross-platform is often the sweet spot for inventory snapshot apps. You can build a solid camera flow, barcode scanning, and a dependable offline queue while keeping one codebase.
Choose this when:
- You need both iPhone and Android
- Offline mode and conflict-free sync matter
- You want room to grow beyond the MVP
If you want to move even faster without slipping into the limitations of generic no-code tools, a vibe-coding platform like Koder.ai can help you prototype and ship an MVP via chat while still producing a real, maintainable stack (web in React; backend in Go with PostgreSQL; mobile in Flutter). It’s especially useful for getting the end-to-end flow working early—capture, offline queue, export—and then iterating with snapshots/rollback as you test in the field.
Option 3: Native (separate iOS and Android)
Native can be best when scanning speed, background uploads, and device-specific behavior are critical.
Choose this when:
- Scanning must be extremely fast and reliable
- You need deep device integration (MDM, specialized hardware)
- You have budget for two apps
Typical components (keep it simple)
Most builds include: (1) a mobile app, (2) a backend API for users and snapshots, (3) a database for item records, and (4) image storage for photos.
MVP timeline (realistic)
- Week 1: Scope + clickable screens
- Weeks 2–3: Build capture flow (photos, items, locations)
- Week 4: Offline + sync + basic admin
- Week 5: Reports/export and polish
- Week 6: Field testing, fixes, app store prep
If you want a deeper decision checklist, add one to your internal docs or link it from /blog/inventory-app-mvp-checklist.
Testing in the Real World (Not Just in the Office)
A simple inventory snapshot app only succeeds if it works where inventory actually lives: cramped aisles, dusty stockrooms, poor lighting, and unreliable reception. Office-only testing tends to overestimate capture speed and underestimate the edge cases that make people abandon the workflow.
What to test (the stuff that breaks trust)
Focus on a few measurable behaviors:
- Capture speed: time from opening the app to a saved snapshot (aim for a repeatable “under 30 seconds”).
- Photo quality: legibility of labels in bright glare and low light.
- Offline queue: snapshots must save locally with a clear “pending upload” state.
- Sync: uploads should be predictable (no silent failures, no surprise duplicates).
Cover real devices, not just the newest phones
Test at least one older Android and an older iPhone. Include small screens, low storage, and devices with weaker cameras. Performance issues often show up as slow camera launch, delayed barcode focus, or failed uploads when storage is near full.
Field testing scenarios to run
Test in a real location with real items:
- Scan the same SKU repeatedly (to confirm duplicate handling).
- Switch to airplane mode mid-capture, then restore connection.
- Force a failed upload (kill the app, change networks) and verify retry behavior.
- Try bad lighting angles and confirm the app doesn’t freeze on autofocus.
Reusable QA checklist (print this)
- Can a new user save a snapshot in under 30 seconds?
- Does every snapshot show: item ID, quantity, location, timestamp, photo?
- In offline mode, is the snapshot clearly marked “queued” and still editable?
- After reconnecting, do queued snapshots upload once—no duplicates?
- If an upload fails, does the user see why and how to retry?
- Does the app remain usable at 5% battery and low storage?
- Can a supervisor verify what changed (who/when) without guessing?
Launch, Onboarding, and Support
A simple inventory snapshot app wins or loses in the first few minutes. Launch is less about marketing and more about removing friction: trust, clarity, and a reliable path to help when something goes wrong.
App store basics that prevent confusion
Before you invite real users, make your store listing and permission prompts feel predictable:
- Screenshots: show the full “create snapshot → add items → export/share” flow, not just the home screen.
- Permission text: explain why you need camera access (photos/barcodes) and optional location (site/room context).
- Privacy notes: be explicit about what gets stored (photos, item counts, timestamps), where it’s stored (device/cloud), and how to request deletion.
Onboarding that gets users to their first successful snapshot
Keep onboarding short: 3–5 screens max. Focus on what success looks like, not feature tours.
A good pattern is:
- What a snapshot is (time-stamped inventory proof).
- How to capture fast (photo + count + optional note).
- Offline expectations (it will queue and sync later).
- How sharing/export works (CSV/PDF/email).
Then run a sample snapshot walkthrough with pre-filled demo items so users can practice without pressure.
Analytics around workflows (not vanity metrics)
Instrument the moments that can fail:
- Drop-off during “Create snapshot” and “Add item.”
- Barcode scan retries and manual-entry usage.
- Sync queue size, sync failures, and time-to-sync.
- Export/share attempts and errors.
These events help you spot friction early—especially with offline usage.
Support path that users can find in 10 seconds
Create one simple route:
- A short FAQ (offline, exports, permissions).
- In-app feedback (one tap from settings).
- A bug report form that auto-attaches app version, device model, and recent sync status.
Link these from a single page like /support.
Rollout plan: pilot → iterate → wider release
Start with a small pilot group (one location or team), run it for 1–2 weeks, ship fixes quickly, then expand. Don’t optimize onboarding copy or exports until the pilot consistently completes snapshots without support tickets.
Iteration: What to Build After the MVP
Your MVP should prove one thing: staff can capture a reliable inventory snapshot quickly, and managers can trust what they see. After that, iterate in a way that protects the core experience—fast capture, predictable sync, and clear data.
Collect feedback (but don’t mix audiences)
Run short feedback loops with two groups separately:
- Staff (doers): Where did the flow slow down? Which fields felt unnecessary? What caused rework?
- Managers (reviewers): What’s missing for decision-making? Which exports or summaries reduce back-and-forth?
Keeping these conversations separate prevents reporting requests from bloating the capture screen.
Prioritize: speed, reliability, clarity
When choosing improvements, bias toward:
- Speed: fewer taps, smarter defaults, faster barcode recognition, quicker photo capture.
- Reliability: fewer sync errors, clearer offline indicators, better conflict handling.
- Clarity: unambiguous item/location names, consistent units, obvious timestamps.
Extra features can wait if they risk slowing down the 30-second snapshot.
Common next features that add real value
Once the core flow is stable, these are typical step-ups:
- Cycle counts: lightweight “count this shelf/bin today” tasks.
- Thresholds and alerts: notify when a snapshot shows low stock or unusual spikes.
- Multi-location: support warehouses, trucks, stores, or rooms with scoped location lists.
When to add reconciliation (and when not to)
Snapshots answer “what did we see right now?” Reconciliation answers “what should the system of record be?” Add reconciliation only when you have agreement on:
- who can approve adjustments,
- how discrepancies are explained (reason codes),
- and what audit trail is required.
If those rules aren’t clear yet, keep the app snapshot-only and export data for controlled review.
Maintain data hygiene as you grow
Messy data compounds over time. Set rules early:
- item naming conventions (e.g., brand + size + unit),
- controlled location lists (no free-typed variations),
- duplicate detection for items and barcodes.
Good hygiene makes every future feature—alerts, reporting, reconciliation—work better with less effort.
If you’re iterating quickly, prioritize a workflow that lets you ship, test, and roll back safely. Platforms like Koder.ai support deployment/hosting, source code export, and snapshot-based rollback—handy when you’re pushing frequent improvements while field teams are actively using the app.
FAQ
What is an inventory snapshot (and how is it different from full inventory management)?
An inventory snapshot is a timestamped observation of inventory at a specific moment—typically item ID + quantity + location + photos + notes. It’s designed for speed and proof, not for maintaining a perpetual, always-accurate system of record.
What should a simple inventory snapshot MVP include on day one?
Start with a flow a user can complete in ~30 seconds:
- Identify item (scan/search/manual)
- Enter quantity
- Take 1–2 photos
- Save to a specific location
Then add essentials: offline capture + safe sync, basic roles, and CSV export. Delay complex features like reordering, transfers, and deep integrations until after field validation.
What’s a good minimal data model for a snapshot app?
Use a single parent record (the snapshot) with supporting fields:
snapshot_id,created_by,created_at,location_iditem_identifier_raw(scan/typed) + optionalitem_id(normalized)quantity,unit,condition,notes,tagsstatus(e.g.,draft → submitted → reviewed)
Keep it small so capture stays fast and exports remain consistent.
How should the app handle photos without making sync slow or storage explode?
Treat photos as evidence and keep them predictable:
- Allow multiple photos (e.g., wide shelf + close-up label)
- Compress on device (max dimension + quality setting)
- Store capture metadata (time, user, snapshot association)
- Upload later if offline; don’t block saving
Also provide a delete/replace option to handle accidental sensitive captures.
What’s the best way to identify items: barcode, SKU search, or manual entry?
Support three paths so users aren’t blocked:
- Barcode scan (fastest when labels and lighting cooperate)
- SKU/name search (best when you have internal identifiers)
- Manual entry (always-available fallback)
When scanning fails, immediately offer search/manual and show recent items for that location. Consider QR codes for locations to reduce “wrong aisle/bin” errors.
How do you design offline mode and sync so users trust it?
Define offline behavior clearly:
- Create and edit unsynced snapshots offline
- Queue uploads with visible states (Saved on device → Waiting to sync → Uploaded)
- Store records in an on-device DB and photos in a local file cache
For conflicts, avoid silent overwrites: show both versions labeled by who/when, and use a simple default like latest update wins with an option for a manager to choose.
What roles, permissions, and audit trail do you need for a snapshot app?
Keep roles minimal and audit-friendly:
- Staff: capture snapshots, photos, notes
- Manager: review, approve/flag, export
- Admin: manage users, locations, retention/settings
Record an audit trail for create/edit/delete (prefer soft delete). On shared devices, add fast user switching and consider in-app PIN/biometric to protect cached data.
What reports and exports are most useful for inventory snapshots?
Start with exports people actually use:
- CSV (stable columns; Excel-friendly formatting)
- Optional PDF summary for handoffs
Include photo references as links (instead of embedding huge images). Keep column names stable across releases to avoid breaking spreadsheets and downstream processes.
How should you test a snapshot app in real-world conditions?
Test where inventory work happens (not just at a desk):
- Low light, glare, cramped aisles
- Poor/zero reception (airplane-mode tests)
- Older devices with weaker cameras and low storage
Verify: capture time, photo legibility, offline queue behavior, retry logic, and “no surprise duplicates” after reconnect.
What’s a practical rollout plan and what analytics should you track?
Launch with a pilot (one team/location for 1–2 weeks), then expand after fixes. Track workflow health metrics:
- Time to complete a snapshot
- Scan retries vs manual entry rate
- Sync failures and time-to-sync
- Export/share attempts and errors
Provide a help path users can find quickly (for example, a single /support page and in-app feedback) and keep onboarding focused on getting to the first successful snapshot.