Sep 01, 2025·8 min
From Idea to Deployed App in One AI-Assisted Workflow
A practical, end-to-end narrative showing how to move from an app idea to a deployed product using one AI-assisted workflow—steps, prompts, and checks.
A practical, end-to-end narrative showing how to move from an app idea to a deployed product using one AI-assisted workflow—steps, prompts, and checks.
Picture a small, useful app idea: a “Queue Buddy” that lets a café staffer tap one button to add a customer to a waiting list and automatically text them when their table is ready. The success metric is simple and measurable: reduce average wait-time confusion calls by 50% in two weeks, while keeping staff onboarding under 10 minutes.
That’s the spirit of this article: pick a clear, bounded idea, define what “good” looks like, and then move from concept to a live deployment without constantly switching tools, docs, and mental models.
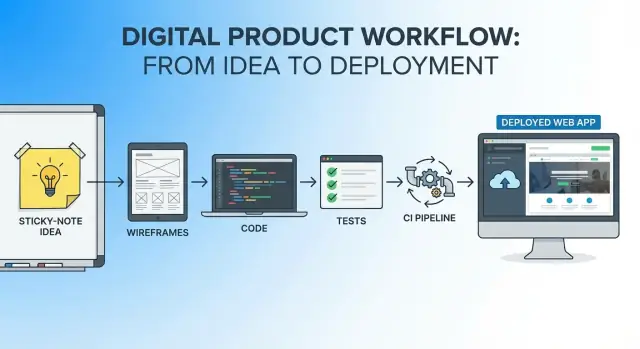
A single workflow is one continuous thread from the first sentence of the idea to the first production release:
You’ll still use multiple tools (editor, repo, CI, hosting), but you won’t “restart” the project at each phase. The same narrative and constraints carry forward.
AI is most valuable when it:
But it doesn’t own the product decisions. You do. The workflow is designed so you’re always verifying: Does this change move the metric? Is it safe to ship?
Over the next sections, you’ll go step by step:
By the end, you should have a repeatable way to move from “idea” to “live app” while keeping scope, quality, and learning tightly connected.
Before you ask an AI to draft screens, APIs, or database tables, you need a crisp target. A little clarity here saves hours of “almost right” outputs later.
You’re building an app because a specific group of people repeatedly hits the same friction: they can’t complete an important task quickly, reliably, or with confidence using the tools they have. The goal of version 1 is to remove one painful step in that workflow—without trying to automate everything—so users can get from “I need to do X” to “X is done” in minutes, with a clear record of what happened.
Pick one primary user. Secondary users can wait.
Assumptions are where good ideas quietly fail—make them visible.
Version 1 should be a small win you can ship.
A lightweight requirements doc (think: one page) is the bridge between “cool idea” and “buildable plan.” It keeps you focused, gives your AI assistant the right context, and prevents the first version from ballooning into a months-long project.
Keep it tight and skimmable. A simple template:
Write 5–10 features max, phrased as outcomes. Then rank them:
This ranking is also how you guide AI-generated plans and code: “Only implement must-haves first.”
For the top 3–5 features, add 2–4 acceptance criteria each. Use plain language and testable statements.
Example:
Finish with a short “Open Questions” list—things you can answer with one chat, one customer call, or a quick search.
Examples: “Do users need Google login?” “What’s the minimum data we must store?” “Do we need admin approval?”
This doc isn’t paperwork; it’s a shared source of truth you’ll keep updating as the build progresses.
Before you ask AI to generate screens or code, get the story of the product straight. A quick journey sketch keeps everyone aligned: what the user is trying to do, what “success” looks like, and where things can go wrong.
Start with the happy path: the simplest sequence that delivers the main value.
Example flow (generic):
Then add a few edge cases that are likely and costly if mishandled:
You don’t need a big diagram. A numbered list plus notes is enough to guide prototyping and code generation.
Write a short “job to be done” for each screen. Keep it outcome-focused rather than UI-focused.
If you’re working with AI, this list becomes great prompt material: “Generate a Dashboard that supports X, Y, Z and includes empty/loading/error states.”
Keep this at the “napkin schema” level—enough to support screens and flows.
Note relationships (User → Projects → Tasks) and anything that affects permissions.
Mark the points where mistakes break trust:
This isn’t about over-engineering—it’s about preventing the kinds of surprises that turn a “working demo” into a support headache after launch.
Version 1 architecture should do one thing well: let you ship the smallest useful product without painting yourself into a corner. A good rule is “one repo, one deployable backend, one deployable frontend, one database”—and only add extra pieces when a clear requirement forces it.
If you’re building a typical web app, a sensible default is:
Keep the number of services low. For v1, a “modular monolith” (well-organized codebase, but one backend service) is usually easier than microservices.
If you prefer an AI-first environment where the architecture, tasks, and generated code stay tightly connected, platforms like Koder.ai can be a good fit: you can describe the v1 scope in chat, iterate in “planning mode,” and then generate a React frontend with a Go + PostgreSQL backend—while still keeping review and control in your hands.
Before generating code, write a tiny API table so you and the AI share the same target. Example shape:
GET /api/projects → { items: Project[] }POST /api/projects → { project: Project }GET /api/projects/:id → { project: Project, tasks: Task[] }POST /api/projects/:id/tasks → { task: Task }Add notes for status codes, error format (e.g., { error: { code, message } }), and any pagination.
If v1 can be public or single-user, skip auth and ship faster. If you need accounts, use a managed provider (email magic link or OAuth) and keep permissions simple: “user owns their records.” Avoid complex roles until real usage demands it.
Document a few practical constraints:
These notes guide AI-assisted code generation toward something deployable, not just functional.
The fastest way to kill momentum is to debate tools for a week and still have no runnable code. Your goal here is simple: get to a “hello app” that starts locally, has a visible screen, and can accept a request—while staying small enough that every change is easy to review.
Give the AI a tight prompt: framework choice, basic pages, a stub API, and the files you expect. You’re looking for predictable conventions, not cleverness.
A good first pass is a structure like:
/README.md
/.env.example
/apps/web/
/apps/api/
/package.json
If you’re using a single repo, ask for basic routes (e.g., / and /settings) and one API endpoint (e.g., GET /health or GET /api/status). That’s enough to prove the plumbing works.
If you’re using Koder.ai, this is also a natural place to start: ask for a minimal “web + api + database-ready” skeleton, then export the source when you’re satisfied with the structure and conventions.
Keep the UI intentionally boring: one page, one button, one call.
Example behavior:
This gives you an immediate feedback loop: if the UI loads but the call fails, you know exactly where to look (CORS, port, routing, network errors). Resist adding auth, databases, or complex state here—you’ll do that after the skeleton is stable.
Create a .env.example on day one. It prevents “works on my machine” issues and makes onboarding painless.
Example:
WEB_PORT=3000
API_PORT=4000
API_URL=http://localhost:4000
Then make the README runnable in under a minute:
.env.example to .envTreat this phase like laying clean foundation lines. Commit after each small win: “init repo,” “add web shell,” “add api health endpoint,” “wire web to api.” Small commits make AI-assisted iteration safer: if a generated change goes sideways, you can revert without losing a day of work.
Once the skeleton runs end-to-end, resist the urge to “finish everything.” Instead, build a narrow vertical slice that touches the database, API, and UI (if applicable), then repeat. Thin slices keep reviews fast, bugs small, and AI assistance easier to verify.
Pick the one model your app can’t function without—often the “thing” users create or manage. Define it plainly (fields, required vs optional, defaults), then add migrations if you’re using a relational database. Keep the first version boring: avoid clever normalization and premature flexibility.
If you use AI to draft the model, ask it to justify each field and default. Anything it can’t explain in one sentence probably doesn’t belong in v1.
Create only the endpoints needed for the first user journey: typically create, read, and a minimal update. Put validation close to the boundary (request DTO/schema), and make rules explicit:
Validation is part of the feature, not polish—it prevents messy data that slows you down later.
Treat error messages as UX for debugging and support. Return clear, actionable messages (what failed and how to fix it) while keeping sensitive details out of client responses. Log the technical context server-side with a request ID so you can trace incidents without guesswork.
Ask AI to propose incremental PR-sized changes: one migration + one endpoint + one test at a time. Review diffs like you would a teammate’s work: check naming, edge cases, security assumptions, and whether the change truly supports the user’s “small win.” If it adds extra features, cut them and keep moving.
Version 1 doesn’t need enterprise-grade security—but it does need to avoid the predictable failures that turn a promising app into a support nightmare. The goal here is “safe enough”: prevent bad input, restrict access by default, and leave a trail of useful evidence when something goes wrong.
Treat every boundary as untrusted: form fields, API payloads, query parameters, and even internal webhooks. Validate type, length, and allowed values, and normalize data (trim strings, convert casing) before storing.
A few practical defaults:
If you’re using AI to generate handlers, ask it to include validation rules explicitly (e.g., “max 140 chars” or “must be one of: …”) rather than “validate input.”
A simple permission model is usually enough for V1:
Make ownership checks central and reusable (middleware/policy functions), so you don’t sprinkle “if userId == …” throughout the codebase.
Good logs answer: what happened, to whom, and where? Include:
update_project, project_id)Log events, not secrets: never write passwords, tokens, or full payment details.
Before calling the app “safe enough,” check:
Testing isn’t about chasing a perfect score—it’s about preventing the kinds of failures that hurt users, break trust, or create expensive fire drills. In an AI-assisted workflow, tests also act as a “contract” that keeps generated code aligned with what you actually meant.
Before you add lots of coverage, identify where mistakes would be costly. Typical high-risk areas include money/credits, permissions, data transformations, and edge-case validation.
Write unit tests for these pieces first. Keep them small and specific: given input X, you expect output Y (or an error). If a function has too many branches to test cleanly, that’s a hint it should be simplified.
Unit tests catch logic bugs; integration tests catch “wiring” bugs—routes, database calls, auth checks, and the UI flow working together.
Pick the core journey (the happy path) and automate it end-to-end:
A couple of solid integration tests often prevent more incidents than dozens of tiny tests.
AI is great at generating test scaffolding and enumerating edge cases you might miss. Ask it for:
Then review every generated assertion. Tests should verify behavior, not implementation details. If a test would still pass after a bug, it’s not doing its job.
Pick a modest target (for example, 60–70% on core modules) and use it as a guardrail, not a trophy. Focus on stable, repeatable tests that run fast in CI and fail for the right reasons. Flaky tests erode confidence—and once people stop trusting the suite, it stops protecting you.
Automation is where an AI-assisted workflow stops being “a project that works on my laptop” and becomes something you can ship with confidence. The goal isn’t fancy tooling—it’s repeatability.
Pick a single command that produces the same result locally and in CI. If you’re using Node, that might be npm run build; for Python, a make build; for mobile, a specific Gradle/Xcode build step.
Also separate development and production config early. A simple rule: dev defaults are convenient; production defaults are safe.
{
  "scripts": {
    "lint": "eslint .",
    "format": "prettier -w .",
    "test": "vitest run",
    "build": "vite build"
  }
}
A linter catches risky patterns (unused variables, unsafe async calls). A formatter prevents “style debates” from showing up as noisy diffs in reviews. Keep the rules modest for version 1, but enforce them consistently.
A practical gate order:
Your first CI workflow can be small: install dependencies, run the gates, and fail fast. That alone prevents broken code from quietly landing.
name: ci
on: [push, pull_request]
jobs:
  test:
    runs-on: ubuntu-latest
    steps:
      - uses: actions/checkout@v4
      - uses: actions/setup-node@v4
        with:
          node-version: 20
      - run: npm ci
      - run: npm run format -- --check
      - run: npm run lint
      - run: npm test
      - run: npm run build
Decide where secrets live: CI secret store, a password manager, or your deployment platform’s environment settings. Never commit them to git—add .env to .gitignore, and include a .env.example with safe placeholders.
If you want a clean next step, connect these gates to your deployment process in the next section, so “green CI” is the only path to production.
Shipping isn’t a single button click—it’s a repeatable routine. The goal for version 1 is simple: pick a deployment target that matches your stack, deploy in small increments, and always have a way back.
Choose a platform that fits how your app runs:
Optimizing for “easy to redeploy” usually beats optimizing for “maximum control” at this stage.
If your priority is minimizing tool switching, consider platforms that bundle build + hosting + rollback primitives. For example, Koder.ai supports deployment and hosting along with snapshots and rollback, so you can treat releases as reversible steps rather than one-way doors.
Write the checklist once and reuse it for every release. Keep it short enough that people actually follow it:
If you store it in the repo (for example in /docs/deploy.md), it naturally stays close to the code.
Create a lightweight endpoint that answers: “Is the app up and can it reach its dependencies?” Common patterns are:
GET /health for load balancers and uptime monitorsGET /status returning basic app version + dependency checksKeep responses fast, cache-free, and safe (no secrets or internal details).
A rollback plan should be explicit:
When deployment is reversible, releasing becomes routine—and you can ship more often with less stress.
Launching is the start of the most useful phase: learning what real users do, where the app breaks, and which small changes move your success metric. The goal is to keep the same AI-assisted workflow you used to build—now pointed at evidence instead of assumptions.
Begin with a minimum monitoring stack that answers three questions: Is it up? Is it failing? Is it slow?
Uptime checks can be simple (a periodic hit to a health endpoint). Error tracking should capture stack traces and request context (without collecting sensitive data). Performance monitoring can start with response times for key endpoints and front-end page load metrics.
Have AI help by generating:
Don’t track everything—track what proves the app is working. Define one primary success metric (for example: “completed checkout,” “created first project,” or “invited a teammate”). Then instrument a small funnel: entry → key action → success.
Ask AI to propose event names and properties, then review them for privacy and clarity. Keep events stable; changing names every week makes trends meaningless.
Create a simple intake: an in-app feedback button, a short email alias, and a lightweight bug template. Triage weekly: group feedback into themes, connect themes to analytics, and decide on the next 1–2 improvements.
Treat monitoring alerts, analytics drops, and feedback themes like new “requirements.” Feed them into the same process: update the doc, generate a small change proposal, implement in thin slices, add a targeted test, and deploy via the same reversible release process. For teams, a shared “Learning Log” page (linked from /blog or your internal docs) keeps decisions visible and repeatable.
A “single workflow” is one continuous thread from idea to production where:
You can still use multiple tools, but you avoid “restarting” the project at each phase.
Use AI to generate options and drafts, then you choose and verify:
Keep the decision rule explicit: Does this move the metric, and is it safe to ship?
Define a measurable success metric and a tight v1 “definition of done.” For example:
If a feature doesn’t support those outcomes, it’s a non-goal for v1.
Keep it to a skimmable, one-page PRD that includes:
Then add 5–10 core features max, ranked Must/Should/Nice. Use that ranking to constrain AI-generated plans and code.
For your top 3–5 features, add 2–4 testable statements each. Good acceptance criteria are:
Example patterns: validation rules, expected redirects, error messages, and permission behavior (e.g., “unauthorized users see a clear error and no data leaks”).
Start with a numbered happy path and then list a few high-likelihood, high-cost failures:
A simple list is enough; the goal is to guide UI states, API responses, and tests.
Default to a “modular monolith” for v1:
Only add services when a requirement forces it. This reduces coordination overhead and makes AI-assisted iteration easier to review and revert.
Write a tiny “API contract” table before code generation:
{ error: { code, message } })This prevents mismatches between UI and backend and gives tests a stable target.
Aim for a “hello app” that proves the plumbing works:
/health).env.example and a README that runs in under a minuteCommit small milestones early so you can safely revert if a generated change goes wrong.
Prioritize tests that prevent expensive failures:
In CI, enforce simple gates in a consistent order:
Keep tests stable and fast; flaky suites stop protecting you.