

Laptop Loan Sign-Out Sheet for Schools: Track Devices
Use a laptop loan sign-out sheet for schools to record who borrowed each device, whether the charger was included, and return status with timestamps.
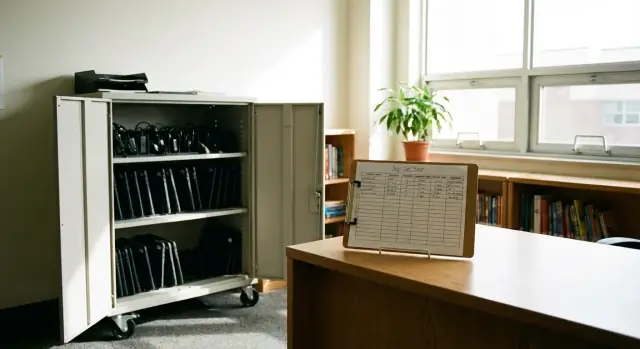
Why a sign-out sheet matters for laptop loans
A laptop loan program only works when everyone can quickly answer the same basics: where each device is, what left with it, and when it should be back. A simple sign-out sheet creates one shared record, so staff aren't trying to reconstruct details from memory.
Schools lose track of laptops for predictable reasons. The counter gets busy, different staff cover different periods, and students borrow devices in a rush between classes. When the only process is a verbal handoff, small details get missed, and those gaps add up.
It’s rarely just the laptop that goes missing. The usual trouble spots are chargers, cases or sleeves, USB-C dongles/adapters, styluses (for 2-in-1 devices), and even the device ID or asset tag being copied incorrectly.
Timestamps matter because they turn disagreements into a clear timeline. If a student says they returned a laptop “yesterday,” a check-in time and staff initials can settle it fast. It also helps when a device is returned after hours, moved to a cart, or left at reception. The time record shows when responsibility changed hands.
A quick comparison helps set expectations:
- Paper sheets are fast and cheap at the counter, but hard to search and easy to misfile.
- Spreadsheets are searchable and can show overdue items, but they depend on consistent access and clean data entry.
- Simple apps can add reminders, reduce duplicates, and keep an audit trail, but they require setup and training.
Example: A student checks out Laptop 014 with a charger at 3:05 PM on Friday. On Monday, they return the laptop at 8:12 AM, but the charger is missing. With a clear checkout line, you can confirm the charger was issued, note the missing item at check-in, and avoid blaming the wrong student or staff member.
Set the rules before you print anything
A sheet only works if everyone uses it the same way. Before you print (or copy) a stack, decide what you’re tracking and how strict the process needs to be. A library loan program, a shared laptop cart, and a classroom set all behave differently, so the rules should match.
Start by naming the pool. Are these laptops assigned to a cart number, a specific room, or a central library pool? If staff can’t tell which group a device belongs to, returns end up in the wrong place and the log stops matching reality.
Next, assign clear ownership for approvals. If “any adult” can hand out a laptop, you’ll get gaps. Pick one role that can approve a checkout (for example, librarian, front office staff, or the classroom teacher) and a backup for busy days. Decide what happens after hours, during testing, or when a substitute is present.
Then define your minimum required fields. If information is optional, it will be skipped when there’s a line.
Five decisions prevent most tracking problems:
- Which device pools exist (cart, room set, library pool) and where each one returns
- Who can approve checkouts and who can accept returns
- What counts as a complete kit (laptop only, laptop + charger, case, hotspot)
- Cutoff rules (due time, weekend loans, and what happens when items are late)
- Where the sheet lives so it’s always within reach
Choose a single home for the sheet: the front office counter, the library desk, or a clipboard attached to the cart. If it moves around, entries get split across pages and it becomes hard to confirm who has what.
What to include on a laptop loan sign-out sheet
A good form answers two questions fast: who has the device, and what exactly went out the door with it. If staff can’t get those answers in 10 seconds, people stop using the log.
Start with borrower details. Write the student or staff name the way it appears in school records, plus a second identifier so you can tell two similar names apart. Grade and homeroom help confirm you’ve got the right person, even when the desk is busy.
Next, capture device details that make the loan traceable. The asset tag is the must-have. Serial number is optional but helpful for warranty and repair tickets. If you store devices in carts, include the cart number or location so returns go to the right place.
Accessories are where tracking usually breaks. Add a simple “Charger included?” field and make it a yes/no checkbox, not free text. If you also lend cases, hotspots, or styluses, include one short “Other items” field for quick notes.
Timing fields should include checkout date/time, due date/time, and return date/time. A date alone won’t tell you whether a laptop came back before last period or after school.
Finally, reserve space for short condition notes. Keep them specific: “corner crack already present,” “missing keycap,” or “battery drains fast.” That protects the next borrower and saves arguments later.
A compact field set that fits on one row per loan:
- Borrower name + ID number (plus grade/homeroom)
- Asset tag (plus model, optional serial)
- Charger included (yes/no) + other items
- Checkout time, due time, return time
- Condition notes + staff initials
Layout tips that make the sheet easy to use
A form works best when it can be filled out quickly and consistently by different staff members. The goal is fewer blank fields and fewer “what does this mean?” moments.
Put the most important fields on the left, in the order people act: identify the borrower, identify the device, confirm what goes out, then capture the checkout time and staff initials. Keep return fields on the right so the row reads like a timeline.
Make key items quick with checkboxes
Checkboxes reduce handwriting issues and speed up the desk line. Use separate boxes so “included” and “returned” can’t be confused.
- Charger included (Y/N)
- Charger returned (Y/N)
- Case included (optional)
- Damage seen at checkout (Y/N)
- Damage seen at return (Y/N)
Follow the checkboxes with a small notes box. If you give people a big blank space, entries turn into paragraphs and the sheet becomes hard to scan.
Design the row so a return can’t be “half done”
Include dedicated columns for checkout timestamp (date + time), return timestamp (date + time), staff initials at checkout, and staff initials at return.
If you can, add a simple Loan ID (0001, 0002, 0003). It helps when two students share a name or when the same laptop is borrowed multiple times in a week. It also makes follow-ups clearer: “We’re checking loan 0147, laptop 12, charger not returned.”
How to check out a laptop (step by step)
A checkout takes less than two minutes when everyone follows the same sequence. The goal is straightforward: match the right person to the right device, then record enough detail that check-in is easy.
Before handing anything over, do a quick eligibility check based on your school’s policy (permissions on file, required notes, unpaid fees, and so on). If something is missing, pause the checkout and record why.
Use the same order every time:
- Confirm the borrower: Ask for student ID (or your standard identifier) and verify eligibility.
- Match the device to the record: Read the asset tag directly from the laptop (not from memory) and say it out loud while writing it.
- Verify the charger and accessories: Put the charger on the desk, check it looks intact, and mark whether it was issued. Record any other items.
- Write the time details: Record the checkout timestamp and the due date/time. Even if it’s “end of day,” write a specific time.
- Sign-off and handoff: Borrower signs (or initials), staff initials, then the laptop and charger go out together.
One small habit prevents most mix-ups: keep the laptop and charger paired on the desk until the signatures are done. If two students are waiting, finish one full transaction before starting the next.
How to check a laptop back in (step by step)
A good check-in is fast, consistent, and done the same way every time. The goal: match the right device to the right record, capture the return time, and spot issues before the laptop goes back into circulation.
Step-by-step check-in
- Step 1: Confirm the device ID and borrower name. Read the asset tag out loud and match it to the correct row before doing anything else.
- Step 2: Record the return timestamp immediately. Write the date and exact time as soon as the device hits the desk.
- Step 3: Confirm the charger is returned and mark status. Check for the correct charger (and any adapter your school uses). Mark it returned, missing, or replaced.
- Step 4: Do a quick condition check. Keep it consistent: screen (cracks, heavy marks), keyboard (missing/stuck keys), ports (USB/charging), and any stickers or writing.
- Step 5: Note issues and route the device. Write a brief note on the same line as the return entry, then send the laptop to the right place (charging station, repair bin, admin review).
For notes, a simple rule helps: write what you see, not what you assume. “Charger cable frayed near plug” is better than “charger broken.”
Example: A student returns a laptop Monday at 8:05 AM with no charger. Record the timestamp first, then mark “charger missing,” and have the student initial the note if your policy allows. That one step prevents confusion when the same device goes out again.
Common mistakes that break tracking
Most problems aren’t about bad intent. They happen when the form leaves room for guessing later. Once you’re guessing, you’re no longer tracking.
The biggest trap is relying on descriptions instead of a clear device ID. “Silver Dell with a sticker” sounds helpful until there are five of them. A missing or incorrect asset tag also makes it hard to connect damage notes, repair tickets, or repeat issues to the right device.
Chargers are the next blind spot. If the log only tracks the laptop, staff end up asking “Did it come back with a charger?” and nobody is sure. Treat the charger like its own item, even if it’s paired with the laptop.
The mistakes that most often create gaps:
- Writing a description, but not the device ID (asset tag or barcode)
- Logging the laptop, but not whether a charger was issued and returned
- Mixing name styles (nicknames one day, legal names the next), which creates duplicates
- Handing out devices without a clear due time, so “tomorrow” becomes “whenever”
- Filling in timestamps later from memory instead of writing them at the desk
Another common issue is having nowhere to record condition at return. If a cracked screen is found during check-in but there’s no space to note it, the detail ends up in a margin or disappears.
Quick checklist for staff at the desk
A laptop loan process works best when the desk follows the same routine every time. Keep a short checklist next to the sign-out sheet so anyone covering the desk can follow it.
Desk checklist (use for every loan)
- Pre-check: Match the device ID on the laptop to what you’ll write down. Confirm the correct charger is physically present. Verify the borrower using your standard method.
- Check-out details: Write the check-out date/time clearly. Set a due date/time (end of period, end of day, or Monday morning for weekend loans). Get a signature or initials.
- Return intake: Record the return date/time immediately. Confirm the charger with the same care as the laptop. Do a quick condition check.
- End-of-day sweep: Scan for anything past due and follow up while the trail is still fresh.
- Weekly sanity check: Compare how many chargers you physically have versus how many laptops you loan. If counts don’t match, investigate early.
If anything is unclear (missing timestamp, unclear handwriting, missing charger note), pause for 30 seconds and fix the record before the next checkout. That tiny delay saves hours later.
Example: weekend loan with a missing charger
On Friday afternoon, Maya (10th grade) needs a laptop for a weekend video project. The front desk records the basics: laptop asset tag, student name and ID, homeroom, checkout date/time, and staff initials.
Before Maya leaves, staff check “Charger included: Yes” and note the charger label (for example, “Charger #14”). They add a quick condition note: “Laptop OK, no cracks, boots normally.”
Monday morning at 8:12 AM, Maya returns the laptop. Staff record the return timestamp right away, confirm the laptop powers on, and notice the charger is missing. On the same row, they mark “Charger returned: No” and write “Student says left at home.” Now the log shows who last had Charger #14 and when it was last confirmed.
A short, calm follow-up script keeps things consistent:
- “Thanks for returning the laptop. The charger is still checked out under your name.”
- “Can you bring it by tomorrow morning, or email us if it’s lost?”
- “Until it’s returned, we’ll note a charger hold on your account.”
- “If it’s lost, we’ll tell you the next step and any replacement cost.”
By Tuesday, Maya brings the charger back at 8:05 AM. Staff add the timestamp in a “Charger returned date/time” column and close the loop.
To prevent repeats, the next checkout entry for that same laptop includes a simple note: “Charger pending, issued laptop only.” That way no one assumes the kit is complete.
Keeping records organized and privacy-friendly
A sign-out sheet only helps if you can find answers later. The easiest approach is to treat every laptop like it has a permanent name, and every loan like it has a paper trail you can pull in under a minute.
Start with a master list that doesn’t change day to day. Keep a page (or binder tab) that maps device ID to its “home,” such as Cart 3, Library Desk, or Room 214. When a laptop goes missing, this tells you where it was supposed to live before you even review individual loans.
Use one consistent naming rule for borrowers. If your school has student IDs, use those instead of full names. If not, pick one format and stick with it (for example: last name + first initial). Consistency prevents duplicate entries that look like different people.
A simple filing routine prevents chaos: store completed sheets by month, label each sheet with the cart/location, and log exceptions (loan without charger, late return) on the same line as the loan. If you use multiple desks, different paper colors can help.
Decide how long to keep records before problems happen. Match your retention period to school policy and any local rules. Keep logs long enough to resolve fees, damage reports, and repeat issues, then securely dispose of older pages.
For privacy, record the minimum personal info needed to identify the borrower. Avoid phone numbers, home addresses, medical notes, or anything unrelated to the loan. Keep the binder in a staff-only area and limit who can take it off the desk.
Moving from paper to a simple tracking tool
Paper logs work well when one person runs checkout, the number of loans is small, and devices rarely leave the building. They’re also a reliable backup when systems are down.
Paper starts to fall apart when tracking depends on memory and manual chasing. Common warning signs include long lines at the desk, unreadable handwriting, missing entries for chargers or return times, no quick way to see what’s overdue, and pages getting lost or filed in the wrong binder.
A practical next step is a spreadsheet with the same fields and routine, just in a cleaner format. Keep one row per checkout event (not one row per student), and add a unique Loan ID so you can match check-out and check-in without guessing. Don’t reinvent the process - copy the columns you already rely on (device ID, borrower, charger issued, timestamp out, timestamp in, condition notes).
Once the data is digital, a few simple views save time: an overdue list sorted by due time, a “charger not returned” list, and a quick filter by device ID to spot repeat damage.
If spreadsheets still feel too manual, a small internal checkout tracker can help, especially if it includes a device list and automatic timestamps. If your school or district builds tools in-house, Koder.ai (koder.ai) can help you prototype a basic web app from a chat description of your fields and rules, then export the source code for IT review.
FAQ
When do we actually need a laptop loan sign-out sheet?
Use it when laptops are shared across classes, staff coverage changes during the day, or accessories like chargers and styluses regularly go missing. If you can’t answer “who has Laptop 014 right now?” in seconds, a sign-out sheet will pay off quickly.
What are the must-have fields on a laptop loan sign-out sheet?
At minimum, record borrower name plus a second identifier, the laptop asset tag, whether a charger was issued, checkout date/time, due date/time, return date/time, and staff initials for both checkout and return. Add a short condition note field so damage and missing parts are documented on the same line.
Should we track asset tag, serial number, or both?
Asset tags are the fastest way to match a specific device to a specific loan record, even when multiple laptops look identical. Serial numbers can help with repairs and warranties, but the asset tag is the practical day-to-day identifier that prevents mix-ups.
How do we stop chargers from getting lost during laptop loans?
Treat the charger like a separate tracked item, not an assumed accessory. Make “charger issued” and “charger returned” explicit so you can see exactly when the charger went missing and avoid blaming the wrong borrower or staff member later.
Why are exact timestamps so important?
Write the return date and exact time as soon as the device hits the desk, before you check anything else. That single habit creates a clean timeline when there’s a dispute, when devices move between locations, or when something is returned without the full kit.
How should we lay out the sheet so staff actually use it?
Keep checkout fields on the left and return fields on the right so each row reads like a timeline. Use checkboxes for common items like “charger issued” and “charger returned,” and keep the notes area small so entries stay readable and easy to scan.
Where should the sign-out sheet live so it doesn’t disappear?
Pick one “home” location and keep it there every day, such as the library desk, front office counter, or a clipboard attached to the cart. If the sheet moves around, entries split across pages and you lose confidence in the record.
What’s the fastest, most consistent checkout process?
Use the same quick routine each time: verify the borrower, read the asset tag directly from the laptop, confirm the charger is physically present, write checkout and due times, then get signatures or initials. Finish one full transaction before starting the next to avoid mixing accessories between students.
How do we keep loan records organized and privacy-friendly?
Keep personal info to the minimum needed to identify the borrower, and avoid phone numbers, addresses, or unrelated notes. Store completed sheets in a staff-only area, follow your school’s retention policy, and dispose of old records securely once they’re no longer needed for disputes or fees.
When should we switch from paper to a spreadsheet or a simple app?
Move to a spreadsheet when you need quick search, overdue views, and cleaner data entry, especially with lots of daily loans. Consider a simple internal app when you want automatic timestamps, fewer duplicate entries, and a clearer audit trail; tools like Koder.ai can help you prototype a basic tracker from your exact fields and rules, then export code for IT review.