

Lead Magnets Made Simple: Auto-Deliver Downloads by Email
Learn how to create a lead magnet and automatically deliver downloads via email—setup steps, templates, best practices, and common mistakes to avoid.
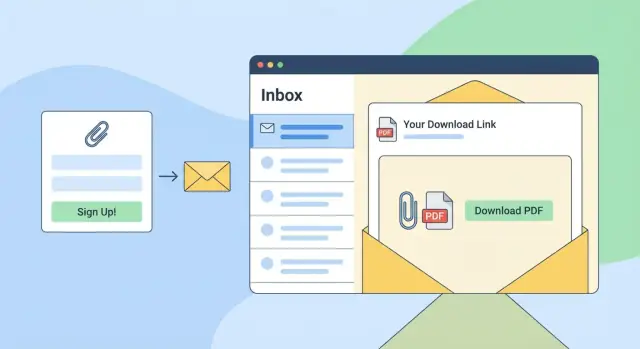
What “Auto-Deliver via Email” Means (and Why It Works)
“Auto-deliver via email” means a person requests your free resource (your lead magnet), and your email tool automatically sends them a message with the download link or access details—without you manually replying, attaching files, or checking your inbox.
A lead magnet is simply a valuable freebie you exchange for an email address. It works because it gives someone a quick win and a clear next step: they get something useful right away, and you earn permission to keep the conversation going.
Why instant delivery matters
Speed is the difference between “nice idea” and “actually used.” If someone has to wait hours (or hunt for a confirmation email that never arrives), excitement drops and downloads don’t happen.
Auto-delivery creates:
- Immediate reward: People feel they made a good choice.
- More trust: You do what you promised, quickly.
- Higher engagement: Your first email is opened more often when it contains the thing they wanted.
Common lead magnet formats that convert
You don’t need a 40-page ebook. Simple formats often perform better because they’re easy to consume:
- Checklist: “10-point pre-launch checklist”
- Template: “Editable outreach email templates”
- Short guide: “Beginner’s guide to pricing”
- Mini-course (email lessons): “5 days to set up your first funnel”
- Swipe file: “20 proven subject lines for service businesses”
What you’ll build in this guide (and who it’s for)
This guide is for non-technical marketers, creators, coaches, and small business owners who want a simple system that works.
By the end, you’ll have a clear plan for:
- choosing a lead magnet people actually want,
- collecting sign-ups with an opt-in form,
- automatically sending the first delivery email,
- and setting expectations (so subscribers know what happens next).
Pick the Right Lead Magnet (Simple Options That Convert)
A lead magnet works best when it delivers one clear, immediate win. If the download tries to solve everything, it often gets ignored (and even if someone downloads it, they won’t use it).
Start with one outcome
Choose a single result your reader can achieve quickly—ideally in 10–20 minutes. Think: “get the first draft done,” “choose the right option,” or “avoid the common mistake.”
Keep it short on purpose. A lead magnet is not a full course; it’s a fast, confidence-building step that makes the next step with you feel obvious.
Match the magnet to where it’s offered (high intent)
Conversions jump when the download matches the page’s purpose.
- On a pricing page, offer a “Plan + cost estimator” worksheet.
- On a service page, offer a “Readiness checklist” for that service.
- On a blog post, offer a template that helps apply the post immediately.
If the offer feels random compared to the page, people hesitate.
Name it with a benefit-first title
Lead with the result, not the format:
- “Write a 5‑Email Welcome Sequence (Fill‑In Template)”
- “GDPR-Friendly Consent Checklist (1 Page)”
Increase perceived value with a preview
Add a simple cover or preview mockup (even a clean PDF first-page screenshot) near the opt-in. It helps people understand what they’ll get and makes the download feel more “real” without adding complexity.
Plan the Delivery Flow Before You Build Anything
Before you touch a form builder or write a single email, decide exactly how the download will move from “someone is interested” to “they have the file.” A clear plan prevents broken links, missed subscribers, and confusing experiences.
The basic flow (keep it simple)
At its core, auto-delivery is just a short chain:
opt-in form → add subscriber to a list and/or apply a tag → send an email → subscriber clicks a download link
That’s it. The details (where you store the file, how you confirm consent, and when the email sends) can change later, but the chain should stay straightforward.
If you’re building the landing page and workflow from scratch, a vibe-coding tool like Koder.ai can help you prototype the form, success page, and “what happens next” flow quickly—then export the source code when you’re ready to plug it into your email provider.
Single opt-in vs. double opt-in
Single opt-in means someone submits the form and immediately gets the delivery email.
- Pros: fastest experience; usually higher conversion rate
- Cons: more fake or mistyped emails; potentially lower list quality
Double opt-in means they submit the form, then confirm via a link in a confirmation email. Only after confirming do they receive the download (or get redirected to it).
- Pros: cleaner list; stronger proof of consent (helpful for GDPR consent and deliverability)
- Cons: extra step can reduce sign-ups
If compliance and list quality matter most, choose double opt-in. If speed and volume matter most, single opt-in may fit better.
When do you deliver the download?
Decide whether the link appears:
- In the first email (common for single opt-in)
- After confirmation (common for double opt-in)
A good compromise: confirmation email first, then a “Here’s your download” email right after they confirm.
Timing: immediate vs. short delay
For lead magnets, immediate sending usually wins—people want the file right now. Use a short delay (5–15 minutes) only if you need time for internal checks, tagging, or to avoid competing with other welcome emails.
Create the Opt-In Form and Landing Page Copy
Your opt-in form and landing page have one job: make the “yes” feel obvious. People won’t read a long explanation before giving you their email—so your copy needs to be clear, specific, and reassuring.
Keep the form minimal
Ask for the minimum you truly need.
- Email required (always)
- Name optional (only include it if you’ll actually use it in your welcome email)
Fewer fields usually means more sign-ups. If you want to personalize later, you can collect extra details after they’ve received the download.
Write a clear promise near the button
The strongest micro-copy is right where the decision happens—above or next to the button. Be explicit about what they’ll receive and how fast.
Examples:
- “Send me the checklist (PDF) now”
- “Email me the 10-minute template pack”
- “Get the free guide in my inbox”
If the lead magnet has a specific outcome, name it: “Get the 7-step budget plan” beats “Download now.”
Choose the best placement for your offer
Where the form lives affects both volume and quality of leads.
- Embedded form (inside a blog post): best when the lead magnet matches what they’re already reading.
- Popup: best for capturing attention, but keep timing reasonable and make the offer highly relevant.
- Dedicated landing page: best for sharing in social posts, bios, ads, partnerships, and your email signature.
If you’re starting simple, a dedicated landing page plus an embedded form in related posts is an easy, reliable combo.
Add consent language when needed
If you’ll send ongoing marketing emails (not just the file delivery), say so. Keep it plain-language and include a link to your privacy policy.
Example:
“By signing up, you’ll receive the download and occasional emails with tips. Unsubscribe anytime. See /privacy.”
This helps with GDPR consent expectations and sets the right tone from the start.
Make the “success” message do real work
After they submit the form, don’t just say “Thanks.” Tell them exactly what to do next.
A good success message:
- confirms what they requested
- tells them to check their inbox
- mentions “spam/promotions” tabs if appropriate
- sets expectations if you use double opt-in (“Confirm your email to receive the download”)
When the page, form, and micro-copy agree on what happens next, your email delivery and download automation feel effortless—and more people actually complete the flow.
Host Your Download File the Reliable Way
If your lead magnet is “auto-delivered,” the delivery is only as dependable as the file link behind it. A broken URL, a renamed file, or a flaky host quickly turns a good first impression into a support headache.
Choose a hosting option that won’t break
You have a few simple ways to host a downloadable file:
- Direct file link (a stable URL that points to the file)
- Hosted file page (a simple page with a download button)
- Cloud storage link (Google Drive/Dropbox-style sharing)
- Gated download page (a “thanks” page with the download after signup)
For most small businesses, a hosted file page or gated download page is the easiest to manage long-term because you can update the file behind the button without changing the email copy.
Don’t attach large files to emails
Avoid sending the file as an attachment—especially PDFs and slide decks. Attachments can trigger spam filters, fail on mobile, and get stripped by some email providers. Instead, send a clean, obvious link to the download.
Make the link stable and the filename recognizable
Use a stable URL that you can keep the same for months. Also name the file like a real product, not a mystery download:
- Good:
2025-home-budget-template.xlsx - Not great:
final_v7_revised(2).xlsx
If you expect to update versions, consider a “latest” filename (e.g., budget-template-latest.xlsx) so old emails still work.
Be careful with link expiration
Expiring links can reduce sharing, but they often frustrate real subscribers who search their inbox later. Only add expiration if you truly need it—and if you do, make the time window generous.
Add a simple backup
Include one line under the download button/link:
“If you can’t access the file, reply to this email and I’ll help.”
That single sentence can save conversions (and goodwill) when anything goes wrong.
Write the Auto-Delivery Email (With Copy Templates)
Your auto-delivery email has one job: get people to the download quickly and confidently. Keep it short, skimmable, and unmistakably about the thing they just requested.
Subject line templates (steal these)
Use a subject that matches what the subscriber expects right after opting in:
- Your [Lead Magnet Name] is inside
- Here’s your [Lead Magnet Name]
- Download: [Lead Magnet Name]
- Your copy of [Lead Magnet Name] (link)
Tip: If your lead magnet name is long, shorten it for the subject and use the full title inside the email.
A simple email body structure that works
Use this flow: greet → deliver link → quick instructions → next step.
1) Greet (1 line)
Use their first name if you have it, but don’t stress if you don’t.
2) Deliver the link immediately (above the fold)
Make it obvious and easy to click. Include both a button and a plain-text link (some email clients block buttons, and some people prefer copying a URL).
3) Quick instructions (2–3 lines)
Tell them what will happen after they click (PDF download, Google Drive file, etc.), and what to do if they have issues.
4) Next step (one clear action)
Invite a small follow-up action that supports your goal: reply with a question, visit a related page, or watch a short tutorial. Keep it optional—this email is primarily delivery.
Copy template: “Your lead magnet is inside”
Subject: Your [Lead Magnet Name] is inside
Hi [First Name],
Here’s your download:
If the button doesn’t work, copy and paste this link into your browser:
/your-link
Quick note: It’s a [PDF/Google Doc/ZIP] and should open in a new tab. If you don’t see it within a few seconds, try a different browser or reply to this email and I’ll help.
Next step (optional): Reply and tell me your #1 goal with [topic]—I read every response.
Thanks,
[Your Name]
Unsubscribe: [link]
[Business name + address/contact info if applicable]
Set expectations for future emails (so people don’t feel tricked)
Add one sentence that tells them what else you’ll send and how often. This reduces spam complaints and increases trust.
Example:
“Over the next couple of weeks, I’ll send 1–2 emails per week with practical tips on [topic]. You can unsubscribe anytime.”
Don’t forget required footer items
At minimum, include:
- An unsubscribe link
- Your business/creator identity (and business address/info if required by your email provider or local rules)
If you collect subscribers in regions that require it, make sure your sign-up process captures appropriate consent (for example, GDPR consent) and that your email content matches what you promised on the opt-in page.
Set Up the Automation: Trigger, Tags, and First Send
Once your form and email are ready, the “auto-delivery” magic is simply an automation that reacts to a signup and sends the right email every time.
1) Create a dedicated list or segment
Start by deciding where these subscribers should live.
If you’re early-stage, one main list plus segments is easiest. Create a segment (or group) like “Lead Magnet: Download Signups” so you can:
- keep reporting clean (how many subscribers came from downloads)
- avoid sending unrelated campaigns to people who only wanted the freebie
2) Apply a specific tag for the magnet
Tags are what make your setup scalable.
Use a clear naming pattern, such as:
LM - Checklist - Home BuyingLM - Template - Budget Spreadsheet
This tag lets you personalize emails (“Here’s your Budget Spreadsheet…”) and prevents confusion when you eventually have multiple lead magnets.
3) Build the automation (trigger → tag → email)
Create a new automation with the trigger set to form submission.
If you use double opt-in, set the trigger to confirmation instead (so only confirmed subscribers get the file). This is cleaner for deliverability and helps with GDPR consent record-keeping.
A simple flow looks like this:
- Trigger: Form submitted (or Confirmed)
- Action: Add tag
LM - … - Action: Send email “Your download is ready”
- Optional: Start a short follow-up sequence (2–3 emails over a week)
If you’re also building the web experience around your lead magnet (landing page + thank-you page + basic tracking), Koder.ai can be useful for shipping a small React-based flow quickly, with snapshots and rollback while you iterate—then deploying when you’re ready.
4) Test the edge cases (so it doesn’t break)
Before you drive traffic, run quick real-world tests:
- Existing subscriber: Do they still get the delivery email?
- Resubscribe: If someone opts in again, do they get it again (or are they blocked)?
- Typos: Submit a fake email, then a corrected one—does the correct address receive the download?
If your platform supports it, add a condition like “If tag already exists → don’t re-enter automation” to avoid accidental loops.
Test Everything in 15 Minutes (Checklist)
Before you send traffic to your opt-in page, do one quick “real-world” test pass. You’re not testing features—you’re testing the exact experience a new subscriber will have.
1) Run 3–5 test signups (different inboxes)
Use at least: Gmail, Outlook/Hotmail, and iCloud (or Yahoo). If you can, also test a work email address (some filters are stricter).
What to look for:
- Does the confirmation email arrive (if you use double opt-in)?
- Does the delivery email arrive within a minute or two?
- Does the subject line clearly match what you promised?
2) Check inbox placement and deliverability basics
Open each email and confirm:
- It lands in the inbox (not Promotions/Spam—note where it lands)
- The sender name is recognizable
- The “from” address looks trustworthy (not a random no-reply domain you don’t use elsewhere)
3) Click every link (especially the download)
From desktop and mobile:
- Download link opens correctly
- File downloads without requiring extra permissions
- Any “backup” link works too (if you include one)
- Thank-you page links (if used) go where they should
4) Mobile formatting sanity check
On your phone, confirm:
- Text is readable without zooming
- The main button/link is obvious and easy to tap
- The email doesn’t look “broken” (weird spacing, giant images, tiny fonts)
5) Verify tagging/segmentation is consistent
After each test signup, check your email tool:
- The contact is added to the correct list/audience
- The right tag/segment is applied every time
- The automation triggered only once (no duplicate sends)
6) Unsubscribe and compliance check
Click unsubscribe in the delivery email:
- The link works
- The user is actually unsubscribed
- Unsubscribing doesn’t cause errors for future automations (it shouldn’t)
7) Set up a simple “resend link” process
Create one saved reply (or an automated email) for support requests:
- Ask for the signup email address
- Confirm they’re subscribed
- Resend the delivery email or share a time-limited link
Done right, this 15-minute test prevents most “I didn’t get it” headaches later.
Measure Performance and Improve Conversions
You don’t need a complicated dashboard to know whether your lead magnet is working. Track a few numbers consistently, then make small changes one at a time.
The 3 metrics that tell the truth
Start with these:
- Form conversion rate: people who submit the form ÷ people who view the landing page. If this is low, your headline, offer, or form friction is the issue.
- Email open rate (delivery email): if opens are low, your subject line (or sender name) needs attention.
- Link clicks: if opens are fine but clicks are low, your email copy and button/link placement need improvement.
Add UTMs to track what happens next
If your delivery email includes a “next step” (like a related post, a consult page, or a product trial), add UTM parameters so you can see what the lead magnet drives in your analytics.
Example:
- /blog/your-related-post?utm_source=leadmagnet&utm_medium=email&utm_campaign=auto_delivery
Keep UTMs for next steps; your actual download link usually doesn’t need them.
Simple A/B tests that move the needle
Run one test at a time for at least a few hundred sends:
- Headline on the landing page (benefit-first vs. curiosity-first)
- Button text (“Get the checklist” vs. “Send me the guide”)
- Subject line for the delivery email (clear and direct vs. specific outcome)
Improve conversions with a small post-delivery CTA
After the download link, add a short, helpful call to action like: “Want the next step? Read this: /blog”. Keep it optional and low-pressure.
Set a quarterly refresh reminder
Put a recurring calendar reminder to review the lead magnet every 3 months:
- Update screenshots, stats, and examples
- Fix broken links
- Tighten the first paragraph on the landing page
Small, regular improvements compound—and your automation keeps benefiting without extra work.
Common Mistakes (and Simple Fixes)
Even a great lead magnet can feel broken if the delivery experience is messy. Here are the most common issues that reduce sign-ups (or increase support emails), plus quick fixes you can apply today.
1) Broken links or hard-to-find downloads
Mistake: The email link goes to a 404, a permission error, or a confusing folder.
Simple fix: Use one stable download URL and keep it consistent. Put the download link near the top of the email and repeat it once near the bottom. If you update the file, replace it at the same location (or keep a redirect).
2) Asking for too much info on the form
Mistake: Name, company, role, phone number… and your conversion rate drops.
Simple fix: Start with email only (or email + first name). You can collect more details later through a short follow-up question or a preference center.
3) Delivering the wrong file/version
Mistake: People receive an outdated PDF, the draft version, or the wrong language.
Simple fix: Create a simple naming system (e.g., lead-magnet-v3.pdf) and a single “source of truth” checklist: file name, last updated date, and the exact link used in the email. Update both together.
4) No clear consent language or privacy link
Mistake: The form doesn’t explain what subscribers will receive, or it hides consent details.
Simple fix: Add one plain sentence under the form: what you’ll send and how often. Include a privacy link such as /privacy-policy. If you use double opt-in, say so.
5) Overpromising and underdelivering
Mistake: The landing page promises “everything you need,” but the download is thin.
Simple fix: Make the promise specific (one clear outcome) and ensure the first page of the download delivers immediate value—checklist, template, or a quick win in 5 minutes.
Next Steps: Turn One Lead Magnet into a Growth System
Your first auto-delivered download is the starting line, not the finish. Once the delivery works reliably, you can turn that single lead magnet into a repeatable engine that grows your list and moves subscribers toward becoming customers—without adding complexity.
Add a short welcome sequence (3–5 emails)
After the delivery email, schedule a simple sequence that helps the subscriber get value quickly.
Email ideas that work well:
- Email 1 (immediately after delivery): “Here’s your download” + one sentence on what to do first.
- Email 2 (day 2): A quick win tip that uses the download.
- Email 3 (day 4): A common mistake + how to avoid it.
- Email 4 (day 6): A short story/case example.
- Email 5 (day 8): “Want help implementing this?” and point to the next step.
Offer the next step without pressure
Include one low-friction link in the sequence to a relevant page—without turning every email into a pitch. For example: “If you’d like to see how we support this end-to-end, you can check details here: /pricing.”
Keep the tone helpful: the download is the main promise; the link is optional.
Personalize based on topic or tag
If your form applies a tag (e.g., “Magnet: Checklist”), use it to tailor what people receive next. Personalization can be as simple as:
- A subject line that references the topic
- Examples that match the subscriber’s goal
- A different call-to-action depending on the magnet
Even lightweight personalization improves relevance and replies.
Create multiple magnets for different routes
One magnet rarely fits everyone. Build 2–3 magnets aimed at distinct audiences (beginners vs. advanced, different roles, different problems). Each magnet can feed a slightly different welcome sequence and CTA, so subscribers enter the path that matches what they actually care about.
Document the process so it’s repeatable
Write a one-page checklist for your next campaign: file naming, hosting link, form fields, consent language, tags, email templates, test steps, and where results are tracked. That documentation turns a one-time setup into a system you can reuse anytime you launch a new lead magnet.
FAQ
What does “auto-deliver via email” mean for a lead magnet?
“Auto-deliver via email” means your email platform sends a delivery message automatically right after someone opts in.
The subscriber gets a download link or access instructions without you manually replying, attaching files, or sending one-off emails.
Why does instant email delivery improve lead magnet results?
Because timing is everything: people are most motivated right after they opt in.
Instant delivery typically improves:
- Opens (the email contains the thing they want)
- Trust (you deliver what you promised)
- Downloads and usage (less waiting, less drop-off)
What are the simplest lead magnet formats that still convert well?
Start with one quick, clear outcome someone can get in 10–20 minutes.
Good options include:
- Checklists (reduce uncertainty)
- Templates (save time)
- Swipe files/examples (show “what good looks like”)
- Short guides (help them start)
- Worksheets/calculators (help decisions)
If you’re unsure, a template is often the fastest to build and the most “immediately usable.”
How should I name my lead magnet so more people opt in?
Name it by the benefit first, then the format.
Examples:
- “Write a 5‑Email Welcome Sequence (Fill‑In Template)”
- “GDPR-Friendly Consent Checklist (1 Page)”
Avoid vague titles like “Free Download.” Make the result obvious and specific.
What’s the basic automation flow for email delivery?
Keep the flow simple:
- Opt-in form submission
- Add subscriber to a list and/or apply a tag
- Send delivery email automatically
- Subscriber clicks the download link
Plan this before building so you don’t end up with broken links, wrong tags, or confusing “what happens next?” messaging.
Should I use single opt-in or double opt-in for lead magnets?
Single opt-in sends the delivery email immediately after form submission.
- Pros: faster experience, usually higher conversion
- Cons: more typos/fake emails, potentially lower list quality
Double opt-in requires email confirmation before delivery (or before joining your list).
- Pros: cleaner list, stronger proof of consent
- Cons: extra step reduces signups
If compliance and list quality matter most, choose double opt-in. If speed is the priority, single opt-in may fit better.
Should I attach the lead magnet file to the email or use a link?
Generally, don’t attach files (especially PDFs, ZIPs, slide decks).
Attachments can:
- Trigger spam filters
- Fail on mobile
- Get stripped by some email providers
Instead, include a clear download button plus a plain-text link as a backup.
What’s the most reliable way to host and share the download link?
Use a stable hosting approach you can maintain long-term:
- A hosted file page with a download button
- A gated thank-you/download page
These make updates easier because you can replace the file behind the button without changing old email copy.
Also use a recognizable filename (e.g., budget-template-latest.xlsx) so subscribers trust what they’re downloading.
What should I include in the auto-delivery email to maximize clicks?
Keep it short and delivery-focused:
- Put the download link immediately near the top
- Add 1–2 lines on what happens when they click
- Include a quick fallback: “If you can’t access it, reply and I’ll help”
- Set expectations for future emails (frequency + topic)
Subject lines that work well:
- “Here’s your [Lead Magnet Name]”
- “Download: [Lead Magnet Name]”
How do I test my lead magnet delivery so subscribers don’t get stuck?
Run a quick real-world test before sending traffic:
- Submit 3–5 test signups using different inboxes (Gmail, Outlook, iCloud/Yahoo)
- Confirm the email arrives quickly and lands in the right folder
- Click every link on desktop and mobile
- Verify the subscriber got the correct tag/segment
- Test unsubscribe to ensure it works
Also decide how you’ll handle “I didn’t get it” requests (a saved reply + a way to resend the link).