Dec 04, 2025·8 min
Lost and Found Board for Gyms and Buildings: Simple Setup
Set up a lost and found board that staff can run in minutes: post photos, track where items are stored, and mark items claimed when returned.
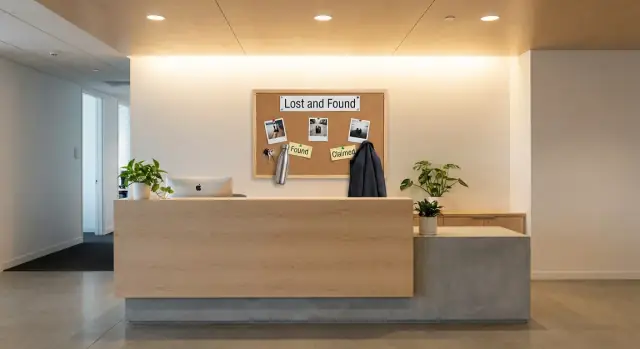
Set up a lost and found board that staff can run in minutes: post photos, track where items are stored, and mark items claimed when returned.
If you manage a front desk, you know how fast mystery items stack up. Water bottles get left by treadmills, keys slip out in locker rooms, and package rooms collect unclaimed deliveries. Without one clear way to log them, the pile turns into a daily guessing game.
Most places start with good intentions. Someone puts an item behind the counter. Another staff member moves it to a drawer. Later it ends up in a box to sort. After that, the same problems show up again and again: items get described differently, similar items get mixed up, the same item gets logged twice, and staff waste time searching. When answers change by shift, customers stop trusting the process.
A simple lost and found board fixes this by turning memory into a shared record. When each found item is posted with a clear photo and a few consistent details, it’s easier to confirm what you have, when it was found, and where it’s stored. Photos reduce disputes because they capture small identifiers like stickers, brand marks, a unique keychain, or a scuff on a case. That makes it harder for someone to claim an item that isn’t theirs and easier for the real owner to spot it quickly.
"Claimed" should mean more than "someone said it’s theirs." It should mean the item was returned and the handoff is complete. A solid habit is to mark claimed only after one quick check that matches the post, like unlocking the phone, describing a keychain, or matching a jacket’s size and brand.
Over time, the board also reveals patterns. You’ll see which areas create the most lost items, which helps you adjust signage or routines and reduce the pile in the first place.
A good post helps the owner recognize the item fast and helps staff return it without guessing. Whether you use a paper board or a digital lost and found board, the key is using the same format every time.
Start with an item ID. It becomes the anchor for everything: the storage label, follow-up questions, and the final return record. A simple format like GYM-041 (or BLDG-041) works well. Put the same ID on a small tag or sticker on the item bag.
At minimum, capture:
Location and time should be specific. "Upstairs" is vague, but "2nd floor treadmill row, near treadmill 7" saves time. "Yesterday" is hard to verify, but "Jan 21, 6:10 pm" helps staff check cameras or class schedules if needed.
Keep details useful, not excessive. Add identifiers people can confirm without you giving away personal info. For example, instead of posting a full name on an ID card, write: "Wallet with ID inside (name withheld), black stitching, small star keychain."
If an item is a set, log it as one post but list what’s included. Earbuds are a common issue: note "left only," "right only," or "pair in case." Do the same for keys (count them), keychains (describe them), and gym gear bundles (shoes plus socks plus shaker).
If you add a photo, make sure it matches the written details and the item ID. A clear picture with the ID label in the frame prevents mix-ups when you have three similar water bottles in the bin.
A lost and found board should help people get their things back, not expose them. The simplest rule: post only what a stranger needs to recognize the item, and nothing that could identify or harm the owner.
When you log a found item with a photo, watch for personal details in the background and on the item itself. Avoid close-ups of name tags, address labels, medical info, membership numbers, car keys with a visible plate, or any document that shows a full name and date of birth. If the item has personal info printed on it, take a wider photo and cover or blur the sensitive part before posting.
Some items shouldn’t sit in an open bin or be shown clearly on the board. A simple approach is to use storage tiers:
For wallets and IDs, don’t post photos of contents. For phones, laptops, and earbuds, avoid showing lock screens, serial numbers, or pairing names that could reveal the owner.
Be friendly, but require a quick check for anything valuable or sensitive. Proof can be simple: a unique detail (scratch, sticker, case color, keychain), a matching purchase receipt or photo, unlocking the phone, connecting to paired earbuds, or describing wallet contents without staff reading them out.
Set a clear retention window and stick to it. Many places use 30 to 90 days depending on local rules and storage space. Decide ahead of time what happens after that (donation, recycling, secure disposal) and keep a basic date record so the process stays fair.
A good system is less about fancy tools and more about consistency. If you set one intake point, use a simple ID, and keep one place to post, your lost and found board becomes something people trust.
Pick one place where found items must be turned in (front desk, concierge, or security). This avoids the "it’s in the staff room" confusion.
Assign ownership for each shift (for example, the front desk lead). That person’s job is logging and returning items, not investigating claims.
Keep it simple and physical-world friendly: an item ID plus a storage location anyone can find.
Use a clear ID format (like 2026-01-21-03), define storage zones (A, B, C shelves or numbered bins), and label each item with ID plus zone. One rule matters most: items never move zones without updating the log.
Then staff can answer fast: "It’s 2026-01-21-03 in Bin B2."
The best moment to capture details is when the item is turned in. Record item type, brand and color, where it was found, and time.
For photos, take one clear wide shot plus a close-up of any unique detail (case color, keychain, scuff, initials). Avoid photographing personal data like addresses or full names on cards.
Choose one place for posts: a physical board at the desk or one shared digital board. Don’t split posts across texts, paper notes, and staff chat.
Define who can mark items claimed (usually the shift owner or manager) and when (only after a quick verification question).
Example: someone reports a black jacket and earbuds. Staff asks them to describe the earbud case color and what’s in the jacket pocket. Once it matches, staff hands it over, marks the item as claimed, and notes the pickup time. This keeps the record clean and prevents double-claims.
A good photo turns a "black water bottle" report into a fast match. Consistency matters more than camera skills. If every item is shot the same way, staff can scan posts quickly and members can recognize their things in seconds.
Pick one spot and stick to it: a plain wall, a counter, or a small table with a neutral background. Use the same angle and lighting each time so similar items don’t look different.
Aim for 2 to 3 photos per item:
Before you snap the photo, remove clutter. A "found shoes" photo with a locker tag in the background creates confusion and privacy risk.
Size helps people identify things. Use a safe reference like a plain coin, a blank key tag, or a generic card-sized object. Avoid staff badges, membership cards, or anything with numbers.
Don’t photograph IDs, credit cards, prescriptions, address labels, or any paperwork with contact details. If you find a wallet, photograph only the outside and keep any content notes off the public board.
Captions matter as much as the image. Use a short, searchable pattern such as: "Blue Hydro flask, dent on bottom, found near treadmill, Tue 6:10 pm."
Example: you find black earbuds in a case. Take one wide shot of the case closed, one close-up of the brand logo, and one shot open to show the ear tips. Do not photograph any pairing name shown on a screen or any serial number label.
A lost and found board only works if everyone can tell at a glance what’s waiting and what’s resolved. "Claimed" should mean the item was returned, the return was recorded, and the status is obvious.
Treat an item as claimed when you can answer three questions: when was it returned, who handled the return, and what proof was used. Proof doesn’t need to be intense, just reasonable for the item.
A simple claimed record includes the date and time returned, staff initials (or role), how ownership was confirmed, and a minimal identifier for the claimant (first name plus last initial, or member ID). Avoid storing phone numbers, full addresses, or full names unless your policy requires it.
After it’s claimed, make the status impossible to miss. On a physical board, stamp or mark "CLAIMED" and move it to a separate Resolved column. On a digital board, change the status and add return details in the same entry so the history stays together.
You want enough detail to handle disputes, but not so much that you store sensitive information. For high-value items (wallets, keys, phones), it can help to note a partial identifier (like the last 2 to 3 digits of a visible key tag number) instead of copying everything.
If the wrong person claims an item, act quickly and keep it calm. Pause further claims for that entry and mark it "Disputed." Review what proof was used and compare it to the photo notes (distinctive stickers, damage marks, case color). If ownership still isn’t clear, escalate to a manager and ask for stronger proof, like unlocking the phone.
For archiving, use a clear rule so staff don’t guess: archive claimed items on a regular schedule (weekly works for many desks) and remove unclaimed items after the posted holding period. Keep dispute records until resolved.
Most lost and found problems aren’t about bad intent. They happen because details are missing, routines break, or storage turns into a mystery box.
"Black jacket" could mean five different items in one evening. Include the details that help someone recognize it without trying it on: brand (if visible), size, standout marks, and where it was found.
If you only have time for one line, use: color + type + unique detail + location found.
The fastest way to lose an item twice is to toss it in a drawer and promise to post it later. Later gets busy. Make logging part of the handoff moment.
A simple rule: if you can carry it, you can log it before you set it down.
When items are stored wherever there’s space, staff start hunting and members lose trust. Pick one storage area and label it clearly. If it gets full, that’s a signal to tighten pickup deadlines or add a second labeled bin.
Photos help, but they can also expose private details. Avoid close-ups of IDs, passports, membership cards, phone lock screens with names or notifications, keys with address tags, medical items with labels, and paperwork with contact details.
Take photos that show the item, not the owner.
If one staff member logs everything and another just puts items behind the desk, your system becomes random. Keep a short checklist near the storage area and train everyone the same way.
A practical example: a member reports missing earbuds. If the post says "white earbuds," they might claim the wrong pair. If it says "white earbuds in a scuffed black case, small sticker on lid, found near treadmill 6," the right owner can identify it quickly.
If consistency is hard with a paper board, it may be time to move the same steps into a simple app-based log so every shift follows one flow.
A lost and found board only works if it stays accurate. A 2 to 3 minute check at shift handover keeps it tidy without turning staff into detectives.
Scan new posts from the last shift. Each entry should have an item ID and a storage location that matches where the item actually sits (for example: "Front desk drawer B" or "Locker room bin 2"). If the item isn’t there, fix the location right away or move the item to the correct bin and update the post.
A short checklist is enough:
Do one quick photo sanity check. If a photo is blurry or only shows a close-up, retake it. A useful photo answers: what is it, what color or brand, and what makes it unique.
Example: you see a post for "Black earbuds" with no case shown and no location listed. Before the rush starts, update it to "LF-042, black earbuds in gray case, stored in Front desk drawer A," add a clearer photo, and place it in the labeled drawer. When the owner comes later, the handoff takes 20 seconds instead of 5 minutes.
Remove anything that has aged out. Keeping expired items on the board creates false hope and extra questions, and it makes recent items harder to find.
After a busy evening class, a member comes to the front desk and says their black jacket is missing. They aren’t sure if they left it in the studio or the locker room. The staff member takes a quick description (brand, size, special features) and explains how found items are posted.
Twenty minutes later, a staff member checks the locker room and finds a black jacket on a bench. In the same area, they also find earbuds in a small charging case. The jacket looks common, so guessing would be risky.
They create two separate posts on the lost and found board. Each post includes clear photos and practical notes, without naming the person who reported the missing item.
Each entry includes: the time found, the exact location (locker room, bench near lockers 12 to 18), a simple description (color, brand if visible, size), and where it’s stored (front desk drawer B). The post also says how to claim it: describe a unique detail, not just "it’s mine."
A little later, someone comes to claim the jacket. Instead of matching an ID to a name, staff asks the person to describe a unique mark. The owner mentions a small tear inside the left pocket seam and a key clip stitched into the lining. Staff checks and confirms both.
For the earbuds, the claimant describes the case color, the initials on a tiny sticker, and the missing left ear tip. That combination is specific enough to feel confident.
Once each item is returned, staff marks it claimed and records the return time and initials. That final step prevents the most common confusion: the next shift thinking the item is still in the drawer.
A whiteboard and a shoebox can work until they don’t. The first sign you’ve outgrown them is repetition: staff answer the same questions all day, items get described differently by each person, and "I think it was returned" becomes normal.
Volume matters too. If you regularly hold more than a handful of items, or you manage multiple entrances (front desk, pool, studio), a single physical board breaks down. People stop checking it when it looks messy.
A basic app can reduce the small mistakes that cause most problems: duplicate posts, missing dates, no storage location, or a photo that never made it into the record. Useful upgrades are simple: search and filters (by date, location, item type), consistent tags, clear roles (who can post, who can mark claimed), automatic timestamps, and a short claim checklist.
If you want to build a simple internal tool quickly, Koder.ai can help you create a basic web-based lost and found board from a chat description, then iterate safely using features like planning mode, snapshots, and rollback while you test your workflow.
Keep the rollout small: run a one-week trial at one desk or one location, then review what staff actually used. After that, copy the same setup to other locations and keep the rules identical so people don’t have to relearn the process.
Use one item ID format everywhere and put the same ID on a physical tag. When someone asks about an item, staff can look up the ID and go straight to the labeled storage spot instead of guessing.
Photos show small identifiers that words miss, like a sticker, scuff, or unique keychain. That makes it easier for the real owner to recognize the item and reduces arguments over similar-looking items.
Keep it consistent: item ID, what it is with a few useful details, exactly where it was found, when it was found, and where it’s stored now. Add a short condition note if it matters, like “wet” or “cracked screen.”
Use a simple prefix plus a running number or a date-based ID, and never reuse IDs. The key is that the ID on the post must match the label on the item bag so anyone on any shift can confirm it’s the same item.
Don’t post anything that identifies the owner or could be misused, like full names on IDs, addresses, membership numbers, or medication labels. If the item contains personal info, photograph the outside only or take a wider shot that avoids readable details.
Lock up high-risk items and keep the public post minimal. For example, record that a wallet or phone was found, but don’t show contents, lock screens, serial numbers, or any pairing names that could reveal the owner.
Mark it claimed only after the handoff is complete and you’ve done one quick verification that matches the post. Good proof is something specific, like unlocking the phone, describing a unique mark, or correctly identifying what’s inside a pocket.
Set a clear holding period and follow it consistently, often 30 to 90 days depending on your space and local rules. Track the found date so staff can remove items fairly and stop expired posts from cluttering the board.
Do a fast check that new posts have an ID, a real storage location, and a clear photo that matches the description. Also confirm the item is actually in the labeled bin and update anything that was returned or moved.
Use one shared digital board instead of scattered notes, so every shift follows the same fields and status rules. If you want to build a basic internal tool quickly, Koder.ai can help you create a web-based lost and found board from a chat description and refine it with planning mode, snapshots, and rollback.