Jun 29, 2025·8 min
Members-Only Websites: A Simple Way to Protect Content
Learn how members-only websites protect pages, downloads, and videos with simple access rules, plus setup steps, best practices, and common mistakes to avoid.
Learn how members-only websites protect pages, downloads, and videos with simple access rules, plus setup steps, best practices, and common mistakes to avoid.
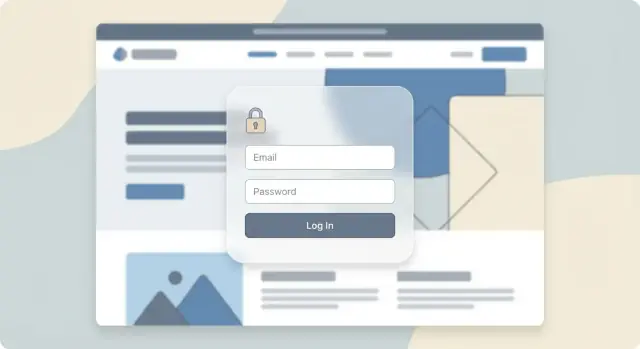
A members-only website is a site (or a section of a site) where visitors must log in to view certain pages, files, or features. Public content stays available to everyone, while “private” content is gated behind a user account and access rules.
At its core, members-only access is simply access control:
This is often simpler than complicated security setups because it relies on proven building blocks—accounts, permissions, and a clear “who can view what” structure—rather than custom workarounds.
Members-only areas show up in many practical scenarios:
A members-only website is not a guarantee that content can’t be copied. Members can still screenshot, download, or share information. Think of it as a way to protect content by controlling access, reducing casual sharing and keeping things organized—not as “perfect anti-piracy.”
It’s also not the same as putting your entire site behind a single shared password. A real membership site ties access to individual accounts, which makes managing permissions, upgrades, and cancellations much cleaner.
Putting content behind a login is less about “locking things down” and more about deciding who gets access, when, and why. A members-only area can turn your website from a public brochure into a controlled space for learning, collaboration, or paid value.
If you publish premium articles, tutorials, templates, swipe files, or downloads, a login helps you reserve the best material for members. That can support a subscription, a one-time purchase, or even a free sign-up where the “price” is an email address and ongoing engagement.
Public pages are easy to copy, mirror, and redistribute. Requiring a website login won’t stop a determined thief, but it does reduce anonymous access and prevents most “drive-by” scraping and indexing of private content.
A subscriber portal (or client portal) is a clean way to deliver files and updates:
That’s often safer—and easier to manage—than emailing attachments back and forth.
Content gating also lets you offer benefits that are hard to replicate on public pages: member-only Q&As, office hours, a resource library, or a “vault” of past sessions. The login becomes part of the product—clear proof there’s something extra on the other side.
Used well, access control supports trust: visitors know what’s free, members know what they’re paying for, and you stay in control of your private content.
Not every members-only website is a full “membership site” with a paywall and complex billing. Most successful setups fall into a few simple models, each with a clear reason for putting content behind a website login.
This is the classic paywall approach: people pay to access private content. You might charge a monthly subscription (steady revenue) or a one-time payment (simple to manage). It works well for premium courses, expert libraries, downloadable templates, or a subscriber portal that delivers ongoing value.
A good fit when your protected content is the product.
Here, content gating is used to exchange value for an email address and basic profile—without charging. Typical examples include onboarding resources, a community space, or “members get more” articles. Free accounts can also reduce support by giving customers a single place to find guides, FAQs, and updates.
A good fit when access control supports lead generation or customer success.
Invite-only members-only websites are common for internal teams, partners, clients, or beta users. Instead of public sign-ups, admins create accounts or send invites. This model is ideal when you need tight control over who can see private content, such as partner pricing, internal documentation, or client deliverables.
A good fit when membership is based on relationship, not marketing.
Tiering means different members see different content: basic vs pro vs enterprise. This can be done with multiple plans, user roles, or access groups. Tiered access is helpful when you want to protect content while still offering a “preview” level for new users.
A good fit when you offer multiple product levels and want the site to match them.
A members-only website can be simple, but it still relies on a few core building blocks. Get these right and you’ll avoid most “why can everyone see this?” or “why can’t paying members log in?” headaches.
You need a reliable way for people to identify themselves.
Email + password is the familiar default, but it adds friction (and password resets). Many sites reduce drop-off with magic links (a one-time sign-in link sent by email). If your audience is inside a company or school, SSO (single sign-on) can be even smoother—members sign in with Google/Microsoft/Okta instead of creating a new password.
Whatever you choose, make sure you can handle basics like email verification, password resets, and “log out everywhere” for compromised accounts.
Authentication answers “who are you?” Authorization answers “what are you allowed to see?”
Plan for roles or tiers (e.g., Free, Pro, Team) and map them to pages, posts, and downloads. Good access control is explicit: if a page is protected, it should always require the right role—no exceptions.
Protecting a page is one thing; protecting the PDF/video behind it is another.
Use delivery methods that don’t expose a permanent, shareable URL. Common approaches include expiring links, signed URLs, or serving downloads only after a permission check. This matters most for downloadable files and hosted video.
You’ll want a clear admin area to:
If you can’t answer “who has access to this right now?” in a minute, your tooling needs improvement.
A members-only website isn’t just “articles behind a login.” You can protect most content you publish—so long as you’re clear on what you’re protecting (viewing, downloading, or sharing) and how strict your access needs to be.
The simplest option is locking individual pages. This works well for premium blog posts, client-only documentation, onboarding guides, internal SOPs, or a subscriber portal knowledge base.
Page-level rules are also useful when only a handful of items are private, or when you want to mix public and private content in the same section without restructuring your site.
If you have a full “library” (courses, resources, templates, help docs), protecting an entire folder, category, or collection is easier to maintain. New pages added to that area inherit the same access rule, so you don’t have to remember to lock each one.
This approach is ideal for tiered memberships (e.g., Basic gets /resources, Pro gets /resources + /training).
Downloads are often the first thing people try to share, so it’s worth handling carefully. You can restrict access to:
Where possible, store files in a protected area and serve them only after login, rather than placing a public URL on a private page.
You can restrict video access by embedding videos only on members-only pages or using a video host that supports domain or token-based restrictions.
Realistic limit: if a member can watch a video, they can usually record their screen. Access control reduces casual sharing and keeps your library organized, but it can’t guarantee a video will never be copied.
These three options all “hide” content, but they’re very different in how access is granted, tracked, and revoked.
A members-only website uses individual logins (email + password, SSO, magic links, etc.) and rules that determine who can see what.
This is the best fit when you need:
If your content is a subscriber portal, training library, customer resources, or a paywall, user accounts are usually the right foundation.
Password protected pages are simpler: one password unlocks a page (or a section of your site). That simplicity is also the limitation.
Key trade-offs:
This works for low-risk gating like a temporary press page, a short-lived campaign, or a draft you want to keep out of search results.
“Anyone with the link can view” is convenient—but it’s weak for sensitive content.
Why private content shouldn’t rely on link-only access:
Use private links for low-stakes sharing (e.g., a preview), not for real content gating.
For internal dashboards or tools used from known networks, an IP allowlist can add a useful layer: only requests from approved IP ranges can reach the content.
It’s helpful, but rarely enough on its own—remote work, mobile networks, and VPNs make IPs change. Pair it with logins whenever possible.
If you’re dealing with compliance requirements (HIPAA, SOC 2, GDPR-sensitive workflows), client contracts, or highly confidential documents, you may need more than basic access control: SSO, MFA, detailed audit logs, least-privilege roles, and formal policies.
If you’re unsure, start with accounts (not shared passwords) and add stricter controls as risk increases.
Before you pick tools or start uploading files, decide exactly who should see what, and when. Clear access rules prevent messy migrations later (and awkward “Why can’t I see this?” support emails).
List your content and label each item as public, preview, or members-only.
Public content builds trust and helps people find you. Previews (a teaser video, a sample lesson, a short excerpt, a limited download) let visitors judge quality without giving everything away. Members-only content is the “real value” that requires a website login.
A simple guideline: if it helps people decide to join, keep it public or preview; if it delivers the main outcome, gate it.
Even if you start with one plan, write down your future tiers now. For example:
Then map tiers to content areas (not individual pages) so it’s easier to manage. Think in sections like “Course Hub,” “Template Vault,” “Replays,” or “Community.” This turns access control into a few clear rules instead of hundreds of exceptions.
Sketch the path a member takes:
Sign-up → welcome email → first login → onboarding checklist → first “win” → ongoing engagement → renewal.
Decide what members see on day one (a dashboard is ideal), what you’ll prompt them to do next, and how you’ll remind them to return.
Be explicit about edge cases:
Writing these rules down now keeps your membership site consistent and fair—and makes setup much faster later.
Setting up a members-only website is mostly about defining who can log in and what they can see. Here’s a high-level sequence you can follow regardless of platform.
Decide how people become members:
Make sure you collect only what you need at signup (usually name + email + password), and confirm emails if your platform supports it.
Most membership sites work better with simple tiers (for example: Free, Pro, Client). Create those roles first, then map access rules to them.
Protect the right assets:
Don’t leave the default experience untouched. Update:
If you have a pricing page, link to it using a relative URL like /pricing.
Create at least three test users (one per tier). Verify:
Document the ongoing basics: how to add/remove members, change tiers, reset passwords, upload protected files, and what to check after publishing new content. A one-page checklist prevents most “why can’t I access this?” support emails.
If your member area needs app-like UX—dashboards, role-based libraries, onboarding checklists, file delivery, and admin workflows—you don’t always have to choose between a rigid plugin and a months-long custom build.
Platforms like Koder.ai (a vibe-coding platform) let you describe the member portal you want in chat and generate a working web app quickly—typically with a React front end and a Go + PostgreSQL backend under the hood. It can be a practical option when you want true access control and a polished subscriber portal, plus the ability to export source code and iterate fast.
A members-only website can protect content, but friction during sign-up and login is where most people quit. Good UX makes content gating feel fair: visitors understand what they’ll get, and members can reach it quickly.
Ask for the minimum you truly need on day one—usually email + password (or even passwordless). Every extra field lowers completion rates.
If you need more details for billing or onboarding, collect them later inside the subscriber portal once the account is created.
When someone hits a protected page, don’t show a dead end.
Add a short message that answers three questions:
A simple call-to-action like “Log in” and “Create account” placed above the fold reduces confusion. If you have multiple access levels (e.g., free vs paywall), say which plan unlocks the page.
Forgotten passwords are a common source of support tickets on any membership site.
Provide:
If you use magic links, make the expiration time clear and provide a one-click “Send a new link” option.
Many users will sign up and log in on their phone. Make sure your website login, menus, and protected content work on small screens:
A good rule: after logging in, members should land on a clear starting point (dashboard, latest content, or library) instead of being dropped back onto a confusing marketing page.
A members-only website doesn’t need enterprise security to be safe—but it does need a few consistent habits. The goal is to protect your content and your members’ accounts without making login feel painful.
Start with authentication. If your platform supports it, consider passwordless login (magic links or one-time codes). It removes the “weak reused password” problem for many people.
If you use passwords, enforce basics:
Also add “speed bumps” against brute-force attempts: login rate limits, temporary lockouts after repeated failures, and CAPTCHA on suspicious activity.
HTTPS should be on for your entire site, not only the checkout or login page. Most hosts provide free TLS certificates—turn them on and redirect all traffic to HTTPS.
For admins and staff, follow the “least access” rule:
If your platform allows it, restrict admin access by IP, device, or SSO.
Members-only sites still get spam—especially through forms (contact, onboarding, community posts). Use form protections like reCAPTCHA/hCaptcha, email verification, and moderation queues for first-time posters.
If you run a subscriber portal with downloads, add rate limits on heavy endpoints and consider expiring download links to reduce automated scraping.
Decide upfront what you allow: one login per person, or team access? Put it in your terms and enforce it.
Practical signals to watch: many logins from different locations, repeated failed attempts, or unusually high downloads. When triggered, require a password reset, step-up verification, or temporary access pause.
A members-only website can be a clean way to protect content and run a membership site, but small setup decisions often create big problems later. Here are the mistakes that most often hurt sign-ups, support load, and trust—and the fixes that keep your content gating simple.
If every page is hidden behind a website login with no context, new visitors don’t know what they’d get. Instead, publish a short “public layer”: a teaser paragraph, a table of contents, sample lessons, or a short demo. Pair it with a clear message (“This is part of the subscriber portal”) and one call-to-action.
More tiers rarely means more revenue—it often means more hesitation. Keep your access control structure straightforward (usually 1–3 plans). Name tiers based on outcomes (“Starter”, “Pro”) rather than vague labels, and show exactly what changes between plans. If you must add complexity later, start with add-ons rather than new tiers.
Many people lock down pages but leave the real assets public: PDFs on a shared drive, videos with an open link, or downloads in a public folder. Audit where your private content lives and ensure those hosts support access rules, expiring links, or tokenized URLs. Otherwise, your paywall is just a signpost.
Most issues appear after billing events, not during launch. Test what happens when someone cancels, expires, gets refunded, upgrades, or changes role. Confirm the experience is graceful: clear messaging, easy renewal, and no accidental access to protected content.
Content gating reduces casual sharing, but it can’t stop screenshots. Set expectations in your terms, watermark sensitive downloads, and focus on making your protected content easier to use legitimately than to pirate—fresh updates, community, and searchable organization.
A members-only website isn’t “set it and forget it.” The simplest way to make it work long-term is to watch a few key numbers, listen to members, and make small, steady changes.
Start with a basic funnel:
If you have multiple plans, track these per tier—otherwise averages can hide problems.
Not all gated pages are equal. Monitor which protected posts, videos, downloads, or portal pages:
Those pages are telling you what people value—or what’s confusing. They’re prime candidates for better previews, clearer positioning, or an improved onboarding flow.
Collect member feedback in lightweight ways: a short “How’s it going?” email, a 1-minute in-portal survey, and a simple tag system in your help desk (billing, access, content requests). Patterns in support requests often reveal friction faster than analytics.
Try controlled tweaks like:
Record results for 2–4 weeks, then keep what works.
As you add content, periodically review who should see what. Rules that made sense with 10 items can feel messy at 100. A quarterly check keeps your access control clear—and your member experience consistent.
A members-only website uses individual user accounts (email/password, magic link, or SSO) plus permission rules to decide who can view specific pages, files, or features.
A password-protected page usually uses one shared password, which is easy to forward and hard to revoke for a single person.
It’s a good fit when your content or service is more valuable with controlled access, such as:
If you’re only hiding a temporary draft or a low-risk page, a shared password or private preview may be enough.
Start by labeling everything as public, preview, or members-only.
Then define roles/tiers (even if you only have one today) and map them to sections (e.g., /resources, /training, /replays) instead of managing dozens of one-off page exceptions.
Most setups fall into four patterns:
Pick the model that matches how you grant access and how often it changes (upgrades, cancellations, project end dates).
Plan for these fundamentals:
If you can’t quickly answer “who has access right now?”, improve your roles and admin workflow first.
Protecting the page isn’t always enough, because files can leak via direct URLs.
Practical approaches include:
After setup, test by logging out and trying to access the file link directly.
You can reduce casual sharing, but you can’t guarantee a member won’t copy content.
For video, common options are:
Realistically, if someone can watch a video, they can often screen-record it—so focus on access control, organization, and ongoing value.
At minimum, use:
These steps prevent most account abuse without making login feel painful.
Test with multiple accounts (one per tier) and include edge cases:
Catching these early prevents the most common “I paid but can’t access” support tickets.
Track a small set of signals that connect directly to outcomes:
Use what you learn to adjust previews, onboarding, and access rules—one change at a time.