

Minimal admin panel for solo D2C founders: what to ship
Define a minimal admin panel for solo D2C founders: the exact first screens, key fields and actions to ship now, plus what to postpone until order volume grows.
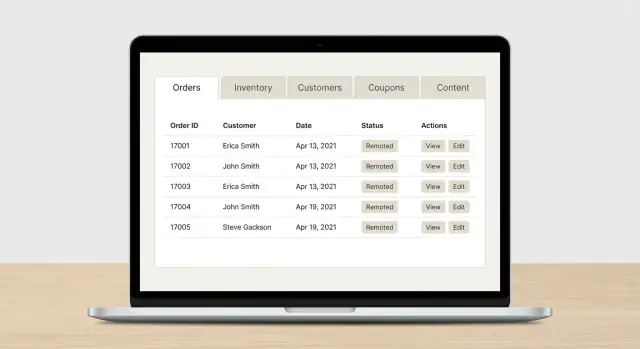
What a minimal admin panel must solve first
A solo D2C founder does not need a “full back office” on day one. You need a small set of screens you can trust every morning and during a support fire drill. The real job is simple: keep orders moving, keep stock accurate, and avoid mistakes that cost money or credibility.
A minimal admin panel is not “fewer features for the sake of it.” It is the smallest set of actions that prevents expensive problems. If a screen does not help you ship today’s orders, answer a customer, or avoid overselling, it is probably not part of v1.
The fastest way to define minimal is to focus on failure points. Your first release should make these hard to mess up:
- Missing or delayed fulfillment because order status is unclear
- Overselling because inventory is not updated or not visible
- Refunds and angry emails because customer details are scattered
- Promo chaos because coupons are inconsistent or hard to audit
- Site edits that require a developer for every tiny change
The audience here is you (or you plus one helper) doing ops between product, marketing, and support. That means the UI must favor speed and certainty over flexibility. Every screen should answer one question quickly: “What do I need to do next?” and every important action should take a few clicks, not a hunt.
The outcome you want is a first version you can ship fast and use daily without fear. Think of it as a reliable cockpit, not a control room.
A concrete example: you wake up to 18 new orders and 3 “where is my package?” messages. If your admin shows paid vs unfulfilled orders, current stock for the top sellers, and the customer’s last order in one place, you can clear the queue in minutes. If it does not, you will end up in spreadsheets and inbox threads.
If you are building this yourself, tools like Koder.ai can help you generate a working baseline quickly, then you can keep trimming until only the daily essentials remain.
Rules for deciding what to include in the first release
A minimal admin panel is not a smaller version of Shopify Admin. It is a set of screens that lets one person keep promises to customers every day: ship the right items, keep stock honest, and answer support fast.
Start by assigning one source of truth for each “thing”. If two screens can change the same number (like stock), you will eventually get mismatches and spend your evenings reconciling.
The 5 rules that keep v1 small and useful
- One owner per record: orders own order status, inventory owns stock count, customers own contact details.
- Fewer states beat smarter workflows: 4 order statuses that everyone understands is better than 12 that nobody trusts.
- Speed over completeness: the top actions should take under 10 seconds (search order, mark packed, adjust stock, resend receipt).
- Low data entry: reuse what you already have from the order (shipping address, purchased items, payment status) instead of retyping.
- Decide your “no” list now: if it is not needed for today’s shipping and support, it waits.
A simple way to test a new feature request: “Will this reduce a daily mistake, or just make reports look nicer?” If it does not prevent a real error (wrong item shipped, oversold size, missed customer message), postpone it.
What to postpone until you have volume
Returns portals, advanced analytics dashboards, complex staff roles, automated fraud rules, and fancy segmentation usually create more work than they save at low order counts.
Instead, leave a clean audit trail. For example, if you allow manual stock edits, require a short reason like “found 3 damaged units” and record who changed it. That one detail will matter more than a chart when you are trying to explain why an item oversold.
If you are building the panel quickly (for example with a chat-driven builder like Koder.ai), keep the same rules: ship the fast actions first, and treat everything else as a later module.
Screen 1: Orders (the daily control center)
If you build only one screen first, make it Orders. A minimal admin panel lives or dies here because this is where money, customer trust, and shipping meet.
Start with a list view that answers the same questions in under 10 seconds: What needs attention today? What is blocked? What is already done? Keep the columns practical: an order ID, when it was placed, who it’s for, how many items, the total, and two clear statuses (payment and fulfillment). If you can’t scan it fast, it’s not helping.
Filters should be boring and strong. You mainly need a date range, status filters for payment and fulfillment, and a search box that finds an order by number or customer email. That’s enough for 90 percent of daily work.
On the order detail page, show only what helps you act: shipping address, line items, internal notes, and a simple history of status changes. That history is not a “nice to have”. It saves you when a customer says, “You never shipped it,” or when you forget why an order was canceled.
Keep actions tight and repeatable:
- mark paid
- mark packed
- mark shipped
- cancel order
- resend confirmation email (only if you actually see this problem often)
The non-negotiable piece is an audit trail: who changed what, and when. Even if you’re solo today, you’ll thank yourself later.
Example: you wake up to 18 orders. Two are unpaid, one has an address note, and three are already packed. With this screen, you filter to “paid + unshipped,” print nothing fancy, mark packed as you go, then mark shipped once tracking is added. No extra workflow, no extra screens, no guessing.
Screen 2: Inventory (keep stock honest)
Your inventory screen is not a warehouse system. It is a truth-check for what you can actually sell today. In a minimal admin panel, the goal is to stop overselling, spot low stock early, and make fixes fast when reality does not match the numbers.
Start with the smallest usable model per SKU: SKU, product name, on-hand quantity, reserved quantity, and a low-stock threshold. “Reserved” is what’s already promised to customers but not shipped yet. Keeping it separate helps you avoid the classic mistake of thinking you have stock when it is already spoken for.
Make the main table simple and loud. Each row is a SKU, and low stock should be obvious at a glance (color, badge, or a clear “LOW” label). Add basic search by SKU or name, because you will use it all the time.
Inventory adjustments are the only “power” feature you need early. Keep it controlled:
- Add units
- Subtract units
- Choose a reason code (damaged, recount, supplier delivery)
- Optional note field for details
Tie inventory to orders with one rule and stick to it. Most solo founders should reduce on-hand when the order ships, not when it is paid, because cancellations and address issues happen. If you prefer reducing on payment, do it consistently and make “reserved” match that choice.
A realistic example: you recount a SKU and discover you have 12 units, not 18. You subtract 6 with reason “recount,” and the low-stock warning triggers because your threshold is 10. Now you know to reorder before the next promo.
Postpone anything that adds complexity without daily payoff: multi-warehouse stock, batch tracking, serial numbers, and complex kits or BOMs.
Screen 3: Customers (support and repeat purchases)
Your customers screen is not a marketing tool on day one. It is a fast way to answer: “Who is this person, what did they buy, and what do we need to fix right now?” If your minimal admin panel nails that, support gets easier and repeat purchases follow naturally.
Start with a simple customer list that helps you recognize people at a glance. You do not need dozens of columns. The list should show only what helps you decide your next action.
The list view: built for quick identification
Include these fields in the table, and keep them readable on one screen:
- Name
- Email (and phone only if you actually collect it)
- Total orders
- Last order date
- A small tag badge (for example: VIP)
Make search the main feature, not filters. You should be able to find a customer in seconds by typing an email or phone number, then copy it with one click (copy-to-clipboard saves a lot of time when you are replying to a message).
The detail view: everything support needs, nothing else
On the customer detail page, focus on support basics: shipping addresses, a clear order history, and internal notes. Notes should be private, timestamped, and short. Think: “Asked to leave package at the back door” or “Reshipped order #1042, damaged item.”
Ship only a few safe actions:
- Add an internal note
- Update contact info (fix a typo, add missing phone)
- Mark as VIP with a simple tag
Example: someone emails “My order is late.” You search their email, open the detail page, confirm the last order date and shipping address, scan the order history for past issues, and add a note like “Customer contacted us about delay, promised update tomorrow.” That is enough.
Postpone anything that turns this into a full CRM: deal stages, complex segments, and marketing automation. You can add those when you have enough volume that manual follow-up stops working.
Screen 4: Coupons (simple promos without chaos)
Coupons feel “small” until you spend a Saturday chasing why a discount applied twice or never expired. In a minimal admin panel, the goal is simple: create a promo fast, see if it is still valid, and stop it instantly if it misbehaves.
Start with only the coupon types you will actually run in the first months: percentage off, fixed amount off, and (optionally) free shipping. That covers most launch promos and influencer codes without turning discounts into a rules engine.
Keep the rules minimal and predictable. Every coupon should have a start date and end date, a maximum number of redemptions, and a minimum order value. These four controls handle 90% of “make it fair” needs and prevent unlimited leakage.
What the list view must show is not fancy, just operational:
- Code and short name (for humans)
- Status (active, scheduled, expired, paused)
- Redemptions count (used/limit)
- Last used date
- Discount type and value
Actions should match real panic moments. You need create, pause, duplicate, and “expire now.” Duplicate matters because most promos are variations on the same idea (same rules, new code).
A realistic example: you post a weekend code on Friday night, then a customer reports it still works on Monday. With “last used date” and “expire now,” you can confirm it is still being redeemed and shut it off in seconds, without editing a dozen settings.
Postpone the things that sound powerful but mostly add risk early on:
- Stacking rules and “best discount wins” logic
- Product-level exclusions and complex collections
- Multi-currency discount math
- Advanced attribution and campaign reporting
When volume arrives, you can add these safely. Until then, keep coupons boring, visible, and easy to stop.
Screen 5: Content (keep it editable, not fancy)
For a solo store owner, “content” is the stuff that answers questions and removes doubt. That usually means product page copy (including size guides or care notes), a couple of basic pages (About, Shipping and Returns, Privacy), FAQs, and short announcements like “Back in stock Friday” or “Holiday cutoff dates.” If it does not reduce support tickets or help someone buy, it can wait.
In a minimal admin panel, the Content screen should feel like a simple notebook, not a publishing suite. Keep the editor small and predictable. The goal is fast edits with low risk, especially when you are changing a return policy line at midnight.
A good v1 Content item can be managed with just a few fields:
- Title
- Slug (the URL-friendly name)
- Body (plain text or basic formatting)
- Status toggle: Draft or Published
- Last updated timestamp (and optionally “updated by” even if it is always you)
Two small safety features are worth adding early because they prevent costly mistakes. First, a Preview mode so you can spot broken formatting before customers see it. Second, a “revert to last saved” action (or a simple version snapshot) so one bad paste does not force you to rewrite a whole page.
Keep approval simple. Draft vs Published is enough for v1. If you need a review step, use Draft as your holding area and publish only when you are ready. That single switch is easier to trust than a complex workflow you will not use.
Example: you notice customers asking the same question about battery life. You open the Product FAQ content item, add two lines, preview it, then publish. No tickets, no redeploy, no waiting.
What to postpone until you have real volume and multiple people touching content:
- Multi-author roles and fine-grained permissions
- Localization and translation workflows
- A/B testing and experiment dashboards
- Editorial calendars, assignments, and approvals beyond Draft/Published
- Complex page builders and heavy layout controls
If you are building with a platform like Koder.ai, this is also a nice place to keep content edits separate from code changes, so you can update copy without turning every tweak into a development task.
Step by step: how to ship the first version fast
Speed comes from deciding what “done” means before you build. Treat your first release like a set of daily chores you want to finish in minutes, not a perfect tool.
Build it in five tight steps
- Write the 10 tasks you do most days and turn each into a simple acceptance test. Example: “Find an order by email, mark it as shipped, and copy the tracking number in under 60 seconds.” These tests keep the minimal admin panel focused.
- Define the smallest data models that make the screens work: Order, Item, SKU, Customer, Coupon, Page. Skip anything you cannot point to in a task (like “segments” or “workflows”).
- Build list views first, then detail views, then the smallest set of actions. Lists answer “what needs attention?” Details answer “what happened?” Actions should be few: update status, add tracking, adjust stock, disable coupon, edit page.
- Add guardrails early. Put confirmations on destructive actions (cancel order, delete coupon, reduce stock). Use clear error messages that say what to do next (“SKU not found. Create it first or choose an existing SKU.”).
- Test with real recent orders and run a 1-hour dry run before launch. Do it like a normal day: refund one order, fix an address, adjust stock after a return, and publish a quick FAQ update.
If you are building this with a chat-driven builder like Koder.ai, keep the same discipline: paste your acceptance tests into planning mode, generate the screens, and then verify each test end to end before adding any “nice to have” settings.
After the dry run, fix only what blocks the tasks. Everything else can wait until you have enough volume to justify it.
Example: a realistic day of ops using only these screens
You are a solo D2C founder doing about 20 orders a day. You sell 15 SKUs, you pack everything yourself, and you have one promo running (WELCOME10). Your minimal admin panel has five screens: Orders, Inventory, Customers, Coupons, and Content.
At 8:30am, you open Orders and filter to “Paid, unshipped.” You scan for anything risky: address missing, unusually large quantities, or a note from the customer. Then you print or copy a simple pack list (order number, items, qty, shipping method) and start packing.
Here’s how the day usually flows:
- Morning: mark each order “Packed” as you finish it, then “Shipped” once the label is created.
- One cancellation: an order comes in twice by mistake. In Orders, you set it to “Canceled” and add a short reason note.
- Stock surprise: while packing, you realize one SKU is short by 2 units.
- Promo issue: by lunch, the coupon is getting used far more than expected.
- End of day: you check for anything stuck (paid but not shipped, shipped without tracking).
The stock incident is where Inventory earns its keep. You open the SKU, adjust the count down to the real number, and add a note like “counted during packing, shelf was wrong.” Back in Orders, two orders contain that SKU. You open each customer record, send a short message (delay or substitution), and tag the customers so you can follow up tomorrow without searching your inbox.
The promo incident stays simple too. In Coupons, you pause WELCOME10 (not delete it), then add a note: “Paused 12:10pm. Overused via influencer story. Review rules later.” You do not build advanced coupon logic yet. For now, you just stop the bleeding and capture what happened.
At 6pm, you finish with a quick sweep: Orders for any “Paid” items you missed, Inventory for any SKUs now below your reorder point, and Content only if something urgent needs an edit (like the banner that mentions the paused promo). That is the whole day, handled with a minimal admin panel and no extra screens to get lost in.
Common mistakes that slow you down later
A minimal admin panel should reduce decisions, not add new ones. Most early admin panels get messy for the same reasons: too many choices, unclear history, and data that disagrees with itself.
1) Too many statuses (and no one uses them the same way)
If you create 12 order statuses, you will get 12 interpretations. Reporting becomes useless because “Processing” means something different every week. Keep it tight: a small set that matches real actions (paid, packed, shipped, delivered, canceled, refunded). Add new statuses only when they change what you do today.
2) Changing old orders without a visible trail
Editing historical orders is tempting when a customer complains, but it creates future disputes. If someone asks, “Why was I refunded?” you need a clear record. Prefer appending notes and events (who, what, when) over rewriting the past.
3) Updating inventory in two places
The fastest way to create stock chaos is to adjust inventory on the product screen and also in a separate spreadsheet. Pick one source of truth. If you must import from somewhere, treat it as a controlled update, not a second place to edit.
4) Building analytics before your data is clean
Dashboards look productive, but early metrics often lie. If returns, cancellations, and partial shipments are recorded inconsistently, you optimize the wrong thing. First make sure orders, inventory movements, and coupon usage are recorded the same way every time.
5) Over-automating emails too early
Automations break on edge cases: split shipments, address changes, backorders. That can increase support tickets. Start with a few messages you can trust, then add more after you see real patterns.
If you’re building this in Koder.ai or any other builder, treat these as rules, not features. They keep your minimal admin panel usable when volume grows.
Quick checklist and next steps
If your minimal admin panel does these few things quickly and clearly, you can run the business without building a huge back office. The goal is speed, clarity, and fewer “Where did that number come from?” moments.
Use this checklist as a go/no-go gate before you add anything else:
- Orders: You can search, open, edit status, and trigger the next action (pick, pack, ship, refund) in under 30 seconds.
- Inventory: Every stock change has a reason and a timestamp, so you can explain “why 12 disappeared” without digging through chats.
- Customers: One page shows all prior orders plus internal notes (for support context and repeat purchases).
- Coupons: You can pause a promo instantly and see basic redemptions, so discounts don’t run wild.
- Content: You can edit the few pieces that actually change (homepage hero, FAQs, product copy) without re-deploying.
Next steps depend on your volume. If you ship fewer than, say, 20 orders a day, focus on making these screens fast and boring rather than “complete.” Add one improvement per week based on real pain: a missing filter, a clearer status label, a better inventory reason list.
When you’re ready to build it quickly, start by writing the screens as plain-language tasks: “Find order by email,” “Reduce stock for damaged units,” “Stop coupon NOW.” Tools like Koder.ai can help you plan screens in chat, generate a working React + Go foundation (with PostgreSQL), and iterate safely using snapshots and rollback when a change breaks something.
One final rule: postpone anything that doesn’t change a decision today. Advanced analytics, complex roles, deep segmentation, and automation are great, but only after the basics are fast, trustworthy, and used daily.
FAQ
Which screens should a solo D2C admin panel include first?
Start with Orders, Inventory, Customers, Coupons, and Content. Together, these screens cover daily shipping, stock checks, support, simple promotions, and urgent copy edits.
How many order statuses do I need?
Use a short, action-based flow such as paid, packed, shipped, canceled, and refunded. Add another status only when it changes what you need to do with an order.
What should appear on the Orders screen?
Show the order number, purchase date, customer, item count, total, payment status, and fulfillment status. Add filters for date, payment, fulfillment, and search by order number or customer email.
What inventory data matters most at the start?
Track SKU, product name, on-hand quantity, reserved quantity, and a low-stock threshold. Make low stock easy to spot, then record every manual adjustment with a reason.
When should inventory decrease for an order?
Choose one rule and apply it consistently. Many solo stores reduce on-hand stock when an order ships and keep promised units in a separate reserved count until then.
What does a minimal Customers screen need?
Keep the customer page focused on support: contact details, shipping addresses, order history, and timestamped internal notes. This lets you answer a delivery question without searching through several tools.
How can I keep coupons from becoming hard to manage?
Use only percentage discounts, fixed-amount discounts, and optional free shipping. Give each code a start and end date, redemption limit, minimum order value, and a pause action.
What should the Content screen let me edit?
For each page, store a title, slug, body, Draft or Published status, and last-updated time. Add preview and a way to restore the last saved version so urgent edits stay safe.
What safeguards should I build into version one?
Put confirmations on actions such as canceling orders, reducing stock, or deleting a coupon. Keep a visible history that records who changed what and when, even if you work alone today.
What features should I postpone until order volume grows?
Postpone advanced analytics, detailed staff permissions, marketing automation, multi-warehouse inventory, complex discount stacking, and full CRM features. Add them when recurring daily work shows a clear need.