Jul 29, 2025·8 min
Real Estate Agent Websites That Convert: Forms, Listings & Trust
Learn how to build a real estate agent website that turns visitors into clients using smart lead forms, listing pages, and clear trust signals.
What Makes a Real Estate Agent Website Convert
A high-converting real estate agent website answers a visitor’s questions almost immediately. In the first 10 seconds, most people scan for four things: homes (listings or search), help (how you’ll guide them), proof (reviews, results, credibility), and speed (the site loads quickly and works on mobile).
Why many agent sites don’t generate leads
A lot of real estate website design looks good but doesn’t convert because the path to action is unclear. Common issues include:
- The homepage talks about the agent, not the visitor’s goal (buying, selling, relocating).
- Calls-to-action are vague (“Contact”) instead of specific (“Get a home value estimate” or “Schedule a showing”).
- Lead forms feel long, intrusive, or show up too early—so people bounce.
- Property listings pages are hard to use, slow, or don’t build confidence around next steps.
- Trust signals (testimonials, licenses, local expertise, clear policies) are missing or buried.
What this guide helps you improve
This guide focuses on the three levers that most directly impact conversion rate optimization for agents:
- Forms: simpler, friendlier lead capture that still qualifies the lead.
- Listings: practical IDX listings basics and page elements that keep people searching.
- Trust: reviews and testimonials, credentials, and clarity that reduce hesitation.
Define the main goal
Your primary goal isn’t “traffic” or “time on site.” It’s capturing leads you can follow up on—with enough context to respond quickly and personally (buyer vs. seller, neighborhood, timeline). Everything on the site should support that next step.
Start With Audience and Intent
A real estate agent website converts best when it feels like it was built for the visitor’s next decision—not for “everyone.” Start by naming your core audiences and what they’re trying to accomplish right now.
Identify your primary audiences
Most agent sites serve a mix of:
- Buyers (actively browsing)
- Sellers (wondering what their home could sell for)
- Renters (often time-sensitive)
- Investors (numbers-first, ROI-focused)
- Relocation clients (need guidance and area clarity)
You don’t need a separate site for each group, but you do need clear paths for each.
Match pages to intent
Intent is the difference between “I’m curious” and “I’m ready.” Map key pages and buttons to what someone actually wants to do:
- “See homes” → listings/search, saved searches, alerts
- “Get a valuation” → seller lead flow, home value page
- “Talk to an agent” → contact/booking, quick question form
If a visitor has to hunt for the next step, you’ll lose them to a site that makes it obvious.
Pick 1–2 primary calls to action per audience
Too many options creates hesitation. For buyers, a primary CTA might be “Search homes” with a secondary “Get new listings alerts.” For sellers, “Get a home value estimate” with a secondary “Request a pricing call.” Keep CTAs consistent across the pages those audiences visit.
Keep navigation simple (especially on mobile)
Mobile screens reward focus. Limit top-level navigation to the essentials (think 4–6 items), and use clear labels like “Buy,” “Sell,” “Neighborhoods,” and “Contact.” If you need more, tuck it under a single “More” menu so the main actions stay easy to tap.
Homepage Layout That Guides Visitors to Take Action
Your homepage has one job: help a visitor quickly understand (1) who you help, (2) where you help, and (3) what to do next. If they have to hunt for a phone number, guess your service area, or scroll through a long intro, they’ll bounce—or go back to Google.
A simple structure that works
Start with a clear headline that matches intent (buying, selling, relocating), then anchor it to your service area.
A practical order:
- Headline: “Buy and sell homes in <Service Area> with a local agent who answers fast.”
- Service area line: cities/neighborhoods you cover (keep it scannable).
- Primary CTA button: one main action (e.g., “Book a Call” or “Get a Home Valuation”).
- Featured listings: a small, curated set—enough to prove you’re active without overwhelming.
Above-the-fold checklist
Before someone scrolls, they should see:
- Phone number (tap-to-call on mobile)
- One primary CTA (button stands out)
- Proof (rating snippet, short testimonial line, or “X homes sold”)
- A short value promise (one sentence, not a paragraph)
If you want a second option, make it a quieter text link—not another competing button.
Link to the pages people expect
The homepage should act like a hub, sending visitors to the next most relevant page based on their intent:
- Sellers: /home-valuation
- Buyers: /listings
- Trust and story: /about
- Ready to talk: /contact
Place these links in your navigation and repeat the most important one(s) in the body.
What to remove (it’s usually the best optimization)
Most conversion issues come from too much, not too little:
- Cluttered sections that repeat the same message in different words
- Too many CTAs (“Call,” “Text,” “Email,” “Chat,” “DM”) competing at once
- Long intro paragraphs about your passion—save the depth for /about
A focused homepage feels calm, confident, and easy to act on.
Lead Forms That Feel Easy (and Still Qualify Leads)
Lead forms work best when they feel like a small step, not a commitment. The goal is to capture enough information to respond well—without creating friction that makes people bounce.
The fields that perform (and why)
For most real estate agent websites, a simple set of fields consistently converts while still qualifying leads:
- Name (keeps the conversation human)
- Email or phone (let people choose their preferred channel)
- Timeframe (e.g., “ASAP,” “1–3 months,” “Just browsing”)
- Budget range (or price range for buyers; estimated value range for sellers)
- Message (optional, but valuable for context)
If you’re worried about lead quality, add one lightweight qualifier (like timeframe) rather than piling on multiple required fields.
Short vs. long forms: when to use each
Short forms (2–4 fields) are ideal for high-intent pages where motivation is already strong: a specific listing, a “Schedule a showing” CTA, or a neighborhood page.
Longer forms make sense when the visitor expects a more tailored response—like a valuation request or a detailed buyer consultation. Even then, consider splitting the form into steps so it doesn’t feel overwhelming.
Placement that matches visitor behavior
Put forms where decisions happen:
- On listing pages near key details and photos
- In a sidebar on informational pages (kept minimal)
- As a sticky “Contact” or “Book a call” button on mobile
- Exit intent prompts only if they’re subtle and easy to dismiss
Set expectations to reduce hesitation
A small note under the button can boost trust: “Typically responds within 1 business hour.” Add a short privacy reassurance (“No spam. Your info stays private.”) and explain what happens next (email/text confirmation, a quick call, or available times via /contact).
High-Intent Lead Capture: Valuations, Alerts, and Booking
When someone asks for a home value, wants listing alerts, or tries to book a call, they’re telling you they’re closer to taking action. Treat these as high-intent moments: keep the experience fast, clear, and low-pressure.
Home valuation (simple, honest, high-converting)
A valuation tool works best when it feels quick and transparent. Ask for the minimum needed to start (address + property type), then request contact details on the next step with a clear reason: “I’ll send the report and a few recent comps.” Avoid overpromising accuracy—use language like “estimate range” and “we’ll refine this with recent sales and property details.”
Alerts and saved searches (the best micro-commitment)
Before asking for a long form, offer a small “yes” that benefits the visitor:
- Save a search and get new listing alerts
- Open house alerts for a neighborhood
- A short neighborhood report (schools, commute notes, recent sales)
This micro-commitment reduces friction and still captures high-quality intent, because the user’s criteria tells you what they want.
Appointment booking that respects preferences
Add a booking option for visitors who don’t want to wait for a call back. Offer a few time slots, let them choose phone/text/email, and include one optional note field (“What are you hoping to do—buy, sell, or both?”). Keep confirmations simple and set expectations: when you’ll follow up and what they’ll get next.
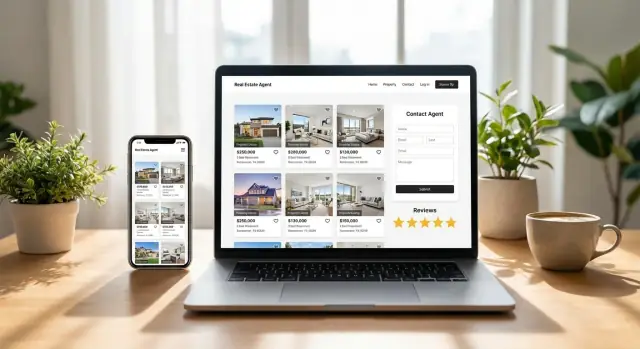
Listings and Search: What to Include and Why
Build listing pages faster
Create fast, mobile-friendly listing page layouts in React and improve CTAs over time.
Your listings pages do more than show inventory—they answer the “Is this right for me?” question quickly. When visitors can scan the essentials and take a next step without hunting, you capture more high-intent leads.
Essential elements on every listing
At minimum, each property page should make these items obvious above the fold:
- High-quality photos (fast-loading, swipe-friendly on mobile)
- Price and key facts (beds, baths, size)
- Location (city/area and a clear address policy if you restrict it)
- Highlights (a short list of the top 5–8 features)
- Map with nearby context (schools, commute notes, or landmarks)
A short, well-written description helps, but it shouldn’t bury the details. Visitors want quick certainty first, story second.
Search and filters people actually use
Keep filters readable and familiar: price range, beds/baths, home type, neighborhood/area, “open house,” and “has garage/pool.” Avoid overly technical MLS fields or abbreviations. If you include advanced filters, tuck them behind a “More filters” button so the first screen stays simple.
Strong calls to action on listings
Each listing page should offer a clear next step:
- Schedule a tour (best: shows available times)
- Ask a question (pre-fill the address in the message)
- Get updates (alerts for price changes or similar homes)
Place at least one CTA near the top and repeat it after photos/details.
IDX, explained plainly (and alternatives)
IDX is a system that lets agents display MLS listings on their own website, typically through an approved feed/provider. It’s useful for comprehensive search, but it’s not your only option.
If you don’t use IDX, you can still convert visitors with:
- Curated featured listings you represent
- Sold and past transactions pages for proof
- “Request a custom list” forms (“Tell me your budget + area”) that start a conversation
For more lead-friendly form ideas, see /blog/lead-forms-that-qualify.
Neighborhood Pages That Support SEO and Discovery
Neighborhood pages are often the difference between a nice-looking website and a site that consistently earns local, ready-to-talk visitors. Done well, they help people self-select: buyers explore areas that fit their lifestyle, and sellers see that you truly know the market.
What to include (beyond a generic description)
Aim for content that answers the questions people actually ask when choosing an area:
- Schools: not just names—add what families care about (program types, nearby amenities, general options). Avoid copying district boilerplate.
- Commute and connectivity: major routes, transit options, typical drive-time ranges to key employment centers.
- Lifestyle notes: parks, dining pockets, walkability, noise level, community vibe, seasonal events.
- Market notes: a plain-language snapshot (price range, common home styles, days-on-market trend). Keep it current and avoid overpromising.
Local SEO basics that still matter
Make it easy for search engines (and humans) to understand where you operate:
- Clearly state your service areas on the page and in headings (e.g., “Homes in Brookside, Kansas City”).
- Keep your NAP (name, address, phone) consistent with your contact page and listings.
- Use clean on-page headings: one clear page topic, then scannable subtopics like “Schools,” “Commute,” and “Market Snapshot.”
Link the neighborhood into the rest of the site
Neighborhood pages work best as hubs. Add internal links to:
- Relevant active listings (e.g., “See homes for sale in Brookside” linking to your listings filter page)
- Nearby/related areas (“Compare Brookside vs. Waldo”)
- Helpful articles (“First-time buyer tips in Kansas City”) in your blog
Avoid thin pages (and the trust hit that follows)
If you’re creating area pages at scale, resist one-paragraph templates. Each neighborhood page should have unique details, specific examples, and a clear next step (alerts, a showing request, or a quick “What’s my home worth here?” link). Thin pages don’t just underperform in search—they also make visitors hesitate.
Trust Signals That Reduce Hesitation
Run small monthly tests
Create a new CTA variant, deploy it, and roll back quickly if needed.
People don’t fill out forms because they’re “not ready”—they skip them because they’re not sure who they’re handing their info to. Trust signals remove that friction by answering the silent questions: Are you real? Are you good? Will you handle this professionally?
A practical trust signals checklist
You don’t need to plaster every badge you can find across the site. Aim for a few strong signals that are easy to verify:
- Testimonials and client stories (short, specific, and local)
- Public reviews (Google, Zillow, Realtor.com—where you’re actually reviewed)
- Affiliations and credentials (MLS access, Realtor® membership, broker logo, certifications)
- Years in market + volume context (e.g., “12 years serving North Austin” or “120 homes helped”)
- Local expertise cues (neighborhood focus, market updates, community involvement)
- Clear contact details (phone number, email, brokerage address)
Where proof should live (so it actually helps conversions)
Trust signals work best when they appear right before a visitor hesitates:
- Homepage: Add one tight proof strip near the primary CTA—e.g., “4.9★ on Google (180+ reviews)” plus 1–2 short testimonials.
- About page: The natural home for depth—your story, approach, credentials, and a fuller set of reviews.
- Near lead forms: Place reassurance next to the form, not buried in the footer. A small block like “No spam. Reply within 15 minutes. 4.9★ average rating” can lift submissions.
If you also offer high-intent tools (valuation, alerts, booking), repeat a compact trust element on those pages too.
Reviews: use them responsibly
Visitors can spot “marketing quotes” instantly. Keep reviews credible:
- Quote accurately and don’t rewrite wording for polish.
- Add names/initials, city, and context when allowed (e.g., “J.S., Tampa — first-time buyer”).
- Link to the original source when possible (or at least label it clearly: “Google Reviews”).
- Avoid cherry-picking only extreme praise. A mix of thoughtful, specific reviews feels more real.
Professional photos and branding that actually matter
A clean design helps, but credibility often hinges on a few basics:
- High-quality headshot (good lighting, neutral background, consistent across site/social)
- Real team and office photos where appropriate (not generic stock imagery)
- Consistent branding (same logo, colors, and tone across pages)
- Readable typography and spacing—if the site feels messy, visitors assume the process will be too
Done well, trust signals don’t feel like bragging—they feel like clarity. And clarity is what turns a cautious visitor into a confident lead.
About and Bio Pages That Build Confidence
Your About page isn’t a résumé—it’s a decision page. Visitors are quietly asking: “Do you understand my situation, and will you guide me without pressure?” A clear story and a few specifics can answer that faster than another generic tagline.
What to include (and what to skip)
Start with a short, human story that explains why you do this work and who you help. Then get practical: your focus areas (neighborhoods, price points, property types) and your process.
Instead of listing every credential, choose details that reduce uncertainty:
- Who you help most (first-time buyers, relocation, investors, downsizers)
- What you’re known for (negotiation, local knowledge, calm guidance)
- Where you work (coverage areas and typical commute radius)
Add a “working with me” timeline
A simple timeline sets expectations and signals professionalism—without sounding salesy. Keep it short and specific:
- Quick call to understand goals
- Plan + next steps (financing, prep, search criteria)
- Tours/strategy, offers, and negotiations
- Inspections, appraisal, and closing coordination
- Post-close support (vendors, move-in checklist)
This reassures visitors who worry about getting overwhelmed or pushed into decisions.
Team pages: clarify roles and access
If you have a team, don’t hide behind a logo. List roles (agent, showing partner, transaction coordinator), coverage areas, and how to reach each person. Some clients want a single point of contact; others value fast availability—address both.
Make the next step obvious on every bio
Every bio page should include a clear path forward: link to /contact and your booking option (if available). Add one primary button (“Book a call”) and one secondary link (“Send a message”) so visitors can choose their comfort level without hunting around.
Mobile Experience and Page Speed Essentials
Most real estate website visitors are on a phone, often while standing in a driveway or scrolling between appointments. If the site feels fiddly or slow, they bounce—usually to the next agent.
Mobile-first priorities
Make the main action effortless. Use large tap targets (buttons and menu items that are easy to hit with a thumb) and keep key options visible.
High-impact choices:
- Add a sticky call/text button so visitors can reach you without hunting.
- Keep your primary form short on mobile (name + email/phone is often enough). Qualify leads in the next step or follow-up.
- Avoid pop-ups that block the screen or are hard to close.
Speed basics that actually matter
Real estate sites get heavy quickly—lots of photos, maps, and scripts. Focus on the biggest offenders:
- Compress and resize images (especially listing and hero photos). Upload at the maximum display size, not full camera resolution.
- Limit sliders and auto-playing carousels; they’re often slow and rarely improve conversions.
- Simplify third-party scripts (chat widgets, multiple trackers, social embeds). Each one adds load time.
Accessibility essentials
Accessibility improves usability for everyone and reduces form abandonment:
- Ensure readable contrast between text and background.
- Add alt text to key images (especially logos and critical visuals).
- Use clear form labels (don’t rely on placeholder text alone) and friendly error messages.
Quick pre-publish performance checklist
Before you publish (or after any redesign), check:
- Homepage loads quickly on mobile data
- Buttons are thumb-friendly and not stacked too tightly
- Sticky call/text works and doesn’t cover key content
- Forms are easy to complete one-handed
- Images look sharp but aren’t oversized
- No blocking pop-ups on first visit
- Core pages (home, listings, contact) pass a basic mobile-friendly test
Tracking, Follow-Up, and Privacy Basics
Launch a valuation flow
Build a simple, honest valuation request experience and tweak it as you learn.
A high-converting real estate agent website isn’t just about design—it’s about knowing what’s working, responding quickly, and making visitors feel safe sharing their info. A few simple systems can make your marketing measurable without turning you into a data analyst.
Track the actions that matter (not everything)
Start with the handful of actions that signal intent:
- Form submissions (contact, buyer/seller forms, “request a showing”)
- Calls and tap-to-call clicks (especially on mobile)
- Booking clicks (if you use Calendly or a similar tool)
Use Google Analytics (GA4) and your ad platforms to record these as conversions. If you’re running Google or Meta ads, confirm that the conversion event is firing correctly—otherwise you’ll optimize spending around the wrong behavior.
Use thank-you pages to measure conversion rate
Whenever possible, send visitors to a dedicated thank-you page after a successful form submit (instead of a simple “success” message). Thank-you pages make tracking cleaner and help you calculate conversion rates reliably.
They can also do useful work:
- Set expectations (“I’ll text you in 10 minutes”)
- Offer a next step (book a call, browse listings, download a guide)
- Confirm what you received (name, area, timeline—without exposing sensitive details)
Follow-up that converts: speed, templates, routing
Most “bad leads” are really slow follow-up. Aim to respond within minutes during business hours.
Keep it simple:
- Create 2–3 message templates (buyer inquiry, seller inquiry, showing request)
- Use lead routing so inquiries don’t sit in one inbox (agent + assistant, or round-robin)
- Reply in the channel they chose (call, text, email) and reference what they asked about
Privacy and consent: make it clear and easy to find
If you collect personal info, be direct about it. Add clear consent wording near forms (especially if you text or call):
- What they’re signing up for (e.g., “Contact me about this property”)
- Whether SMS is included (and that message/data rates may apply)
- How to opt out (for text, “Reply STOP”)
Also include an easy-to-find /privacy-policy link in your footer and near key lead forms. Clear privacy signals reduce hesitation and increase form completion—especially for higher-intent requests like showings or consultations.
An Ongoing Optimization Plan (Without Overwork)
A high-converting real estate agent website isn’t “set it and forget it.” The good news: you don’t need constant redesigns. A simple rhythm—review, test one thing, publish one helpful update—keeps your site improving without stealing time from showings and clients.
A 30-minute monthly website review checklist
Once a month, run a quick sweep:
- Forms: Submit each lead form yourself (mobile + desktop). Confirm the thank-you message, autoresponder, and where the lead lands (email/CRM).
- Links & CTAs: Click your top buttons (Call, Text, Email, Book, Home Valuation, Listings). Fix anything broken or confusing.
- Listings/search: Check that featured listings load quickly, filters work, and “save”/“request info” buttons are visible.
- Speed/mobile: Open your homepage and a listing on your phone. If it feels slow or jumpy, it’s a priority.
- Content freshness: Update anything time-sensitive (sold properties, team changes, market stats, service areas).
Simple A/B tests worth trying
Pick one test per month so results are clear:
- CTA text: “Get New Listings Alerts” vs. “Send Me Matching Homes.”
- Form length: 3 fields vs. 5 fields (move extra questions to the follow-up message).
- Testimonial placement: Add one strong review near the main CTA (homepage and/or contact page) and compare conversion rates.
Content ideas that directly support leads
Focus on pieces that answer questions people ask right before they reach out:
- Monthly market updates for your key neighborhoods (with a clear “Want comps for your home?” CTA)
- FAQs: timelines, costs, contingencies, “what happens after I submit a valuation request?”
- Buying/selling steps pages that set expectations and reduce hesitation
A simple build-or-refresh roadmap
If you’re improving an existing site, use this order:
- Fix tracking + forms → 2) Improve homepage CTAs → 3) Tighten listing/search UX → 4) Add trust signals near actions → 5) Publish 2–4 high-intent pages.
If you’re deciding whether to refresh or rebuild, price it out early—see /pricing for a quick reference point.
If you need to move fast (for example, launching a new neighborhood hub, a valuation flow, or a cleaner booking experience), a vibe-coding platform like Koder.ai can help you prototype and ship the website and lead-capture tools via chat—then iterate with snapshots/rollback and export the source code when you’re ready to hand it to a developer or agency. That speed matters when your conversion gains come from small improvements shipped consistently.