

Solo to Launch: A Story-Led Guide to Shipping a Digital Product
Follow a story-driven, step-by-step path for how one person can validate an idea, build a simple MVP with no-code tools, launch, and grow without a dev team.
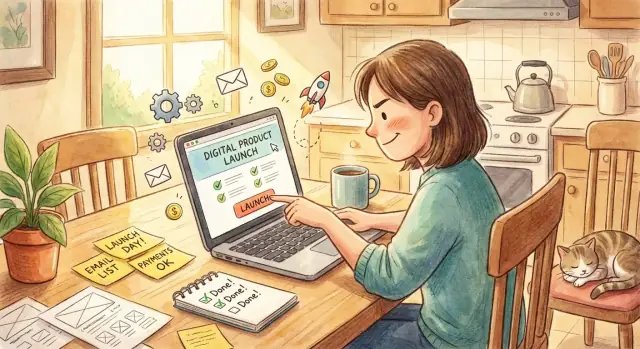
Meet the Solo Creator and the Idea Worth Shipping
Nina has a day job she doesn’t hate, a calendar she can’t bend, and a growing itch to build something of her own. She’s a solo creator: no developer friends on standby, no agency budget, and no spare weekends to “figure it out later.” What she does have is three focused evenings a week, a $200 monthly tools ceiling, and a habit of paying attention when people complain.
The constraint that shapes everything
Nina’s rule is simple: if an idea needs a team, it’s not her idea (not right now). She wants a product she can validate, build, and sell with tools she can learn quickly—and keep running without becoming customer support 24/7.
That constraint is not a weakness. It’s a filter that pushes her toward clear scope, clear promises, and a business she can actually sustain.
The problem worth solving
Her audience is freelance designers who are great at their craft but inconsistent at follow-ups. They lose projects because they forget to send a “quick check-in,” don’t know what to say after a call, or let proposals sit too long.
Nina’s idea: a small digital product that turns awkward follow-ups into a simple system—ready-to-send email templates, a lightweight reminder flow, and a one-page “what to do next” checklist. Not a full CRM. Not a course with 47 videos. Just enough to help someone get paid sooner.
What success looks like in 30 days
Nina defines success with numbers, not vibes. In the next 30 days, she wants:
- 20 customer conversations (to confirm the real pain)
- 100 email subscribers (proof of interest)
- 10 paying customers (proof people will buy)
- $300–$500 in revenue (proof the checkout works and pricing isn’t fantasy)
If she hits those, she earns the right to keep going.
The journey you’re about to follow
This guide tracks Nina’s path through five stages: validate → build → sell → support → iterate.
Each stage is designed for one person with limited time, so you move forward with evidence—not perfection—and ship something people will actually use.
Choosing a Problem Small Enough to Win
Nina’s first instinct was to build “a productivity toolkit for freelancers.” It sounded exciting—and it also described almost everyone. When she tried to write a landing page headline, she froze. If it’s for everyone, it’s clear to no one.
So she made one intentional constraint: one narrow audience, one painful problem.
Pick a narrow audience you can picture
Instead of “freelancers,” Nina chose: independent designers who sell packaged services and run projects in 2–4 week sprints. She could name five people like this without searching.
Then she picked a problem that shows up weekly, not “someday”:
Problem statement: Independent designers lose projects and cash flow because follow-ups are inconsistent, so leads go quiet and proposals stall.
“Who it’s for / not for” (make it sharp)
It’s for:
- Solo designers managing leads and projects end-to-end
- People who send proposals and need a follow-up rhythm
- Creators who want a repeatable process, not custom consulting
It’s not for:
- Agencies with account managers and long approval chains
- Teams that already use a full CRM heavily
- Anyone looking for a complete project management replacement
Assumptions that must be true
Nina wrote down the few bets she couldn’t afford to be wrong about:
- The problem happens often enough to justify paying
- Designers will use templates/scripts without feeling “salesy”
- A lightweight system (not complex software) can improve replies meaningfully
- They will buy without needing calls or heavy onboarding
Define the smallest outcome (one transformation)
Not “better client management.” The smallest outcome was:
From: “I hate following up and I lose leads.”
To: “I follow up in 2 minutes with confidence—and deals move forward.”
That single transformation became her filter for everything she built next.
Validation Without Guessing: Quick Customer Conversations
When you’re building solo, “validation” can’t mean a month of surveys and wishful thinking. It has to be fast, specific, and based on what people already do—because behavior is harder to fake than enthusiasm.
The goal: hear real routines, not compliments
You’re not asking, “Would you buy this?” You’re mapping how someone follows up today, what it costs them (time, money, stress), and what finally pushes them to look for help.
Start by drafting 10–20 interview questions that focus on current behavior, not opinions. A few that reliably surface truth:
- “Walk me through the last time a lead went quiet—what triggered it?”
- “What did you try first? What happened next?”
- “Do you have follow-up templates? Where do they live?”
- “What’s the most annoying part of the process?”
- “How do you decide it’s ‘bad enough’ to fix?”
- “If you paid for something related, what did you pay and why?”
How to find people quickly (without a big audience)
Speed matters more than perfection. You can get conversations in 48 hours by:
- Posting a clear ask in relevant communities (“Looking to interview 5 people who ___; 15 minutes; no pitch.”)
- Messaging past coworkers, clients, or friends-of-friends who fit the situation
- Doing simple cold outreach on LinkedIn: short message, one qualifying line, one time estimate
Aim for 8–12 conversations. You’ll hear patterns sooner than you think.
Capture patterns, not notes
Right after each call, write three things:
- repeated pain points, 2) the exact phrases they used (“I keep overthinking what to say,” “I hate chasing people”), and 3) their current alternatives (spreadsheets, CRM trials, sticky notes, doing nothing).
Those phrases become your landing page copy later.
Set go/no-go criteria before you fall in love
Decide your “go/no-go” rules based on evidence, not excitement. Example: you only proceed if at least 6 of 10 people describe the same painful moment, can name what they tried, and either paid for a workaround or spend significant time on it weekly.
If the evidence isn’t there, you didn’t fail—you just saved months.
Turning Insights Into Clear Positioning and Messaging
After a handful of calls, Nina had messy quotes and one clear pattern: nobody asked for “features.” They asked for relief.
One designer said, “I just want to know what to send without feeling annoying.” Another: “If I miss a day, I want a way to restart without spiraling.” That language became her marketing.
A one-paragraph positioning statement (use their words)
Write this like you’re explaining it to a friend—no buzzwords, no cleverness.
Positioning draft:
“For independent designers who lose leads because follow-ups fall through the cracks, [Product Name] is a simple follow-up system that helps you send the right next message in 2 minutes—even if you’re juggling client work all day. Unlike a heavy CRM or random scripts, it gives you one clear sequence, timed reminders, and ready-to-send templates you can customize in seconds.”
(Replace the bracketed parts with phrases you heard in customer calls.)
Benefits vs. proof points (promise less, prove more)
Nina picked three benefits she could actually deliver, then backed each with proof.
3 key benefits
- A clear next follow-up step (no guessing)
- A “reset” routine when you miss a day
- Less cognitive load: templates, timing, and tracking in one place
3 proof points (honest and specific)
- Built from interviews with designers; the wording is pulled from those calls
- Includes a 7-day follow-up flow for proposals and a 3-touch “ghosted lead” flow
- Real examples: filled-in templates for discovery calls, proposals, and “just checking in” messages
Name it and write a tagline (no jargon)
Nina avoided invented words and picked something you can remember.
Product name: The Follow-Up Flow Kit
Tagline: “A simple system to follow up without feeling pushy.”
An FAQ that handles objections before they ask
Keep it short, direct, and calm.
- “How much time does this take?”
- “Will this sound generic to my clients?”
- “What results should I expect (and what not)?”
- “Why does it cost this much?”
- “Is there support if I get stuck?”
- “What if it doesn’t work for me?” (refund policy + who it’s for/not for)
When Nina’s messaging matched her customers’ words, her landing page stopped sounding like a pitch—and started sounding like help.
Designing the MVP: The Smallest Version People Will Buy
Your MVP isn’t a “tiny product.” It’s the first version that reliably gets a buyer to a real result.
In Nina’s case, she had ten good ideas for features. She picked one promise: “Send a confident follow-up in 2 minutes.” Everything in the MVP had to support that.
Choose a format that ships fast
Nina stopped asking, “What product should I build?” and started asking, “What format delivers the win fastest?” A few options that tend to ship quickly:
- Template pack (Google Docs, Notion, Canva)
- Toolkit (checklists, scripts, swipe files)
- Mini-course (60–90 minutes total, not 12 hours)
- Coaching product (a paid call + follow-up doc)
- Paid newsletter (weekly prompts + examples)
- Micro-SaaS (only if the core value truly needs automation)
She chose a toolkit + templates because it could be created in days, not weeks.
Sketch the customer journey (signup → first win)
Nina drew a five-step journey on paper:
- Buy
- Get access
- Pick one starting path (“proposal follow-up” / “ghosted lead” / “post-call recap”)
- Do a 10-minute setup (customize voice + add client name variables)
- Get a measurable outcome (send the message + set the next reminder)
If a step didn’t move the customer forward, it wasn’t MVP.
Write the scope: must-have vs. nice-to-have vs. later
Nina made three columns:
- Must-have: core templates, a short “start here,” one filled-in example, simple delivery
- Nice-to-have: more variations, short walkthrough videos, a swipe file of subject lines
- Later: automation, dashboards, integrations
Decide what’s manual (and why that’s okay)
At first, delivery was partly manual: a confirmation email plus a personal “reply with the type of clients you sell to” message. That felt small—but it gave Nina priceless data: what people wrote today, where they got stuck, and which templates they wanted next.
Manual work is fine when it buys learning. The MVP is the version you can sell, support, and improve—without disappearing for three months.
Building Without Developers: A Practical No-Code Setup
Nina gave herself a rule: if a tool required a tutorial longer than her lunch break, it didn’t make the cut.
She wasn’t trying to build “the perfect platform.” She needed a setup that could (1) take payment, (2) deliver the product, and (3) help her learn what customers actually did after buying.
Pick a stack by need (not by hype)
Start by listing the jobs your product must do on day one, then choose the simplest tool for each job.
- Landing page: a page builder that lets you publish fast and edit copy without breaking anything.
- Forms: a simple form tool for “request access,” feedback, or onboarding questions.
- Database: a lightweight table to track customers, deliverables, and support requests.
- Automations: basic “when X happens, send Y” flows (purchase → welcome email → delivery link).
- Analytics: page views and conversion events—nothing fancy at first.
Nina’s shortcut: she chose tools she could connect with native integrations so she wasn’t debugging automations at midnight.
When the MVP needs light automation (without hiring)
Most of Nina’s MVP is templates. But she also wants a small “reminder flow” later (even something as simple as: choose a follow-up track → get timed prompts → copy the next message).
If you reach that point and you don’t want to stitch together five tools, a vibe-coding platform like Koder.ai can be a practical middle path: you describe the workflow in chat, use Planning Mode to tighten scope, and generate a real app (React front end, Go backend, PostgreSQL) you can deploy and host. If you outgrow it, you can export the source code, and features like snapshots/rollback help you iterate without breaking what paying customers rely on.
Prototype first, then run 3–5 usability tests
Before she finalized the full kit, Nina assembled a basic prototype: a rough landing page, a sample template set, and the checkout flow.
Then she invited 3–5 target users to try it on a call. Her only goal was to watch where they hesitated.
She asked questions like:
- “What do you think this product is, in your own words?”
- “Where would you click next?”
- “What would make you confident this will work for you?”
Those sessions usually revealed one high-impact fix—like changing a button label, adding an example, or making the first step more obvious.
Set up a lightweight content workflow
Digital products fail quietly when the assets are messy. Nina created a simple workflow she could maintain:
- A single folder structure for drafts, final assets, and customer-facing files
- A consistent naming convention (dates + version numbers)
- One “source of truth” doc that listed what was included in the product today
This kept updates stress-free: she always knew what to change, where it lived, and what customers would receive.
Add quality checks and a “first success” path
To reduce refunds and support, she added small quality guardrails:
- Clear instructions: short, step-by-step setup written like a checklist
- Examples: at least one “filled-in” example for every template or worksheet
- First success path: a 10–15 minute quick win customers could complete immediately after purchase
Nina’s test: if someone could buy, open the product, and send one follow-up before their coffee cooled, the setup was good enough to ship.
Pricing and Payments: Getting to a Confident Checkout
By the time the MVP is real, the solo creator feels a new kind of pressure: not “Can I build it?” but “Will anyone pay for it—without a long call?” Pricing is where the product stops being an idea and starts being a decision.
Pick a pricing shape you can explain in one breath
Start with the simplest option: one plan. One plan works best when the product does one clear job and the buyer is mostly deciding “yes/no.” It also reduces support (“Which tier should I pick?”) and speeds up checkout.
If there are genuinely different customer needs, consider three tiers:
- Starter for the smallest use case (core templates)
- Pro for the most common “I need this to work reliably” buyer (templates + reminder flow + examples)
- Team only if multiple seats or shared access is real
The rule: each tier must be easy to choose without a sales call.
Anchor on outcomes, not features
Instead of stacking features, Nina wrote pricing notes around what the product replaces and what it gives back:
- “Replaces the ‘I’ll follow up later’ mental loop” (and the missed replies that come with it)
- “Saves ~30–60 minutes per week” (by removing drafting from scratch)
- “More confidence before you hit send” (without promising miracles)
No inflated claims—just specific, believable before/after.
Make payment, tax, and delivery feel boring (in a good way)
Nina chose a payment tool that handled the basics: Stripe Checkout (direct), or a merchant-of-record platform like Lemon Squeezy/Gumroad for simpler tax handling.
At a high level, she confirmed:
- Whether she needed to collect VAT/sales tax for her audience
- What the platform would calculate/remit vs. what she must report
- How customers get access immediately (receipt email + login link, download page, or invite to the app)
Write the refund/support stance down—clearly
Before launch, she added a plain-language section on the checkout page and in /terms: what “refund” means for this product, how to request help, and expected response times. The goal isn’t to sound strict—it’s to prevent surprises for both sides.
A Simple Funnel: Landing Page, Email, and Onboarding Basics
When you’re shipping solo, your funnel should do one job: move the right person from “this seems interesting” to “I know what to do next” without you manually nudging every step.
The landing page: one page, seven blocks
Think of your landing page like a short conversation that ends with a clear decision.
- Hero: one-line promise + who it’s for + primary CTA (“Join the waitlist” or “Buy now”).
- Problem: 2–3 specific pains your buyer recognizes instantly.
- Solution: what your product does, in plain language (avoid feature soup).
- Proof: one of: 2 testimonials, a short founder note, early user count, or a simple “built from interviews with X designers” statement.
- What’s inside: 4–6 bullets mapped to outcomes (“Send a post-call recap in 2 minutes,” not “Includes templates”).
- Pricing: show the plan(s), what’s included, and a reminder of who it’s for. If you need a deeper breakdown, keep it on /pricing.
- FAQ + final CTA: handle objections (time, refunds, access, support) and repeat the button.
A lead magnet that matches the main pain
Your lead magnet should be the first slice of the product, not a random freebie. If your product helps people follow up, offer a “5 Follow-Up Emails You Can Send Today (with fill-in-the-blanks)”.
It should create a small win and naturally point to the paid next step.
Email sequences you can copy-and-paste
Keep emails short, skimmable, and consistent.
1) Waitlist sequence (2 emails)
- Email 1 (instant): deliver the lead magnet, set expectations (“I’ll email twice before launch”), ask one question.
- Email 2 (48 hours): share a quick story of a stalled proposal, link to one helpful post (e.g., /blog), invite replies.
2) Launch sequence (3 emails)
- Email 1: announce open cart + who it’s for + what they get today.
- Email 2: handle top objections via FAQ-style bullets.
- Email 3: final reminder with a calm close time and a single CTA.
3) Onboarding sequence (2 emails)
- Email 1 (post-purchase): login/access + “Start here” link + what to do in 10 minutes.
- Email 2 (day 3): check-in, one quick win tip, and support contact.
Onboarding basics: one path, one next step
Your first screen (or first email) should answer: “What do I do first?” A simple checklist beats a long welcome video. If you only have time to build one thing, build the “Start here” page—and let everything else hang off it.
Launch Week: A Calm Plan That Fits One Person’s Schedule
Launch week doesn’t need adrenaline. It needs a repeatable rhythm—one that fits around work, family, and the fact that you’re the entire “team.” The goal is simple: ship, learn, and keep your energy intact.
Pick channels that match your audience (not your anxiety)
Choose one primary launch channel where your people already pay attention. That might be your email list, a niche community, LinkedIn, YouTube, or a small Slack group. Then pick one backup channel you can use if the primary channel underperforms—ideally one that uses the same assets (the same story, screenshots, and offer).
If you’re torn, choose the channel where you can start conversations, not just broadcast.
A 7–10 day launch calendar you can actually follow
Here’s a calm schedule that keeps daily work small and focused. Adjust the days, but keep the order.
- Day 1 (Prep): Finalize the offer page, checkout, and onboarding email. Write a simple FAQ.
- Day 2 (Assets): Create 3–5 posts/emails, 2 customer stories (or “why I built this”), and a short demo.
- Day 3 (Soft launch): Invite 10–20 friendly people to buy/use it first. Ask them to try to “break” the flow.
- Day 4 (Fix day): Patch the top friction points (confusing copy, broken links, unclear next step).
- Day 5 (Announcement #1): Primary channel post/email focused on the problem and who it’s for.
- Day 6 (Proof): Share results from soft launch: a quote, screenshot, or before/after outcome.
- Day 7 (Behind-the-scenes): Show how it works and what someone does in the first 10 minutes.
- Day 8 (Objections): Address top questions: “Is this for me?”, time, price, and alternatives.
- Day 9 (Reminder): Re-state the promise, add urgency only if it’s real (bonus ends, cohort starts).
- Day 10 (Close/Next steps): Last call, then shift to onboarding and support.
Track only the numbers that guide your next move
Keep a tiny scorecard:
- Visits (per channel)
- Conversion rate (landing → purchase)
- Replies (questions and objections are gold)
- Refunds (and the reason)
- Activation (did buyers send the first follow-up?)
If one metric drops, don’t panic—treat it like a clue. Your job during launch week is not perfection; it’s collecting signal while staying steady.
Support and Trust: Keeping Customers Happy Without Burning Out
The morning after launch, Nina woke up to three sales and five emails. The sales felt great. The emails… less so. One customer couldn’t find the download. Another asked if it worked on mobile. A third simply wrote: “Is this legit?”
She didn’t need a big support team—she needed a simple system and a few reusable answers.
Start with three templates (and don’t overthink them)
Before you get busy, write:
- Welcome email: what they bought, where to access it, “reply to this email if you get stuck,” and one quick win to try in 5 minutes.
- Common questions reply: access, refunds, device compatibility, and timelines (“I respond within 24 hours, Mon–Fri”).
- Troubleshooting steps: 3–5 checks (log out/in, try another browser, confirm payment email, etc.) and what to send you if it still fails.
These aren’t “marketing.” They’re trust builders—clear, calm, and consistent.
Set up a lightweight support system
Pick one path and keep it obvious:
- A shared inbox (even if it’s just you) like support@yourdomain
- A simple form that asks for order email + issue type
- A one-page help doc linked in your welcome email and receipt
The goal: fewer back-and-forth messages, faster resolutions.
Collect the right feedback on day 1, 7, and 30
Nina stopped asking “Any thoughts?” and started asking specific questions:
- Day 1: “What were you trying to do first, and did you succeed?”
- Day 7: “What’s still confusing or slowing you down?”
- Day 30: “What result did you get, and what would make you renew/recommend?”
Protect focus with office hours and boundaries
She added office hours to every support touchpoint: two reply windows per day, plus an auto-reply that set expectations. Customers didn’t mind waiting a bit—they minded uncertainty.
With templates, one support channel, and scheduled responses, Nina kept trust high without letting support swallow her week.
Iterate and Grow: The 30-Day Retrospective and Next Steps
Thirty days after launch, Nina blocks a quiet hour, pulls up a simple dashboard (sales, refunds, support tickets), and re-reads the notes from early customer calls. The goal isn’t to “optimize everything.” It’s to learn what actually happened compared to what she expected.
Review the original goals (and the surprises)
She starts with the promises she made to herself before launch: “Have 20 conversations,” “Get 10 onboarding replies,” “Keep support under 30 minutes/day.” Then she adds what surprised her—because surprises are where the real data lives.
Common surprises look like:
- Fewer sales than planned, but higher conversion from one specific channel (one community, one newsletter).
- A template nobody used… and one tiny onboarding step that confused almost everyone.
- People willing to pay more than expected, but only after seeing a concrete example.
Decide what to improve first
To avoid scattered work, Nina picks one priority by asking: “If I fix only one thing, what increases revenue or reduces effort the fastest?”
A simple order of operations:
- Onboarding (reduce drop-off)
- Offer (make the outcome clearer)
- Pricing (test one change, not five)
- Acquisition (double down on the channel that already works)
Build a tiny roadmap (three moves)
Keep it small and measurable for the next 30 days:
- Automate one task: canned replies + one help-page link to cut repeat questions.
- Improve one module: rewrite the template set that caused the most hesitation.
- Add one upsell: a light add-on (template personalization review, extra sequences) that fits the same buyer.
If Nina decides to turn the reminder flow into a small app, she can still keep the roadmap lean: plan the workflow, ship a minimal version, and use a platform like Koder.ai for deployment/hosting and safe iteration with snapshots—without resetting her whole business around “learning to code.”
A repeatable solo retrospective checklist
- Compare results to your 3–5 launch goals.
- List the top 5 customer questions you received.
- Identify the biggest drop-off point (visit → signup → purchase → first success).
- Choose one focus area for the next month.
- Write three tasks: automate one, improve one, upsell one.
- Schedule the next retro on your calendar today.
FAQ
How do I choose an idea that’s realistic to launch as a solo creator?
Start with a hard constraint: if it needs a team, it’s not the idea (yet). Choose a problem you can validate, build, and sell with tools you can learn quickly—and that won’t force you into 24/7 support. A good test is whether you can describe the first version in one sentence and ship it in evenings, not months.
What’s the fastest way to narrow my audience without overthinking it?
Write a sharp “who it’s for / not for” definition. For example:
- For: a narrow role + situation (e.g., independent brand designers running 2–4 week sprints)
- Not for: groups that require complex workflows (agencies, teams, heavy approvals)
If you can’t picture a specific person and their week, your audience is still too broad.
How do I know if a problem is “small enough to win” but still worth paying for?
Pick a problem that:
- happens weekly (not “someday”)
- has a clear “pain moment” people can describe
- already costs time, money, or stress
Then define one transformation in plain language (e.g., “capture scope changes in 2 minutes and confidently charge for them”). That outcome becomes your scope filter.
What should I ask in customer conversations to get real validation?
Avoid opinion questions (“Would you buy this?”) and focus on behavior:
- “Walk me through the last time this happened—what triggered it?”
- “What did you try first? What happened next?”
- “What are you using now (templates, tools, doing nothing)?”
- “What does this cost you in a typical week/month?”
You’re mapping routines and tradeoffs, not collecting compliments.
How many interviews are enough, and what’s a good go/no-go rule?
Set go/no-go criteria before you get attached. For example: proceed only if 6 of 10 people describe the same painful moment, can name what they tried, and either:
- paid for a workaround, or
- spend significant time on it weekly
If you don’t hit the bar, treat it as a saved quarter—not a failure.
How do I turn messy notes into clear positioning and messaging?
Use their phrases to write a simple positioning paragraph:
- who it’s for
- the painful stuck point
- the outcome
- the constraint it fits (time, complexity)
- what it replaces (random advice, messy tabs, vague processes)
Then choose 3 benefits you can deliver and back them with specific proof (examples included, schedules, “built from interviews”).
What counts as an MVP for a digital product (and what doesn’t)?
An MVP is the first version that reliably gets a buyer to a real result. Keep only what supports one promise (e.g., “get a first win in 30 minutes”).
A practical approach:
- sketch the journey (buy → access → setup → first win)
- list must-have / nice-to-have / later
- allow manual steps if they buy learning (personal follow-up, simple delivery)
If a step doesn’t move the customer forward, it’s not MVP.
What’s a practical no-code stack for a solo creator who wants to ship fast?
Choose tools by the jobs they must do on day one:
- landing page you can edit fast
- a form for onboarding/feedback
- a lightweight database to track customers and issues
- basic automations (purchase → welcome → delivery)
- simple analytics (views + conversions)
Prefer native integrations so you’re not debugging workflows late at night.
How should I price my first product and set up payments without headaches?
Start with a pricing shape you can explain in one breath—often one plan for a focused product. Anchor pricing on outcomes and what the product replaces (time saved, fewer mistakes, confidence before hitting send).
For payments, make everything “boring”:
- use a simple checkout (e.g., Stripe Checkout)
- or consider a merchant-of-record if you want lighter tax handling
- ensure instant access (receipt email + delivery link)
Also write refund/support terms clearly to prevent surprises.
How do I handle support and build trust without burning out?
Put lightweight systems in place before you’re busy:
- 3 email templates (welcome, common questions, troubleshooting)
- one obvious support path (support email or form)
- a one-page help doc linked from receipts and onboarding
Add boundaries (response windows, expected timelines). Customers usually don’t mind waiting—they mind uncertainty.