Jul 16, 2025·8 min
How to Start a No-Code Blog That’s Actually SEO-Friendly
Learn how to start a no-code blog that ranks: pick a niche, set up SEO basics, plan site structure, write search-focused posts, and publish with confidence.
What “SEO-Friendly” Means for a No-Code Blog
“SEO-friendly” doesn’t mean tricking Google. It means your blog is easy to find, easy to understand, and genuinely useful—even if you never touch code.
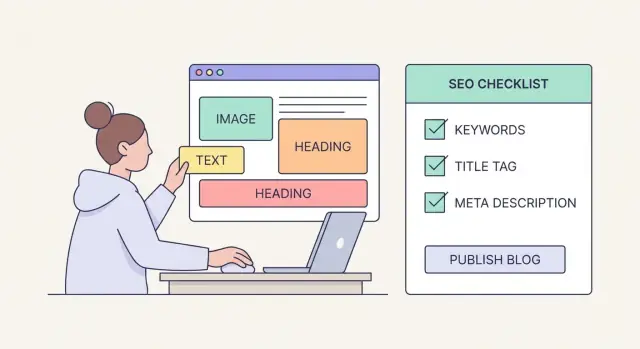
At a practical level, an SEO-friendly blog does three things well:
1) Discoverable (people can find it)
Your posts target topics people already search for, using language they use. You’re not guessing—you’re choosing keywords and angles that already have demand, then writing titles that earn clicks.
2) Crawlable (search engines can read it)
Google needs to access your pages, follow your links, and understand your structure. That usually comes down to basics like clean URLs, consistent navigation, a sensible category system, and a template that doesn’t hide content behind odd layouts.
3) Helpful (readers get what they came for)
If someone searches “best no-code blog platform,” they want clear options, tradeoffs, and a recommendation—not a generic essay. Helpful content matches the search intent, answers quickly, and adds detail that builds trust.
What “no-code” changes (and what it doesn’t)
With a no-code setup, you’ll rely on templates, visual editors, and plugins/integrations instead of custom development. The good news: most modern platforms handle core SEO needs (mobile-friendly design, sitemaps, basic metadata) out of the box.
The tradeoff is performance and control: you’ll want a fast template and you’ll want to be selective about third-party widgets that slow pages down.
If you want more flexibility than templates without going full “traditional dev,” a vibe-coding platform like Koder.ai can be a middle path: you describe what you want in chat (site structure, blog layout, categories, and basic SEO requirements), and it generates a real web app you can host, deploy, and export source code from—useful if you expect to evolve your blog into a larger product later.
Realistic expectations
SEO is rarely instant. For a new blog, it’s normal to see meaningful traction in months, not days—especially if you publish consistently and improve posts over time.
By the end of this guide, you’ll have a simple setup checklist and a plan for your first post (topic, keyword, outline, and on-page SEO basics) so you can publish with confidence.
Choose a Niche and Topic Pillars That Can Rank
A niche isn’t just a theme you like—it’s a clear promise to a specific reader. One of the fastest ways to grow a new SEO-friendly blog is to focus on one audience problem area where people already search for help, and where you can realistically create clearer, more useful content than what’s already ranking.
Pick a niche at the intersection of problems + search demand
Start with audience problems, then verify there’s consistent search interest.
Ask:
- What does my ideal reader struggle with weekly?
- What are they trying to achieve (save money, get a job, learn a tool, fix a process)?
- Are there “how to,” “best,” “template,” or “checklist” searches in this space?
If you can’t quickly name 20–30 post ideas that solve real problems, the niche may be too vague.
Write a one-sentence positioning statement
This keeps your content focused and makes your blog easier to understand (for readers and search engines).
Formula:
“I help [specific audience] achieve [specific outcome] using [topic/tool/approach].”
Example:
“I help freelance designers build a repeatable client pipeline using simple no-code systems.”
Choose 3–5 topic pillars (categories) that can scale
Your pillars are your long-term content categories—broad enough for dozens of posts, focused enough to feel cohesive.
Good pillars:
- map to real search intent (people actively look them up)
- allow beginner → advanced progression
- naturally connect through internal links later
Example pillars for a “no-code operations” blog: onboarding, client portals, automations, templates, pricing/process.
Avoid niches that are too broad (or too competitive)
“Marketing” or “Fitness” is usually too wide for a new site. Instead of “personal finance,” consider “personal finance for first-year teachers” or “budgeting for couples with variable income.” Narrow doesn’t limit you—it helps you rank sooner and expand later.
Domain, Blog Location, and URL Basics
Before you pick a theme or write your first post, make three early decisions that are surprisingly hard to change later: your domain name, where the blog “lives” on that domain, and how your URLs will be structured.
Choose a domain you won’t regret
Pick a domain name that’s brandable, easy to spell, and easy to say out loud. If you have to explain “it’s with a dash” or “two L’s,” people will mistype it—and that can quietly cost you returning readers and links.
A few practical rules:
- Prefer short and clear over clever.
- Avoid hyphens and numbers when possible.
- If your audience is local, a country TLD can help trust (but don’t force it).
Blog on a subdomain or the root?
Most no-code builders let you publish a blog either on a subdomain (blog.example.com) or a folder on the main domain (example.com/blog).
- Root domain folder (recommended for most): example.com/blog keeps all your content under one domain, which is simpler for branding and typically easier to manage as one site.
- Subdomain: blog.example.com can make sense if your blog is run separately, needs a different platform, or you want a hard separation from a product site. The trade-off is a more “split” web presence.
Keep URLs simple and consistent
Use a clean structure like /blog/post-name. Avoid dates in URLs unless your content is truly news-based. Pick one format and stick with it—changing URLs later often creates extra redirect work.
Basic expectations: HTTPS, backups, security
Make sure your site runs on HTTPS (the padlock). Turn on automatic backups if your platform offers them, and keep logins protected with strong passwords (and 2FA when available). You don’t need deep technical setup—just make sure these basics are enabled from day one.
Pick a No-Code Platform and Template Built for Speed
Speed is a ranking factor, but it’s also a reader factor. A fast, clean blog loads quickly on mobile, feels trustworthy, and makes it easier for Google to crawl your pages without wasting time.
Start with a lightweight, readable template
Choose a theme/template that’s built for content first: plenty of white space, clear typography, and minimal scripts. “Pretty” templates that rely on heavy animations, sliders, and multiple font families often slow down your site and distract from the article.
When comparing no-code platforms (like Webflow, Squarespace, Wix, Ghost, or Notion-to-site tools), prioritize templates that:
- Use one primary font (and one accent font at most)
- Keep the layout simple (single-column posts usually win)
- Don’t require lots of third-party add-ons to look finished
If you’re building beyond a standard template (for example, a blog plus gated resources, a small tool, or a member area), Koder.ai can help you generate a custom React-based web app through chat—while still keeping practical needs like clean routing, page structure, and deploy/rollback workflows in mind.
Do quick mobile-first checks
Most readers will find you on a phone. Before committing to a template, open a few demo posts on mobile and check:
- Font size and line spacing (comfortable to read without zooming)
- Buttons and tap targets (easy to tap, not cramped)
- Navigation (simple, not hiding important categories)
Remove distractions that hurt reading (and SEO)
Avoid templates that push popups on every scroll, autoplay video/audio, or cluttered sidebars stuffed with widgets. If you use a newsletter popup, set it to appear after meaningful engagement (or only on exit intent).
Create a simple design system
Consistency helps readers scan and helps you publish faster. Decide once on:
- Heading styles (H2/H3 sizes and spacing)
- Callouts (tips, warnings, key takeaways)
- Image style (width, borders, captions)
A clean template + consistent styling gives you speed, clarity, and a blog that’s easier to maintain as it grows.
Set Up Site Structure Before You Write
A clean structure helps search engines understand your blog—and helps readers find the next helpful page without thinking. Do this once, and every post you publish will land in the right place.
Create your core pages first
Before you publish a single article, build the pages every real blog needs:
- Home: what your blog is about and who it’s for (include links to your main categories)
- About: your story + credibility + what readers will learn here
- Contact: a simple form or email address
- Privacy Policy / Terms (as needed): especially if you use analytics, email signups, or ads
These pages don’t need to be long. They just need to exist, be easy to find, and be linked in your header or footer.
Build category pages around topic pillars
Your categories should match your topic pillars, not random tags. If you write about “healthy meal prep,” categories like Meal Prep Basics, Recipes, and Grocery Planning are clearer than “Tips,” “Food,” and “Lifestyle.”
For each category page, add a short intro (2–5 sentences) explaining what’s inside. This helps the page rank on its own and makes the category feel intentional.
Keep navigation simple (header + footer)
Use a top menu that includes 4–6 items max: Home, your 2–4 main categories, and About/Start Here.
In the footer, link to: About, Contact, Privacy Policy, and your main categories. Footer links are a simple way to make sure important pages are always reachable.
Plan an internal link path (pillar → post)
Aim for a simple flow:
- Home → Category page → Post
- Post → Related post (2–5 contextual links)
- Post → Category page (a “More in…” link)
This creates a predictable path from high-level pages to specific articles—without any coding, plugins, or complicated architecture.
Do Beginner-Friendly Keyword Research (That Works)
Get clean URLs by default
Set up clean slugs and a simple /blog structure without hand-editing routing.
Keyword research doesn’t have to mean spreadsheets and SEO jargon. For a no-code blog, the goal is simple: find phrases people already type into Google that match what you can write better than existing results.
Start with real questions (not “ideas”)
Begin by collecting the exact problems your audience mentions. Pull from:
- Google autocomplete (type your topic and note the suggestions)
- “People also ask” boxes
- Reddit, Quora, YouTube comments, and niche forums
- Your own DMs, customer emails, and support tickets
Turn these into a small keyword list written in plain language, like “best budgeting app for couples” or “how to meal prep with no fridge at work.” These are often easier to rank than broad terms.
Label each keyword by search intent
Add a quick intent label next to every phrase:
- Informational: “what is…”, “why…”, “ideas for…”
- How-to: “how to…”, “step-by-step…”, “template…”
- Comparison: “A vs B”, “best…”, “reviews”, “alternatives”
This helps you write the right type of post. A comparison keyword usually needs options, pros/cons, and a clear recommendation. A how-to keyword needs steps and screenshots.
Choose “easy win” keywords
Look for keywords that are:
- Long-tail (4+ words)
- Specific (includes a situation, audience, or constraint)
- Low competition (results look thin, outdated, or off-topic)
If the first page is packed with huge brands that perfectly answer the query, save that keyword for later.
Group keywords into clusters (so posts support each other)
Create clusters where one pillar topic links to several supporting posts. Example:
- Pillar: “No-code blog SEO checklist”
- Support: “How to write meta titles”, “Internal linking for blogs”, “Blog structure for SEO”
This makes internal linking natural—and helps Google understand your site faster.
On-Page SEO: The Non-Technical Essentials
On-page SEO is simply how you present each post so search engines and readers immediately understand it. You don’t need code for this—you need clarity, structure, and a few repeatable habits.
Key takeaways: pick one main keyword, write a clean outline, add helpful images (with alt text), and make the page easy to scan.
1) Use one primary keyword (and a few close variations)
Choose one primary keyword for the post (for example, on-page SEO for blogs). Then use a few natural variations you’d say out loud, like blog SEO checklist or SEO-friendly blog.
Place the primary keyword where it matters most:
- In the H1 (the post title)
- In the first 1–2 paragraphs
- In one H2 if it fits naturally
- In the meta title/description (covered in the next section)
Avoid repeating it in every sentence. If it sounds awkward, it’s too much.
2) Write a clear H1 and a logical H2/H3 outline
A good outline helps readers skim and helps search engines understand what the page is about.
- H1: one clear promise (what the reader will learn)
- H2s: the major steps or sections
- H3s: the details, examples, or mini-steps under each H2
Before you publish, scroll through your headings only. If the story still makes sense, your structure is doing its job.
3) Add images that help (and write descriptive alt text)
Images aren’t required for SEO, but they can improve understanding and time-on-page—especially for checklists, templates, or before/after examples.
When you add an image, give it alt text that describes what it shows, not a string of keywords.
Bad: “seo-friendly blog on-page seo for blogs keyword research for blogging”
Good: “Example of an H2/H3 outline for an on-page SEO checklist”
Also keep images reasonably sized so they don’t slow the page down (most no-code platforms let you upload compressed files).
4) Make the post easy to scan
Most readers don’t read—at first. They scan.
Use short paragraphs, clear headings, and occasional bullets to highlight steps. When you mention a tool, template, or related concept, link to the most relevant page on your site (for example, a future guide on /blog/keyword-research-for-blogging). This helps readers and sets up your internal linking strategy later.
Titles, Meta Descriptions, and Slugs That Earn Clicks
Publish without extra tools
Go from chat to a live site with deployment and hosting handled in one workflow.
Your title, meta description, and URL slug are the “front door” of your post in search results. They don’t require any coding, but they do affect two big things: whether people click, and whether Google understands what the page is about.
Write title tags that are specific and benefit-led
A good title tag tells the reader what they’ll get and who it’s for—without trying to be clever.
Keep it focused on one main topic, and aim for clarity over wordplay. If you can, add a small promise or outcome.
Examples:
- Not great: “My Blogging Journey With Webflow”
- Better: “How to Start a No-Code Blog in Webflow (Beginner Steps + SEO Basics)”
Length matters because Google may truncate long titles. You don’t need to count pixels—just avoid stuffing. If your title starts to feel like a sentence with three commas, it’s probably too long.
Write meta descriptions that match the page and invite the click
Meta descriptions don’t usually “boost rankings” directly, but they can boost clicks—especially when they clearly match what the searcher wants.
A strong meta description:
- Mirrors the post’s promise (no bait-and-switch)
- Mentions who it’s for (beginners, freelancers, small business, etc.)
- Includes one specific detail (steps, checklist, templates, examples)
Example formula:
“Learn how to [do the thing] with [tool/approach]. Includes [specifics]. Best for [audience].”
Use clean, readable slugs
Your slug should be short, lowercase, and easy to understand at a glance. Use hyphens, not underscores.
Good:
- /no-code-blog-seo
- /meta-titles-descriptions
Avoid:
- /How-To-Start-A-Blog!!!
- /blog-post-12345
- /no-code-blog-seo-checklist-for-beginners-2025-complete-guide
Avoid duplicates (more common than you think)
No-code templates often create duplicate titles by accident—especially for category pages (e.g., multiple pages called “Blog”). Make sure every post has a unique title tag, and that category pages aren’t reusing the same title as a post.
A quick habit: before publishing, search your own site titles in your CMS for repeats (or scan your blog list) and tweak anything that looks too similar.
Build Content Clusters and Internal Links (No Code Needed)
Content clusters are a simple way to make your blog easier to understand—for readers and for search engines. Instead of publishing unrelated posts, you group them around a “pillar” topic, then connect everything with clear internal links.
Start with a small, realistic cluster
For your first month or two, aim for 2–3 pillar pages and 8–12 supporting posts.
- Pillar page: a broad, evergreen guide (example: “No-code blog SEO checklist”).
- Supporting posts: narrower questions that belong under that guide (example: “How to write meta titles that get clicks”).
The goal is coverage: the pillar explains the big picture, and the supporting posts handle the details.
Map your internal links (before you publish)
You don’t need a tool—just a simple doc or spreadsheet.
- Link each supporting post → the pillar page (usually near the top and again near the end).
- Link related supporting posts → each other where it genuinely helps the reader.
This creates clear pathways through your site and helps your important pages (pillars) earn more internal “votes.”
Add “Related articles” sections automatically
Most no-code blog templates let you add a reusable block at the end of posts. Create a short Related articles section with 3–5 links. Keep it consistent across posts so readers always have a next step.
Use descriptive anchor text
Your link text should describe what’s behind the click. Avoid “click here.”
Good: “blog structure for SEO”
Not great: “read this”
If you do this consistently, your blog becomes easier to navigate, easier to crawl, and more likely to rank as a connected set—rather than isolated posts.
Write Posts That Match Search Intent and Keep Readers
Search intent is the “why” behind a query. If your post answers a different question than the one the reader actually has, they’ll bounce—even if your writing is great.
Start with one reader problem (one clear outcome)
Before you write, finish this sentence: “After reading this post, someone should be able to ______.” Keep it to one outcome.
Examples:
- Too broad: “Learn Notion for blogging”
- Clear: “Create a simple editorial calendar in Notion (with a template)”
That clarity helps you choose what to include, what to skip, and what to link out to for follow-up.
Add context early: who it’s for + what they’ll learn
In the first 5–8 lines, make it obvious the post is for them. A simple structure works well:
- Who this is for: “New bloggers using a no-code platform who haven’t set up categories yet.”
- What you’ll learn: “A 3-step structure you can copy, plus a quick checklist.”
This reduces confusion and keeps the right readers engaged.
Make it actionable with steps, examples, and checklists
Readers stay when they can do something as they scroll. Aim for:
- Numbered steps for any process (even short ones)
- A concrete example (a sample intro, a headline rewrite, a mini outline)
- A checklist near the end so they can confirm they didn’t miss anything
If you’re teaching, show the “before → after.” If you’re recommending, explain when it’s a good fit and when it isn’t.
Match depth to the query (and avoid detours)
A “how to” query needs a clear process. A “best” query needs options and comparisons. A “vs” query needs a decision framework.
Stay on-topic. If a related idea is useful but would derail the post, mention it briefly and save the full explanation for a separate article.
End with next steps (so the journey continues)
Close with a clear action and one internal link to a natural follow-up, like:
- “Next, build a simple content cluster around this topic: /blog/content-clusters-internal-links”
- “Or tighten your click-through rate with better snippets: /blog/meta-titles-descriptions-slugs”
A Simple No-Code Publishing Workflow You Can Repeat
Use your own domain
Put your blog on a custom domain when you are ready to brand it properly.
A no-code blog gets easier (and more SEO-friendly) when you stop reinventing the process for every post. The goal is a workflow you can follow even on busy weeks—without turning blogging into a full-time job.
1) Keep a lightweight editorial calendar
Start with 1–2 posts per week. That’s enough to build momentum and learn what your audience responds to.
Plan in two layers:
- Monthly themes (your topic pillars)
- Weekly posts (specific questions you’ll answer)
A simple spreadsheet or Notion board works. Track: working title, target keyword, status (Draft → Edit → Publish), and the internal links you’ll add.
2) Use the same post template every time
Consistency helps readers scan—and helps you avoid missing key elements.
Aim for a predictable structure:
- H1 title
- Short intro (what the reader will get)
- 3–6 sections with clear H2/H3 headings
- A practical takeaway or next step
Use consistent formatting for headings, lists, and callouts so your content feels like one coherent site, not random posts.
If you’re building your blog experience as a custom app (rather than a fixed template), make sure your workflow includes safe iteration. For example, Koder.ai supports snapshots and rollback, which makes it easier to experiment with layouts, navigation, or internal-link modules without risking your live site.
3) Create a reusable publishing checklist
Copy/paste this into every draft:
- SEO basics: keyword used naturally in title + intro + one subheading
- Meta: title and description written (not auto-generated)
- Slug: short, readable, no filler words
- Links: 2–4 internal links to related posts + 1–2 credible external sources
- Formatting: short paragraphs, scannable headings, limited long lists
- Media: add images only if they clarify (and use descriptive alt text)
- Final pass: read it out loud for clarity
4) Update older posts on purpose
Set a monthly reminder to refresh 2–3 posts. Update when you learn something new, when a link breaks, or when rankings shift. Small improvements—clearer headings, better internal links, a sharper intro—often move a post further up the results without writing from scratch.
Measure What Matters and Improve Over Time
SEO isn’t something you finish. It’s a feedback loop: publish, measure, adjust, repeat. The good news: you can get useful data without touching code.
Do a basic tracking setup (once)
Start with two essentials:
- Google Search Console to see how you appear in search (queries, impressions, clicks, rankings).
- An analytics tool (Google Analytics 4 or a privacy-friendly alternative) to understand what readers do on your site.
Most no-code platforms support copy‑paste verification or a simple integration. Keep the setup minimal—your goal is reliable signals, not perfect attribution.
Track early signals that predict growth
In the first 4–8 weeks, focus on metrics that tell you whether search engines and readers are responding:
- Impressions: Are you showing up for anything yet?
- Clicks and CTR: Are titles/snippets earning attention?
- Top queries: What people actually typed to find you.
- Time on page / engagement: Are readers sticking around long enough to get value?
A post can be working even before it ranks well. Rising impressions usually come first.
Use query data to improve posts (fast wins)
Open Search Console, pick a page, and scan the queries. Then:
- If you’re getting impressions but few clicks, tighten the title and meta description to better match the query.
- If you’re ranking for a subtopic you barely covered, expand that section and add an FAQ block.
- If a query suggests a missing angle, add a short subsection rather than writing a whole new post.
Schedule quarterly refreshes
Every quarter, pick your top posts (by impressions or clicks) and refresh them:
- Update steps, screenshots, and examples
- Add internal links to newer related posts
- Improve the intro to match the main intent
This simple routine compounds over time—and keeps your SEO-friendly blog from going stale.