Dec 04, 2025·7 min
Tool lending library tracking for borrowers, due dates, returns
Tool lending library tracking made simple: track who borrowed each item, set due dates, and record condition on return with clear rules and a lightweight system.
Tool lending library tracking made simple: track who borrowed each item, set due dates, and record condition on return with clear rules and a lightweight system.
A neighborhood tool library usually starts with good intentions and a small pile of donated tools. Then real life happens: someone forgets the return date, a drill comes back missing a bit, and nobody is sure who had it last. After a few awkward conversations, volunteers get tired and the collection slowly shrinks.
The goal is simple: always know who has what, when it’s due back, and what shape it returned in. If you can answer those three questions quickly, you prevent most losses and most hurt feelings.
You don’t need a complicated system on day one. You do need a few pieces of information that stay consistent, even when different people are running the table on different weekends.
At minimum, most groups track:
Tool libraries also have real constraints. Tools aren’t uniform like books. Some come with parts (sanders with dust bags, socket sets, ladders with straps). Some are fragile. Others are sturdy but expensive. And the people running the library are volunteers with limited time, often helping a line of neighbors at once.
That’s why the tracking method has to be fast and forgiving. If a process takes five minutes per checkout, people skip steps when it gets busy. If it’s too strict, it can feel unfriendly.
Start with a version you can do every time, even on a hectic Saturday. Once the basics are solid, you can improve over time with better labels, clearer condition categories, and simple due date reminders. The best tool inventory checkout system is the one your volunteers actually keep using.
A community tool library workflow runs smoothly when every checkout creates three records you can search later: the item, the borrower, and the loan. This is the heart of tool lending library tracking, whether you use a notebook, a spreadsheet, or an app.
Think of it like a small paper trail. If a tool goes missing or comes back damaged, you don’t want opinions. You want dates, notes, and who handled it.
A practical set of fields that prevents most confusion:
A concrete example: Alex borrows "Cordless drill D-014" on Friday night. The loan record shows it’s due Sunday at 6 pm. If Alex texts for an extra day, record the extension and the new due date so the next volunteer doesn’t promise the drill to someone else.
On return, do a quick check together: battery present, case closed, bits returned, no new cracks. If there’s an issue, write a neutral note ("chuck stuck, still turns") and add a photo. That keeps the conversation calm because you’re documenting the tool, not judging the person.
If your rules are fuzzy, any system will feel messy. If your rules are clear, even a paper notebook can handle tool lending library tracking.
Start with an item ID that stays readable after real use. Many libraries use a tough sticker label covered with clear tape, or a small laminated tag on a zip tie. For metal tools, an engraved number can last longer. Keep it short (like H-014 for hand tool #14), and put the ID in the same spot for each category so volunteers don’t hunt for it.
Also decide what "one item" means. A drill might be one item, but the battery and charger could be separate items with their own IDs, or they could be a single kit ID. Pick one approach and stick to it.
Agree on condition levels before the first checkout. Use words everyone can apply the same way:
To reduce arguments, use a short checklist per tool category. For example, a power tool check can be: turns on, no unusual noise, cord or battery looks safe, guard present, bits or blades secure. Yard tools might be: handle cracks, head tight, sharp edge protected.
Photos help when memories fail. A simple standard works well: one clear photo at intake showing the full tool and the ID, then a return photo only if something changed (new crack, missing part, heavy rust). That keeps documentation useful without turning returns into a photo shoot.
People relax when the policy is predictable and kind. Write down what you will do every time. Keep it focused on actions, not blame: record the damage, update condition, move the tool to a repair queue, and explain the next step.
If you charge fees or accept repairs from borrowers, define when that applies and how you communicate it. Even a simple "we’ll follow up after we inspect it" can help, as long as you do it consistently.
Example: if a hedge trimmer returns with a cracked guard, you mark it "Needs repair," snap one photo, and place it in the repair bin with a short note. The borrower hears, "Thanks for letting us know. We’re taking it out of circulation today," not a lecture.
The best system is the one a tired volunteer can use correctly in 30 seconds. For tool lending library tracking, that usually means fewer fields, clear steps, and a place to record the due date and condition without debate.
A paper binder can work for a very small library. It’s easy to train on and doesn’t need Wi-Fi, but history is harder to search, and two volunteers can’t update it at the same time.
A spreadsheet is the next step up. It’s still familiar, but easier to sort by due date, filter by borrower, and see what’s out. The key is a consistent template: one row per loan, the same columns every time.
A simple web app can be worth it when multiple volunteers handle checkouts, when you want clean history, or when you need reminders. Phone use matters: if it takes too many taps to find an item, people will skip steps. A lightweight tool inventory checkout system can also keep a clearer audit trail (who checked it out, when, and what condition was recorded).
A few practical questions usually decide what fits:
Whatever you choose, set a simple review rhythm. A quick weekly pass for overdue items and messy records, plus a monthly cleanup to merge duplicates and confirm that "missing" tools aren’t just recorded wrong, prevents slow drift.
Fast checkouts prevent lines, mistakes, and awkward follow-ups. The trick is to record only what you truly need at the moment of handoff, in the same order every time.
One rule keeps the whole system honest: the item doesn’t leave the table until the loan is recorded.
A quick example: Sam checks out a corded drill. The volunteer confirms Sam’s phone number, sets the due date for Tuesday at 7 pm, and notes: "Works, chuck stiff, missing one bit from set." Sam repeats the due date and hears, "If you need one more day, text before Tuesday." That single note is often the difference between calm borrowed item due date tracking and a week of guesswork.
If you do only one thing, do this: say the due date out loud, then record it immediately.
Returns are where most arguments start: "It was like that when I got it." You can avoid that by using the same routine every time, the same condition scale, and a calm, fact-first tone. The goal is a return process that feels fair to both sides.
Before you begin, have two things ready: the tool’s ID label (or tag) and the open loan record. If you can’t match the tool to an active loan, pause and fix that first while the borrower is still there.
A simple, repeatable flow:
If there’s a problem, keep it neutral: describe what you see, not what you think happened. "The drill runs, but the chuck is wobbling and the charger is missing" is easier to resolve than an accusation. Then agree on the next step (repair hold, replacement fee if your rules say so, or a note for follow-up).
Most tool libraries don’t lose items because people are careless. They lose items because the tracking is fuzzy, so nobody can tell what happened later. Good tool lending library tracking is less about fancy software and more about clear, repeatable habits.
Similar tools are the first trouble spot. "DeWalt drill" might mean two different drills, plus a charger, plus two batteries. Without a unique ID on the tool, the wrong item gets marked as returned, and the real one stays "out" forever.
Another common problem is keeping borrower details in text messages or email threads. It feels quick in the moment, but when the drill is late you can’t find the history, the phone number, or the last due date.
Arguments usually come from unclear rules. Due dates cause friction when they’re set differently each time. Condition notes create conflict when they’re vague. "Fine" doesn’t help if a saw comes back with a chipped blade.
A small set of habits prevents most problems:
Example: a hedge trimmer goes out with its blade cover and a spare battery. On return, the trimmer is back but the cover is missing. If the record never listed the cover, it turns into "nobody knows." If the record listed it, it’s a simple follow-up: "The trimmer is back, we’re missing the blade cover. Can you check your car trunk?"
A tool library stays friendly when problems are caught early. You don’t need long meetings or fancy reports. A few routines make your community tool library workflow reliable, so volunteers aren’t guessing and borrowers feel treated fairly.
A workable rhythm for most groups:
A simple repair log helps more than most people expect: what broke, when it was fixed, cost (even if it’s $0), and who repaired it. It turns "that saw is always broken" into clear history.
Also decide where records live and who can edit them. If it’s digital, decide how you back it up and how a new volunteer gets access.
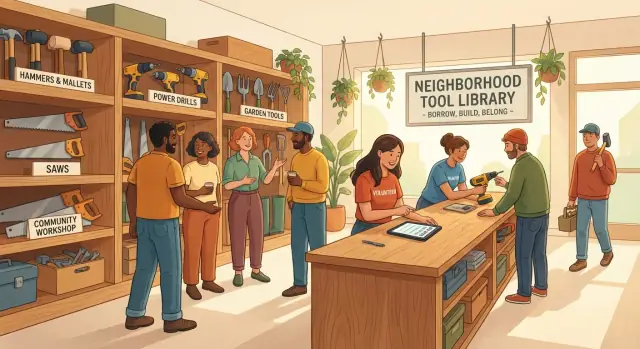
Saturday morning, your neighborhood tool library has a line. Maya needs a drill to hang shelves, Sam wants a ladder to clean gutters, and Priya grabs a hedge trimmer for an overgrown yard. A volunteer does the checkout in one place so nothing gets lost in side conversations.
Each loan gets the basics: item name and ID tag, borrower name, checkout time, due date, and a quick condition note. For kits, one clear photo at checkout can save time later, but only if it’s fast and consistent.
Due dates are set for Monday 6 pm for weekend tools. On Sunday afternoon, a reminder goes out. Sam realizes he’s running late and requests an extra day. The volunteer approves it and updates the record, so everyone sees the new return time.
On Monday, returns come in fast. Priya brings the hedge trimmer back on time, but the plastic carry case has a new crack and the blade guard is missing. Because the checkout record listed the guard, the conversation stays calm and factual.
The volunteer keeps the return check simple: match the ID, confirm parts, take a photo only if something changed, write one clear note, then set the status (available, cleaning, or repair). Priya agrees to replace the guard, and the library marks the trimmer as repair so nobody checks it out by mistake.
That’s tool lending library tracking that stays friendly even when something goes wrong.
If you want tool lending library tracking that sticks, start with the smallest setup that answers three questions: what went out, who has it, and when it should come back. Everything else can wait until you see how people really borrow.
A solid minimum setup is:
Run this for two lending events without trying to perfect it. Pay attention to where volunteers hesitate or make mistakes. If people keep writing "red drill" but you have two similar drills, that’s your signal to add labels and a short description field. If the due date is missed often, it may be a rules problem: unclear, inconsistent, or unrealistic.
After the pilot, make only the changes that remove friction. Drop fields nobody fills in. Add one field that prevents confusion (often the item label, due date, or borrower contact). Write one simple rule volunteers can repeat in one sentence.
Upgrade from a spreadsheet to a small app when the work stops fitting in one person’s head. Common triggers are multiple volunteers on different days, a growing inventory, and the need to search history fast (for patterns like "this hedge trimmer returns damaged often").
If you decide to build a simple custom app, platforms like Koder.ai (koder.ai) can help you create a basic checkout and return workflow from a chat description. The point isn’t the software, it’s keeping borrowed item due date tracking and return condition notes consistent as your library grows.
Track three things every time: the item (with a unique ID), the borrower (name plus one reliable contact method), and the loan (checkout date, due date, and who handled it). Add a short return-condition note when it comes back so you’re not relying on memory later.
Use a short, unique ID that’s physically attached to the tool and easy to spot. Keep the ID format consistent by category and put the label in the same place each time, so volunteers don’t waste time hunting for it.
Pick one definition and stick with it: either treat the whole kit as one item, or give key parts their own IDs. If parts often get separated or lost, separate IDs usually reduce confusion because returns can be checked piece by piece.
Set one default loan length for most items and say the exact due date out loud at checkout, then record it immediately. If you allow extensions, require that the new due date is written into the record right away so the next volunteer sees the same truth.
Use a small set of plain categories that anyone can apply the same way, then add one short note when needed. The goal is repeatability, not perfection, so avoid vague words like “fine” and write what you can see, such as “cord frayed near plug” or “battery missing.”
Describe the issue neutrally, update the tool’s status to something like “Repair” so it doesn’t get re-loaned, and record one clear note while the borrower is present. If you have fees or repair expectations, apply the same rule every time and communicate the next step calmly.
A binder works when inventory is tiny and one person can manage it, but it’s hard to search and easy to double-book. A spreadsheet is often the best next step because it’s searchable and familiar, and an app becomes worth it when multiple volunteers need clean history, fast lookups, and reminders.
Keep checkout to the few fields that prevent confusion: item ID, borrower contact, due date, and a quick condition/accessories note. The best safeguard is a single rule: the tool doesn’t leave the table until the loan is recorded.
Use reminders for due dates and do quick overdue reviews on a regular cadence so small problems don’t pile up. Even a simple weekly check of what’s late and what’s marked “repair” prevents tools from getting lost in limbo.
Store borrower contact info in one shared record system, not scattered across personal phones, and only collect what you truly need to manage returns. Limit editing access to trained volunteers and agree on a basic backup habit so records don’t vanish after a laptop loss.