UPI-first checkout for Indian D2C stores: lower drop-offs
UPI-first checkout for Indian D2C: design a fast UPI intent flow, add smart card and netbanking fallback, and cut mobile drop-offs with clear UI.
What problem a UPI-first checkout solves
On mobile in India, shoppers expect checkout to feel like paying a friend: fast, familiar, and with almost no typing. If they have to key in a long card number, hunt for an IFSC code, or switch apps without clear guidance, many will quit even if they wanted the product.
Payment is where most D2C checkouts lose people because it is the first moment that feels risky. The customer is about to part with money, they are often on a weak network, and they may be juggling OTPs, app switching, and distractions. A small delay or confusing screen can look like a failure.
A UPI-first checkout simply means UPI is the default, quickest path you present and support best. It does not mean UPI is the only option. Cards and netbanking still matter, but they should be positioned as fallbacks, not competing choices that slow down decision-making.
A good UPI-first flow optimizes for four things:
- Time to pay (few taps, minimal typing)
- Clarity (what happens next, what to do after app switch)
- Trust (clear amount, merchant name, and confirmation)
- Recovery (easy retry and safe fallbacks when something breaks)
For example, a buyer on Instagram taps “Buy”, lands on your payment step, and sees UPI at the top with their last-used app suggested. They tap once, approve in their UPI app, and return to a clear success screen. If anything goes wrong, they should see a simple message like “Payment not confirmed yet” with a safe next action, instead of getting stuck or paying twice.
When you solve for speed, clarity, and recovery, you reduce drop-offs without pushing users into a single payment method.
Pick the payment paths before you design screens
A checkout feels “simple” when the product team has already decided what the shopper should do next in every common situation. If you skip this and jump straight into UI, you usually end up with a crowded payment page and higher drop-offs.
Start by naming your primary path. For an Indian D2C store, that often means a UPI-first checkout where the default action is one-tap UPI intent: the user chooses an app and completes payment in their UPI app with minimal typing.
Then define your secondary paths as deliberate fallbacks, not equal choices. Think of them as “escape hatches” for when intent is not possible (no UPI app, app failure, user prefers another method). Keep the set small and predictable so users do not hesitate.
A practical way to decide the paths
Use a simple rule: default to the fastest option, and only expand when needed.
- Default: UPI intent (with a short app picker or last used app)
- Expanded: UPI QR and UPI ID (for users who do not want to switch apps, or are on desktop)
- Fallback: card and netbanking (and wallet only if it is meaningful for your audience)
- Always available: a clear “More payment options” control, not a full grid upfront
Now decide when each option appears. For example, show UPI intent first for mobile users with typical order values, but bring card higher when you detect a higher-ticket order or a repeat buyer who used a card last time.
Success criteria should be written down before UI work starts. Aim for fewer steps, fewer chances to mistype, and a confirmation state that is obvious. A good test is to describe the flow in one sentence: “Tap Pay with UPI, approve in app, return and see confirmed.” If you cannot say it that simply, the screen design will struggle too.
A quick scenario: a shopper on a slow 4G connection should still see one clear primary button first, and only see the rest after tapping “More options.” This reduces choice overload and keeps the fastest path front and center.
Design the checkout screen hierarchy for mobile
On mobile, the fastest checkout is the one that makes the next step obvious. A UPI-first layout should guide most buyers into an app switch (intent) with one tap, while still keeping other methods close enough that people do not feel trapped.
A practical order for payment methods is: UPI intent first (Pay with UPI app), then UPI QR or UPI ID, then cards, then netbanking. Put the first option in its own prominent card, and collapse the rest behind a simple “More payment options” row so the screen stays calm.
Labels matter because they set expectations. Avoid vague buttons like “Proceed” or “Continue”. Use action labels that describe what happens next, such as “Pay with UPI app” (opens your UPI app) or “Pay by card” (enter card details). If you support multiple UPI apps, show “Choose UPI app” only after the first tap, not as a long list upfront.
Place money details where people can confirm without scrolling: total payable near the bottom, close to the primary button, with a small “View bill details” expander for items like shipping, discount, and taxes. Add one or two trust cues near the pay button (for example, “Secure payment” and “Easy refunds”) and keep them short so they do not push the button down.
Keep the layout stable. Reserve space for error text and loading states so the pay button does not jump. Disable method switching while you are creating the payment request, and show a clear spinner with a single line like “Opening UPI app…” to prevent double taps.
Collapse rarely used methods by default, and only expand when asked. Too many equal-looking options creates choice overload and slows decisions, especially on small screens.
Step-by-step UPI intent flow (the happy path)
A good UPI-first checkout keeps the user moving forward with almost no reading. The goal is: confirm, tap once, complete in the UPI app, return, and see the order confirmed.
Start with a compact order summary that fits on one screen. Show the total amount clearly, plus 1-2 key lines (item count, delivery address city, expected delivery). Avoid long carts or extra fields here. If something must be editable, make it a small “Change” action that does not kick the user out of checkout.
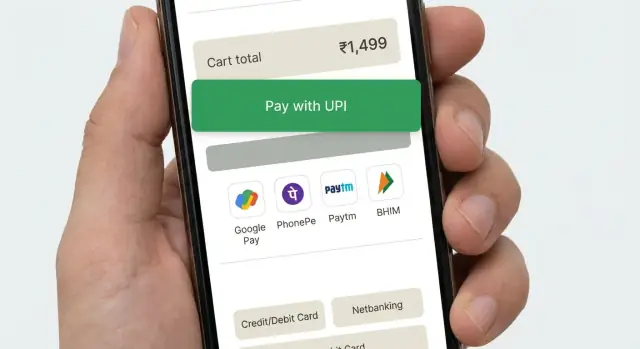
Then make “Pay with UPI” the primary action. On tap, launch the UPI intent flow so the phone shows installed UPI apps (for example, PhonePe, Google Pay, Paytm, BHIM). If you support UPI ID too, keep it secondary so most people can just pick an app.
When the user returns from the UPI app, handle three outcomes and make each feel safe:
- Success: show a short “Payment received” state and move ahead.
- Failure: show “Payment failed” with one clear retry button.
- Unknown: show “Checking payment status” and keep the user on the same screen.
For “checking”, show a processing screen with a spinner and a plain message like “Confirming your payment. This can take up to 30 seconds.” Poll your server for final status. Do not ask the user to pay again during this window.
Once confirmed, land on a simple receipt screen: order number, amount paid, delivery address, and next actions like “Track order” and “Continue shopping.” Keep it clean so the user instantly trusts the result.
Handle failures and uncertain payment states safely
A UPI-first checkout must treat failures as normal, not as user mistakes. The goal is simple: keep the order safe, keep the shopper calm, and make the next action obvious.
If the phone has no UPI apps (or the intent launch fails), do not leave the buyer stuck on a spinner. Say what happened in plain words and immediately offer a working option like UPI QR, plus cards and netbanking.
When a shopper cancels inside the UPI app, don’t scold them with “Payment failed”. They made a choice, or they got interrupted. Bring them back to checkout with a neutral message like “Payment not completed” and keep their cart, address, and selected method intact.
Pending states are common with spotty networks and delayed bank responses. Treat “pending” as its own status, not a failure.
A safe way to handle uncertain outcomes
- Create the order once, mark it as “payment pending”, and show an order confirmation screen.
- Keep checking the payment status in the background and offer a clear “Check status” button.
- If confirmation is delayed, tell them what you are doing and how long it may take.
- If it stays pending, offer “Try again” and “Use another method” without losing the order.
Duplicate payments usually happen when people tap Pay again too quickly. Prevent it with clear status and gentle friction. Disable the Pay button as soon as you hand off to UPI, and show “Waiting for confirmation” with the amount and the last attempt time.
Timeouts and retries that feel safe
If you time out, avoid “Retry now” as the only option. Offer a safe retry after a short cooldown, and explain that you will not charge twice if the first attempt succeeds later.
Example: Riya pays via UPI, returns to your app, and sees “Confirming payment (up to 30 seconds)”. If it’s still pending, she can close the screen and later tap “Check status” from her order page instead of paying again in panic.
Build a smooth fallback to cards and netbanking
A good UPI-first checkout does not show every payment option up front. It earns the UPI attempt first, then offers a calm, fast fallback only when the user needs it. If you surface cards and netbanking too early, many buyers will hesitate, compare, and abandon.
Trigger the fallback only after a clear UPI problem: the user cancels in the UPI app, the intent times out, or you receive a failure from the gateway. For uncertain states (like “pending”), don’t rush them into another method that could cause double payment. Instead, show a short status screen with a single action like “Try UPI again” and a secondary action like “Use another method”.
When the buyer switches methods, keep their progress intact. The cart, shipping address, coupon, and selected delivery option should remain exactly as they were. If you already collected email/phone for receipts, do not ask again.
Keep fallback steps short and predictable:
- Default to the fastest option for that user (saved card or netbanking bank list) only after UPI fails.
- Minimize fields: card number, expiry, CVV, and name only if required.
- Use autofill and numeric keyboards on mobile where possible.
- Write errors in plain words (“CVV is 3 digits”) and place them next to the field.
- Allow switching back to UPI with one tap, without clearing inputs.
Example: a buyer taps “Pay with UPI”, gets pushed to their UPI app, then returns with “Payment not completed”. Show “Try again” first. Under it, offer “Pay by card” and “Netbanking”. If they pick card, prefill name and billing email, keep the cart unchanged, and let them return to UPI instantly if they change their mind.
UI details that reduce drop-offs on mobile
Make the primary action obvious
Mobile checkout fails when the screen asks the buyer to think. Pick one clear primary action and make everything else secondary. If you are doing an UPI-first checkout, the main button should read something like “Pay with UPI” or “Open UPI app”, not a vague “Continue”.
Avoid competing buttons (for example, “Pay now”, “Apply coupon”, and “Edit address” all shouting at once). Keep extras as small text links or inside collapsible rows.
Use thumb-friendly spacing. Most taps happen with one hand, so give buttons enough height and keep them away from the very bottom edge where gestures can interfere. Use readable text sizes so buyers do not pinch-zoom just to confirm the amount.
Reduce typing and doubt
Typing is slow on mobile. Pre-fill what you can (phone and email from the account, last-used address, saved UPI ID if the buyer used it before). When you must ask for input, keep it to one field per screen and show the keyboard type that matches (number pad for phone).
Error messages should be short, specific, and tell the next step. “Something went wrong” is a dead end. A better pattern is: what happened + what to do now.
Lightweight trust cues help more than long paragraphs. Show a small “Secure payment” note, keep the merchant name consistent across the checkout header and payment prompt, and always display the final payable amount near the primary button.
A quick UI check that catches most drop-offs:
- One primary button per screen, with a clear label
- Large tap targets (especially for UPI app selection)
- Pre-filled contact fields and minimal typing
- Specific errors with a clear next action
- Consistent merchant name and amount shown at all times
Common mistakes that hurt conversion
Many drop-offs are not about price or trust. They happen because the payment flow feels uncertain on a small screen. A good UPI-first checkout should feel like one continuous task, even when the user jumps to a UPI app and back.
Mistakes that quietly kill completion
Here are problems that show up again and again in Indian mobile checkouts:
- Treating UPI intent like a redirect that “ends” checkout. If the user returns and sees a blank screen, a restarted cart, or a logged-out state, most will quit. Keep the session alive and show a clear “Waiting for confirmation” state when they come back.
- Back button behavior that kicks people out by accident. On Android, back should not dump the user to the product page or close the webview without warning. Make back take them to the last safe step and confirm before abandoning payment.
- Retry loops that create duplicates. If you let users smash “Pay again” without checking the last attempt, you invite double charges, duplicate orders, and support tickets. Block quick repeats and always check payment status before starting a new attempt.
- Too many options shown upfront. A wall of payment choices forces thinking and scrolling. Start with UPI as the default, then reveal cards and netbanking only when needed, with simple labels.
- Vague errors like “Payment failed, try again.” Users need to know what to do next: “UPI app not opened”, “Payment pending”, “Bank server not responding”, or “You cancelled”. Pair each with one clear action.
A concrete example: a buyer taps Pay, switches to their UPI app, then returns to the store and sees the cart page again. They do not know if money was deducted, so they leave. A better outcome is a single status screen that explains what the store is doing (checking payment) and what the buyer can do (wait, check UPI app, or choose another method).
Measure what is really causing drop-offs
A checkout can look “fine” and still lose buyers because one small step fails on mobile. Treat your payment flow like a funnel with clear events, so you can see exactly where people exit and why.
Start by tracking the core journey, from payment method selection to final confirmation. The goal is to separate “user changed their mind” from “the flow broke” and “the bank/UPI network was slow.” In a UPI-first checkout, the handoff to a UPI app is the most fragile point, so measure it with extra care.
Capture a small set of events that explain most losses:
- Payment method chosen, method switch rate, and the exact step where the user leaves
- UPI app availability (apps detected), intent launch success/failure, and whether the user returned to your app
- Return outcomes: success, failure, user cancelled, or no callback/unknown
- Pending and timeout rates, plus time-to-confirmation (p50/p90) from “Pay” to final status
- Retry behavior: how often users retry UPI vs switch to cards/netbanking
Numbers without context can mislead, so segment your data. Break down funnels by device (Android vs iOS, low-end vs high-end), network quality (slow/unstable vs good), and new vs returning customers. Many “conversion issues” are really “low-memory phone + bad network” issues.
Once you have baselines, run simple A/B tests that change one thing at a time:
- Button copy (for example, “Pay via UPI app” vs “Open UPI app”)
- Default method order (UPI first vs last used method first)
- When fallback appears (immediate vs after one failed intent)
- “Retry UPI” phrasing and placement after a failure
- Pending handling (wait screen vs gentle prompt to check status)
Keep tests short, watch failure and pending rates, and stop early if you see more unknown states. A slightly lower click-through is worth it if it reduces stuck payments and support tickets.
Quick checklist before you ship
A UPI-first checkout is only “fast” if it behaves predictably on real phones, with real networks, and real UPI apps. Do this pass with at least 2 Android devices (one mid-range), and one slow network test.
Pre-release checks (conversion + safety)
- Confirm UPI intent truly opens in one tap on common Android setups (Chrome + WebView), and returns to your checkout with a clear result.
- Test the “no UPI apps installed” case and keep the user moving: show a simple fallback option immediately (cards or netbanking), without dead ends.
- Make retries safe: one payment attempt should map to one order, and re-trying should not create duplicate orders or duplicate charges.
- Handle uncertain outcomes: if you cannot confirm success instantly, show a clear “Payment pending” state with one next action (for example, “Check status” and “Try another method”).
- Verify cancel/back behavior: if the user backs out of the UPI app, your screen should explain what happened and offer the next best step.
After these checks, run a short internal “fake sale” day where the team places a few test orders end-to-end and flags any confusing moment.
Post-release habit
Once a week, review your top failure reasons and the single step with the biggest drop-off (often the handoff to the UPI app, the return to browser, or the pending screen). Fix the biggest leak first, then re-measure.
A realistic example flow for an Indian D2C buyer
Riya is buying from your D2C store for the first time. She is on a low-end Android phone, on mobile data that keeps switching between 4G and 3G. She wants to pay fast and get back to her day.
She reaches payment and sees one clear default: UPI at the top, with a short hint: “Pay in your UPI app. Takes about 10 seconds.” Below it, smaller options say “Card” and “Netbanking”. This is an UPI-first checkout without hiding fallbacks.
Happy path: UPI intent works
Riya taps “Pay with UPI app”. Your screen shows: “Opening your UPI app…” and a single action: “Change UPI app”. Her UPI app opens, she approves, and she is sent back.
Back on your store, the message is simple and confident: “Payment successful” with “Order confirmed” and a visible order number. No extra steps, no extra forms.
Same buyer, but the network turns it into “Pending”
Next time, the approval succeeds in the UPI app but the return to your store is slow. Don’t show “Failed” just because you did not get an instant callback. Show a neutral state:
- “Payment status: Pending confirmation”
- “Do not press Back. This can take up to 60 seconds.”
- Buttons: “Check status” and “Get help”
- Small text: “If your account was debited, we will confirm your order automatically.”
This is where many stores lose users: they show a scary error, or they push users to retry immediately, causing double payments and panic.
Fallback that does not feel like punishment
If the pending state lasts too long, offer a choice that respects what Riya might be seeing on her bank side:
“Still pending. Choose what you want to do:”
- “Wait and keep checking”
- “Try another payment method”
If she picks fallback, keep her cart and address locked in. Pre-fill everything you can, show “Card” and “Netbanking” in one tap each, and keep the promise visible: “You will not be charged twice. If the earlier payment confirms, we will cancel this attempt automatically.”
When it works well, Riya feels two things: speed (UPI intent opens instantly) and safety (pending is explained, and every choice is clear).
Next steps: ship, learn, and iterate without breaking checkout
Treat your first release as a safe, conversion-focused baseline: a clear UPI-first path plus a reliable fallback to cards and netbanking. Avoid adding every wallet, offer, and edge-case UI on day one. Small scope makes it easier to spot what actually reduces drop-offs.
Before you code changes, write a one-page spec for payment states and how your app behaves in each one. The important part is not the labels, but the rules: what the customer sees, what order status becomes, and whether you allow retries.
A simple set that works well:
- Success: show confirmation, lock the cart, create the order.
- Failed: show a clear reason if you have it, allow retry and fallback.
- Cancelled: user backed out, return to payment selection without losing address/cart.
- Pending: show “We’re confirming”, poll or refresh, and allow “Check status”.
- Unknown: treat like pending until verified server-side, never mark paid from the client.
Then run a short test plan on real devices. Emulators miss the pain points.
- Test 2 to 3 UPI apps installed and only one installed.
- Try slow network, network switch (Wi‑Fi to LTE), and airplane mode mid-flow.
- Verify behavior when the user returns late from the UPI app.
- Confirm that every state above updates order status correctly.
- Re-check the fallback path after any UPI change.
Ship with guardrails: event tracking for each step, server-side payment verification, and a quick rollback plan. If you need to prototype or revise fast, you can build the checkout screens and backend logic in Koder.ai using planning mode, then use snapshots and rollback while you test changes in small batches.